
【中央化された設定サーバー】 Spring Cloud Config Server - Springboot3 第6回

はじめに
こんにちは、今日は「Spring Cloud Config Server」を勉強します!「Spring Cloud Config Server」 を使用する場合、設定ファイルを変更するたびに各インスタンスでマイクロサービスを再起動する必要はありません。ですので、中央化された設定サーバーとも言われます。

config-server プロジェクトの作成


<ConfigServerApplication>
@SpringBootApplication
@EnableConfigServer
public class ConfigServerApplication {

	public static void main(String[] args) {
		SpringApplication.run(ConfigServerApplication.class, args);
	}

}
@EnableConfigServerのアノテーションを付きます。
config-server を Eureka Clientとして登録
spring.application.name=CONFIG-SERVER
server.port=8888
eureka.instance.client.serverUrl.defaultZone=http://localhost:8761/eureka
config-server の Git ロケーションの設定
spring.application.name=CONFIG-SERVER
server.port=8888
eureka.instance.client.serverUrl.defaultZone=http://localhost:8761/eureka

spring.cloud.config.server.git.uri=https://github.com/{myaccount}/springboot-microservices.git
spring.cloud.config.server.git.clone-on-start=true
spring.cloud.config.server.git.default-label=main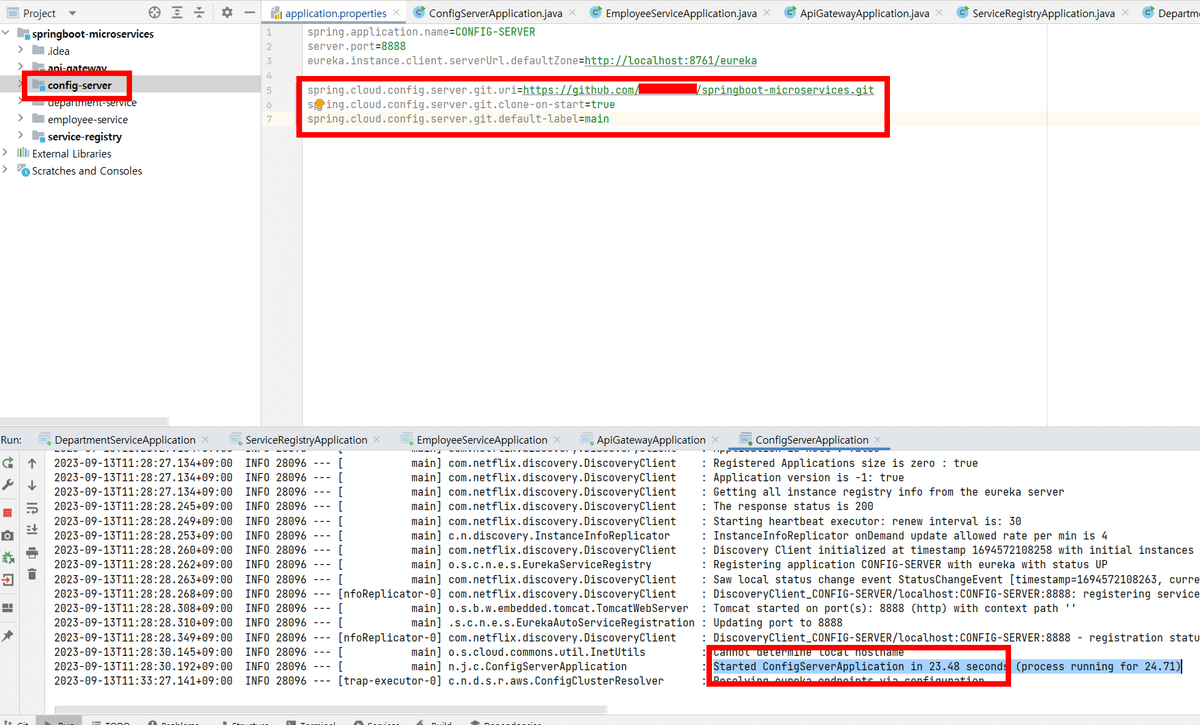
リファクタリング: department-service

<dependency>
      <groupId>org.springframework.boot</groupId>
      <artifactId>spring-boot-starter-actuator</artifactId>
    </dependency>
    <dependency>
      <groupId>org.springframework.cloud</groupId>
      <artifactId>spring-cloud-starter-config</artifactId>
    </dependency>
department-service <pom.xml>に依存性追加

Githubではアプリケーションnameを削除て、
springboot-microservicesのrootフォルダにコミット
spring.config.import=optional:configserver:http://localhost:8888department-service <pom.xml>に追加します。

リファクタリング: employment-service
department-serviceと同じ流れで依存性を追加します。
注意すべき点はConfig-Serverを再起動しないといけないのです。
「/actuator/refresh」の実装

@RefreshScope
@RestController
public class MessageController {

    @Value("${spring.boot.message}")
    private String message;

    @GetMapping("message")
    public String message() {
        return message;
    }
}
「message()」メソッドは「/message」エンドポイントを通じて「spring.boot.message」環境属性値を露出するRESTfulAPIを提供します。 これらのエンドポイントは、環境プロパティが変更されるたびに新しい値を取得できるように@RefreshScopeアノテーションを使用して動的に更新できます。
@RefreshScope
このアノテーションは、Spring Cloud Config サーバーと一緒に使用される際、環境属性の変更を動的に適用するために使用されます。 プロパティ値が変更されると、アプリケーションを再起動することなく変更された値を取得できます。
@Value("${spring.boot.message}")
このアノテーションはSpringの@Valueアノテーションを使用してspring.boot.message環境属性値を注入します。 これにより、message変数に該当プロパティの値を取得できます。


うまくできた。
department-serviceやconfig-serverを再起動しなくて、Githubのmessageの修正
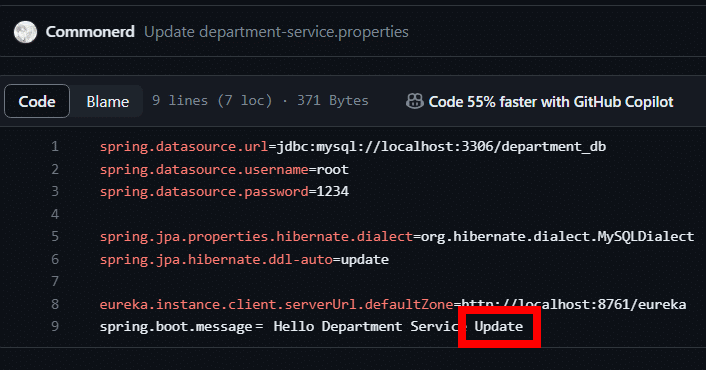


つまり、設定ファイルを変更するたびにマイクロサービスを再起動する必要はありません。

Githubのアドレス
https://github.com/Commonerd/springboot-microservices
最後に
システムメンテナンスをしていた時、隣の同僚がAPサーバーを切らずにあるURLを飛ばして環境設定を変えるというのを見たことがあります。 当時、とても不思議でこれが何なのか聞いてみましたが、マイクロサービスに対する全体的な理解がなくて聞いてもよく理解できませんでした。 今回の勉強をきっかけに、Config Serverの便利さだけでなく、マイクロサービスの全体的な可用性を高める方法だということも理解できてとても有益な勉強になりました!
エンジニアファーストの会社 株式会社CRE-CO
ソンさん
【参考】
[Udemy] Building Microservices with Spring Boot & Spring Cloud
この記事が気に入ったらサポートをしてみませんか?