
SwiftでOpenCVを使ってみた

はじめに
Pythonでは使ったことがありましたが、Swiftでも使えるということで、実際にアプリを作ってみました。
完成イメージ

使用環境
● OS:macOS Big Sur 11.3.1
● Xcode:12.5
● Swift:5.4
● Objective-C++
● OpenCV:4.3.0
環境構築
cocopodsにOpenCVを導入
cocopodsにライブラリを導入する方法 → こちら
podfile
# Uncomment the next line to define a global platform for your project
# platform :ios, '9.0'

target 'OpenCV_Swift' do
 # Comment the next line if you don't want to use dynamic frameworks
 use_frameworks!

 # Pods for OpenCV_Swift
 pod "OpenCV"

 target 'OpenCV_SwiftTests' do
   inherit! :search_paths
   # Pods for testing
 end

 target 'OpenCV_SwiftUITests' do
   # Pods for testing
 end

endSwiftでビルド出来る様に、Objective-C++でOpenCVのメソッドを書き込む
Swiftで直接ビルドできないため、下記の手順に処理をする。
Objective-C → Objective-C++ → Swift
手順はこちらを参照 → 【swift4.2】swiftでOpenCVを使ってみる
Bridging-Header.hにObjective-Cクラスのヘッダを追加
#import "OpenCVSample.h"OpenCVSample.hにラッパーメソッドを定義
//
//  OpenCVSample.h
//  OpenCV_Swift
//

#import <Foundation/Foundation.h>
#import <UIKit/UIKit.h>

NS_ASSUME_NONNULL_BEGIN

@interface OpenCVSample : NSObject
+(UIImage *)GrayScale:(UIImage *)image;
@end

NS_ASSUME_NONNULL_END
OpenCVSample.mmに処理を実装
//
//  OpenCVSample.mm
//  OpenCV_Swift
//

#import "opencv2/opencv.hpp"
#import "opencv2/imgproc.hpp"
#import "opencv2/imgcodecs.hpp"
#import "opencv2/imgcodecs/ios.h"

#import "OpenCVSample.h"

@implementation OpenCVSample
+(UIImage *)GrayScale:(UIImage *)image{
   // convert image to mat
   cv::Mat mat;
   UIImageToMat(image, mat);

   // convert mat to gray scale
   cv::Mat gray;
   cv::cvtColor(mat, gray, cv::COLOR_BGR2GRAY);

   // convert to image
   UIImage * grayImg = MatToUIImage(gray);

   return grayImg;
}
@end
実装
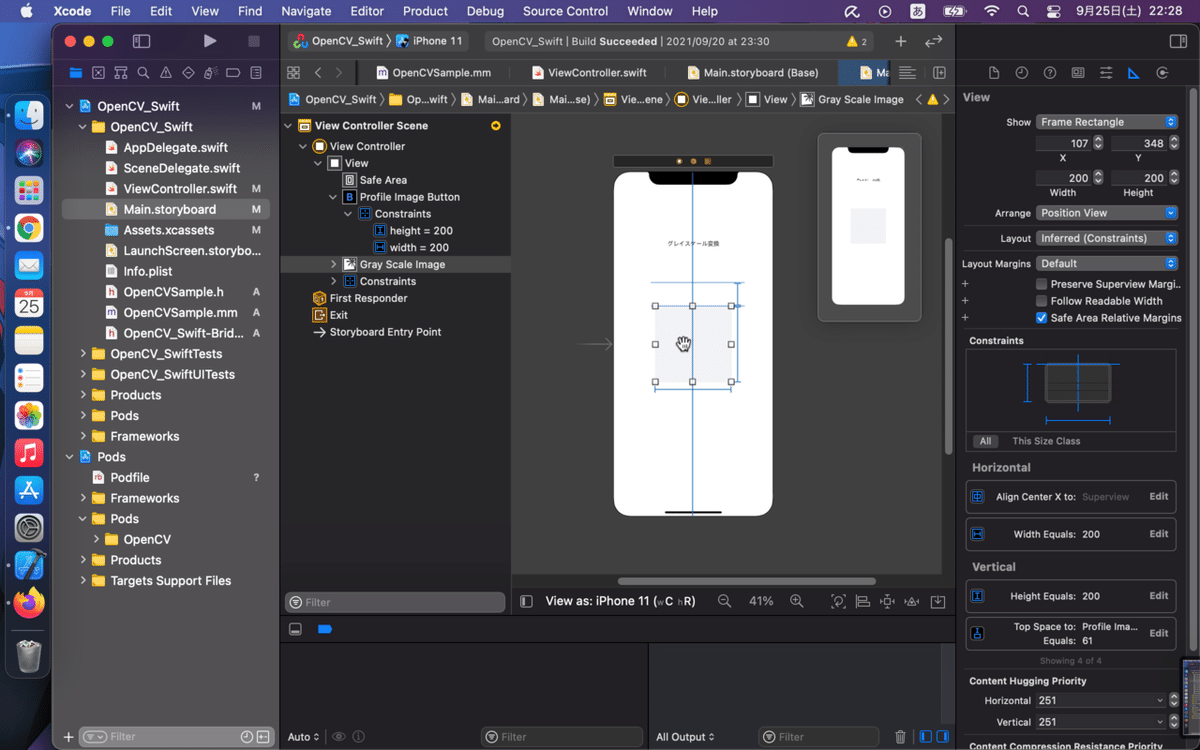
UI
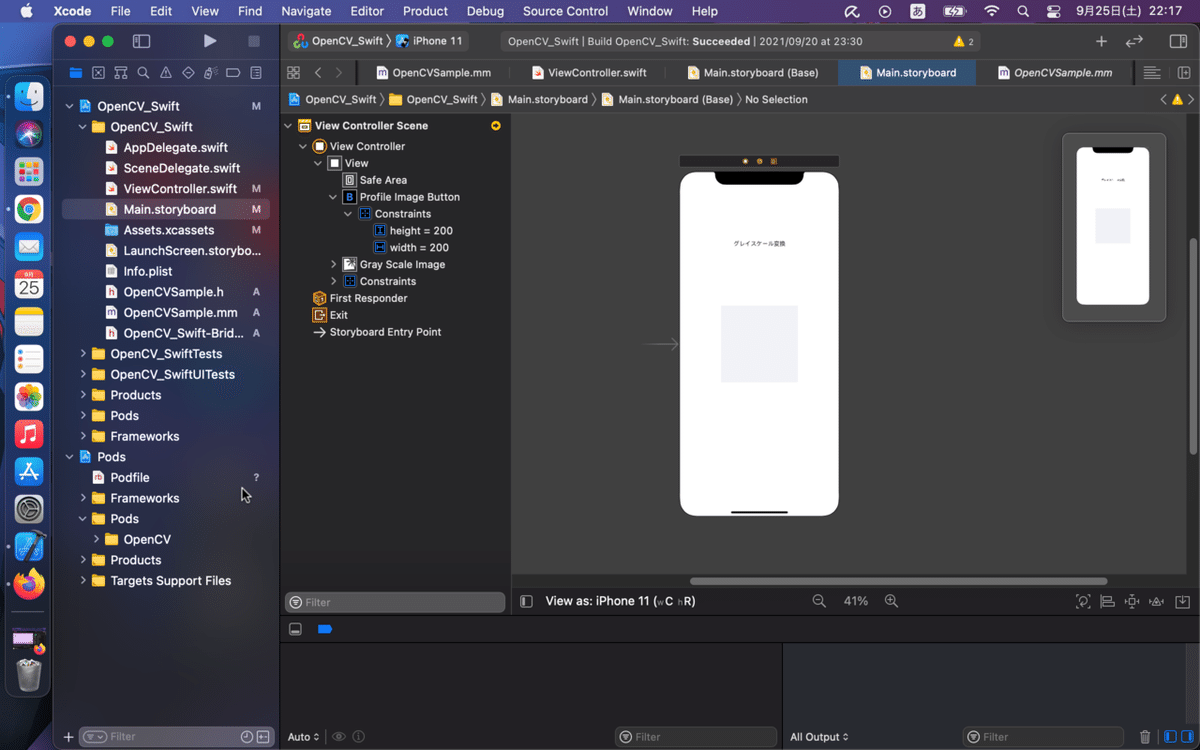
Xcode上ではこんな感じです。
PreviewでiPhone11、iPhone8 Plus、iPhone SE(1st generation)に見るとこんな感じです。
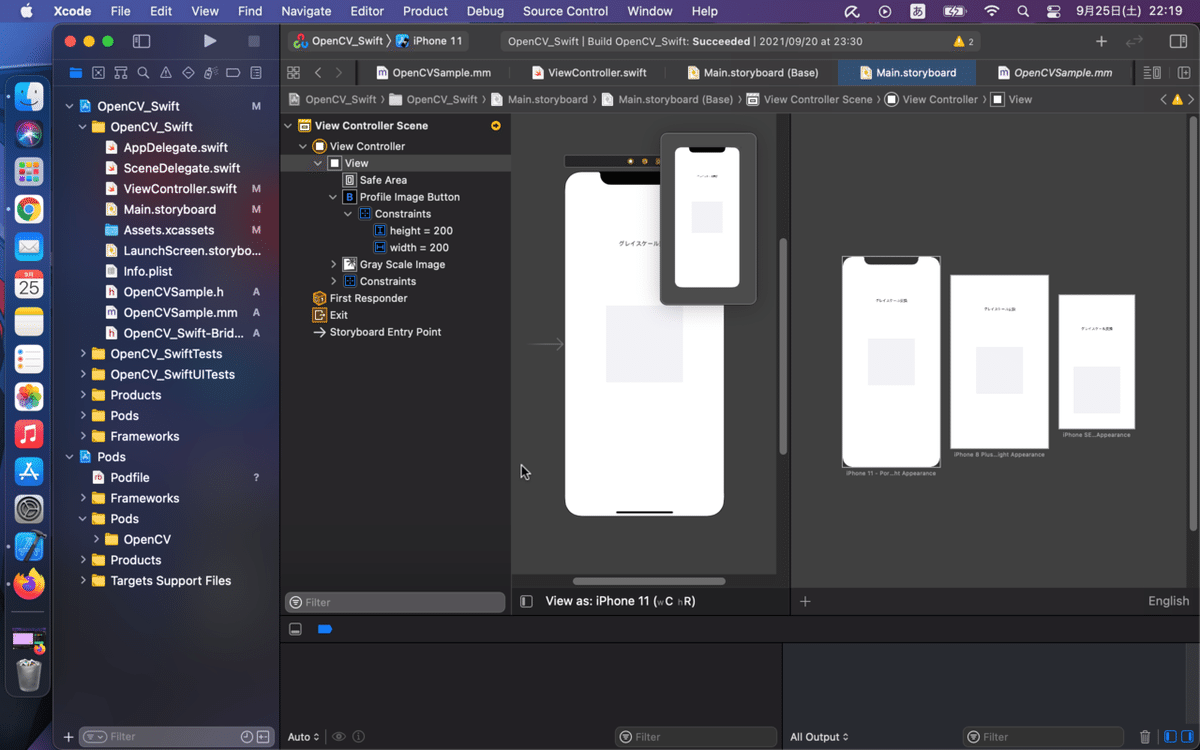
レイアウトを付けているので、UIが崩れない様になっています。
1、UIButtonをwidthとheightを200に設定

2、UIImageViewをwidthとheightを200、topを61に設定
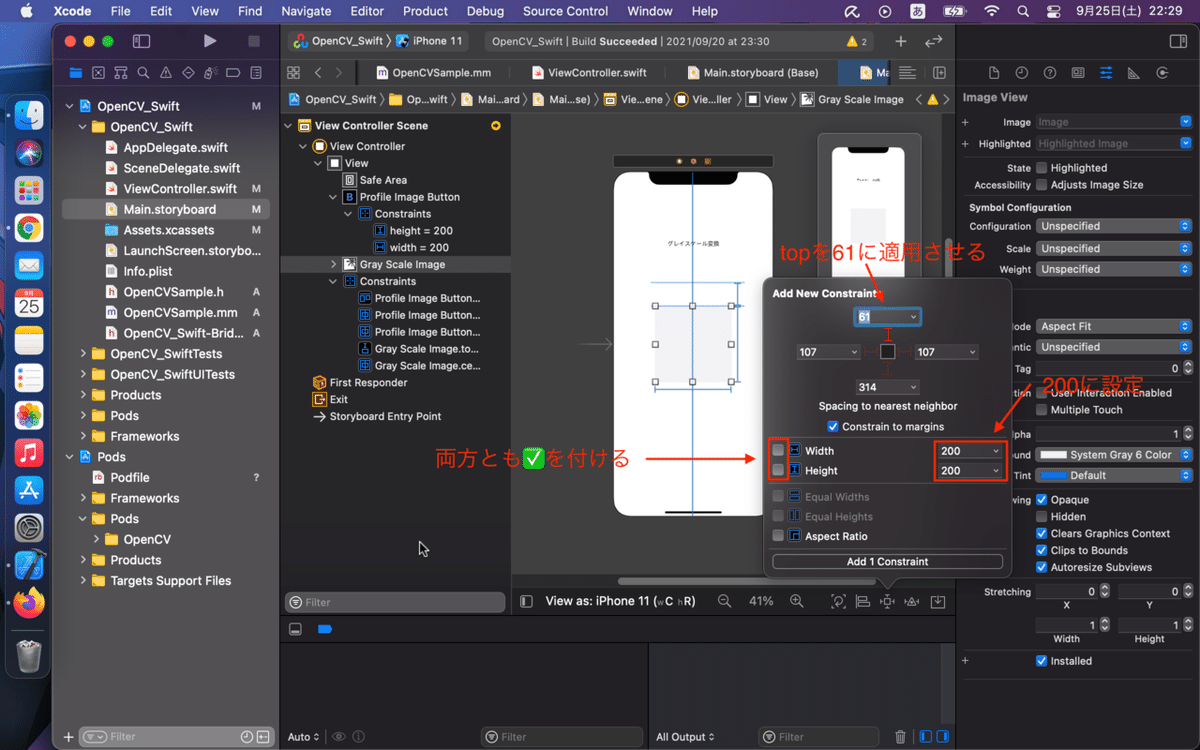
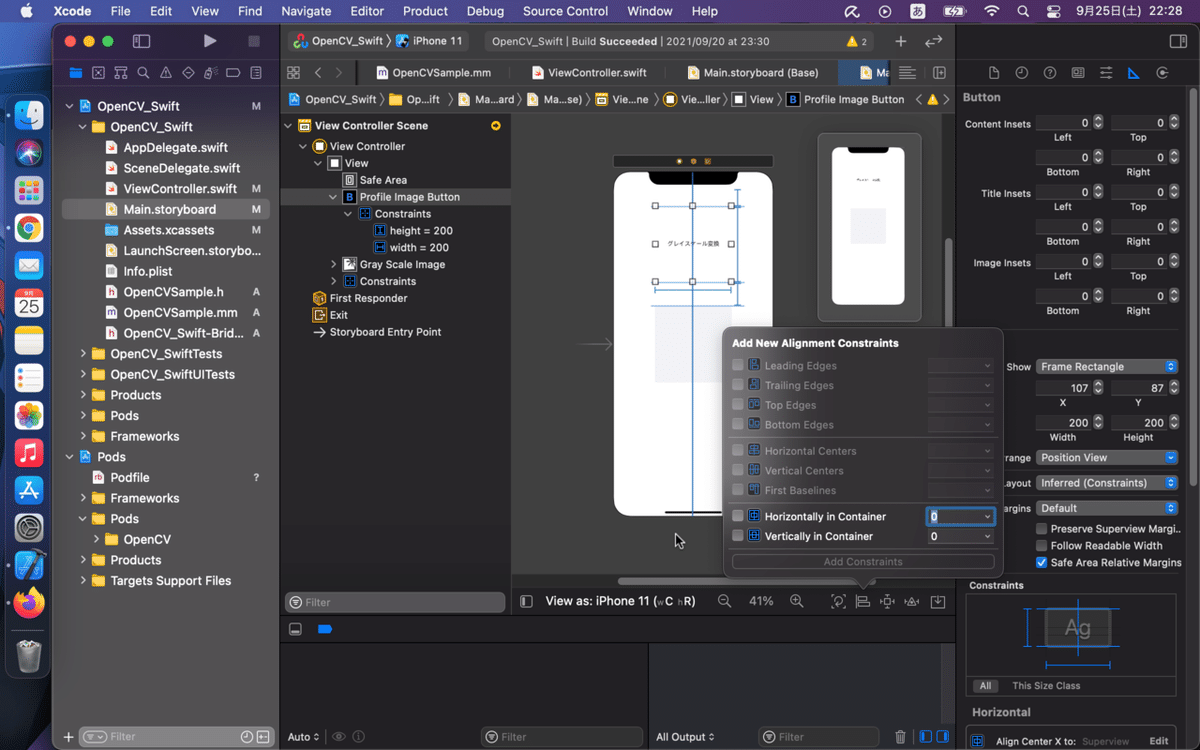
3、UIButtonとUIImageViewに horizontally in container を付ける
コード
//
//  ViewController.swift
//  OpenCV_Swift

import UIKit

class ViewController: UIViewController {

   @IBOutlet var profileImageButton: UIButton!

   @IBOutlet weak var grayScaleImage: UIImageView!


   override func viewDidLoad() {
       super.viewDidLoad()

       profileImageButton.layer.cornerRadius = 100
       profileImageButton.layer.borderWidth = 1
       let border = UIColor.black.cgColor
       profileImageButton.layer.borderColor = border
       profileImageButton.addTarget(self, action: #selector (tappedProfileImageButton), for: .touchUpInside)
       grayScaleImage.layer.cornerRadius = 100
       grayScaleImage.layer.borderWidth = 1
       grayScaleImage.layer.borderColor = border
   }

   @objc private func tappedProfileImageButton() {
       print("tappedProfileImageButton")
       let imagePickerController = UIImagePickerController()
       imagePickerController.delegate = self
       imagePickerController.allowsEditing = true

       self.present(imagePickerController, animated: true, completion: nil)
   }

}

extension ViewController: UIImagePickerControllerDelegate, UINavigationControllerDelegate {
   func imagePickerController(_ picker: UIImagePickerController, didFinishPickingMediaWithInfo info: [UIImagePickerController.InfoKey : Any]) {
       if let editingImage = info[.editedImage] as? UIImage {
           profileImageButton.setImage(editingImage.withRenderingMode(.alwaysOriginal), for: .normal) } else if let originalImage = info[.originalImage] as? UIImage {
               profileImageButton.setImage(originalImage.withRenderingMode(.alwaysOriginal), for: .normal)
           }

       profileImageButton.setTitle("", for: .normal)
       profileImageButton.imageView?.contentMode = .scaleAspectFill
       profileImageButton.contentHorizontalAlignment = .fill
       profileImageButton.contentVerticalAlignment = .fill
       profileImageButton.clipsToBounds = true

       let image = profileImageButton.imageView?.image
       grayScaleImage.image = OpenCVSample.grayScale(image!)
       grayScaleImage.contentMode = .scaleAspectFill
       grayScaleImage.clipsToBounds = true

       dismiss(animated: true, completion: nil)
   }
}
おわりに
今回は、SwiftでOpenCVを使ったアプリを作り、学習して行きました。
またOpenCVを使ったアプリを作る際は、多機能を導入しているものを作りたいと思います。
最後まで読んで下さり、ありがとうございました。
この記事が参考になれば幸いです。