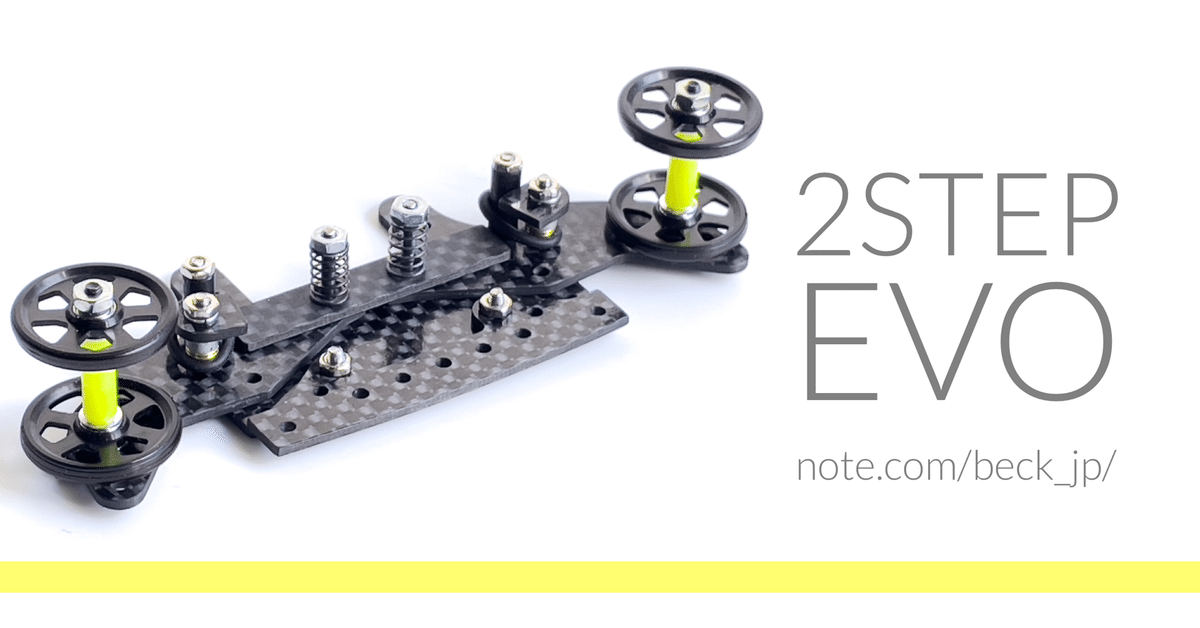
2STEP EVO

About 2STEP EVO…
1) Perfect landing
2) The weight is a little heavier than the first 2step anchor
3) Low error rate
2STEP EVO 特徴
1) 優しい着地
2) 重量は初代2stepより重め
3)エラーを抑えました
Hi, everyone! How are you?
The new rear gimmick "2step EVO" has been completed, I would like to introduce it.
こんにちは!新作リアギミック「2step EVO」が完成したのでご紹介します。

2EVO prototype
こちらはプロトタイプ。
That's cool. No matter how many times I see it, it's the best. It was really cool, but the rear roller was too close to the tires and I couldn't fly straight. And I remade it.
イイネイイネ!何度見ても最高です。とてもカッコイイんだけどリヤローラーがタイヤに近すぎてまっすぐ飛ばなかったです笑。そして作り直されました…。


It’s new 2STEP EVO
And here is the latest 2STEP EVO to introduce this time. Simple and cool, I always aim for such a gimmick.
The gimmick design inherits the "first 2step anchor". I hope you can take a look at that as well.
そしてこちらが今回ご紹介するの最新の2STEP EVO。ソフトランディングは神なる領域に。シンプル and 🆒!
ギミックデザインは「初代 2step anchor」を継承しています。そちらもご覧いただければ幸いです。
デルタ2と2step evo type-830を使ったスペシャルエディションはDELTA2 #3に収録されています。
Let’s get started🪛
それでは始めます!
0. Test machine specs

I inserted the screw into the white circle and fixed it to the chassis. I did a lot of testing in this position.
The test machine spec is MS chassis, the front and rear roller distances are about 128mm, and the front is a Delta anchor with 13mm rollers.
ビスを白丸に通してシャーシに取り付け。私はこのポジションで多くのテストを行いました。テストシャーシはMS、前後ローラーベースは約128mm、フロント側は13mmローラー付きのデルタアンカーというスペックです。
1. Main plates

The FRP plates is also okay. To your liking.
FRPプレートもOKです。お好みでどうぞ。


Tighten the nuts while pressing the plates together.
互いにプレートを押しながらナットを締めます。


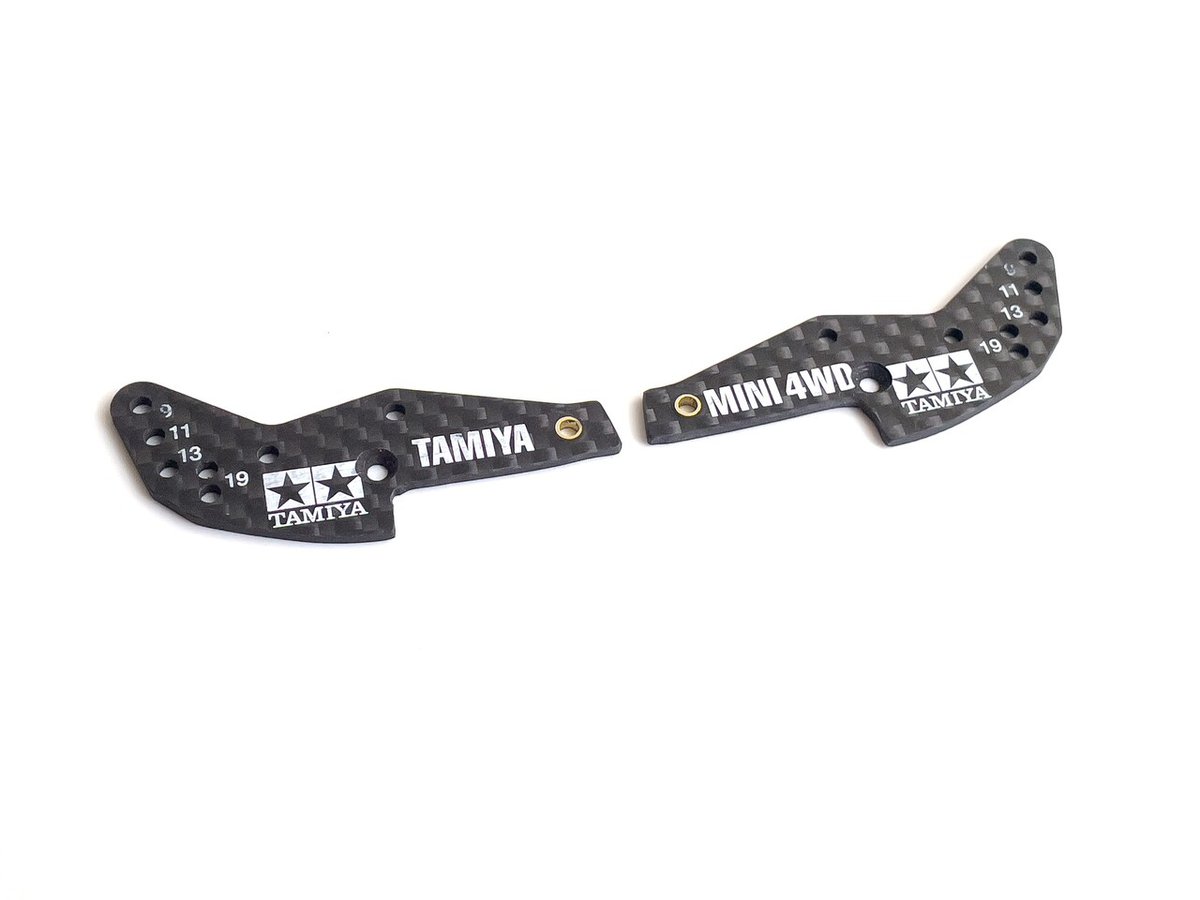
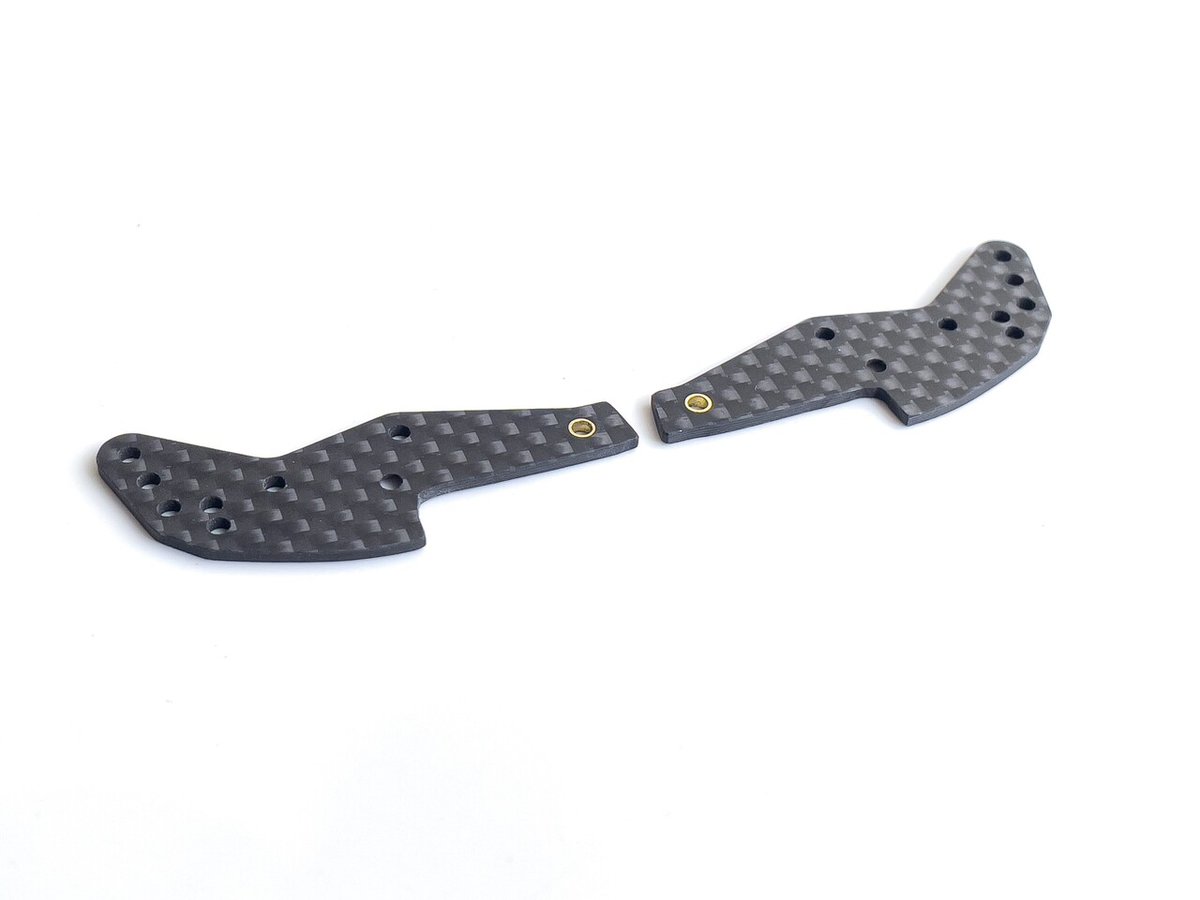
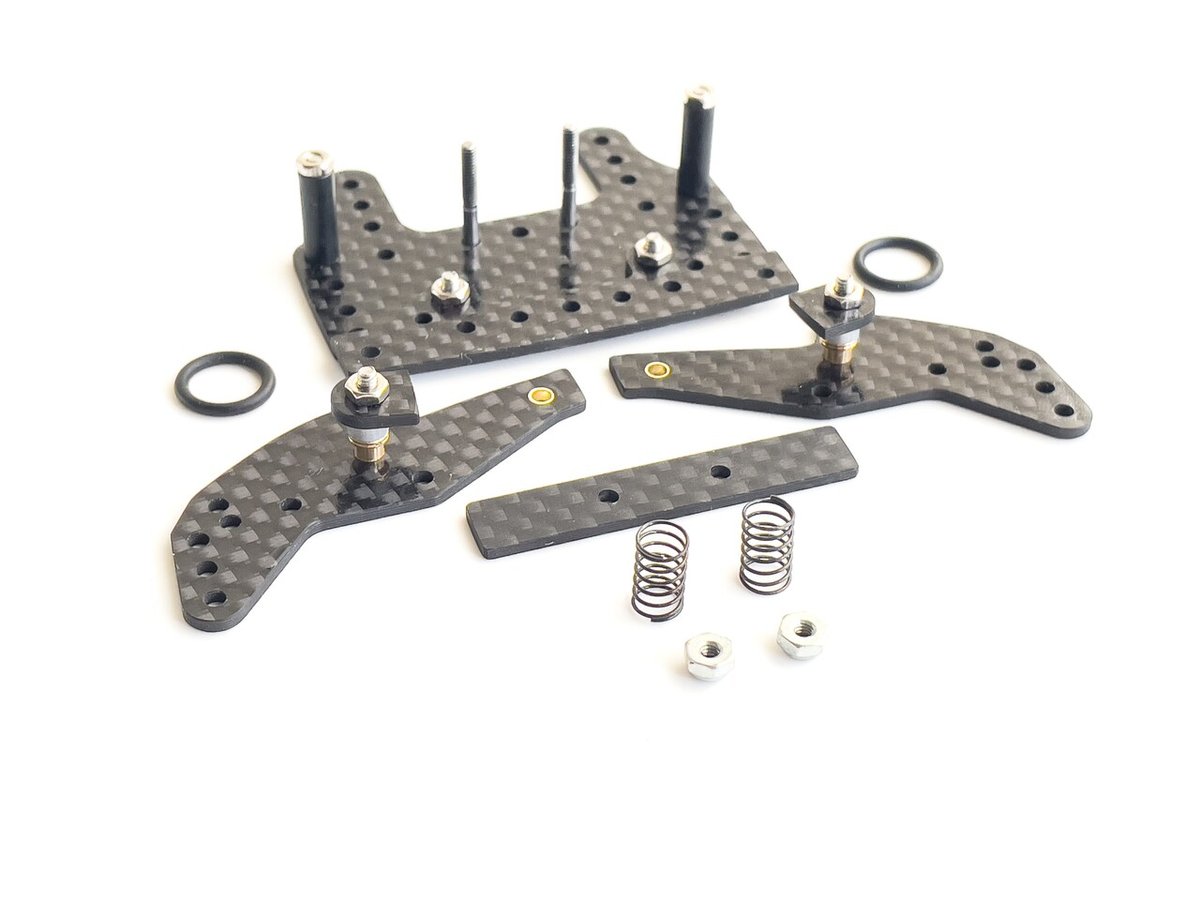
This is the stopper plate and main plate.
今回のストッパープレートとメインプレート。


M2x6 and small nuts


Tighten the nuts while pressing the plates together.
互いにプレートを押しながらナットを締めます。
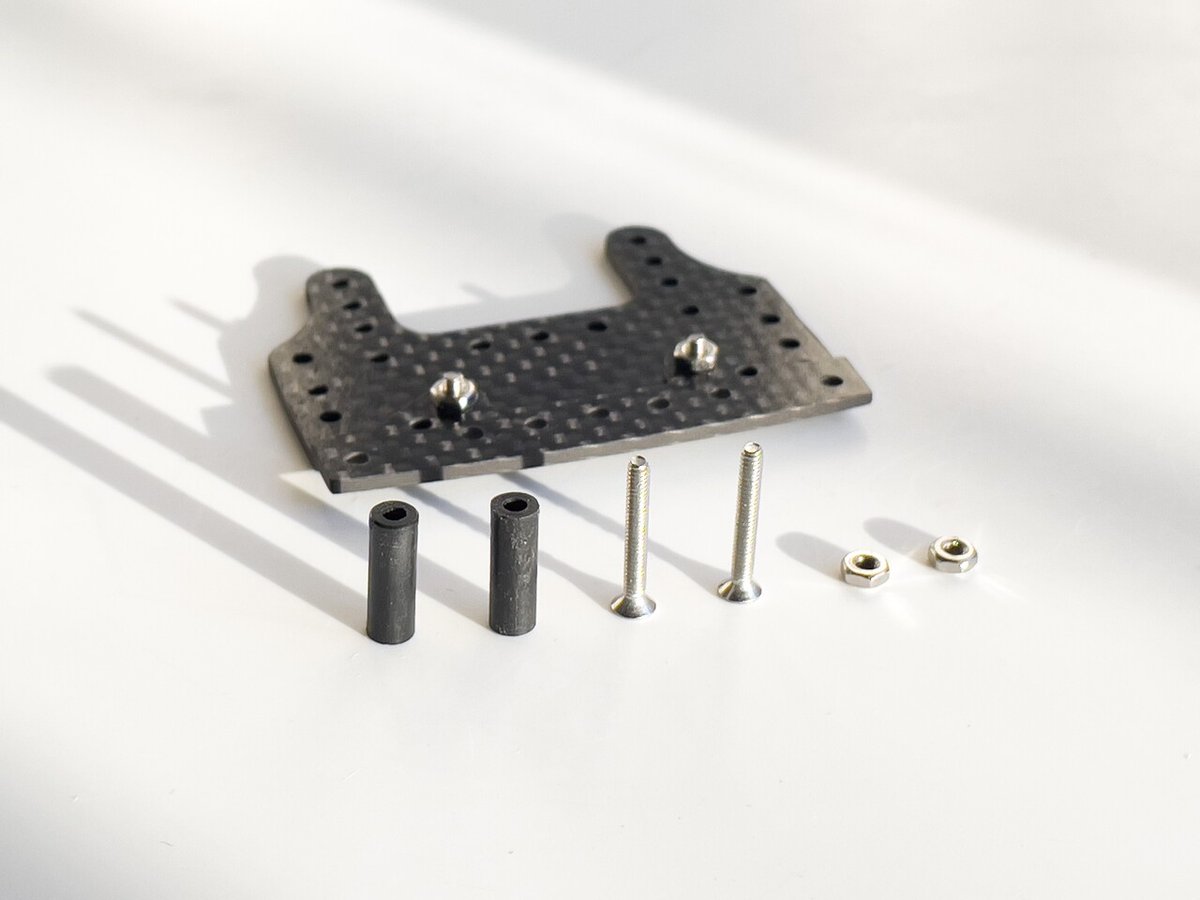
12mm plastic spacers, M2x15, and small nuts
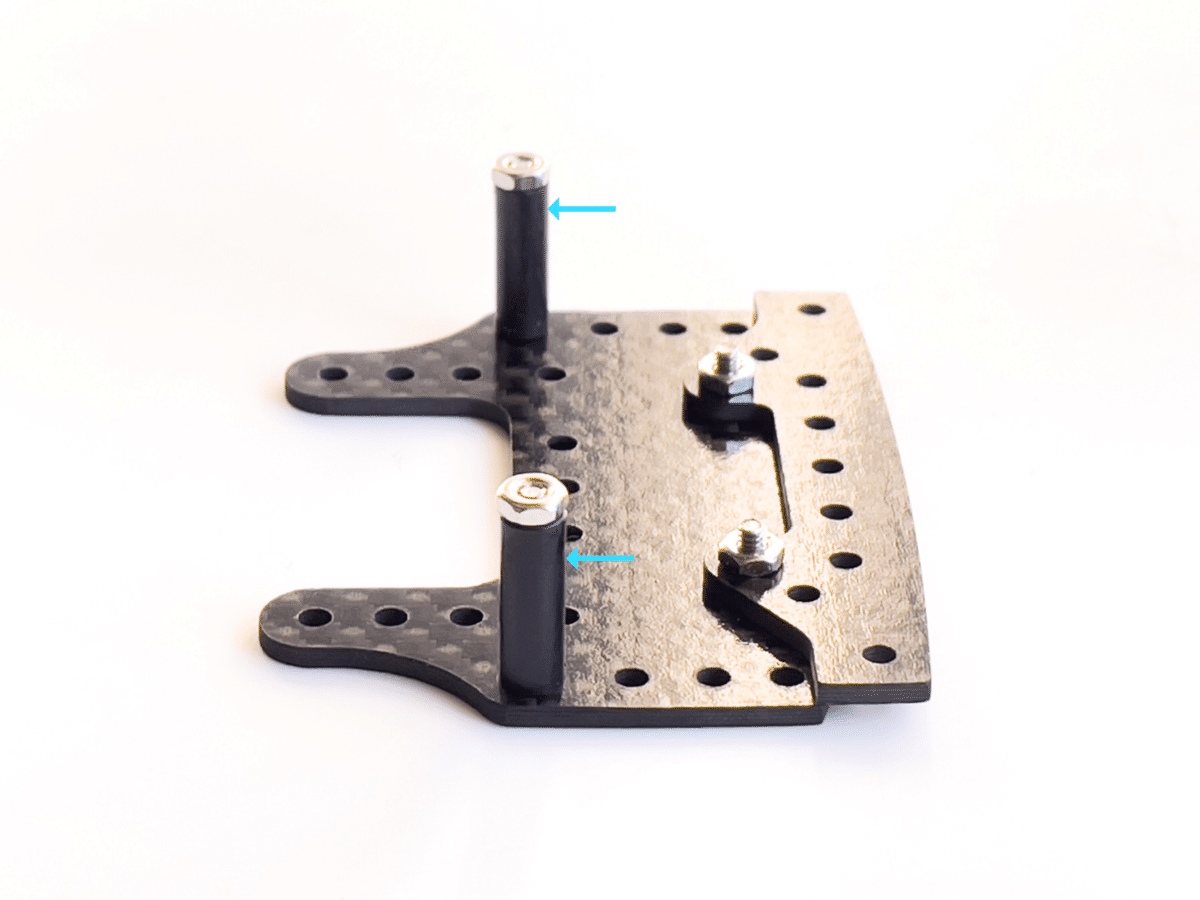
Tighten the nuts while gently pressing the plastic spacers in the direction of the arrow.
矢印方向にプラスペーサーを軽く押しながらナットを締め付けます。


Finished ✔️

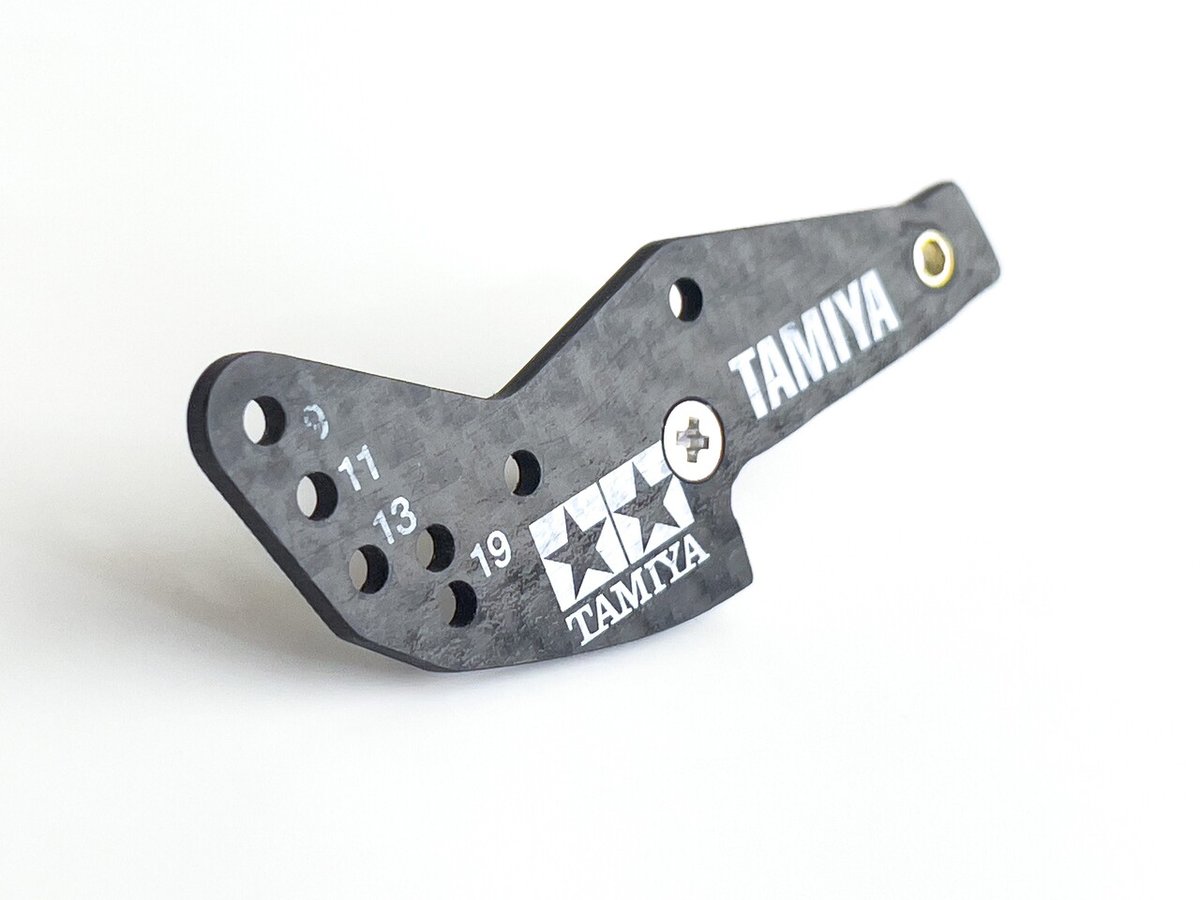
About the stopper plate
Unlike the 2step anchor, the backslide stroke of the 2EVO is fixed, but I think it is a sufficient stroke amount, not too much and not too little.
It may be better not to backslide the Batman arm on the downhill slope immediately after the corner.
Replace it with another stopper plate that has been overcoated with Super Glue, and try to prevent the Batman arm from sliding backwards.
It’s convenient to have two patterns of normal and fixing stoppers so that they can be replaced.
You can also attach a sponge brake to the stopper plate, so use a washer or the like to adjust the height if you like.
ストッパープレートについて
2ステアンカーと違って2EVOのバックスライドストロークは固定タイプになりますが、多すぎず少なすぎず十分なストローク量だと思います。
コーナー直後の下りスロープなどではバットマンアームをバックスライドさせない方がいい場合があります。瞬着などを盛った別のストッパープレートを用意して、バットマンアームが後ろにスライドしないように工夫してみてください。
もしコーナー直後の下りセクションでエラーが出た時にすぐ交換できるように、通常のストッパーと固定ストッパーの2つのパターンがあると便利ですね。
それとストッパープレートにはブレーキを貼る事ができますので、お好みでワッシャー等を使って高さ調整してみてください。
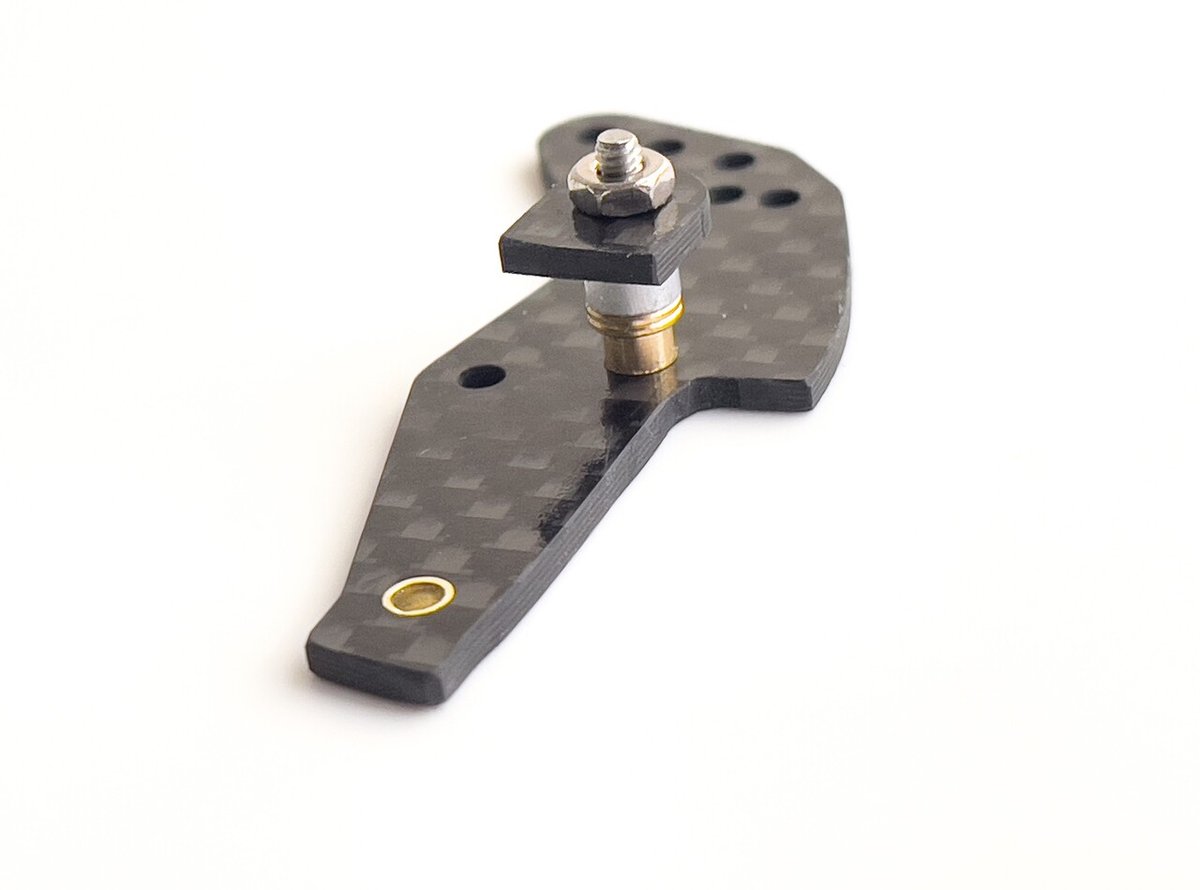
[Adjustable stoppers]

This type can adjust the slide amount. Install carbon scrap instead of the stopper plate.
スライド量を自由に調整できるタイプです。ストッパープレートの代わりにカーボンやFRPの端材を取り付けます。

If you don't jump straight, adjust the Backslide stroke less
もしまっすぐジャンプしない場合はバックスライドストロークを少なく調整してください
2. BATMAN arms


BATMAN and JIG away to tighten nuts.
バットマンとジグを遠ざけてナットを締めます。


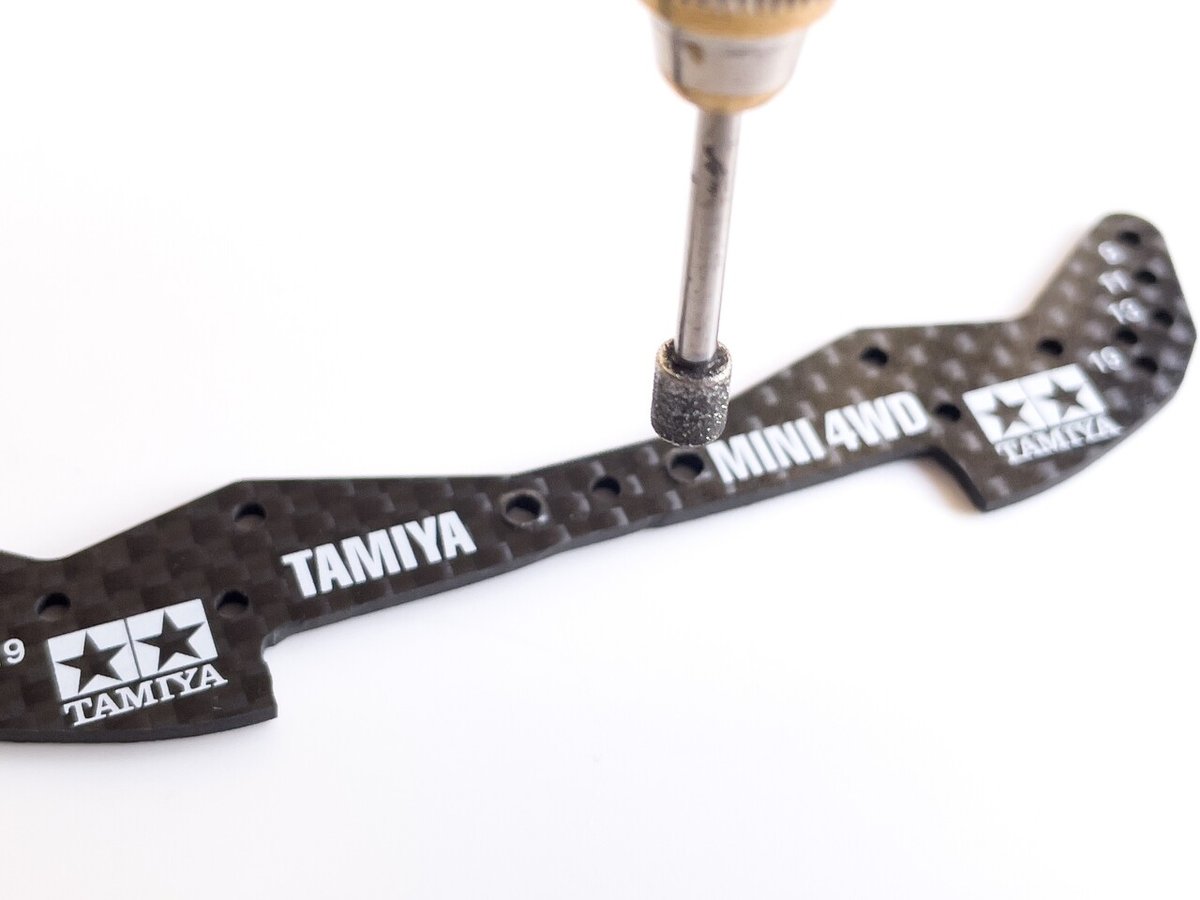
Crimp the eyelets into the 2.5 mm holes. Before that, clean the burrs a little with a countersunk bit. Do the backside and frontside.
ハトメを2.5mm穴に圧着します。その前に皿ビスビットでバリを少し掃除してください。ほんの少しでokです。裏面と表面しましょう。

I think that's enough. The holes is clean.
掃除完了。この位がいいですね。


Crimping with countersunk screw. Tighten the nut and crimp.
皿ネジで圧着。ナットを締めてカシメます。

The left is after crimping and right is before crimping
左は圧着後。右は圧着前。

Crimping completed ✔️
カシメ完了!

Flatten the eyelets protrusions
ハトメの突起を平らにします


Also on the back side
裏側も

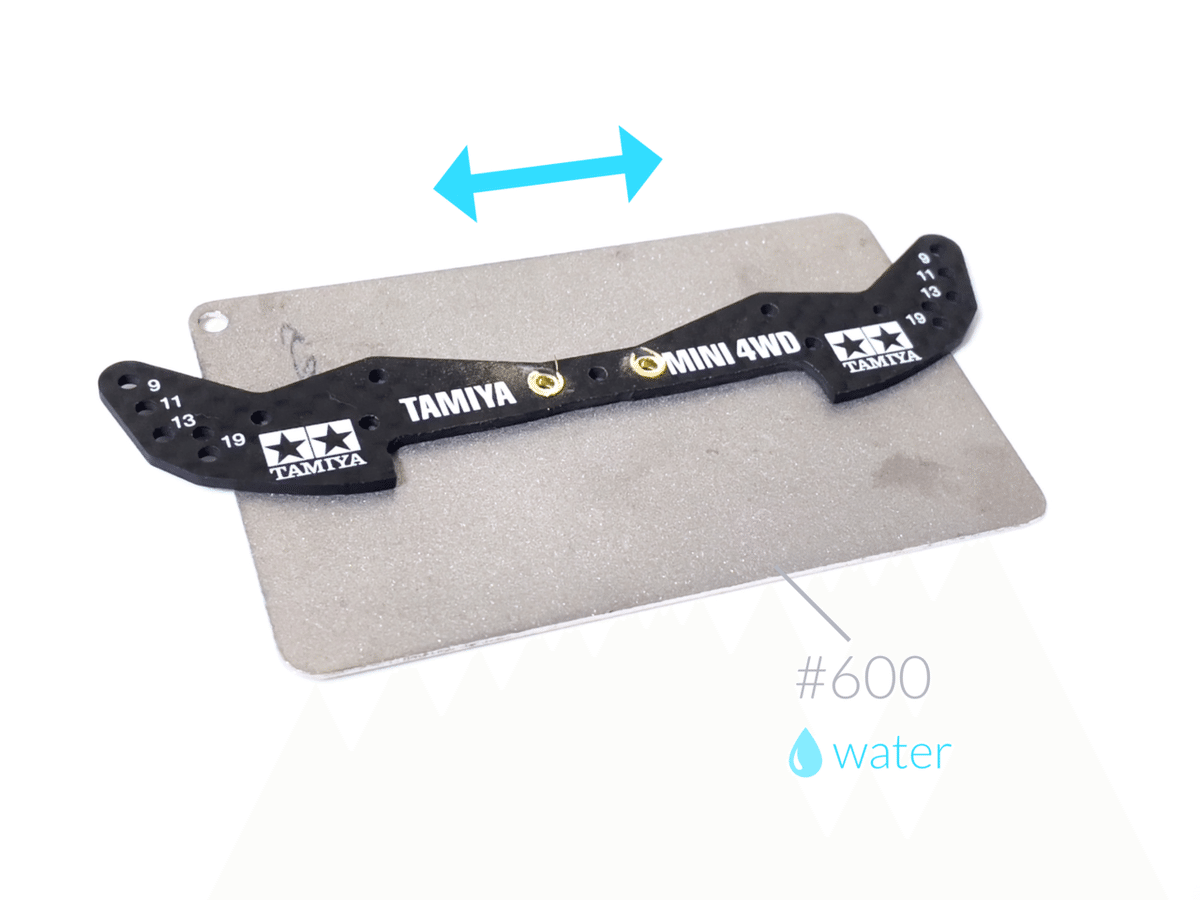
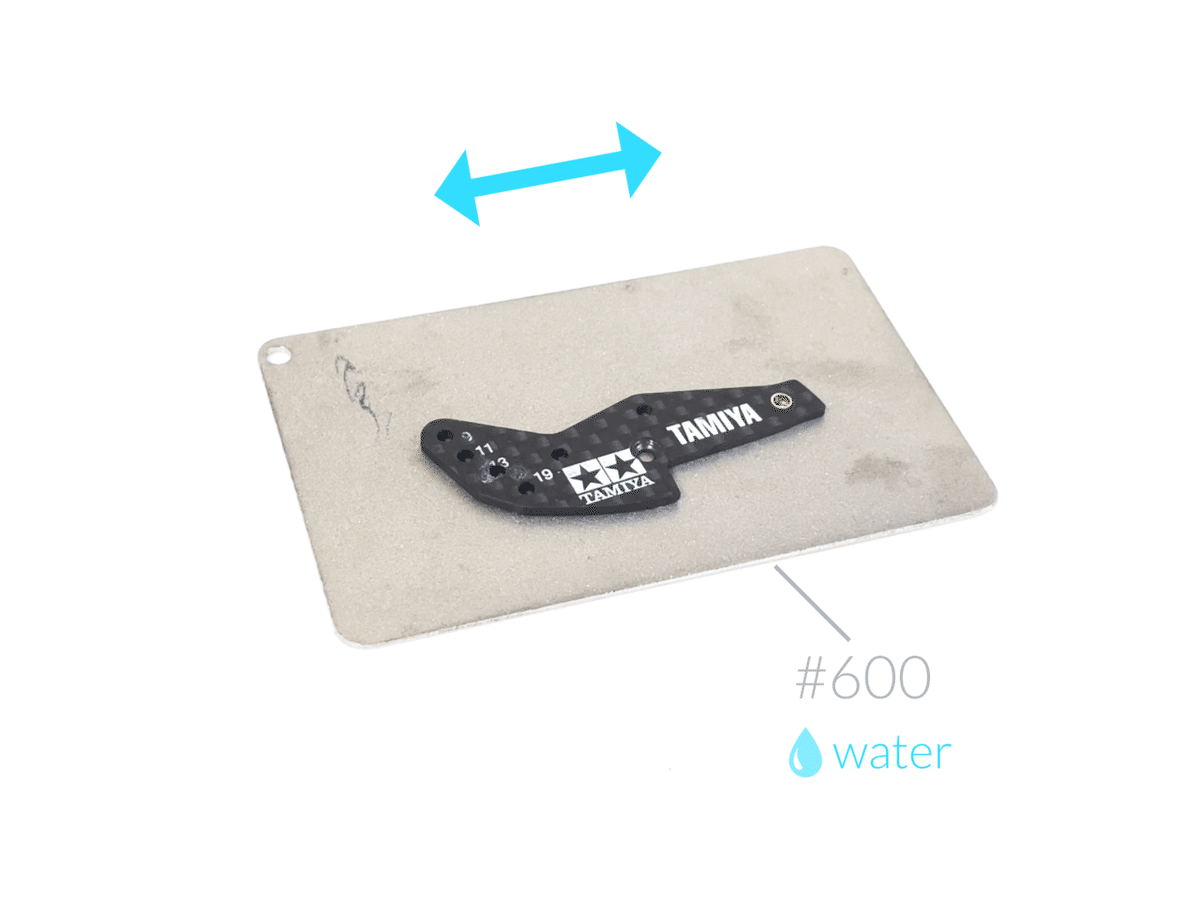
When flattened to a certain extent, file with water. The front and back sides should be completely flat
ある程度平らになったら板ヤスリで水研ぎ。裏表の両面がマッタイラになるように仕上げます。


This is crimping the eyelets. File the eyelets head. Protects the shaft hole from wear.
ハトメをカシメて頭を飛ばしました。軸穴を摩耗から守ります。
From now on, I will explain with the non-printed side facing up.
以降は印刷されてない面を上としてご説明します。
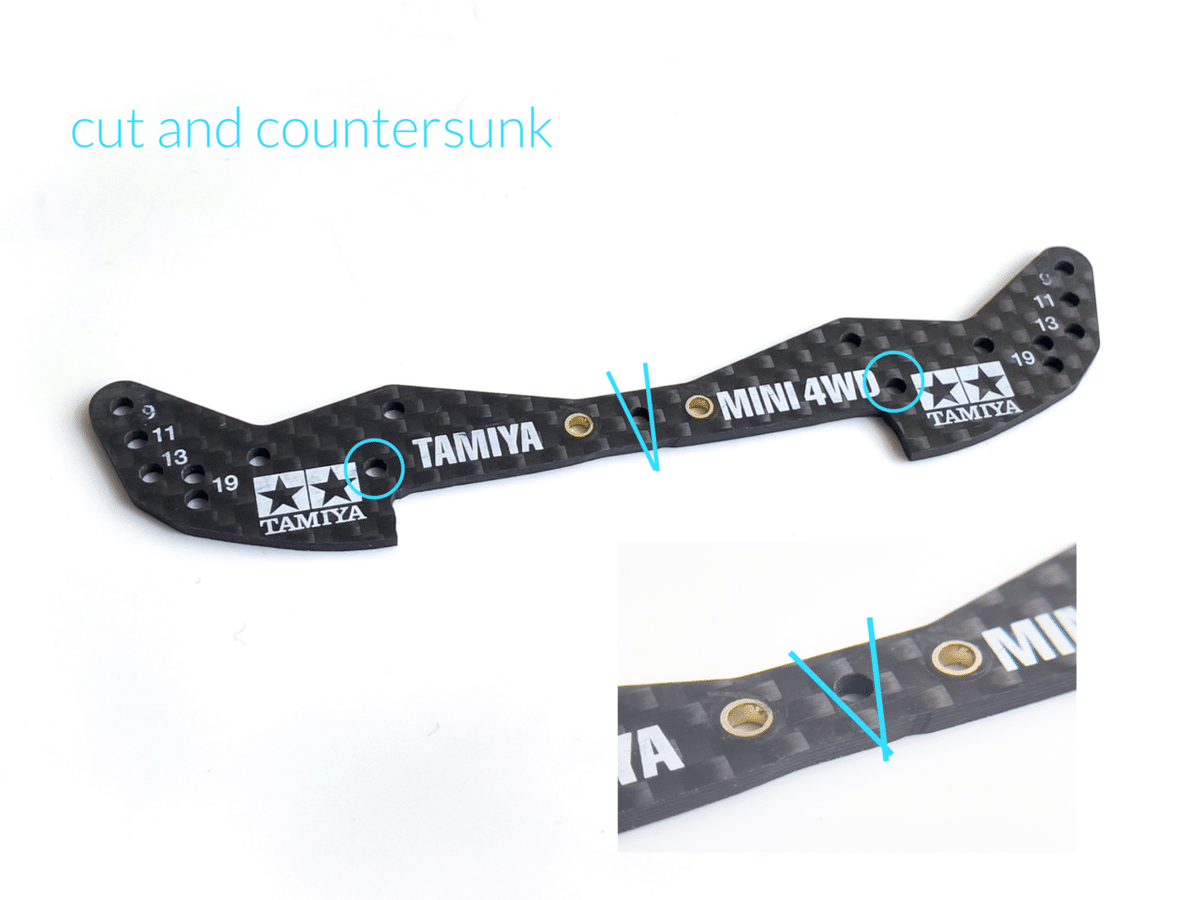
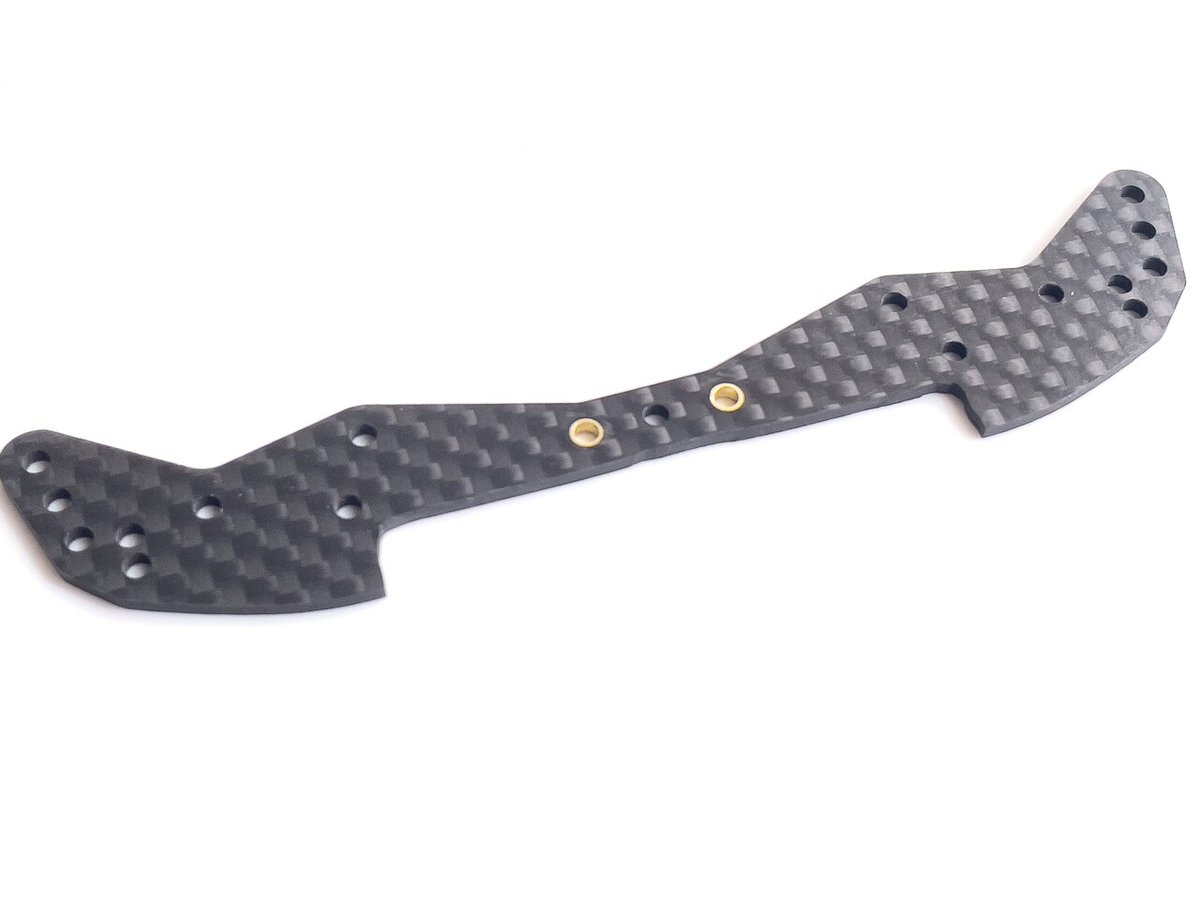
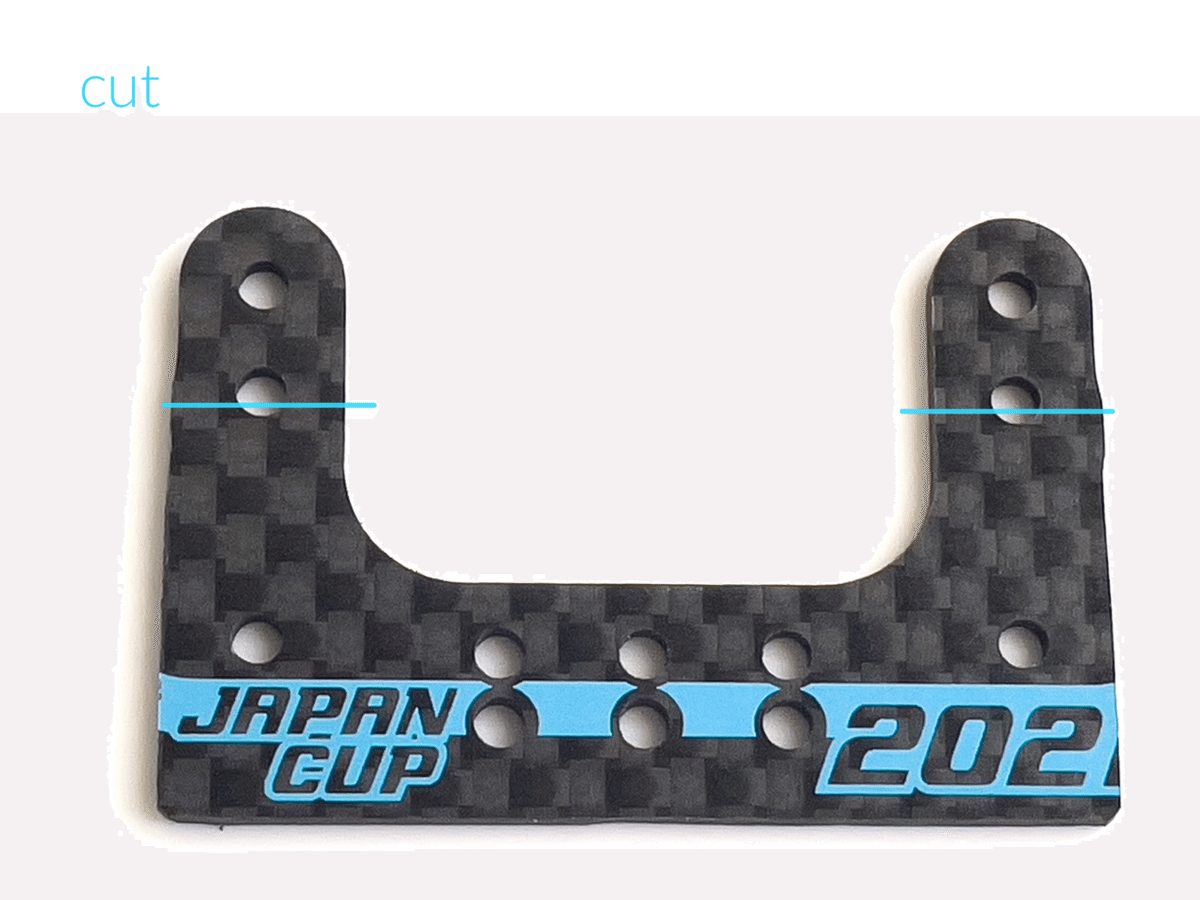
The back side. Cut and countersunk screw processing. Sink the head of the countersunk screw firmly.
裏面。カット & 皿ザグリ。皿ネジの頭をしっかり沈めてください。

Points
If the countersunk screw head pops out, the stroke will be poor.
ビス頭が飛び出すとストローク不良になります

Chamfer sharp edges
角はメントリしましょう
Finished ✔️
[Reinforced eyelets]

The testing machine used normal eyelets, but it was necessary to tighten it strongly so that the stoppers (carbon scraps) would not rotate, and then the eyelets would be crushed and could not be fixed well, so I used the stepped spacers by processing them like eyelets. It will not collapse even if tightened with over-torque. This time, we will call it “Reinforced eyelets”.
試験機は普通のハトメを使っていました。ダウンスラストを防止するストッパー(カーボン端材)が回らないように強く締め付ける必要があって、するとハトメが潰れてしまって上手く固定出来ないので、段付きスペーサーをハトメ風に加工して使用することに。これでオーバートルクで締め付けても潰れることは無くなりました。今回こちらでは「強化ハトメ」と呼称します。強化アイレットでも良いですね。


Scrap motor, 6mm spacer, Stepped spacer
廃モーター、6mmスペーサー、段付きスペーサー


Press so that the length of the slim part is about 2 mm
スリム部分の長さが約2mmになるように押し当てます

Finish from 2.0 to 2.1mm
2.0〜2.1mmに仕上げましょう

Finished ✔️
[Stoppers / standard type]

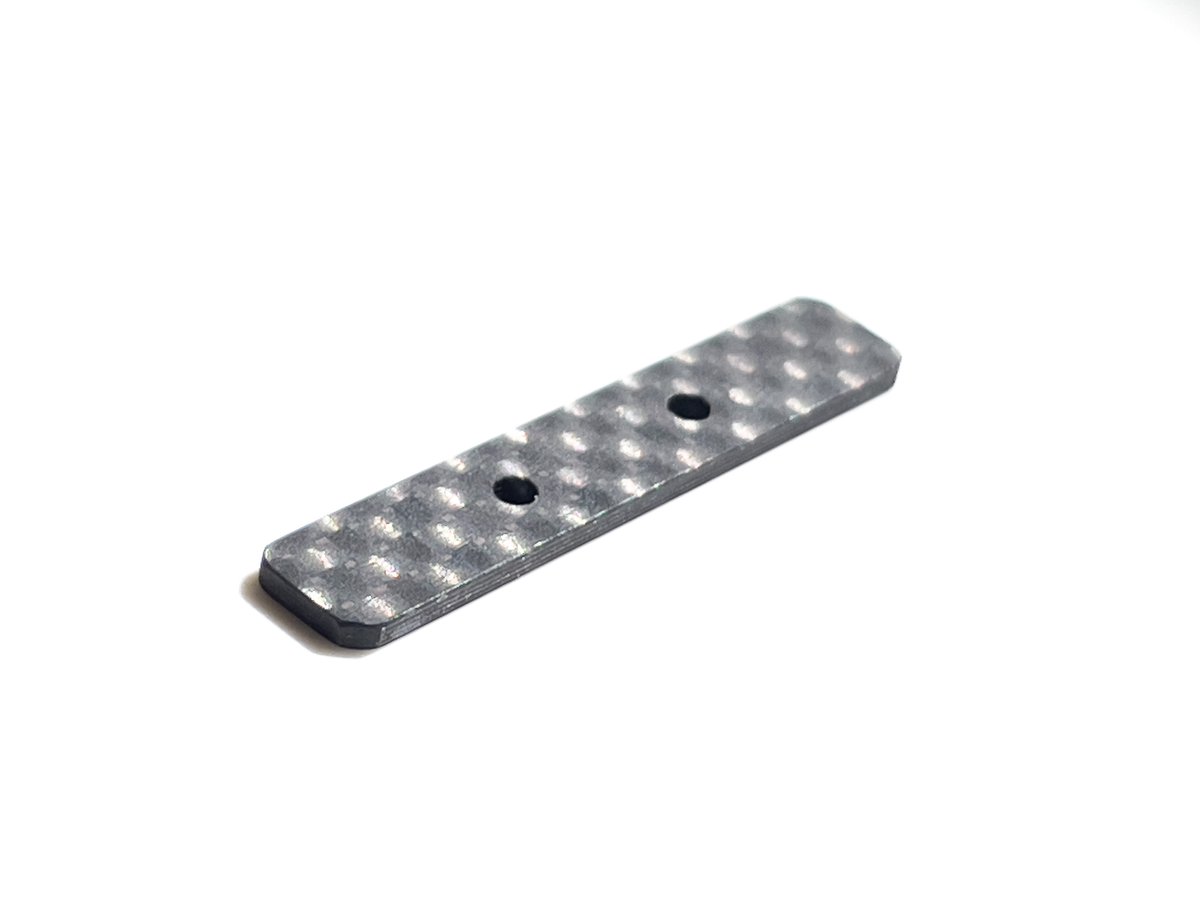
These are Carbon or FRP scraps. We will call it “Stoppers”.
カーボンやFRPの端材です。こちらでは「ストッパー」と呼称します。

From the left, M2x12, Reinforced eyelets, 3mm Aluminum spacers, Stoppers, and Small nuts.
左から M2x12、強化ハトメ、3mmアルミスペーサー、ストッパー、小ナット
points
Be sure to use an aluminum spacer as the plastic spacer is easy to loosen.
プラスペーサーは緩みやすいので、必ずアルミスペーサーを使用してください。


Temporary assembly. Adjust so that both Stopper and BATMAN hit the plastic spacer.
仮組み。ストッパーとバットマンの両方がプラスペーサーに当たるように調整します。


It's still easy to loosen, please so check the tightening before the race.
緩みやすいのでレース前に締め付けチェックをお願いします。
Points
・ This Stopper is for high-speed waves and lane changes. It has the role of preventing the rear rollers from becoming a positive angle.
・ If the tightening is loose, the Stoppers will rotate during running, which may cause malfunction. Please tighten it tightly! It may be good to use the spring washers together.
・このストッパーは高速ウェーブとレーンチェンジ対策です。リヤローラーがダウンスラストになるのを防ぐ効果があります。
・締め付けが緩いと走行中にストッパーがズレてしまい不調の原因になります。とにかく強く締めてくださいね。スプリングワッシャーを併用するのも良いと思います。

Finished ✔️
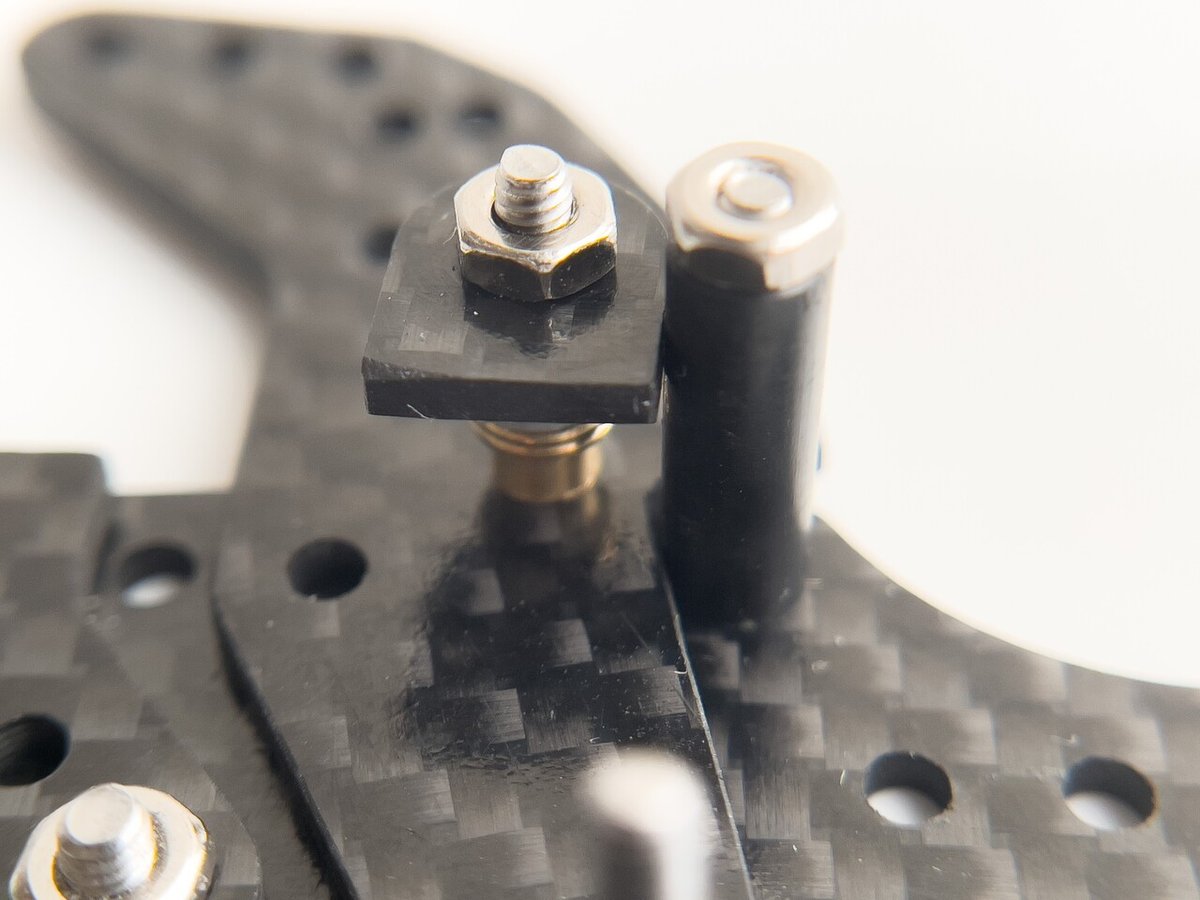
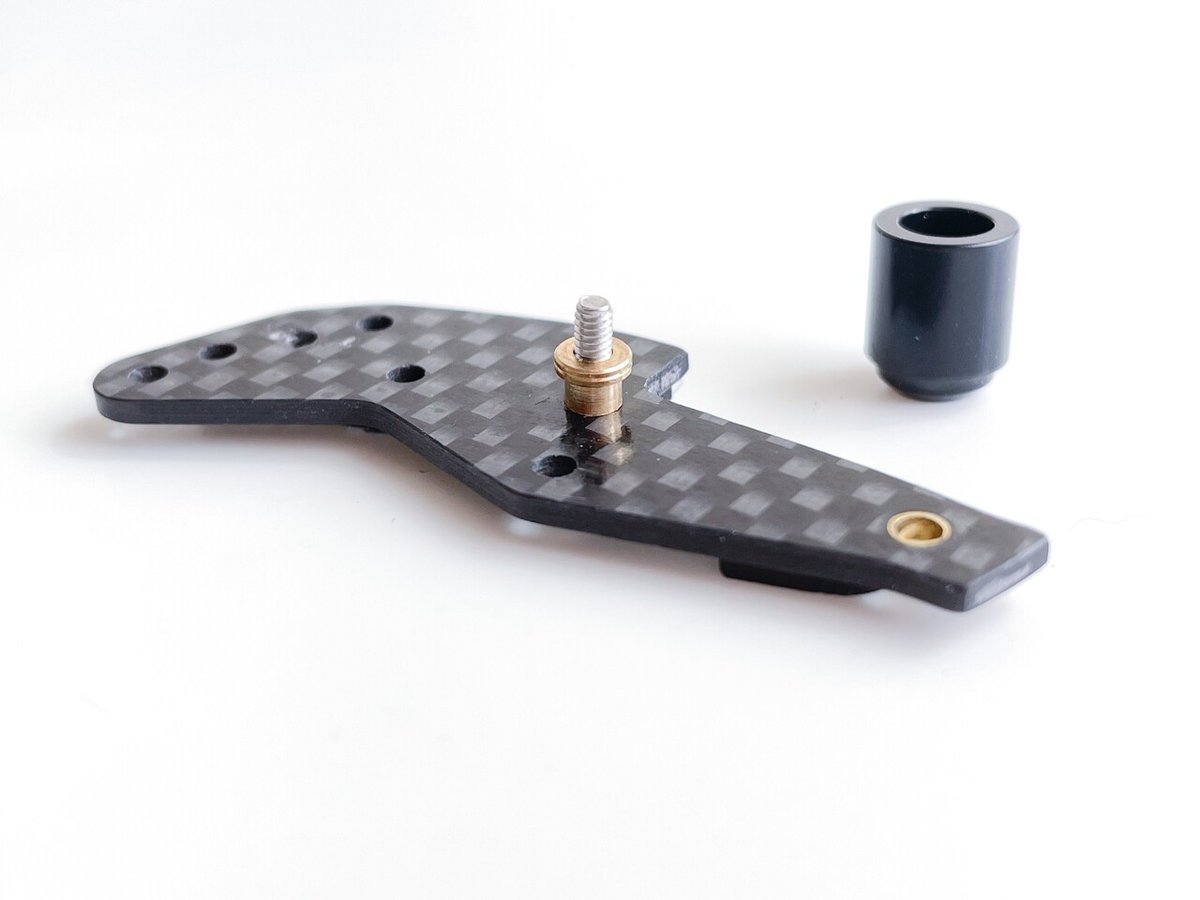
[Stoppers / ZERO GARAGE type]


Press in a large nut
大ナットを圧入

M2x8, Reinforced eyelets, Tube stabilizers


You can't make fine adjustments, but it's not bad. It is a position within the allowable range. This is good!
微調整はできませんが悪くありません。許容範囲内に収まっています。良いですね!

If there is a gap, apply Super Glue again to adjust the gap.
隙間調整は瞬着を盛ってどうぞ。
Points
ここの瞬着は摩耗します。メンテナンス時に隙間チェックしてください。
The super glue here will wear out. Please check at the time of maintenance.


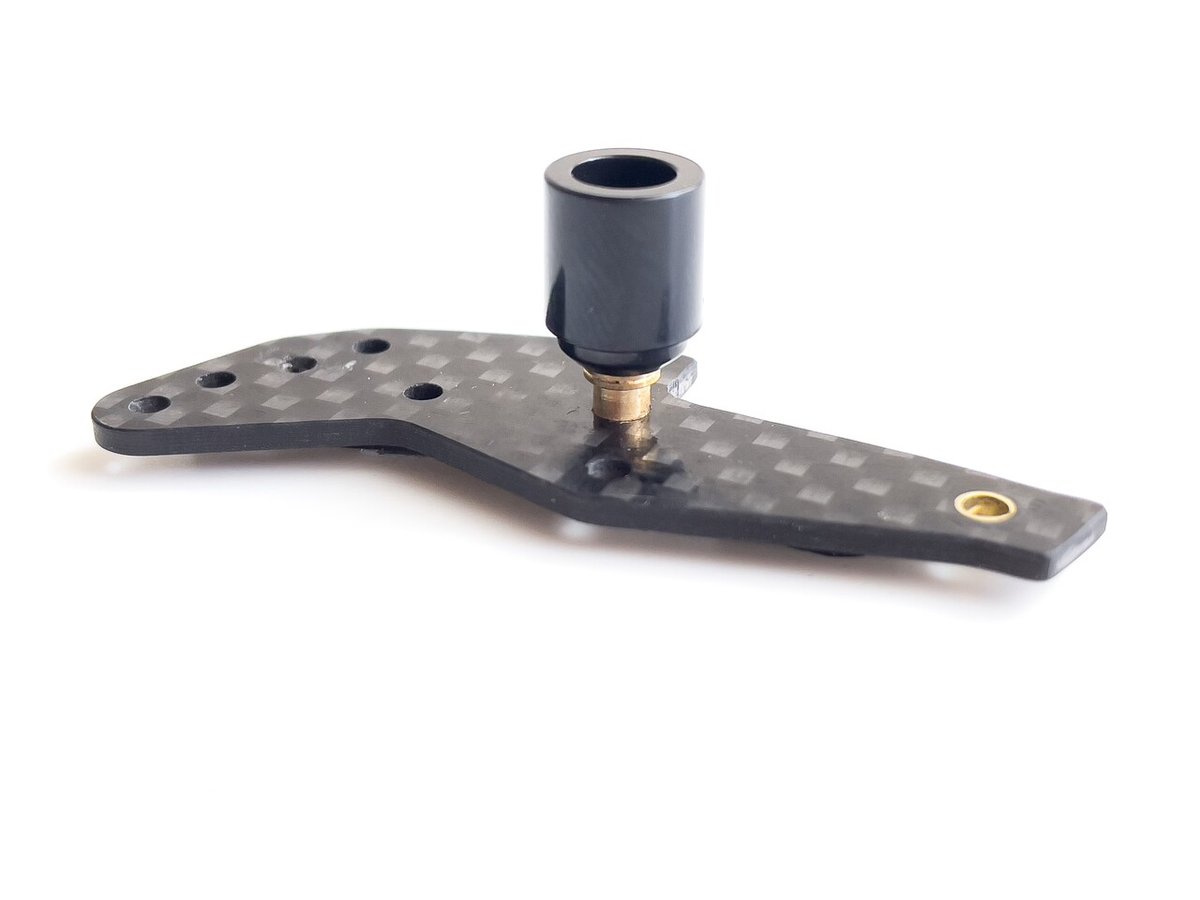
Finished ✔️
About ZERO GARAGE type
This is an idea from Mr.ZERO GARAGE. The stroke is very smooth and there is no worry that the stoppers position will change. I recommended it.
ゼロガレージさんからのアイデアです。ストロークがウルトラスムーズで、使用中にストッパー位置が変わる心配がありません。メリットしかありませんね。おすすめです。
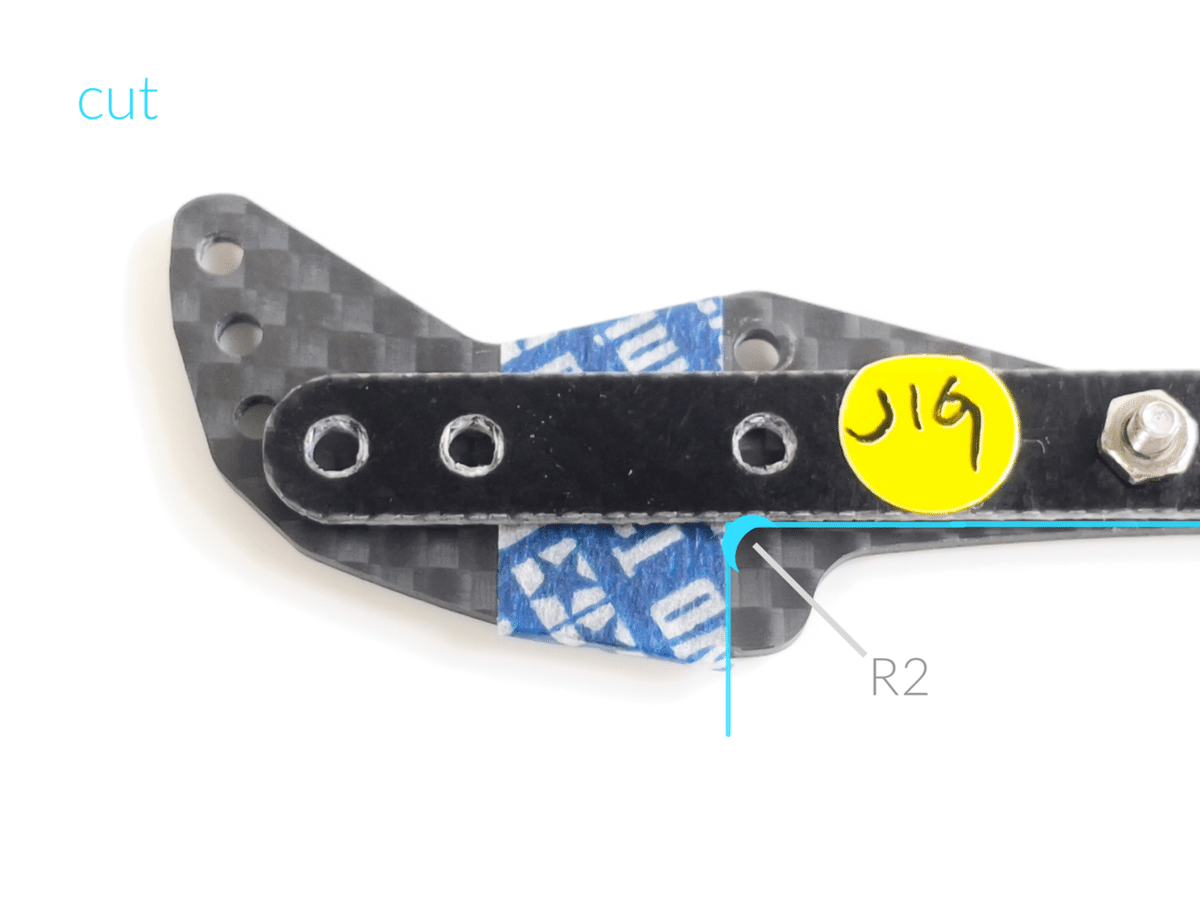
3. Roller holes


Close the 19mm hole
19mm穴を塞ぎます


The existing 13mm roller holes were moved inward to determine the position. Adjust the hole position so that it becomes 104.5 mm.
今回は既存の13mmローラー穴を内側に寄せて位置を決めました。ローラー幅が104.5mmになるように穴位置を調整してください。


Points
It’s okay to move the 11mm roller holes inward.
11mmローラー穴を内側に寄せても大丈夫です。僕はこっちの方が好きかも。


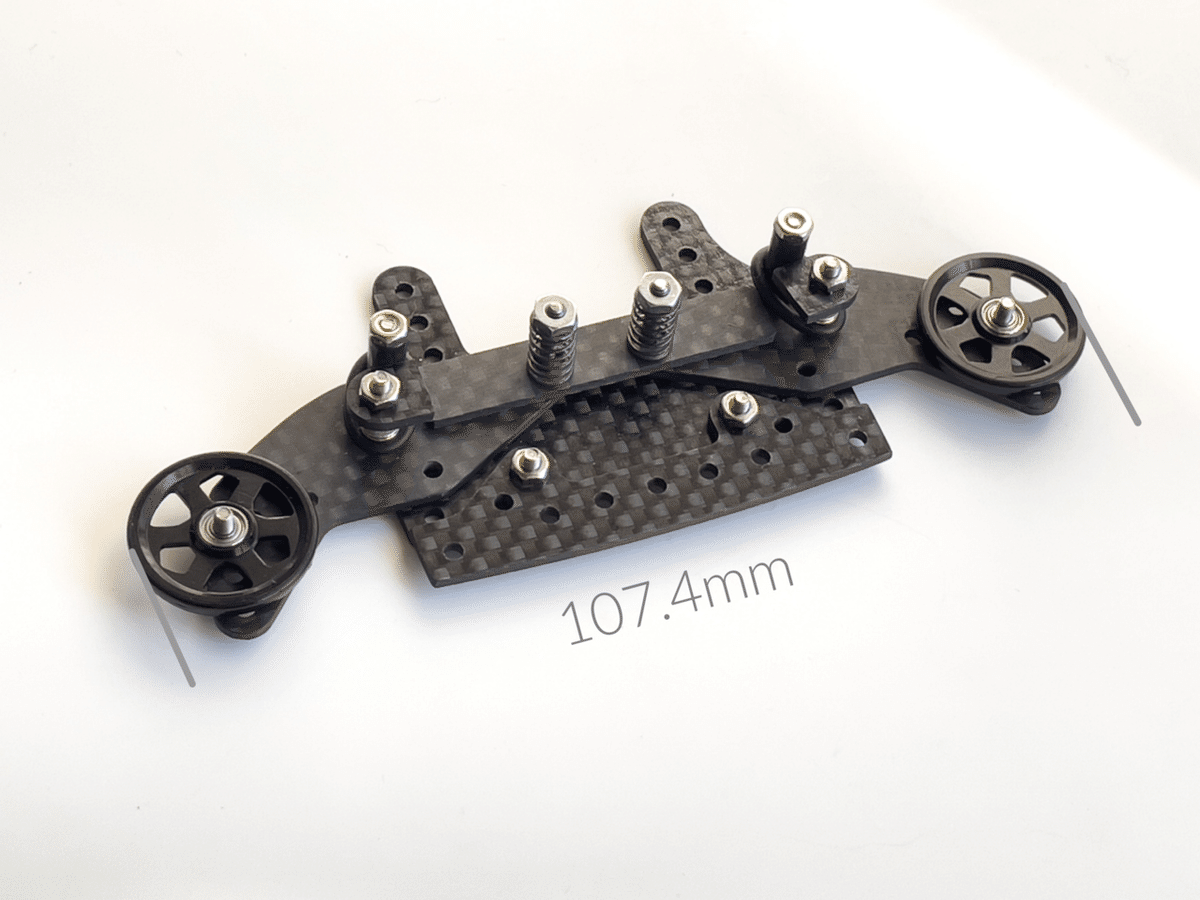
This is a reference measurement value. The numerical value changes a little every time it is made. Give priority to your actual measured values.
これは参考値です。数値は作成毎に少し変化します。皆様が測定した実測値を優先してくださいね。
Calculation example / 計算例
107.4 - 104.5 = 2.9 mm
2.9 ÷ 2 = 1.45
1.45 + 2 = 3.45 (3.5) mm
Expand the existing 13mm holes inward so that it is 3.5mm.
既存の13mmの穴を直径2mmから3.5mmになるように内側に拡張します。


Install the roller and check the roller width.
一度ローラーを仮組みしてチェック。

This is a Spray on the carbon side each time just before bonding.
瞬着硬化剤。接着直前にカーボン側に毎回スプレーします。


Close the outside of the ellipse hole. And also close the hole of the 19mm roller.
楕円穴の外側と19mmローラー穴を瞬着で塞ぎます。


Clean the holes
穴を掃除しましょう

Flatten the front and backside
水研ぎ。裏表を平らにします


Finished ✔️
The 13mm rear rollers can’t be used this time. sorry😢
今回は13mmリヤローラーは使用できないと思います🙏
4. Connecting plate and Main shafts
Create a connecting plate. The difference from the original 2step anchor is that (1) the connect plate is brought into contact with the rear end on the chassis side so that the roller does not have a positive angle when backsliding, and (2) the EVO has a wider connect plate. This has been devised so that the camber angle does not occur on the rollers. Simply put, I think you'll jump straight.
コネクトプレートを作成します。初代2ステップアンカーとの違いは、①コネクトプレートをシャーシ側後端に接触させてバックスライド時にダウンスラストが発生しにくい仕組みになったことと、②EVOはコネクトプレート幅がワイドになり、ローラーを後ろから見た時にハの字になりにくい(キャンバー角が発生しにくい)ように工夫されています。簡単に言えばまっすぐジャンプすると思いますよ。
[13-Connecting plate]


13.0mm from hole edge to bar end
穴端からバーエンドまで13.0mm


Apply damper grease to the connecting plate and Batman as needed. You can use it without any problem even if you do not apply it.
Apply to the back side of the connect plate and each shaft hole (main plate shaft holes, BATMAM arms shaft holes, connecting plate shaft holes).
お好みでダンパーグリスを塗布します。塗らなくても問題なく使用できます。どちらでも。
コネクトプレート裏側と各軸穴(メインプレート軸穴、バットマン軸穴、コネクトプレート軸穴)に塗布してみてください。

This is a connecting plate and main shafts. The main shafts is 25mm cap screws processed into countersunk screws.
コネクトプレートとメインシャフト類。メインシャフトは皿ビス形状に加工された25mmキャップスクリューです。


In the case of MS, I think the connect plate will interfere with the chassis. The point is to make contact with the chassis, so try scraping the interference part of the connect plate little by little.
MSの場合はコネクトプレートがシャーシに干渉すると思います。シャーシに接触させるのがポイントなので、コネクトプレートの干渉部分を少しずつ削ってみてください。
Points
・Finish the connecting plate with as little space as possible from the chassis.
・If the gap is little, the rear rollers are unlikely to have a positive angle even when backsliding, reducing gimmick errors.
・If the gap is too small, the stroke will be poor, so look for a good position.
シャーシからできるだけスペースを空けずにコネクトプレートを仕上げます。
隙間が少ないとバックスライド時もダウンスラストになりにくく、ギミックエラーが減少します。
隙間が小さすぎるとストロークが悪くなりますので、適切な位置を探してみてください。

Finished ✔️
[For FMA]


Please cut it a little longer and then make fine adjustments.
ほんの少し長めにカットしてから微調整してください。


For FMA finished ✔️
[Main shafts]

Please prepare a few cheap files. Replace the file when the sharpness is reduced. Apply cutting oil. Please make two.
安価な使い捨てダイヤモンド平ヤスリを数本用意し、キャップスクリューを皿ビスっぽく加工してゆきます。切れ味が落ちたらヤスリを新品に交換してください。ヤスリに切削油を塗布しながら加工します。オイルを枯らさないように、回転数は低めに。2つ作ってください。


1)Cut the screw
2)Chamfer sharp edges
3)Polish the body with compound
①ビスカット
②傘部分のエッジを面取り
③胴部分をコンパウンドで磨く

M2 thread cutting die. Fix damaged threads
M2 ねじ切りダイスとダイスハンドル。ビス切断時に損傷したネジ山を修復しましょう

Finished ✔️

memo
If you have a mini-sized bench grinder instead of a stick file, the work can be done in an instant. While turning the lutor, lightly press it against the bench grinder to cut. It's a very quiet electric tool, so I think it can be used indoors.
棒ヤスリの代わりにミニサイズのベンチグラインダーがあると作業は一瞬で終了します。リューターを回しながらベンチグラインダー砥石の側面に軽く押し当てて加工してみてください。とても静かな電動ツールなので屋内で使用できると思います。
5. Assemble


postscript
If lane change is difficult, please change to a silver spring. Tighten the silver spring further and use it in a hard state. The sense of stability and corner speed are improved, and the clearing rate of lane changes is dramatically improved. Loosen the preload a little for special sections such as wave landing and downhill slopes from the wave.
We recommend choosing a black spring for landing, a silver spring for LC, and so on.
追記
LCが難しいレイアウトの場合は是非銀バネを試してみてください。銀バネを更に締め込んで固い状態で使用します。安定感とコーナー速度が向上し、LCのクリア率が飛躍的に向上します。例えばウェーブ着地やウェーブ下りスロープなど、特殊なセクションだけ少し緩めてみてください。
着地なら黒バネ、LCには銀バネ…みたいな選択がオススメ。


Finished ✔️
6. Skid plates and cap screws


25 or 30 mm
25か30mmかお好みで


A small washer with an outer diameter of 3.5 mm. Process with a flat file and a leutor. I called “GOD washers”😂
外径をφ3.5に加工した小ワッシャー。厚みが0.3mmになります。神ですか…。適当に神ワッシャーとでも名付けましょう。神ワッシャーはリューターと平ヤスリで作ります。因みにデルタアンカーにもおすすめ。ローラー位置を下げることができます。
最近はスーパースーパー提灯とか神ワッシャーとかネーミングが雑になっ…。おっと誰か来たようです笑。
About GOD washers
This is a substitute part for the bearing washers.
Attach a small washer to the countersunk screw and file it while turning it with a leutor. Finally, don't forget to remove the burrs with a flat file.
Since the position of the Rear bottom rollers can be lowered, stability is improved.
God Washer 2 will appear in the third episode of Delta Anchor. That is also recommended.
神ワッシャーとは…
こちらはベアリングワッシャーの代用部品です。
皿ネジに小ワッシャーを取り付け、リューターで回しながらヤスリます。最後に板ヤスリ等でバリ取りをお忘れなく。
リヤボトムローラー位置を下げることができるのでスタビリティが向上します。
デルタアンカー第3話で神ワッシャー2が登場します。そちらもおすすめ。


To improve the adhesive strength, degreas the carbon plate and apply tape. Also, warm the tape a little.
粘着力を高めるため、カーボンプレートはパークリで脱脂してからテープを貼り付けます。また貼り付け直前にテープを少し温めてください。
もし瞬着を使うと…。数周で剥がれて行方不明になると思います笑。


Please stick the polycarbonate so that it will not get caught on the wall.
壁に引っ掛からないようにポリカを貼ってください。


Completed ✔️
Points
The point is to use a low-headed cap screw and sandwich the carbon with a large washer. This will almost eliminate carbon cracks. (In rare cases, it may crack)
Make the Skid plates with carbon scrap and stick it with Super-double-sided tape. When applying the tape, degreas the carbon and heat the tape a little to improve the adhesive strength.
Also, if you do not stick polycarbonate on the Skid plates, it will get caught often. I recommend pasting polycarbonate.
ポイントは低頭のキャップスクリューを使用し、大ワッシャーでカーボンを挟むことです。これによりカーボンのクラックをほぼ解消できます。(まれに割れる場合もあります)
また、乗り上げた時に引っ掛からないように、適当なカーボン端材等でスキッドプレートを作ります。スキッドは強力両面テープで貼り付けます。貼り付け前にカーボンをパーツクリーナーで脱脂し、テープを少し加熱すると接着力が向上するのでお試しください。
それと、スキッドプレートにポリカを付けないと引っ掛かりがちです。ポリカの貼り付けをお勧めします。
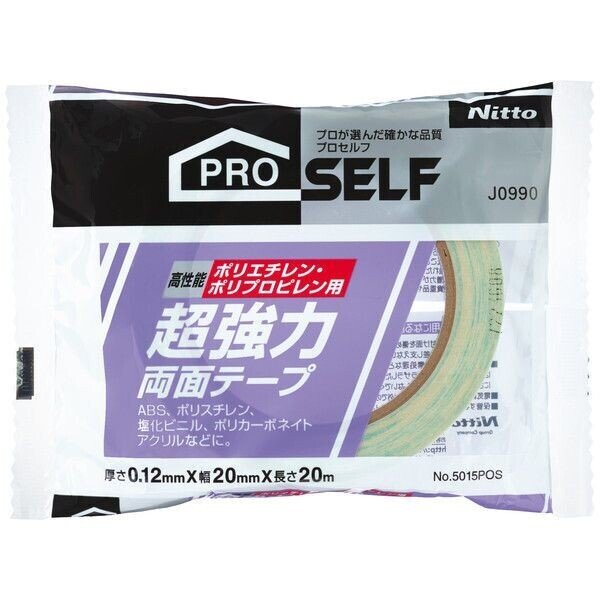
Nitto 5015
It’s a Japanese Super-double-sided tape that I used to attach skid plates and polycarbonate. 3M is also okay.
スキッドプレートやポリカの貼り付けに今回使用した両面テープです。
7. Special thanks🇮🇹🇯🇵
TOY’s CAP boss
⁵²⁴𝙍𝘼𝘾𝙄𝙉𝙂
i_ale_
ZERO GARAGE
Thank you so much!
8. Afterword
This work "2STEP EVO" was born by abolishing the originally planned “rear Delta anchor” and evolving the “first 2step anchor” that has left and right independent arms.
We hope that this tutorial will give you some hints for your creation!
当作品「2STEP EVO」は、当初予定していた「リアデルタアンカー」を廃案にして、左右独立アームを備えた「初代2step anchor」を進化させて誕生しました。
こちらのチュートリアルを通して皆様の創作のヒントになる事を願っています。
-.-.-.-.-.-.-.-.-.-.-.-.-.-.-.-.-.-.-.-.-.-.-.-.-.-.-.-.-.-.
The front gimmick "Delta Anchor" has finally been completed. Please have a look ↓
See you again!
フロントギミック「デルタアンカー」もついにシリーズ完結しました。是非ご覧くださいね↓
ではまた!
(c) 2021 BECKJPN All Lights Reserved
この記事が気に入ったらサポートをしてみませんか?