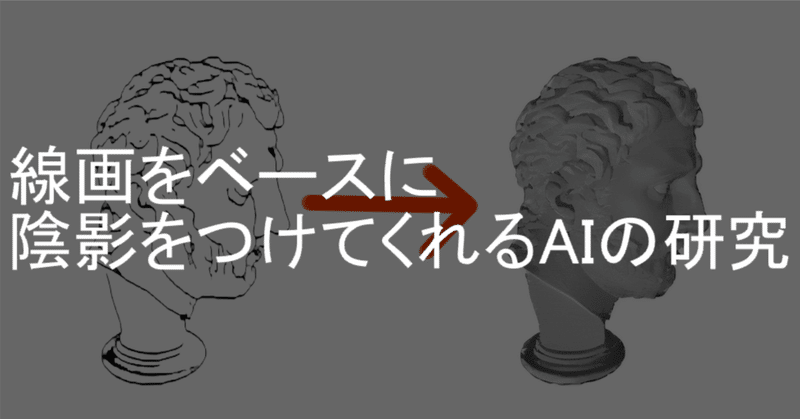
自作ControlNetモデル開発記録④

さて、今回もControlNetのepoch考察していきましょう。
今回使っているControlNetモデルはロイヤリティーフリーの3Dモデルや公的機関が公開している彫刻3Dデータ3905体をあらゆる角度から10000枚撮影したデータセットから作られたものになります。
最終的に自作ソフトウェアに組み込んで配布したいので、AUTOMATIC1111氏によるStable Diffusion web UIは使わず、以下のようなdiffusersライブラリを用いたスクリプトで画像を生成しました。
import torch
from diffusers import AutoencoderKL, StableDiffusionControlNetPipeline, ControlNetModel
from torch import autocast
from PIL import Image, ImageOps, ImageEnhance
import numpy as np

# CONSTANTS
MAX_SPLIT_SIZE_MB = 100
CUDA_DEVICE = 'cuda'

# TorchでのCUDAメモリ割り当てを設定
def set_torch_cuda_memory_allocation():
    torch.cuda.memory._set_allocator_settings(f"max_split_size_mb:{MAX_SPLIT_SIZE_MB}")

# AutoencoderKLをロード
def load_counterfeit_autoencoder():
    return AutoencoderKL.from_pretrained('models/vae/Counterfeit', torch_dtype=torch.float16).to(CUDA_DEVICE)

# ControlNetModelを指定されたパスからロード
def load_model_from_pretrained_path(path):
    return ControlNetModel.from_pretrained(path, torch_dtype=torch.float16).to(CUDA_DEVICE)

# inpaintingのパイプラインをロード
def load_inpainting_pipeline(vae, control_net, control_net_canny):
    return StableDiffusionControlNetPipeline.from_pretrained(
        "models/Stable-diffusion/stable-diffusion-2_Secta",
        controlnet=[control_net, control_net_canny],
        vae=vae,
        revision="fp16",
        torch_dtype=torch.float16,
    ).to(CUDA_DEVICE)

# inpaintingを実行するメインの関数
def main(image_path, mask_path, output_path, max_size, control_model_path, prompt):
    set_torch_cuda_memory_allocation()

    vae = load_counterfeit_autoencoder()
    control_net = load_model_from_pretrained_path(control_model_path)
    control_net_canny = load_model_from_pretrained_path("models/controlnet/control_v11p_sd21_canny")

    # StableDiffusionInpaint Pipelineの準備
    pipe = load_inpainting_pipeline(vae, control_net, control_net_canny)
    pipe.load_textual_inversion("models/textual_inversion", weight_name="Mayng.safetensors", token="Mayng", torch_dtype=torch.float16)
    pipe.enable_xformers_memory_efficient_attention()
    pipe.enable_attention_slicing("max")

    # 画像生成
    negative_prompt = "Mayng, (low quality, worst quality:1.4)"

    init_image = Image.open(image_path).convert("RGB")  # 初期画像をRGB形式で開く
    mask_image = Image.open(mask_path).convert("RGB")  # マスク画像をRGB形式で開く
    old_width, old_height = init_image.size  # 初期画像の幅と高さを取得

    # マスクを使用して画像をトリミングし、トリミングされた画像と関連情報を取得
    trimmed_image, min_row, min_col, init_width, init_height, init_aspect_ratio = trim_image_with_mask(init_image, mask_image, old_width, old_height)
    # トリミングされた画像を指定した最大サイズにリサイズし、リサイズ後の幅と高さを取得
    resized_image, trimmed_width, trimmed_height = resize_image(trimmed_image, max_size)
    # トリミングされた画像を反転させる
    invert_image = ImageOps.invert(trimmed_image)

    with autocast("cuda"):
        images = pipe(
            prompt=prompt,
            negative_prompt=negative_prompt,
            height=resized_image.height,
            width=resized_image.width,
            image=[resized_image,invert_image],  # 入力画像
        ).images

    # 生成された画像を元のサイズに戻す
    restored_size_image = restore_image_size(images[0], trimmed_width, trimmed_height)
    # トリミングした画像を元のトリミング領域に戻す
    restored_trim_image = restore_image_trim(restored_size_image, init_width, init_height, min_row, min_col)
    # 元画像のマスクで覆っていた部分を復元する
    restored_image = restore_image_mask(restored_trim_image,mask_image,init_image, max_size)
    # 復元された画像を指定された出力パスに保存
    restored_image.save(output_path)

    torch.cuda.empty_cache()

def round_to_multiple_of_8(value):
    # 値を8の倍数に丸める
    return (value // 8) * 8

def resize_image(image, max_size):
    # 画像を指定した最大サイズにリサイズする
    old_width, old_height = image.size
    new_max_size = round_to_multiple_of_8(max_size)
    aspect_ratio = old_width / old_height

    if aspect_ratio >= 1:
        if old_width > old_height:
            new_width = new_max_size
            new_height = int(round(new_width / aspect_ratio))
        else:
            new_height = new_max_size
            new_width = int(round(new_height * aspect_ratio))
    else:
        if old_height > old_width:
            new_height = new_max_size
            new_width = int(round(new_height * aspect_ratio))
        else:
            new_width = new_max_size
            new_height = int(round(new_width / aspect_ratio))

    # リサイズされた画像と元の幅と高さを返す
    resized_image = image.resize((new_width, new_height))
    return resized_image, old_width, old_height

def trim_image_with_mask(init_image, mask_image, old_width, old_height):
    # 画像とマスクを配列に変換
    image_array = np.array(init_image)
    mask_array = np.array(mask_image)
    # マスクの非ゼロ要素のインデックスを取得
    nonzero_indices = np.nonzero(mask_array)
    min_row, min_col = np.min(nonzero_indices[0]), np.min(nonzero_indices[1])
    max_row, max_col = np.max(nonzero_indices[0]), np.max(nonzero_indices[1])
    # トリミングされた画像の配列を作成
    trimmed_image_array = image_array[min_row: max_row + 1, min_col: max_col + 1]
    # トリミングされた画像をPILイメージに変換
    trimmed_image = Image.fromarray(trimmed_image_array)
    # 初期画像の幅と高さを返す
    init_width, init_height = init_image.size
    return trimmed_image, min_row, min_col, init_width, init_height, old_width / old_height

def restore_image_size(resized_image, trimmed_width, trimmed_height):
    # リサイズされた画像のサイズを元のトリミングされたサイズに復元
    restored_size_image = resized_image.resize((trimmed_width, trimmed_height))
    return restored_size_image

def restore_image_trim(trimmed_image, init_width, init_height, min_row, min_col):
    # 元の画像と同じサイズの新しい空の画像を作成(白で塗りつぶす)
    original_image = Image.new("RGB", (init_width, init_height), (255, 255, 255))
    # トリミングされた画像を正しい位置に貼り付ける
    original_image.paste(trimmed_image, (min_col, min_row))
    # 復元されたトリミング画像を返す
    restored_trim_image = original_image
    return restored_trim_image

def restore_image_mask(restored_trim_image, mask_image, init_image, max_size):
    # restored_trim_image、mask_image、init_imageのアスペクト比を崩さずにmax_sizeを長辺の値にする
    max_dim = max_size
    restored_trim_image = restored_trim_image.resize(calculate_resized_dimensions(restored_trim_image.size, max_dim))
    mask_image = mask_image.resize(calculate_resized_dimensions(mask_image.size, max_dim))
    init_image = init_image.resize(calculate_resized_dimensions(init_image.size, max_dim))

    # 画像をNumPy配列に変換
    restored_array = np.array(restored_trim_image)
    mask_array = np.array(mask_image)
    init_array = np.array(init_image)

    # マスク画像が白い部分を特定(RGBすべてが255の部分)
    white_area = np.all(mask_array == [255, 255, 255], axis=-1)

    # 白い部分でのrestored_arrayの値をinit_arrayに代入
    init_array[white_area] = restored_array[white_area]

    # 修復された画像をPILオブジェクトに変換して返す
    restored_image = Image.fromarray(init_array)
    return restored_image

def calculate_resized_dimensions(image_size, max_dim):
    width, height = image_size
    if width > height:
        new_width = max_dim
        new_height = int(height * max_dim / width)
    else:
        new_width = int(width * max_dim / height)
        new_height = max_dim
    return new_width, new_height

if __name__ == "__main__":
    input_no = 27
    image_path = f"input{input_no}.png"
    mask_path = f"input{input_no}_mask.png"
    max_size = 960
    if input_no == 1:
        prompt = "(greyscale, monochrome:1.4),1girl, solo,gloves, short hair, pants, tailcoat,full body, white background, simple background, looking at viewer,smile, long sleeves, standing, holding, formal, flute"
    elif input_no == 2:
        prompt = "(greyscale, monochrome:1.4), 1girl, solo, braid,wings, dress, twin braids, high heels, ahoge, fairy wings, hair ornament, flower, fairy, hair flower, open mouth, pointy ears, smile, full body, looking at viewer, simple background"

# 省略


    for mode in range(30, 101, 10):
        output_path = f"results/{image_path.replace('.png', f'_shadow_{mode}.png')}"
        control_model_path = f'models/controlnet/contrl_v11p_sd21_shadow_front_{mode}'
        main(image_path, mask_path, output_path, max_size, control_model_path, prompt)
インペイント機能をどうしても実装したかったのですが、diffusersのinpaint用モデル変換がうまくできず疑似的に実装しました。
自作ControlNetだけでなくcontrol_v11p_sd21_cannyも一緒に使っているのはそっちの方が出力結果が安定したからです。
RTX3060(12gb)では大体720-960前後で動きました。おそらくいろいろ最適化がされているであろうWebUIよりもシビアです。


さて上記の結果からわかることは、彫刻データ、3905体をあらゆる角度から10000枚撮影したデータセットの場合、epoch数は30-50程度が最適ということです。
おそらくレンダリングする3Dモデルの数を増やしたり、角度だけでなく、距離の遠近もランダムにしたらバリエーションが広がり、さらなるepoch数に耐えられる可能性がでてくるでしょう。
3Dモデルを増やすアプローチはこれ以上は私がしんどいので(あらゆる公的教育機関のアーカイブした彫刻データを手動でDLし、Unityで読み込める形にするのめちゃくちゃ辛かった……!)
次にチャレンジするとしたら、『3Dモデルの遠近』もランダムにして撮影したデータセットを作ることでしょう。
オレはようやくのぼりはじめたばかりだからな このはてしなく遠い理想の陰影ControlNet坂をよ……!
次回へ続く!
この記事が気に入ったらサポートをしてみませんか?