
【Python】iPadでリアルタイム物体認識

最近のスマホはカメラ,加速度・角速度センサ,気圧センサなどセンサーの塊です.これとpythonを組み合わせれば簡単に実世界の状態を観測することが可能になります.
本記事では,pythonでiPadのカメラから見えている物体が何かを認識させる方法の解説を行います.実際に動いてる様子はこちら.
必要なものは以下の通りです.
① iOSのデバイス
iPadまたはiPhone.iPadの方が画面が大きいため操作しやすいです
② iOS環境でpythonを実行するためのアプリ「Pyto」
デフォルト状態で画像解析に用いられるモジュール(Open CV)がインストールされているため便利です.有料1220円(2020.11月現在)ですが,3日のお試し期間でも下記のスクリプトは実行可能ですのでお試しください.
https://apps.apple.com/jp/app/pyto-python-3/id1436650069
③ Lightning-USB カメラアダプタ
Blootoothキーボードがない場合に,USBキーボードをiPad・iPhoneで使用できるアダプタです.
1. Pytoのインストール
app storeから"Pyto -Python 3"をインストールします.
有料または,3日限定の試用が選択できます.試用でも問題ありません.
著者の環境
端末:iPad Air 3
OS:iPad OS 14.1
Pyto:14.1.1
2. ファイルの作成
サンプルコードは以下の通りです.OpenCVとは画像や動画を処理するために必要な機能が実装されたライブラリです.こちらを使ってiPadのカメラに映る物体が何かを検知します.
 #objectDitection .py

import cv2
from cv2 import dnn
import numpy as np
import time
import os

inWidth = 224
inHeight = 224
WHRatio = inWidth / float(inHeight)
inScaleFactor = 0.017
meanVal = (103.94, 116.78, 123.68)
prevFrameTime = None
currentFrameTime = None
device = 0

if __name__ == "__main__":
   modelfolder = "./MobileNet-Caffe-master"
   net = dnn.readNetFromCaffe(
       os.path.join(modelfolder, "mobilenet_v2_deploy.prototxt"),
       os.path.join(modelfolder, "mobilenet_v2.caffemodel"),
   )
   cap = cv2.VideoCapture(device)
   f = open(os.path.join(modelfolder, "synset.txt"), "r")
   classNames = f.readlines()
   showPreview = True

   while cap.isOpened():
       # capture frame-by-frame
       ret, frame = cap.read()
       # check if frame is not empty
       if not ret:
           # print("continue")
           continue
       frame = cv2.autorotate(frame, device)
       rgbFrame = cv2.cvtColor(frame, cv2.COLOR_BGR2RGB)
       blob = dnn.blobFromImage(rgbFrame, inScaleFactor, (inWidth, inHeight), meanVal)
       net.setInput(blob)
       detections = net.forward()

       maxClassId = 0
       maxClassPoint = 0
       for i in range(detections.shape[1]):
           classPoint = detections[0, i, 0, 0]
           if classPoint > maxClassPoint:
               maxClassId = i
               maxClassPoint = classPoint

       className = classNames[maxClassId]
       # print("class id: ", maxClassId)
       # print("class point: ", maxClassPoint)
       # print("name: ", className)
       prevFrameTime = currentFrameTime
       currentFrameTime = time.time()
       if prevFrameTime != None:
           i = 1
           # print(1.0 / (currentFrameTime - prevFrameTime), "fps")

       if showPreview:
           font = cv2.FONT_HERSHEY_SIMPLEX
           size = 1
           color = (255, 255, 255)
           weight = 2
           cv2.putText(frame, className, (10, 30), font, size, color, weight)
           cv2.putText(frame, str(maxClassPoint), (10, 60), font, size, color, weight)
           cv2.imshow("detections", frame)
3. 機械学習の学習済ディレクトリをダウンロード
https://github.com/shicai/MobileNet-CaffeからMobileNet-Caffe-masterをダウンロード.これを実行ファイルと同じディレクトリに保存します.
① iOS上で上記リンク先からファイルをダウンロード
② zipファイルを展開(iOS13以降で可能です)
③ ファイルを実行ファイルのあるディレクトリに移動(デフォルトではicloud/pytoです)
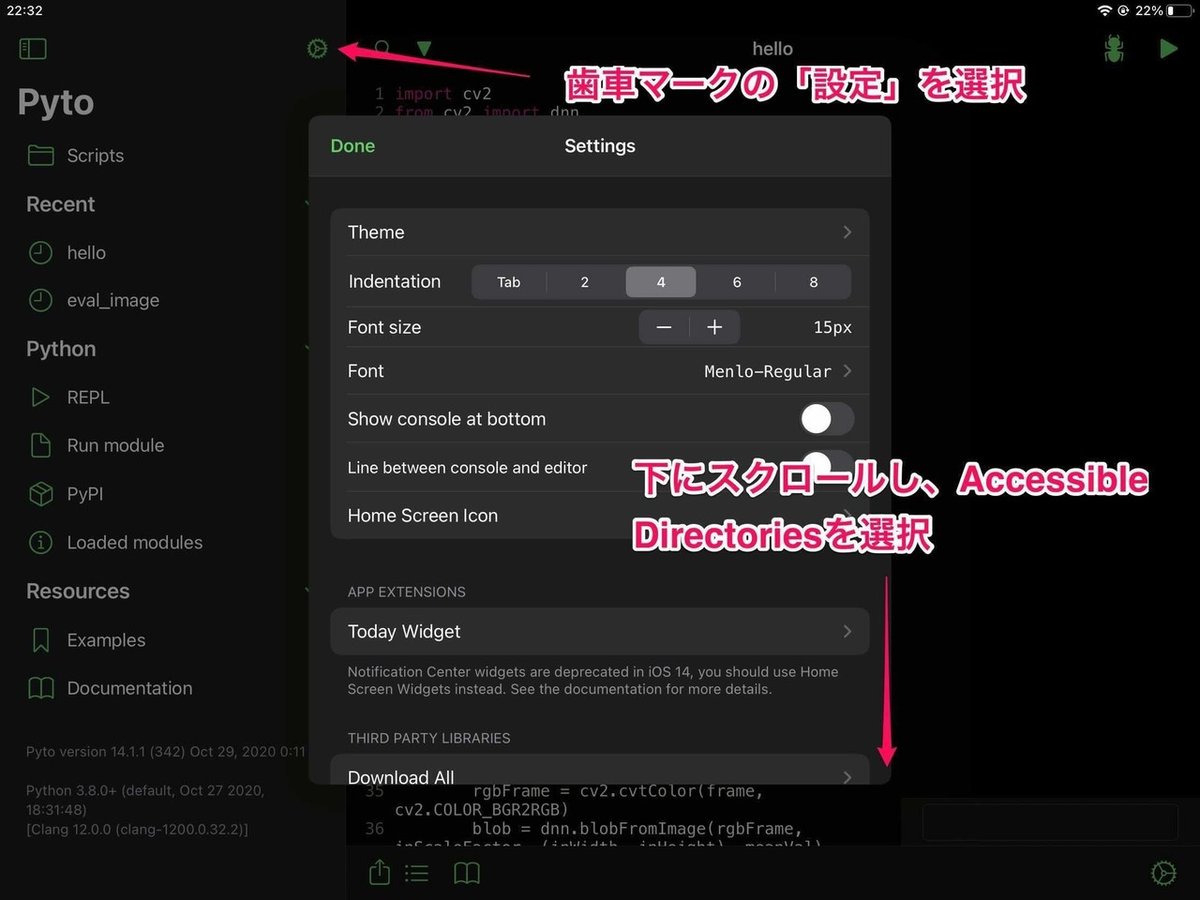
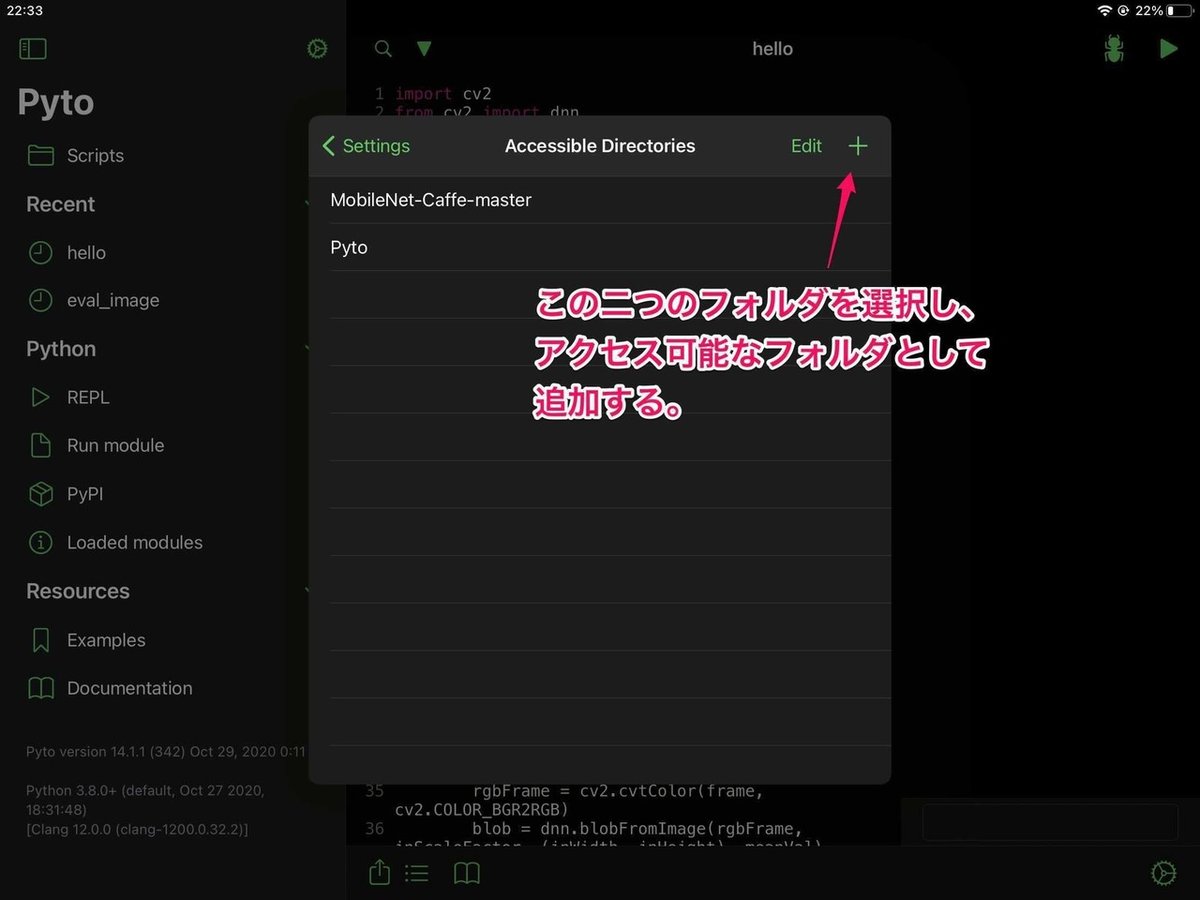
4. フォルダへのアクセス許可
pyto内の設定から以下の手順で「pyto実行ファイルの存在するフォルダ」,「MobileNet-Caffe-masterの存在するフォルダ」にアクセス許可を与えます.
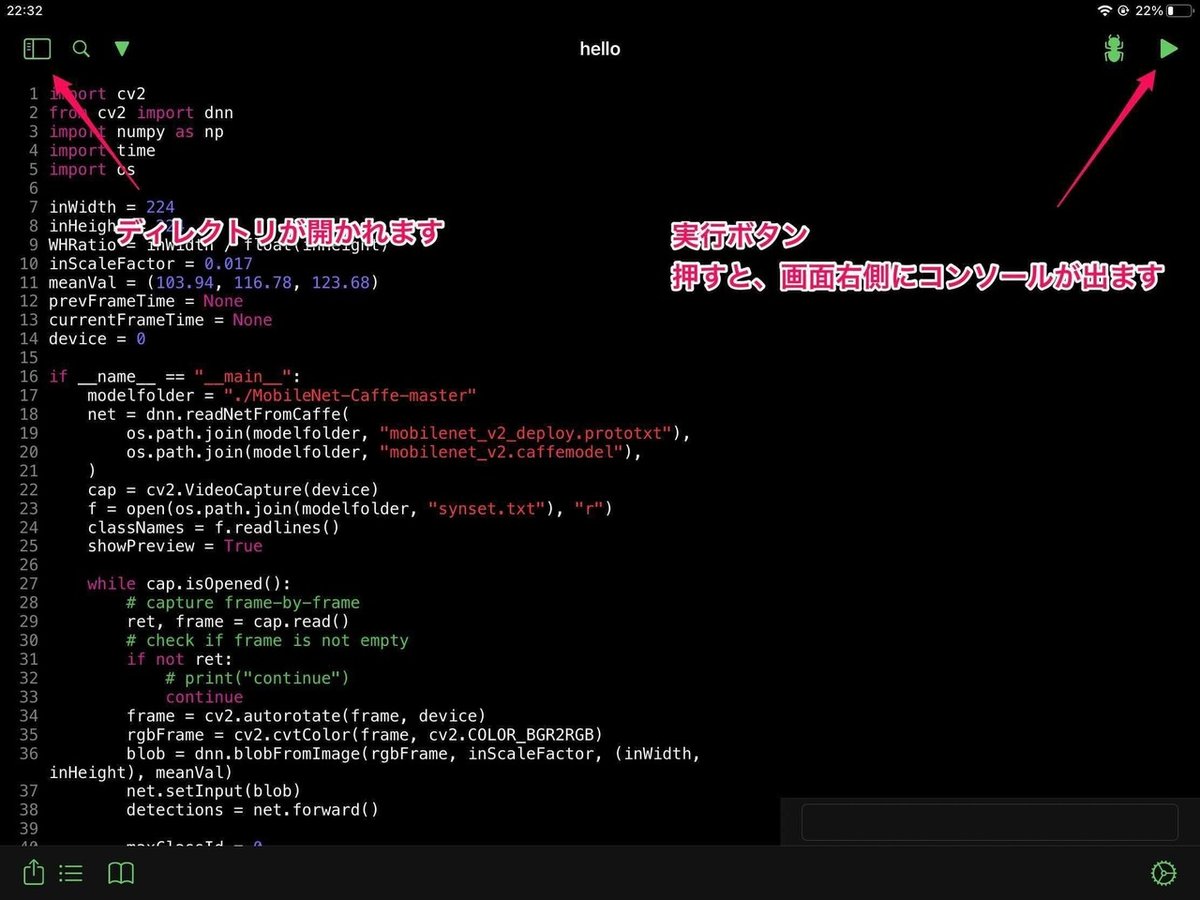
5. 実行
右上,実行ボタンを押すだけでコンソール上に画面が表示されます.
環境構築やモジュールのインストールさえ必要ないため本当に3分できます!お試しください.
参考にさせていただいた記事
https://github.com/shicai/MobileNet-Caffe
https://qiita.com/yamamido0268/items/e1172d25072da1687c49
http://asukiaaa.blogspot.com/2018/03/opencvdnnpythonmobilenet.html
いつもサポートありがとうございます.