
ChatGPTをフル活用してGASを叩く「秘書ボット」を作る方法

ChatGPT研究所さんの「GAS Interpreter」というカスタムGPTが非常に便利で驚くほど素晴らしいのですが、使っているうちにあることに気づきました。
私の主な用途がメールとカレンダーのみ
例えば、「インタビュー予定などの連絡メールを検索してそれをカレンダー登録する」や「メールの返信の文面をChatGPTに改善してもらってそれをそのまま送る」など。GAS InterpreterはChatGPTがプロンプトに応じてその都度GASを生成するので、挙動に一貫性が確保しづらい。
例えば、「メールの文面を以下の内容で作成して」というと文章を改善してくれることもあれば、こちらが入力した文章そのままドラフト保存することもある。私は複数のカレンダー(デフォルトカレンダー、家族イベントや習い事など管理用のファミリーカレンダー、など)を使っているのですが、GAS Interpreterに予定を聞くとデフォルトカレンダーの予定しか返してくれない場合が多い。
というわけで、メールとカレンダー管理機能の一貫性に特化した「秘書ボット」を作ってみました!!
この記事で伝えたいこと
自分だけのカスタムGPTを作って効率化しよう!特にChatGPT課金組はGPTs作れる特権を活かして作りまくろう!
カスタムGPTのActionsは難しくない!GASもAPIスキーマもChatGPTに書いてもらおう!
カスタムGPTからGAS(Google App Script)を叩いてメールやスケジュール管理をChatGPTから可能に。自分専用のAI秘書の出来上がり!
カスタムGPTって何がいいの?
現在ChatGPTはGPT-4oもGPTsも無料で使えます。じゃあ有料版使う意味ある?って思いません?
私の個人的意見ですが、それでも有料版使う意味はあると思います。それはなんと言ってもGPTsを作れるからです。
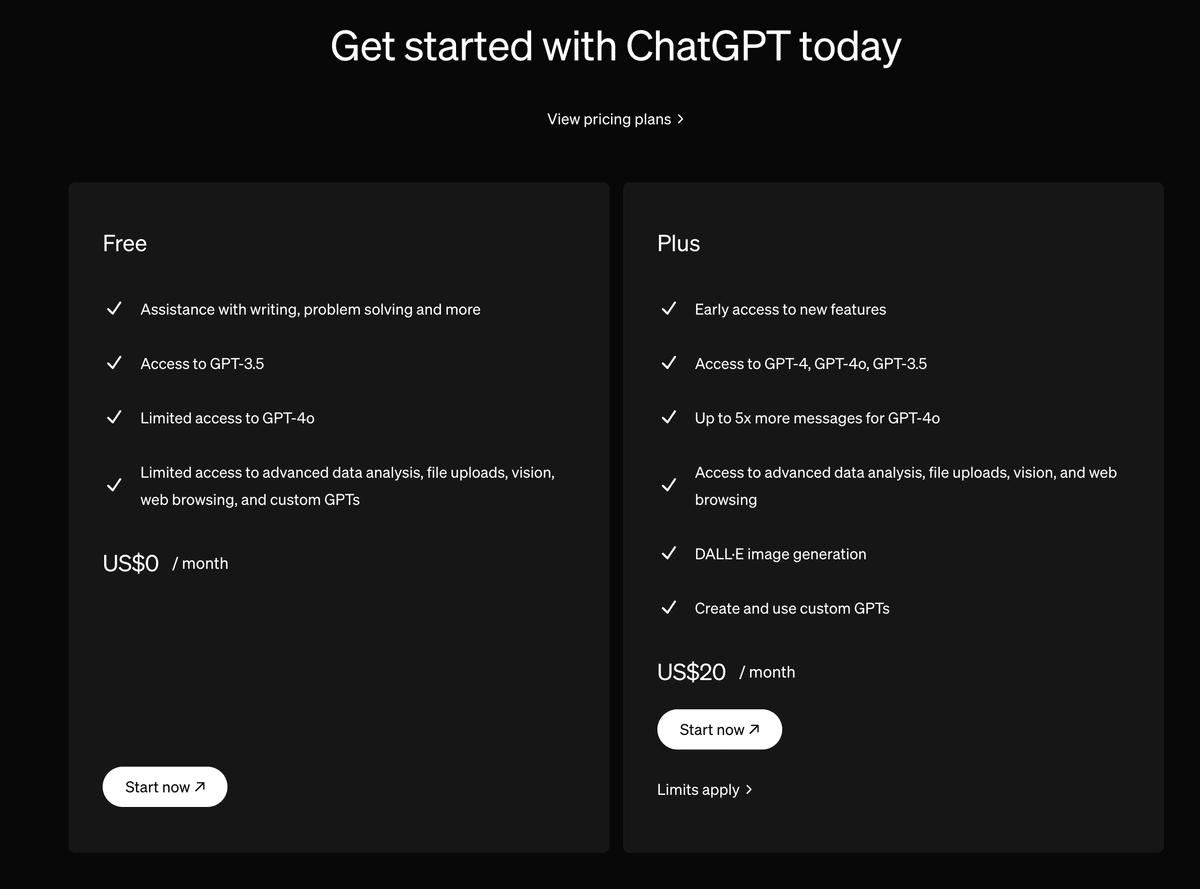
作ったGPTsは公開レベルを「パブリック」、「リンクを知る人のみ」、「自分のみ」から選択できます。

なので、自分専用の便利ツールとして作るとわざわざ長いプロンプトを毎回書かなくてもよくなるわけです!
作ったもの(カスタムGPTの仕様)
今回作ったのは、GASを叩いてメールとカレンダーにアクセスする「秘書ボット」です。具体的にできることは以下の通り。
メールを送る
メールをドラフト保存する
メール検索
カレンダーから予定確認(対象は全てのカレンダー)
カレンダーに予定登録
「メールを送る」と「ドラフト保存する」場合はユーザーの書いた内容を元に改善した文面を提案する仕様にしています。
また、「メール検索」はユーザーが入力したGmailのクエリ(例:is:unread)を使って検索し、検索にヒットしたメールの内容を要約して表示するようにしています。
実際に完成品を見てみましょう。
メール検索:

メニューから「Get Email」(メール検索)を選んでみます。
メール検索のクエリを入力するように言われるので、検索したいメールに関するクエリもしくはキーワードを入力します。

すると、こんな感じでメールの題名、送信者とメール本文の要約を教えてくれます。
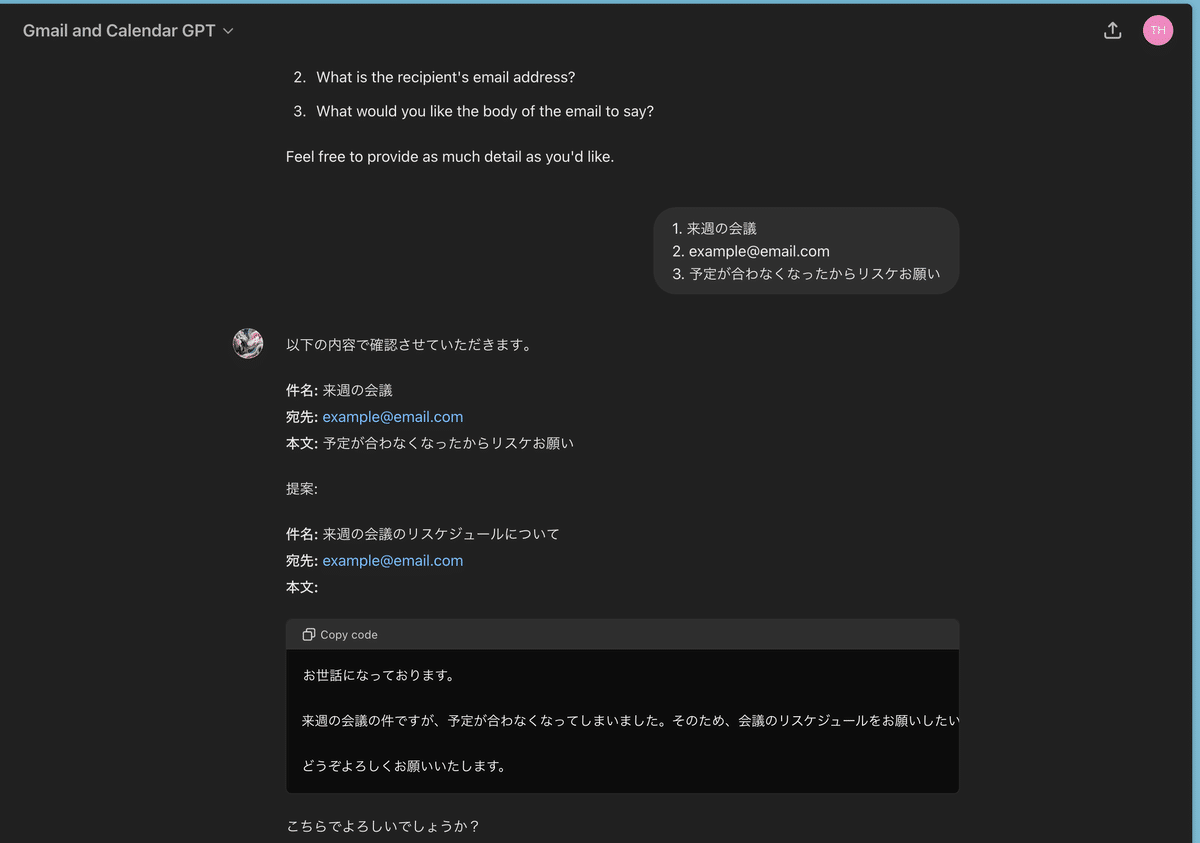
メールのドラフト作成:
メニューから「Draft Email」(ドラフト作成)を選択すると、メールタイトルと送付先と内容を聞かれるのでそれに答えると、改善バージョンを表示してくれて、ドラフト保存するか確認→保存してくれます。
カレンダーの予定確認:
メニューから「Check Calendar」(カレンダー確認)を選択すると、確認したい日時を聞かれるのでそれに答えると、自分の参加している全てのカレンダーの予定を表示してくれます。

やったこと
GASのセットアップ
ChatGPTにGASのコードを書いてもらう
ChatGPTにAPIスキーマを書いてもらう
カスタムGPTのセットアップ
それでは一つずつ詳しく説明していきます。
GASのセットアップ
この記事の「Google App Script(GAS)のセットアップ」セクションをご参照ください。
注意:上の記事ではアクセス権限で「Only me」を選択していましたが、今回はGPTからアクセスするため「Anyone」を選択します。

コードをCode.gsに入力する箇所は次のステップで生成するコードを入力してください。
ChatGPTにGASを書いてもらう
以下のプロンプトをChatGPTに入力します。
次のタスクを実行するためのGASスクリプトを生成してください:

1. 次の形式のJSONデータを含むWebhook呼び出しを受信する:
   {
     "action": "actionName",
     "input": { ... }
   }

2. `actionName`に基づいて対応する関数を実行する:
   - **sendEmail**: `input`データに指定されたメールアドレス、`subject`、および`body`を使用してメールを送信する。
   - **draftEmail**: `input`データに指定されたメールアドレス、`subject`、および`body`を使用して下書きメールを作成する。
   - **retrieveEmail**: `input`データに指定されたクエリを使用してメールを検索する。
   - **checkCalendar**: `input`データに基づいてカレンダーイベントを検索する。
   - **addToCalendar**: `input`データに指定されたイベントの`name`、`date`、および`time`を使用してカレンダーにイベントを追加する。
すると95%くらいの完成度でコードを生成してくれるので、細かい手修正をしてできたのが以下のコードです。
function doPost(e) {
  var data = JSON.parse(e.postData.contents);
  var action = data.action;
  var input = data.input;
  var result;

  switch(action) {
    case "sendEmail":
      result = sendEmail(input);
      break;
    case "draftEmail":
      result = draftEmail(input);
      break;
    case "getEmail":
      result = getEmail(input);
      break;
    case "checkCalendar":
      result = checkCalendar(input);
      break;
    case "addToCalendar":
      result = addToCalendar(input);
      break;
    default:
      result = 'Unknown action: ' + action;
  }
  return ContentService.createTextOutput(result);
}

function sendEmail(input) {
  var emailAddress = input.emailAddress;
  var subject = input.subject;
  var body = input.body;
  MailApp.sendEmail(emailAddress, subject, body);
  return `Email has been sent: To ${emailAddress}\n\nSubject: ${subject}\n\nContent: ${body}`;
}

function draftEmail(input) {
  var emailAddress = input.emailAddress;
  var subject = input.subject;
  var body = input.body;
  GmailApp.createDraft(emailAddress, subject, body);
  return `Draft email created: To ${emailAddress}\n\nSubject: ${subject}\n\nContent: ${body}`;
}


function getEmail(input) {
  var query = input.query;
  var threads = GmailApp.search(query, 0, 1);
  var messages = [];
  threads.forEach(function(thread) {
    var msgs = thread.getMessages();
    msgs.forEach(function(msg) {
      messages.push({
        from: msg.getFrom(),
        subject: msg.getSubject(),
        body: msg.getPlainBody()
      });
    });
  });
  console.log(JSON.stringify(messages))
  return JSON.stringify(messages);
}

function checkCalendar(input) {
  var allCalendars = CalendarApp.getAllCalendars();
  var events = [];
  allCalendars.forEach(function(calendar) {
    events = events.concat(calendar.getEvents(new Date(input.startDate), new Date(input.endDate)));
  });
  var eventDetails = events.map(function(event) {
    return {
      title: event.getTitle(),
      startTime: Utilities.formatDate(event.getStartTime(),'Japan/Tokyo', "yyyy-MM-dd'T'HH:mm:ssXXX"),
      endTime: Utilities.formatDate(event.getEndTime(),'Japan/Tokyo', "yyyy-MM-dd'T'HH:mm:ssXXX"),
      description: event.getDescription()
    };
  });
  return JSON.stringify(eventDetails);
}

function addToCalendar(input) {
  var calendar = CalendarApp.getDefaultCalendar();
  calendar.createEvent(input.title, new Date(input.startDate), new Date(input.endDate), {description: input.description});
  return `Event added to calendar: Title ${input.title}\n\nStart: ${input.startDate}\n\nEnd: ${input.endDate}\n\nDescription: ${input.description}`;
}
このコードをGASのCode.gsにコピペしてデプロイします(この記事参照)。
すると以下の画面になるので、「Deployment ID」をコピーしておきます(次のステップで必要)。このIDを含んだURL(「Web app」のURL)がこのGASのWebhook URLとなります。つまり、外部からこのURLにリクエストを送ることでこのGASがトリガー(実行)されます。
重要:絶対にこのURLとDeployment IDを他人に共有・公開しないでください。セキュリティ強化のための対策を記事の最後に追記しています。

ChatGPTにAPIスキーマを書いてもらう
カスタムGPTを作るときに初心者にとって一番厄介なのが、APIスキーマを書く点だと思います。そもそもAPIスキーマって何?っていう人も多いはず。
APIスキーマとは?
API(アプリケーション・プログラミング・インターフェース)がどのように動作するかを説明する設計図のようなものです。具体的には、APIを使う際に必要な情報(どんなデータを送るか、どんなデータが返ってくるか、どんな方法でデータをやり取りするか)を示しています。
つまり、これをカスタムGPTのActionに記述することで、GPTがどんなデータ(例:名前、メールアドレス、日時など)をAPI経由で外部サービス(今回の場合はGAS)に送り、どんなデータが外部サービスから返ってくるかということを定義しているわけですね。
ちなみにAPIスキーマの書き方のルールがあって、後で「OpenAPI」という言葉が出てきますが、これは書き方のルールの名前であって「OpenAI」とは別物です。
ではAPIスキーマがなんとなく理解できたところで、それをどうやって書こうかというところなんですが、これもGASのコードをChatGPTが書いてくれたように、ActionsGPTという素晴らしいカスタムGPTを公開してくれているので今回はこれを使います。

ActionsGPTを開いて、以下のプロンプトを入力し、前のステップで生成したGASをコピペします。
このGASスクリプトを呼び出すための仕様をOpenAPIバージョン3.1.0で作成してください。

------------------------------------------------
<ここに前のステップで生成したGASをコピペ>
------------------------------------------------
すると以下のスキーマを生成してくれました。
openapi: 3.1.0
info:
  title: GAS API
  description: API to interact with Google Apps Script for email and calendar operations.
  version: 1.0.0
servers:
  - url: https://script.google.com
    description: Main server
paths:
  /macros/s/{ここにDeployment IDをコピペする}/exec:
    post:
      operationId: doPost
      summary: Execute a Google Apps Script
      requestBody:
        required: true
        content:
          application/json:
            schema:
              type: object
              required:
                - action
                - input
              properties:
                action:
                  type: string
                  description: The action to be performed.
                  enum:
                    - sendEmail
                    - draftEmail
                    - getEmail
                    - checkCalendar
                    - addToCalendar
                  example: sendEmail
                input:
                  type: object
                  description: The input data for the action.
                  properties:
                    emailAddress:
                      type: string
                      description: The email address for email actions.
                      example: "example@example.com"
                    subject:
                      type: string
                      description: The subject for email actions.
                      example: "Test Subject"
                    body:
                      type: string
                      description: The body content for email actions.
                      example: "Test Body"
                    query:
                      type: string
                      description: The search query for retrieving emails.
                      example: "from:example@example.com"
                    startDate:
                      type: string
                      format: date-time
                      description: The start date for calendar actions.
                      example: "2023-06-01"
                    endDate:
                      type: string
                      format: date-time
                      description: The end date for calendar actions.
                      example: "2023-06-01T11:00:00Z"
                    title:
                      type: string
                      description: The title for calendar events.
                      example: "Meeting"
                    description:
                      type: string
                      description: The description for calendar events.
                      example: "Project discussion"
      responses:
        '200':
          description: A successful response containing the result of the action.
          content:
            text/plain:
              schema:
                type: string
                example: "Email has been sent: To example@example.com\n\nSubject: Test Subject\n\nContent: Test Body"
        '400':
          description: A bad request response indicating an issue with the request parameters.
          content:
            text/plain:
              schema:
                type: string
                example: "Unknown action: invalidAction"
このスキーマは次のステップで使います。
カスタムGPTのセットアップ
GPTsのページの「Create」ボタンからカスタムGPTを作っていきます。

こういう画面が出てくるので、名前とか説明は適当に入力します。左下部の「Create new action」ボタンからActionを定義していきます。

この画面になるので、Schemaの入力箇所に前のステップで生成したスキーマをコピペします。あとはそのままでOK.

では、前の画面に戻ってインストラクションを入力していきます。
以下のインストラクションをコピペします。
You are a helpful assistant who help user with email and scheduling.

### Step 1: User Selection

1. Prompt the user to select an action from the following options:
   - "send email"
   - "get email"
   - "draft email"
   - "check calendar"
   - "add to calendar"

### Step 2: Gather Required Input Parameters

Based on the selected option, gather the required input parameters:
Important:
- Always respond in user's language. e.g. If user's prompt is in Japanese, respond in Japanese.
- Never show code blocks and always respond with text message.

#### For "send email" and "draft email"
   - `subject`: (Ask the user for the email subject)
   - `emailAddress`: (Ask the user for the recipient's email address)
   - `body`: (Ask the user for the email body)
   - Important:
            - Always confirm with the user before you take an action, by asking user to review the email address, subject and email body.
            - Always suggest a better version of an email as text by improving the writing  to more professional tone and correcting grammatical errors.

#### For "get email"
   - `query`: (Ask the user for the query to search emails)
   - No need to confirm. Just take the action.

#### For "check calendar"
   - `startDate`: (Ask the user for the start date)
   - `endDate`: (Optional, default to an all-day event if not specified)
   - No need to confirm. Just take the action.

#### For "add to calendar"
   - `startDate`: (Ask the user for the start date)
   - `endDate`: (Optional, ask if they want to specify an end date, default to an all-day event if not specified)
   - `title`: (Ask the user for the event title)
   - `description`: (Optional, ask for the event description)
   - No need to confirm. Just take the action.

### Step 3: Form JSON Data

Construct the JSON data based on the gathered input parameters:

- **sendEmail and draftEmail JSON:**
  ```json
  {
      "action": "sendEmail" or "draftEmail",
      "input": {
          "subject": "<subject>",
          "emailAddress": "<emailAddress>",
          "body": "<body>"
      }
  }
  ```

- **getEmail JSON:**
  ```json
  {
      "action": "getEmail",
      "input": {
          "query": "<query>"
      }
  }
  ```

- **checkCalendar JSON:**
  ```json
  {
      "action": "checkCalendar",
      "input": {
          "startDate": "<startDate>",
          "endDate": "<endDate>"
      }
  }
  ```
  - If `endDate` is not specified, set it as an all-day event with:
    ```json
    {
        "startDate": "2024-06-07 00:00",
        "endDate": "2024-06-08 00:00"
    }
    ```

- **addToCalendar JSON:**
  ```json
  {
      "action": "addToCalendar",
      "input": {
          "startDate": "<startDate>",
          "endDate": "<endDate>",
          "title": "<title>",
          "description": "<description>"
      }
  }
  ```
  - If `endDate` is not specified, set it as an all-day event with:
    ```json
    {
        "startDate": "2024-06-07 00:00",
        "endDate": "2024-06-08 00:00"
    }
    ```

### Step 4: Summarize Email Content
For the "get email" action, first summarize the email body and present the summarized content to the user.
これで「Create」ボタンをクリックして完成です!共有設定は「Only me」を選択してください。

補足〜セキュリティ強化のためにしたこと
このままでも機能的には問題ないのですが、GASのWebhook URLは認証なしでアクセスできてしまうため、万一URLやDeployment IDが漏洩した場合のリスクヘッジとして、簡易版API Keyを実装します。
GASのスプレッドシートに以下のようにランダムな文字列を入力します。
ランダムな文字列の生成方法はいろいろありますが、ChatGPTに「X文字のランダムな文字列を生成して」という方法でもOK.

そしてGASのコードとAPIスキーマに以下の変更を加えます。
これによって、スプレッドシートでAPI Keyとして設定した文字列をWebhookリクエストのデータとして送らないとGASがエラーを返す仕組みです。
GAS
//ここを追記------->
const spreadsheetId = 'スプレッドシートID'
const sheetName = 'シート名 例:Sheet1'
const cellAddress = 'ランダム文字列の入力セル 例:B1'
//<-------ここを追記

function doPost(e) {
  var data = JSON.parse(e.postData.contents);

//ここを追記------->
  var apiKey = data.apiKey;
  var expectedApiKey = getCellValue(spreadsheetId, sheetName, cellAddress);

  if (!isApiKeyValid(apiKey, expectedApiKey)) {
    return ContentService.createTextOutput(JSON.stringify({error: 'Invalid or missing API key'}))
                         .setMimeType(ContentService.MimeType.JSON);
  }
//<-------ここを追記

  var action = data.action;
  var input = data.input;
  var result;

  switch(action) {
    case "sendEmail":
      result = sendEmail(input);
      break;
    case "draftEmail":
      result = draftEmail(input);
      break;
    case "getEmail":
      result = getEmail(input);
      break;
    case "checkCalendar":
      result = checkCalendar(input);
      break;
    case "addToCalendar":
      result = addToCalendar(input);
      break;
    default:
      result = 'Unknown action: ' + action;
  }
  return ContentService.createTextOutput(result);
}

//ここを追記------->
function isApiKeyValid(apiKey, expectedValue) {
  return apiKey === expectedValue;
}

function getCellValue(spreadsheetId, sheetName, cellAddress) {
  // Open the spreadsheet by ID
  var spreadsheet = SpreadsheetApp.openById(spreadsheetId);

  // Get the sheet by name
  var sheet = spreadsheet.getSheetByName(sheetName);

  // Get the value of the specified cell
  var cellValue = sheet.getRange(cellAddress).getValue();

  // Return the cell value
  return cellValue;
}
//<-------ここを追記

function sendEmail(input) {
  var emailAddress = input.emailAddress;
  var subject = input.subject;
  var body = input.body;
  MailApp.sendEmail(emailAddress, subject, body);
  return `Email has been sent: To ${emailAddress}\n\nSubject: ${subject}\n\nContent: ${body}`;
}

function draftEmail(input) {
  var emailAddress = input.emailAddress;
  var subject = input.subject;
  var body = input.body;
  GmailApp.createDraft(emailAddress, subject, body);
  return `Draft email created: To ${emailAddress}\n\nSubject: ${subject}\n\nContent: ${body}`;
}


function getEmail(input) {
  var query = input.query;
  var threads = GmailApp.search(query, 0, 1);
  var messages = [];
  threads.forEach(function(thread) {
    var msgs = thread.getMessages();
    msgs.forEach(function(msg) {
      messages.push({
        from: msg.getFrom(),
        subject: msg.getSubject(),
        body: msg.getPlainBody()
      });
    });
  });
  console.log(JSON.stringify(messages))
  return JSON.stringify(messages);
}

function checkCalendar(input) {
  var allCalendars = CalendarApp.getAllCalendars();
  var events = [];
  allCalendars.forEach(function(calendar) {
    events = events.concat(calendar.getEvents(new Date(input.startDate), new Date(input.endDate)));
  });
  var eventDetails = events.map(function(event) {
    return {
      title: event.getTitle(),
      startTime: Utilities.formatDate(event.getStartTime(),'Japan/Tokyo', "yyyy-MM-dd'T'HH:mm:ssXXX"),
      endTime: Utilities.formatDate(event.getEndTime(),'Japan/Tokyo', "yyyy-MM-dd'T'HH:mm:ssXXX"),
      description: event.getDescription()
    };
  });
  return JSON.stringify(eventDetails);
}

function addToCalendar(input) {
  var calendar = CalendarApp.getDefaultCalendar();
  calendar.createEvent(input.title, new Date(input.startDate), new Date(input.endDate), {description: input.description});
  return `Event added to calendar: Title ${input.title}\n\nStart: ${input.startDate}\n\nEnd: ${input.endDate}\n\nDescription: ${input.description}`;
}
APIスキーマ
openapi: 3.1.0
info:
  title: GAS API
  description: API to interact with Google Apps Script for email and calendar operations.
  version: 1.0.0
servers:
  - url: https://script.google.com
    description: Main server
paths:
  /macros/s/{ここにDeployment IDをコピペする}/exec:
    post:
      operationId: doPost
      summary: Execute a Google Apps Script
      requestBody:
        required: true
        content:
          application/json:
            schema:
              type: object
              required:
                - apiKey
                - action
                - input
              properties:
                apiKey:
                  type: string
                  description: {ここにスプレッドシートのapiKeyをコピペする}
                action:
                  type: string
                  description: The action to be performed.
                  enum:
                    - sendEmail
                    - draftEmail
                    - getEmail
                    - checkCalendar
                    - addToCalendar
                  example: sendEmail
                input:
                  type: object
                  description: The input data for the action.
                  properties:
                    emailAddress:
                      type: string
                      description: The email address for email actions.
                      example: "example@example.com"
                    subject:
                      type: string
                      description: The subject for email actions.
                      example: "Test Subject"
                    body:
                      type: string
                      description: The body content for email actions.
                      example: "Test Body"
                    query:
                      type: string
                      description: The search query for retrieving emails.
                      example: "from:example@example.com"
                    startDate:
                      type: string
                      format: date-time
                      description: The start date for calendar actions.
                      example: "2023-06-01"
                    endDate:
                      type: string
                      format: date-time
                      description: The end date for calendar actions.
                      example: "2023-06-01T11:00:00Z"
                    title:
                      type: string
                      description: The title for calendar events.
                      example: "Meeting"
                    description:
                      type: string
                      description: The description for calendar events.
                      example: "Project discussion"
      responses:
        '200':
          description: A successful response containing the result of the action.
          content:
            text/plain:
              schema:
                type: string
                example: "Email has been sent: To example@example.com\n\nSubject: Test Subject\n\nContent: Test Body"
        '400':
          description: A bad request response indicating an issue with the request parameters.
          content:
            text/plain:
              schema:
                type: string
                example: "Unknown action: invalidAction"
おわりに
さて、お気づきでしょうか。ここまで私がほとんどコーディングをしていないことを(5%くらいはしたかな)。めんどくさいことは全てChatGPTがやってくれて、私は仕様を考えてプロンプトを書いただけです。
こんな風にプログラミングスキルがなくても、やりたいこと(仕様)を定義できてそれを明確に生成AIモデルに伝えること(プロンプト)ができれば、誰でも簡単にアプリやカスタムGPTが作れるんです!
車ができて人間が早く移動できるようになったように、インターネットができて世界中の人々が一瞬で繋がることができるように、AIが人間の問題解決能力とそのスピードを飛躍的に向上させているのを日々実感しています。
これからのAIがどんな進化をしていくのか考えるとワクワクしますね!!
この記事が気に入ったらサポートをしてみませんか?