
【Swift5】リモートプッシュ通知の実装方法

FCM(Firebase Cloud Messaging)を利用したリモートプッシュ通知の実装方法です。
自分が若干手間取ったので、メモとして残しておきます。
※基本的には解説はせず、設定方法のみ載せます。
事前準備
・Firebaseとアプリの連携が完了していること
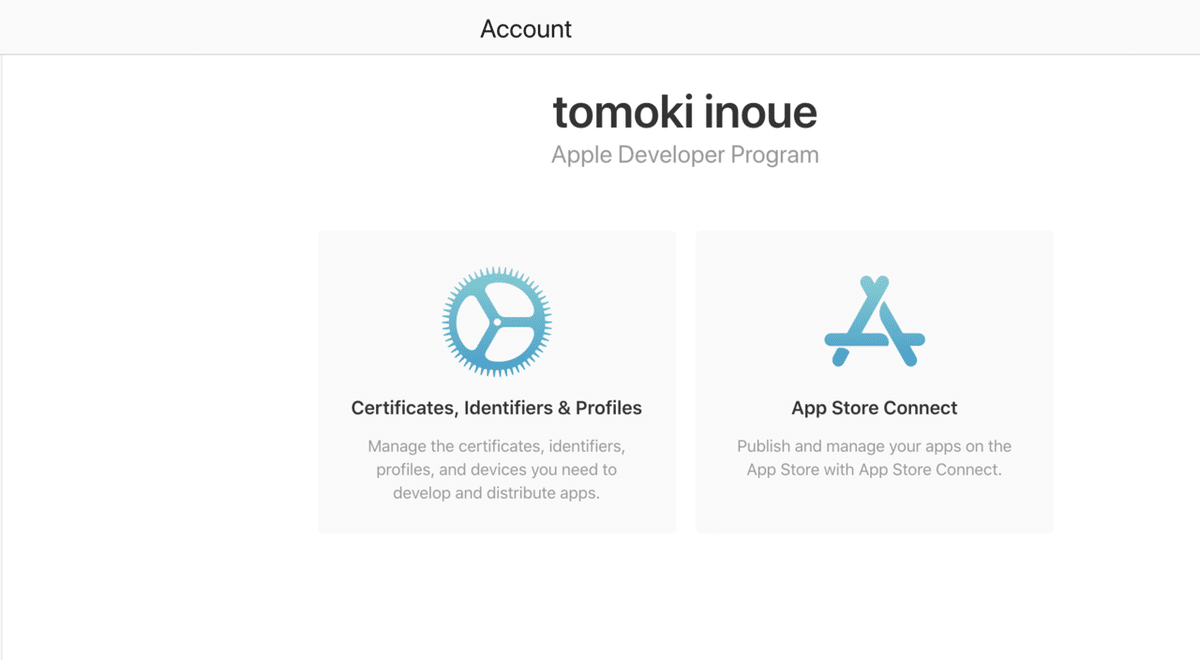
・Apple Developer Programへの登録が完了していること
・Certificateの登録が完了していること
・通知を受け取るための端末の登録が完了していること(Deviceの設定)
・以下のライブラリをPodでインストールしておく
'Firebase/Messaging'
'Firebase/Core'
上記の設定が完了していない方は下の3つの記事を参考に設定してみてください。
・Firebaseとアプリを連携する
・Apple Developer Programの登録
・Apple Developer ProgramのDeviceの登録
↑こちらの記事は少し古いのでUDIDの取得方法だけ参考にしてください。
※UDIDがわかればDeviceの登録は簡単です。
設定の流れ
①キーチェーンアクセスより証明書を発行
②Apple Developer Programのidentifierを作成
③Provisioning Profileを作成
④APNs証明書を作成
⑤FirebaseのCloud MessagingにAPNs証明書を登録
⑥XcodeのSigningを設定
⑦AppDelegate.swiftに通知の許可やDeviceの登録する処理を実装
⑧Cloud Messagingより通知を送信する
①キーチェーンアクセスより証明書を発行
LaunchPadよりキーチェーンアクセスを選択します。
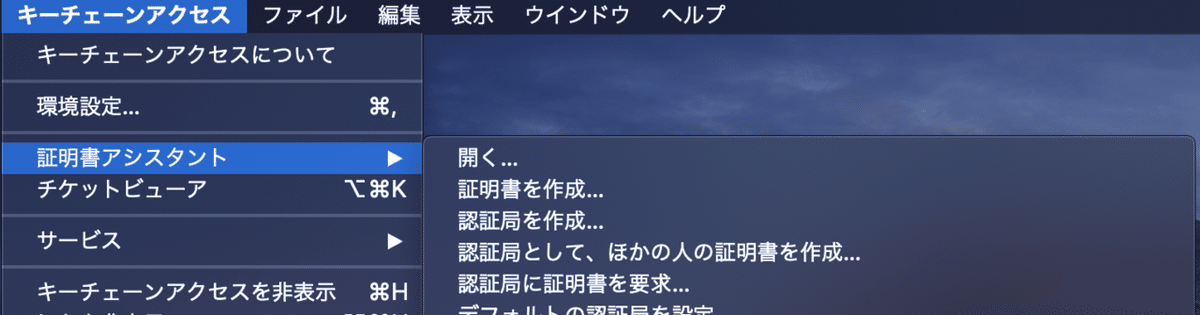
左上メニューより「キーチェーンアクセス」→「証明書アシスタント」→「認証局に証明書を要求」を選択します。
メールアドレス、通称はデフォルトで入力されていると思うのでそのままで大丈夫です。(私は今あえて消しています。)
下部の「メールでCAに送信」→「ディスクに保存」に変更し続けるを選択します。
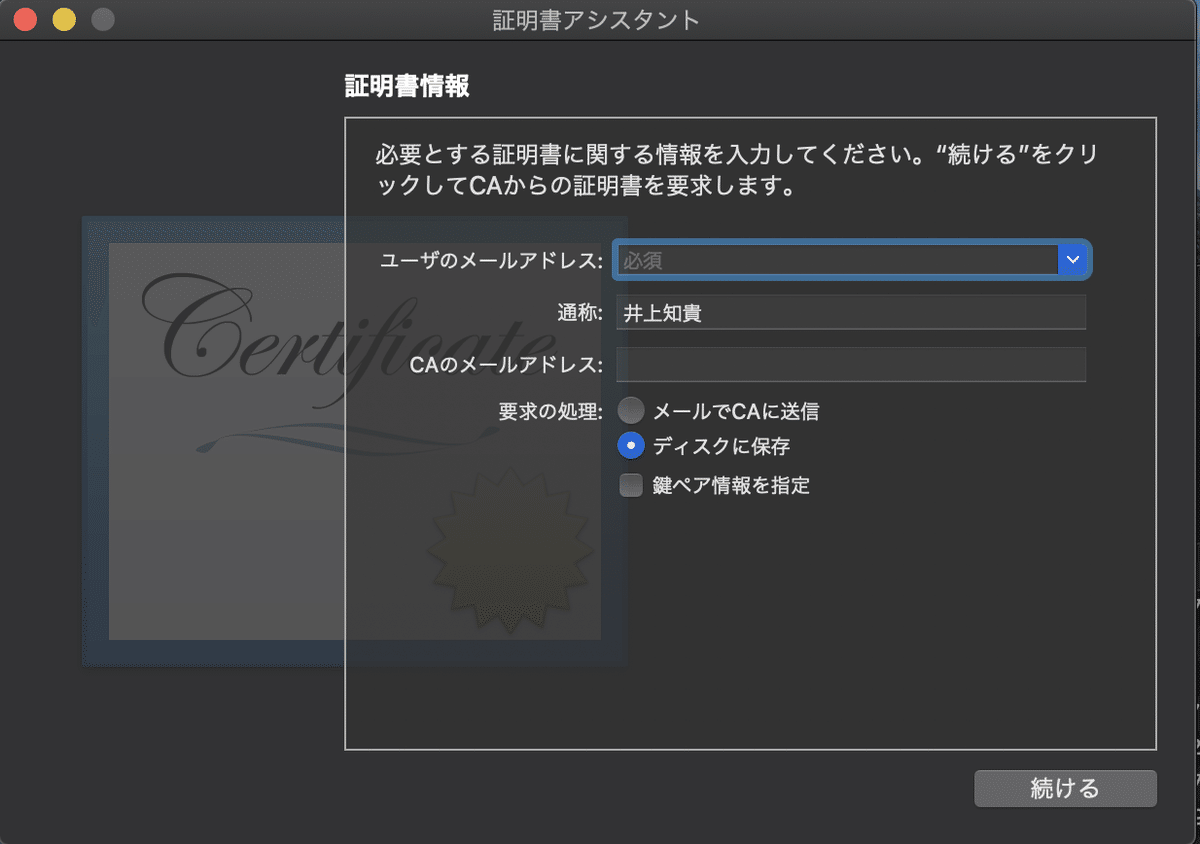
次に保存先を選択する画面が出ると思うので、自分がわかりやすい位置を選択して保存を選択します。
パスワードを設定する画面が出た場合は、一旦空白のままで大丈夫です。
こちらでキーチェーンアクセスの設定は完了です。
②Apple Developer Programのidentifierを作成
次にDeveloper Programの設定をしていきます。
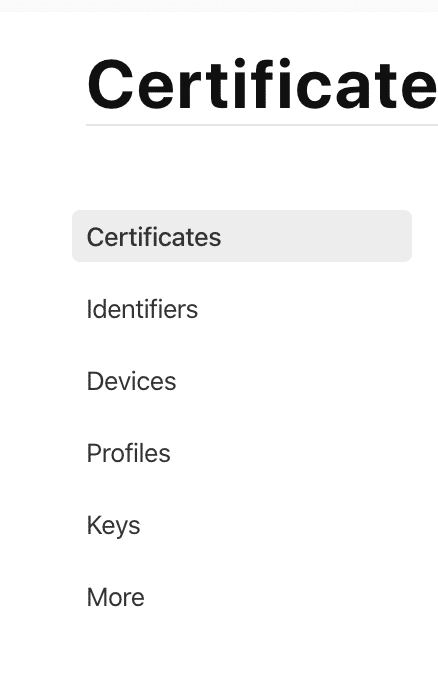
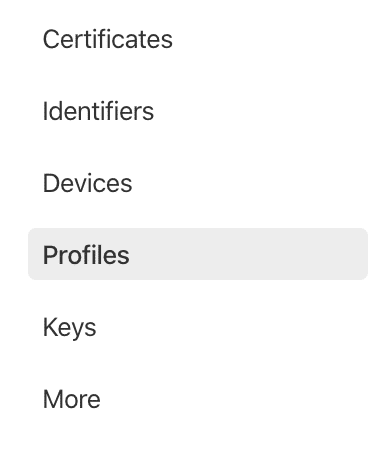
Apple Developer Programへ行きCertificates,Identifiers,Profilesを選択します。
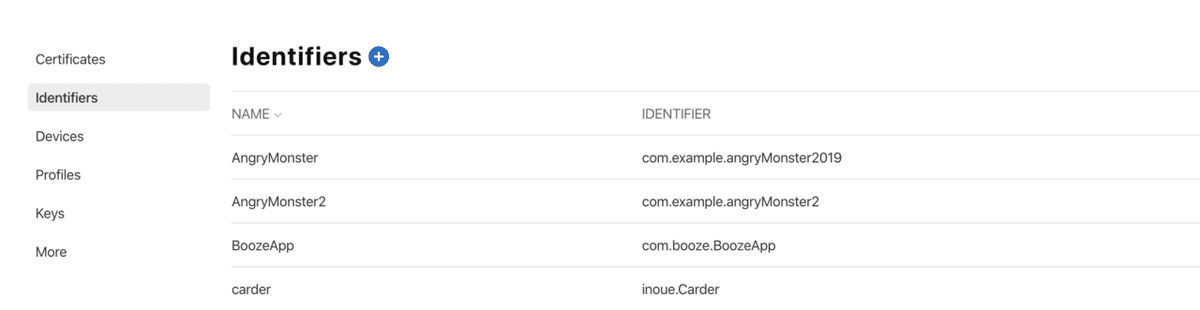
左メニューより「Identifier」を選択します。
Identifierの横にある+ボタンを選択します。
「App IDs」を選択した状態で、Containueをクリックします。

Descriptionにアプリ名、BundleIDにアプリのbundleIDを入力します。
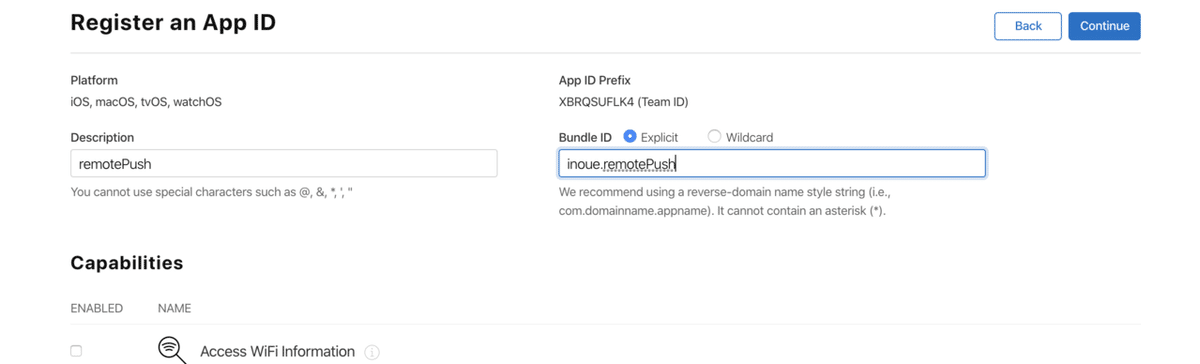
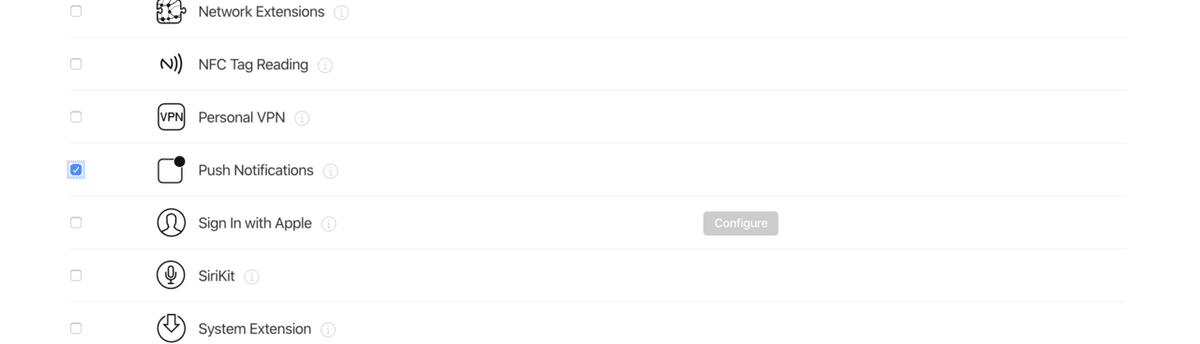
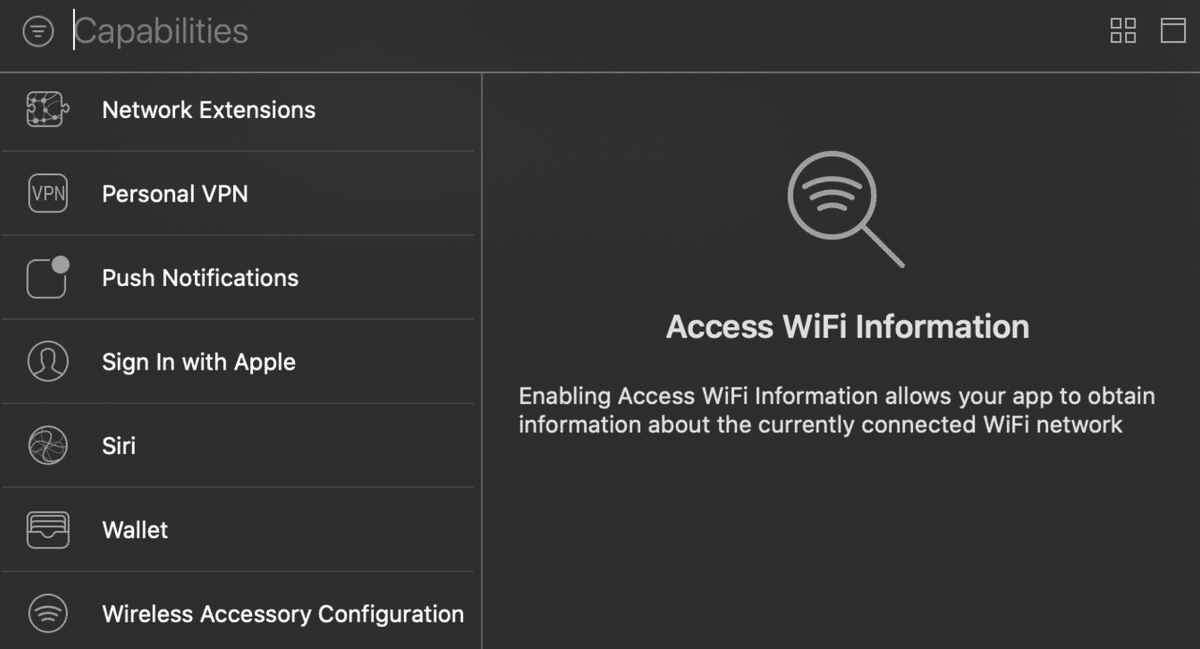
Capabilitiesをスクロールして、「Push Nortifications」にチェックを入れて画面上部のContinueをクリックします。
Registerを押します。登録が完了するとIdentifierの一覧に先ほど登路したものが表示されます。

こちらでIdentifierの設定は完了です。
③Provisionig Profileを作成
Identifierを同様にProvisioning Profileを設定します。
左メニューよりProfilesを選択します。
Profileの横の+ボタンを選択します。

iOS App Developmentを選択した状態で、Continueをクリックします。

App IDで先ほど作成したものを選択して、Continueをクリックします。

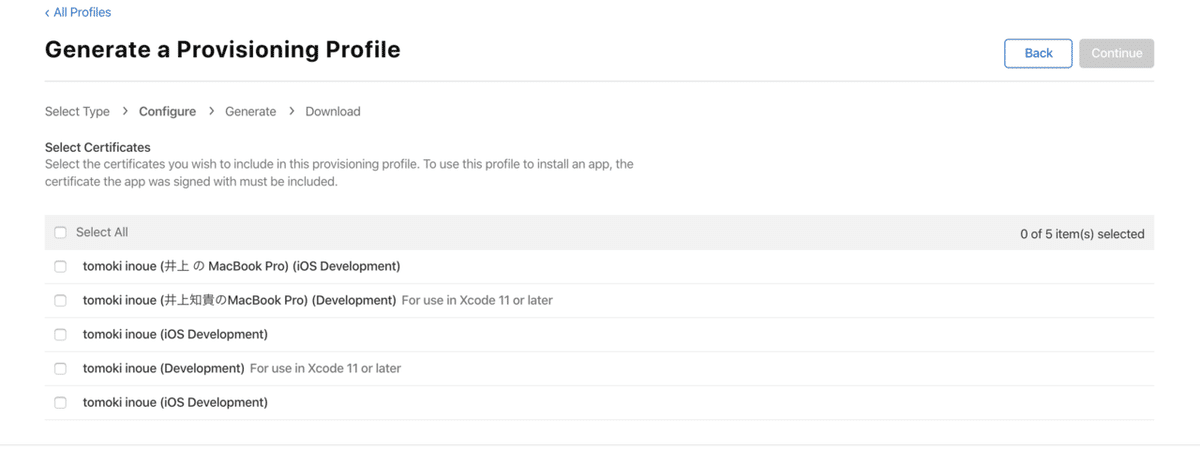
Certificateを選択します。事前設定で設定したCertificateが出てると思います。
こちらはSelect Allで大丈夫です。Continueをクリックします。
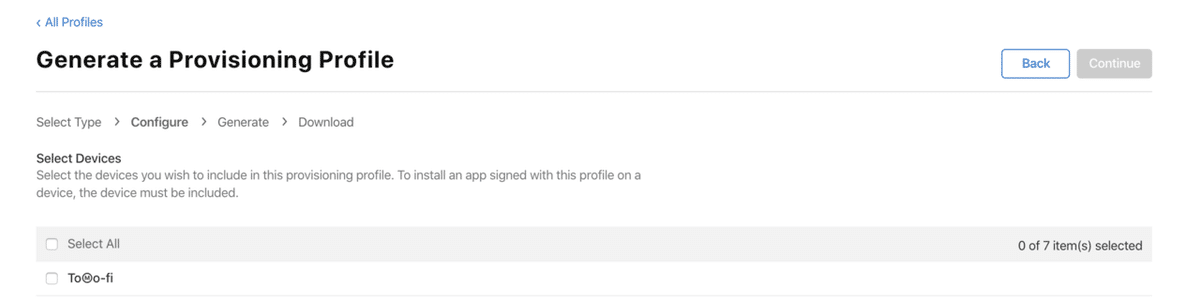
対応するでデバイスを登録します。
こちらは事前設定で作成しているdeviceを選択してください。特になければSelect Allで大丈夫です。(こちらに登録しているデバイスのみ通知が届きます。) 問題なければContinueをクリックします。
Provisioning Profile Nameにアプリ名を入力してGenerateをクリックします。
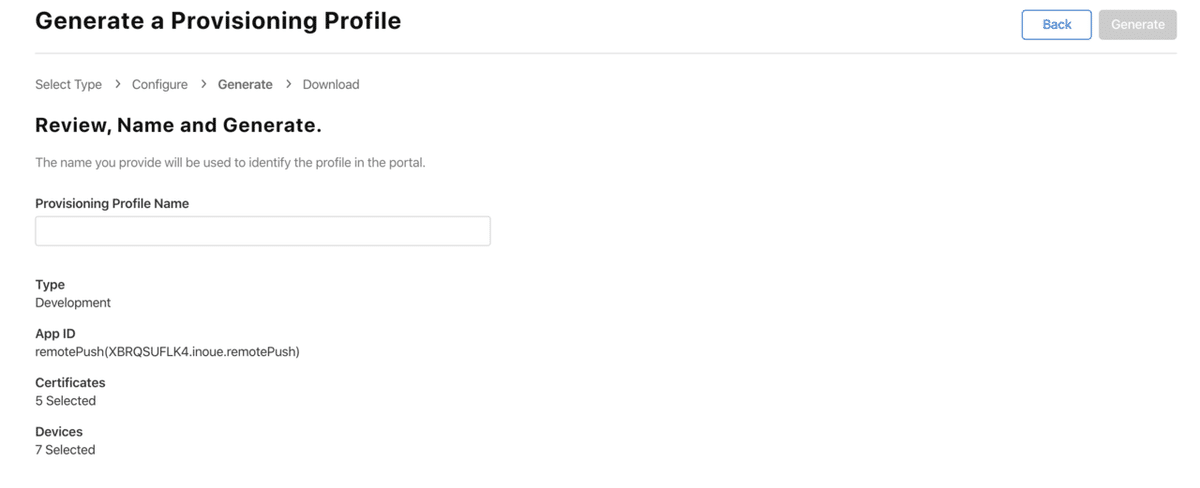
作成が完了したらDownLoadをクリックします。
こちらも自分がわかりやすい場所に保存してください。
後ほど⑥で使用します。
こちらでProfileの設定は完了です。

④APNs証明書を作成
次にAPNs証明書を作成します。まずは証明書を書き出すためのCertificateを登録していきます。左メニューよりCertificateを選択し、Certificateの横の+ボタンをクリックします。

次にページの下の方にスクロールし、Apple Push Notification service SSL (Sandbox)を選択します。
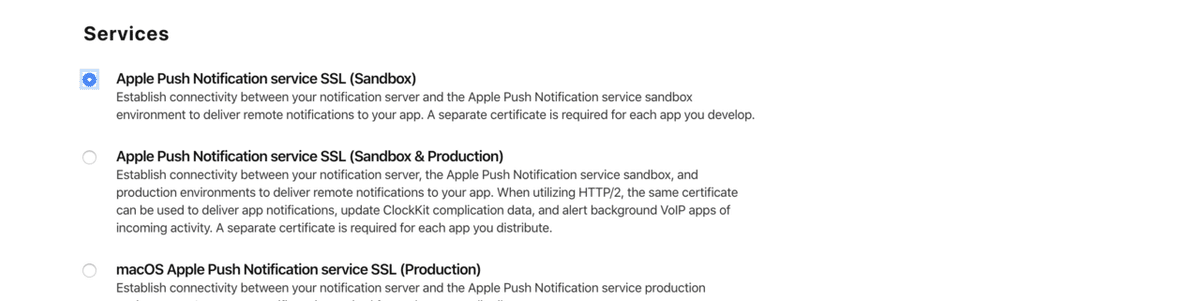
次にPlatformをIOS、AppIDに今回使用するアプリを選択し、Continueを選択します。

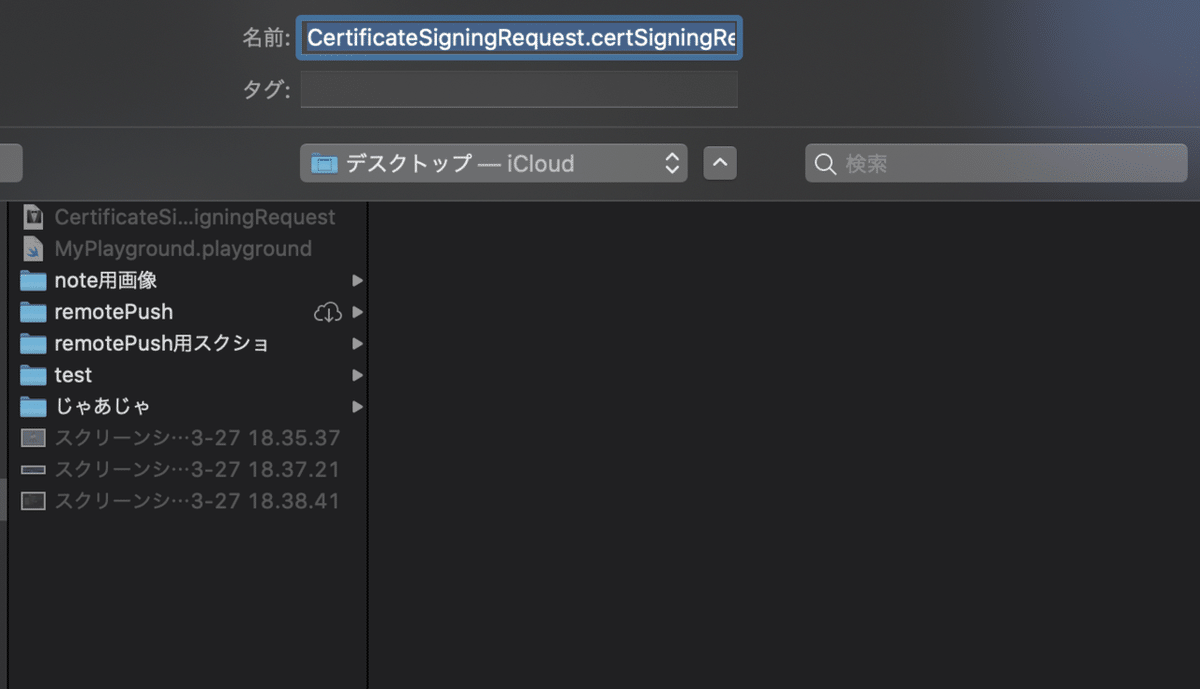
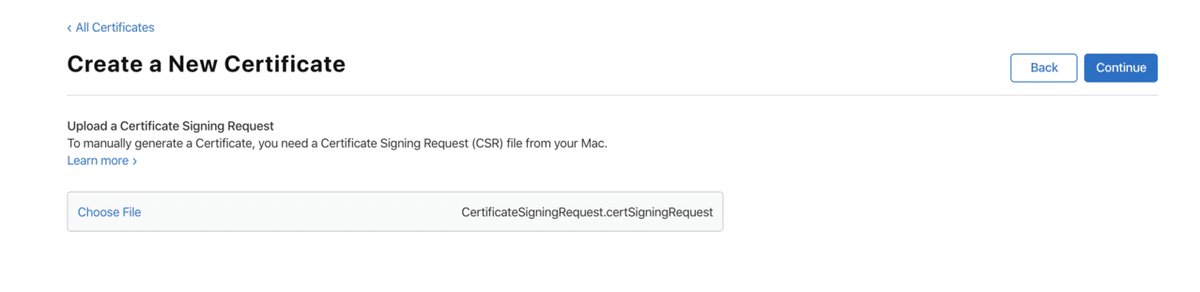
Choose Fileを選択し①で作成したファイルを選択します。
変更していなければ、「CertificateSigningRequest.certSigningRequest」という名前のファイルです。選択が完了したらContinueをクリックします。
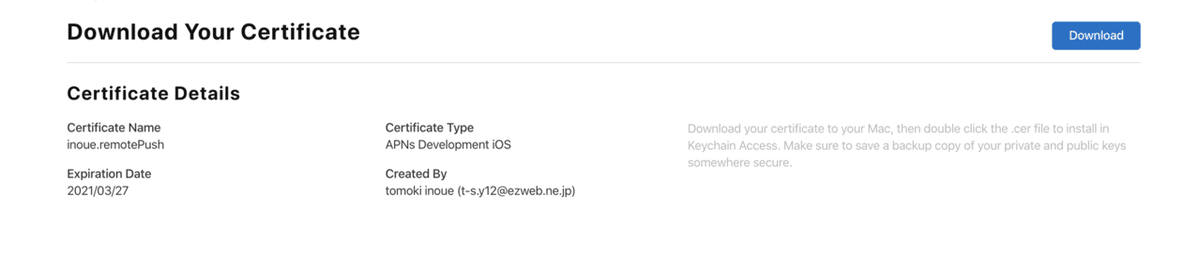
DownLoadをクリックします。
ダウンロードされたものをダブルクリックで開きます。
Chromeの場合はダウンロード後に選択すればOKです。
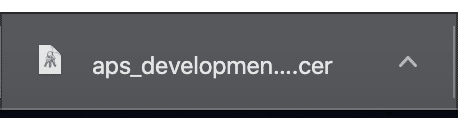
キーチェーンアクセスを開くとこういった証明書ができていると思います。(できていない場合はもう一度クリック、それでもできない場合は一度PCを再起動してみてください。)
![]()
こちらの証明書の上で右クリック→「ファイル名を書き出す」を選択します。

ファイルの保存先を指定して自分がわかりやすい場所に保存してください。(これがAPNs証明書です。)
パスワードが求められた場合は空白で大丈夫です。
これでAPNs証明書の作成は完了です。
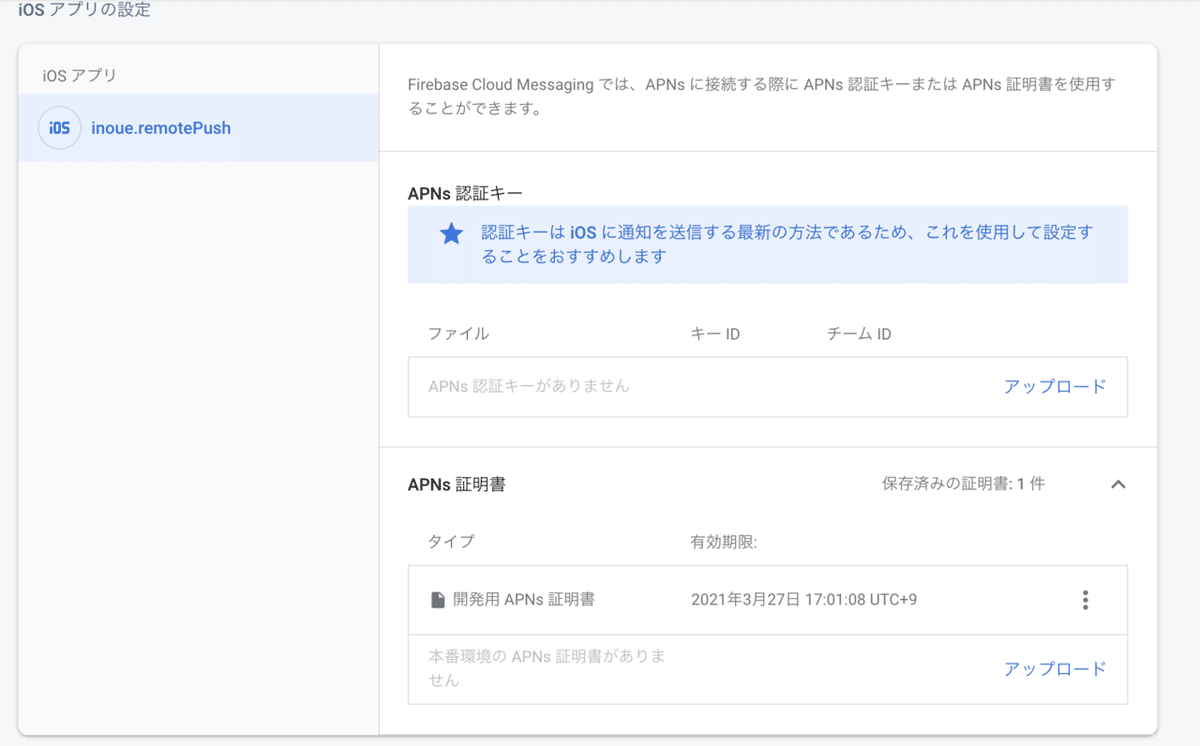
⑤FirebaseのCloud MessagingにAPNs証明書を登録
次にFirebaseの設定画面に移動します。
Firebase Consoleの対象のプロジェクトの画面左上部の歯車のアイコンを選択して、プロジェクトの設定を選択します。
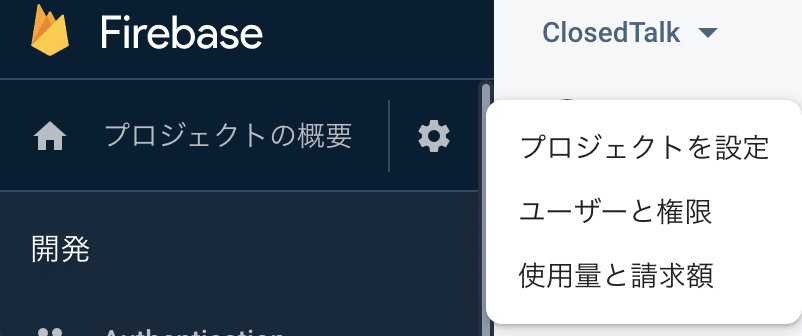
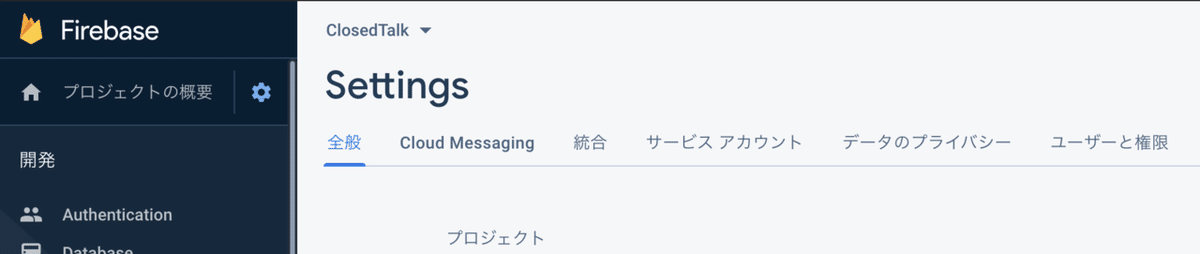
SettingメニューのCloud Messagingを選択します。
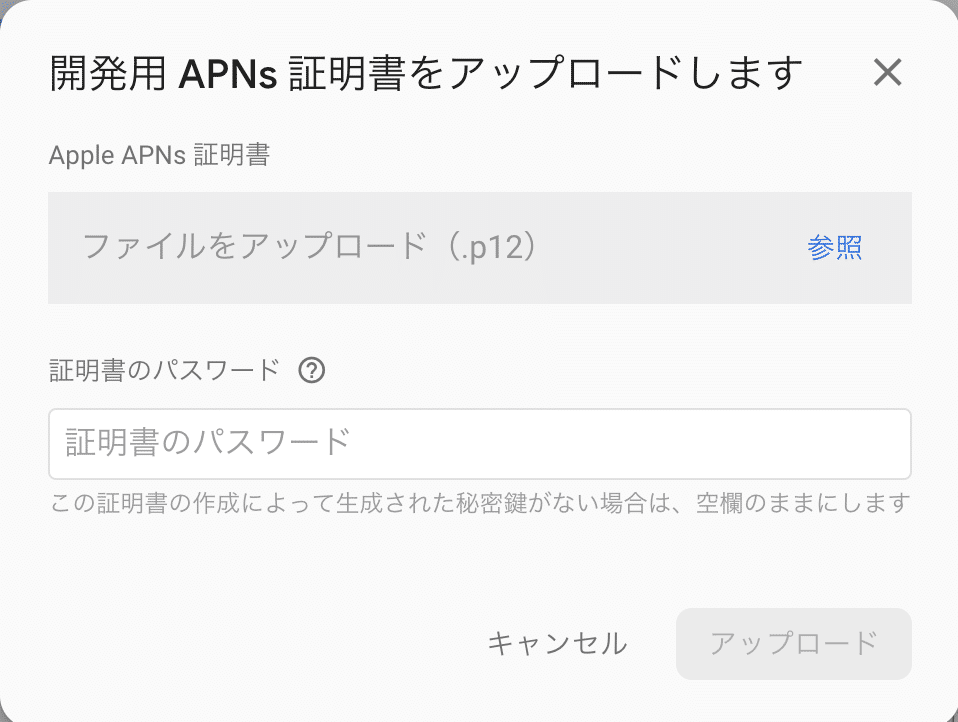
画面スクロールしIOSアプリの設定のAPNs証明書の開発用APNs証明書のアプロードを選択します。
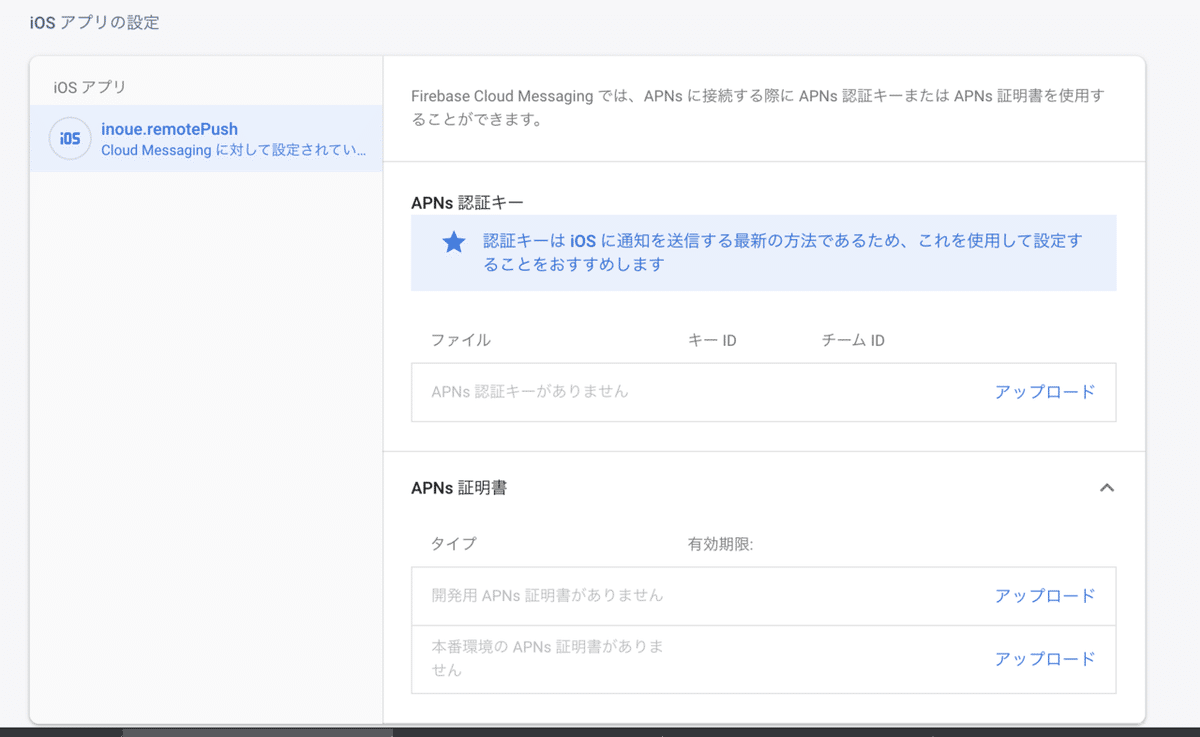
ファイルをアップロードをクリックし、④で作成したAPNs証明書を選択してップロードを選択します。
こちらでアップロードが完了すればFirebaseの設定は完了です。
⑥XcodeのSigningを設定
次にXcodeの設定を行います。
Xcodeのこちらの画面を開き、Signing & Capabilityを選択します。
まずAutomatically manage signingのチェックを外し、Provisioning Profileに③で作成したProvisioning Profileを設定します。
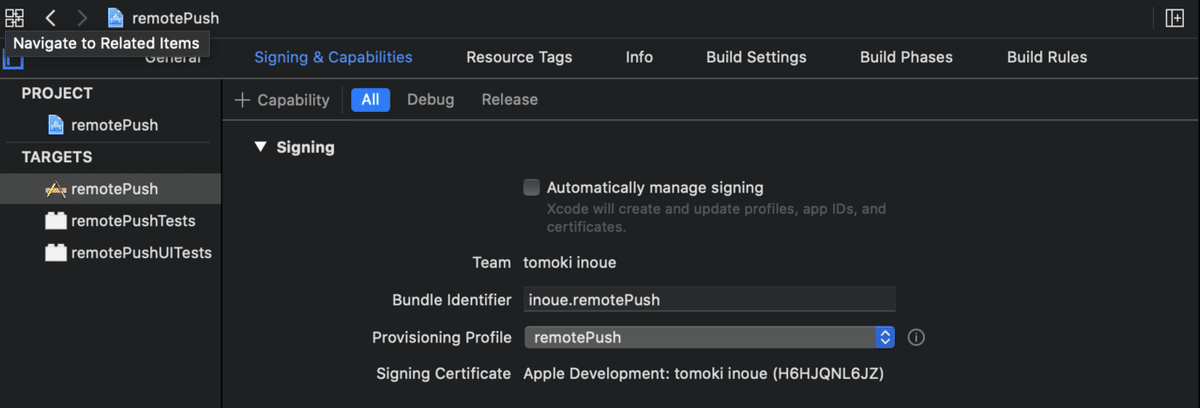
次に+CapabilityをクリックしてPush NortificationsをSigningのした後にドラッグアンドドロップします。
同様にBackgroundModeもドラックアンドドロップします。

Background ModeのRemote nortificationsにチェックを入れます。
こちらでXcodeの設定は完了です。
⑦AppDelegate.swiftに通知の許可やDeviceの登録する処理を実装
最後にAppDelegateに処理を書いて終わりになります。
実装箇所は4箇所です。
①import
②didFinishLaunchingWithOptions
③AppDelegateのクラス内
④UNUserNotificationCenterDelegateのExtension
今回解説はしないので、コードだけ載せていきます。
①import
import Firebase
import FirebaseMessaging
import UserNotifications
②didFinishLaunchingWithOptions
    func application(_ application: UIApplication, didFinishLaunchingWithOptions launchOptions: [UIApplication.LaunchOptionsKey: Any]?) -> Bool {
       // Override point for customization after application launch.
       FirebaseApp.configure()
       // 通知に必要なのはここからしたの処理
       if #available (iOS 10.0, *) {
           // For iOS 10 display notification (sent via APNS)
           UNUserNotificationCenter.current().delegate = self

           let authOptions: UNAuthorizationOptions = [.alert, .badge, .sound]
           UNUserNotificationCenter.current().requestAuthorization(
               options: authOptions,
               completionHandler: {_, _ in })
       } else {
           let settings: UIUserNotificationSettings =
               UIUserNotificationSettings(types: [.alert, .badge, .sound], categories: nil)
           application.registerUserNotificationSettings(settings)
       }

       application.registerForRemoteNotifications()

       return true
   }
③AppDelegateのクラス内
    // クラス内の他のdelegateメソッドと同じ階層に追記
    func application(_ application: UIApplication, didReceiveRemoteNotification userInfo: [AnyHashable: Any]) {
       // Print message ID.
       if let messageID = userInfo["gcm.message_id"] {
           print("Message ID: \(messageID)")
       }

       // Print full message.
       print(userInfo)
   }

   func application(_ application: UIApplication, didReceiveRemoteNotification userInfo: [AnyHashable: Any],
                    fetchCompletionHandler completionHandler: @escaping (UIBackgroundFetchResult) -> Void) {
       // Print message ID.
       if let messageID = userInfo["gcm.message_id"] {
           print("Message ID: \(messageID)")
       }

       // Print full message.
       print(userInfo)

       completionHandler(UIBackgroundFetchResult.newData)
   }
④UNUserNotificationCenterDelegateのExtension
@available(iOS 10, *)
extension AppDelegate : UNUserNotificationCenterDelegate {
   func userNotificationCenter(_ center: UNUserNotificationCenter,
                               willPresent notification: UNNotification,
                               withCompletionHandler completionHandler: @escaping (UNNotificationPresentationOptions) -> Void) {
       let userInfo = notification.request.content.userInfo

       if let messageID = userInfo["gcm.message_id"] {
           print("Message ID: \(messageID)")
       }

       print(userInfo)

       completionHandler([])
   }

   func userNotificationCenter(_ center: UNUserNotificationCenter,
                               didReceive response: UNNotificationResponse,
                               withCompletionHandler completionHandler: @escaping () -> Void) {
       let userInfo = response.notification.request.content.userInfo
       if let messageID = userInfo["gcm.message_id"] {
           print("Message ID: \(messageID)")
       }

       print(userInfo)

       completionHandler()
   }
}
念のため全体のコードも載せておきます。
import UIKit
import Firebase
import FirebaseMessaging
import UserNotifications

@UIApplicationMain
class AppDelegate: UIResponder, UIApplicationDelegate {

   func application(_ application: UIApplication, didFinishLaunchingWithOptions launchOptions: [UIApplication.LaunchOptionsKey: Any]?) -> Bool {
       // Override point for customization after application launch.
       FirebaseApp.configure()
       if #available (iOS 10.0, *) {
           // For iOS 10 display notification (sent via APNS)
           UNUserNotificationCenter.current().delegate = self

           let authOptions: UNAuthorizationOptions = [.alert, .badge, .sound]
           UNUserNotificationCenter.current().requestAuthorization(
               options: authOptions,
               completionHandler: {_, _ in })
       } else {
           let settings: UIUserNotificationSettings =
               UIUserNotificationSettings(types: [.alert, .badge, .sound], categories: nil)
           application.registerUserNotificationSettings(settings)
       }

       application.registerForRemoteNotifications()

       return true
   }

   // MARK: UISceneSession Lifecycle

   func application(_ application: UIApplication, configurationForConnecting connectingSceneSession: UISceneSession, options: UIScene.ConnectionOptions) -> UISceneConfiguration {
       // Called when a new scene session is being created.
       // Use this method to select a configuration to create the new scene with.
       return UISceneConfiguration(name: "Default Configuration", sessionRole: connectingSceneSession.role)
   }

   func application(_ application: UIApplication, didDiscardSceneSessions sceneSessions: Set<UISceneSession>) {
       // Called when the user discards a scene session.
       // If any sessions were discarded while the application was not running, this will be called shortly after application:didFinishLaunchingWithOptions.
       // Use this method to release any resources that were specific to the discarded scenes, as they will not return.
   }

   func application(_ application: UIApplication, didReceiveRemoteNotification userInfo: [AnyHashable: Any]) {
       // Print message ID.
       if let messageID = userInfo["gcm.message_id"] {
           print("Message ID: \(messageID)")
       }

       // Print full message.
       print(userInfo)
   }

   func application(_ application: UIApplication, didReceiveRemoteNotification userInfo: [AnyHashable: Any],
                    fetchCompletionHandler completionHandler: @escaping (UIBackgroundFetchResult) -> Void) {
       // Print message ID.
       if let messageID = userInfo["gcm.message_id"] {
           print("Message ID: \(messageID)")
       }

       // Print full message.
       print(userInfo)

       completionHandler(UIBackgroundFetchResult.newData)
   }


}

@available(iOS 10, *)
extension AppDelegate : UNUserNotificationCenterDelegate {
   func userNotificationCenter(_ center: UNUserNotificationCenter,
                               willPresent notification: UNNotification,
                               withCompletionHandler completionHandler: @escaping (UNNotificationPresentationOptions) -> Void) {
       let userInfo = notification.request.content.userInfo

       if let messageID = userInfo["gcm.message_id"] {
           print("Message ID: \(messageID)")
       }

       print(userInfo)

       completionHandler([])
   }

   func userNotificationCenter(_ center: UNUserNotificationCenter,
                               didReceive response: UNNotificationResponse,
                               withCompletionHandler completionHandler: @escaping () -> Void) {
       let userInfo = response.notification.request.content.userInfo
       if let messageID = userInfo["gcm.message_id"] {
           print("Message ID: \(messageID)")
       }

       print(userInfo)

       completionHandler()
   }
}
こちら上記の4つをコピペでできると思いますので、そのように実装してください。
こちらでコードの設定も完了です。
アプリを実機に接続して、アプリを起動し、通知の許可のダイアログが出ると思うので許可した状態で置いておいてください。(通知の許可がないと通知が届きません。+リモートの通知は実機でないと届かないです。)
⑧Cloud Messagingより通知を送信する
あとは通知を送信するだけです!
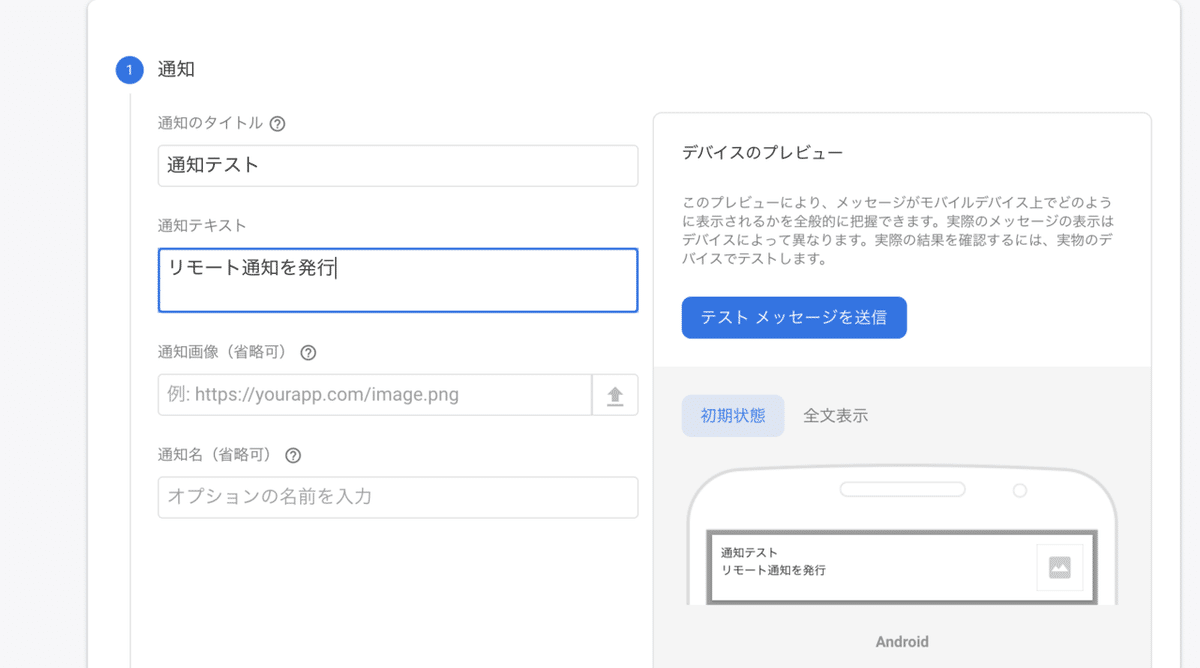
Firebase Console左メニューよりCloud Messagingを選択します。

Send your firdt messageをクリックし、通知する内容を入力します。(適当で大丈夫です。) 次へをクリックします。
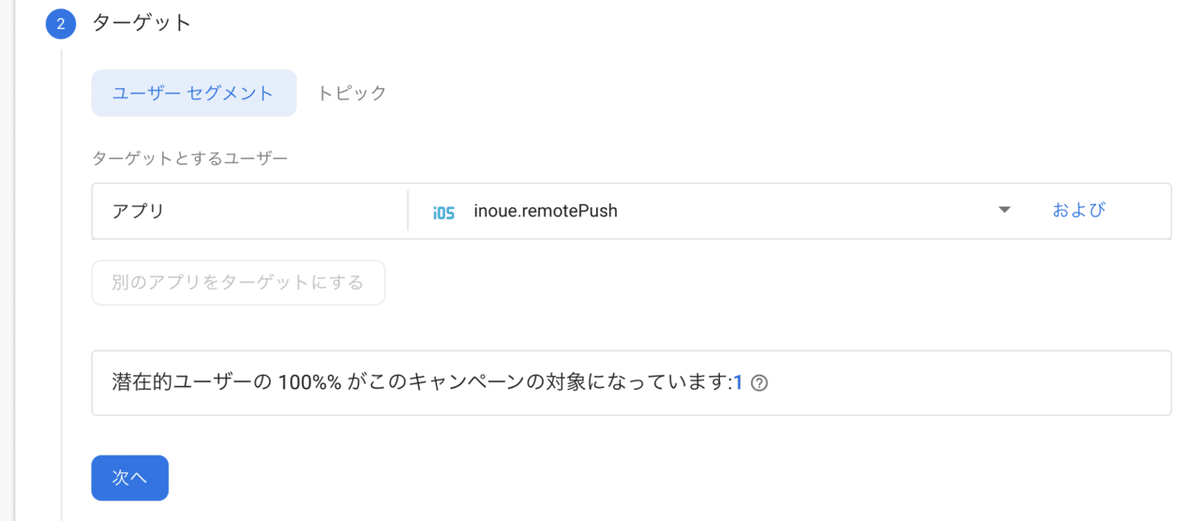
アプリを選択から自分のアプリを選択して次へをクリックします。
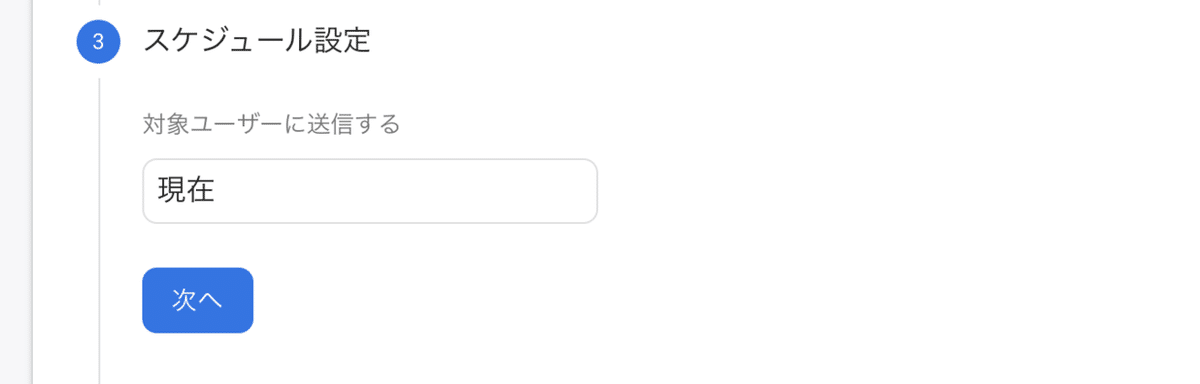
スケジュールは細かく設定できますが、今は現在で大丈夫です。次へをクリックします。
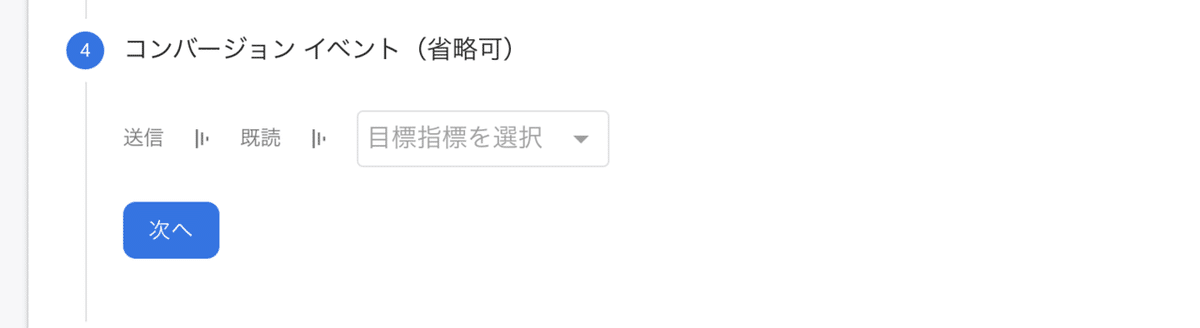
こちらは特に何も設定せず次へをクリックします。
最後は通知音のON、OFFやIOSバッチ(アプリ右上につく赤い丸いやつ)の数量など細かく設定できます。設定はお任せします。問題なければ確認をクリックします。

最後に公開をクリックすると通知はが発送され、実機に通知が届きます。

以上で設定と通知が完了しました。
念のため作成したアプリのプロジェクトも載せておきます。
設定しても通知が届かない場合
・実機でアプリが開きっぱになっていないか確認(アプリが開いてると届かないです。)
・通知の許可がうまくできていない可能性あるので、アプリを一度削除して再インストールする
・Info.plistに変な設定をしていないか確認する。(記事によってはInfo.plistに設定が必要と書いてありますが特に必要ないです。)
最後に
通知の設定はどこでなにがおかしくなってるかわからないケースがあるので、ダメだった場合は一度最初からやり直してみると届いたりします。
証明書周りは慎重に設定を進めてください。
快適な通知ライフを!
この記事が気に入ったらサポートをしてみませんか?