
Traefik&Dockerで複数のマクロサービスをhttpsで実行させる

個人的な備忘録ですが、Reverse Proxy、Load BalancerとしてTraefikを使い、Dockerizeしたアプリを走らせる環境構築の記録です。
追記:Tomcat上で動くArcGIS Enterpriseの設定を追加しました。言い換えればJava Web Applicationが独自のポート、サブディレクトリで動いている場合の設定です。
備忘録なので、環境と設定内容を先に記し、詳細は後述します。
Host: DigitalOcean.com
OS: Ubuntu 16.04/18.04
必要な環境: DockerおよびDocker-compose
構築したい環境
- 基本的にFrontendもBackendもDatabaseもDockerで構築し
- Traefikを使ったReverse-Proxyの運用。アプリ増えても追加設定必要なし。
- Staticなフォルダへアクセス可能であること(Nginx利用)
- Let's encryptを使用してhttps経由で閲覧できるように。
Traefikの設定:Traefik.toml
変更する箇所はyourdomainname.comとabc.xyz@gmail.comだけです。
debug = false

logLevel = "ERROR"
defaultEntryPoints = ["https", "http"]

[entryPoints]
  [entryPoints.dashboard]
    address = ":8090"
    [entryPoints.dashboard.auth]
      [entryPoints.dashboard.auth.basic]
        usersFile = '/etc/traefik/.htpasswd'
  [entryPoints.http]
  address = ":80"
    [entryPoints.http.redirect]
    entryPoint = "https"
  [entryPoints.https]
  address = ":443"
  [entryPoints.https.tls]

[retry]

[api]
entrypoint = "dashboard"

[acme]
email = "abc.xyz@gmail.com"
storage = "acme.json"
caServer = 'https://acme-staging-v02.api.letsencrypt.org/directory'
onHostRule = true
entryPoint = "https"
[acme.httpChallenge]
entryPoint = "http"

[docker]
endpoint = "unix:///var/run/docker.sock"
domain = "yourdomainname.com"
watch = true
Docker-compose.yml
変更する箇所:yourdomainname.comとabc.xyz@gmail.com
version: '3'

services:
  reverse-proxy:
    image: traefik:latest
    container_name: traefik
    restart: always
    ports:
      - "80:80"
      - "443:443"
      - "8090:8080"
    volumes:
      - "/var/run/docker.sock:/var/run/docker.sock"
      - "./traefik.toml:/etc/traefik/traefik.toml"
      - "./acme/acme.json:/etc/traefik/acme/acme.json"
      - "./.htpasswd:/etc/traefik/.htpasswd"
    command:
      - "--defaultEntryPoints=http,https"
      - "--insecureSkipVerify"
      - "--entryPoints=Name:http Address::80 Compress:true Redirect.entryPoint:https"
      - "--entryPoints=Name:https Address::443 Compress:true TLS"
      - "--api"
      - "--docker"
      - "--docker.watch"
      - "--docker.domain=yourdomainname.com"
      - "--acme"
      - "--acme.email=abc.xyz@gmail.com"
      - "--acme.onhostrule"
      - "--acme.entrypoint=https"
      - "--acme.httpchallenge"
      - "--acme.httpchallenge.entrypoint=http"
      - "--acme.storage=/etc/traefik/acme/acme.json"
    labels:
      - "traefik.frontend.rule=Host:yourdomainname.com,www.yourdomainname.com;PathPrefixStrip:/monitor"
      - "traefik.port=8080"
    networks:
      - traefik_net

# Static data folder
  nginx:
    image: nginx:1.15
    container_name: nginx
    volumes:
      - "./nginx.conf:/etc/nginx/conf.d/default.conf"
      - "/var/www/html/data:/usr/share/nginx/html"
    labels:
      - "traefik.enable=true"
      - "traefik.backend=nginx"
      - "traefik.frontend.rule=Host:yourdomainname.com,www.yourdomainname.com;PathPrefixStrip:/data;ReplacePathRegex: ^/data/(.*) /$$1"
      - "traefik.passHostHeader=true"
      - "traefik.port=80"
    networks:
      - traefik_net

networks:
  traefik_net:
    external: true
nginx.conf
server {
  listen 80;
  location / {
    root /usr/share/nginx/html;
    index index.html index.htm;
    try_files $uri $uri/ /index.html =404;
    autoindex on;
  }
}
仮にTraefikという名前のフォルダを作ってその中に上記のファイルを作成した場合、最終的にはこういう構成になります。

このacmeフォルダのなかにはacme.jsonを作成しますが、中身は空です。ただパーミッションは変える必要があります。
$ chmod 600 acme/acme.jsonこれにUsersFileの設定に使用するhtpasswdを次のURLから取得します。http://www.htaccesstools.com/htpasswd-generator/
$ vi .htpasswdこの中に作成したパスワードをコピペします。以上で設定は終わりです。
$ docker-compose up -dこれでLet's encryptoを利用してSSLの設定および、これから追加するDockerベースのアプリを自動で認識する環境ができました。
確認のためにFirewallの設定で一時的にPort8090をオープンにすれば次のようなDashboard画面が見られるはずです。

設定がうまくいってれば同様の画面をhttps://yourdomainname.com/monitor/でも見ることができるようになっています。
Traefikを使う利点やエラーが出た場合の対応
TraefikをReverse ProxyやLoad balancerとして使う以上、ある意味最初に設定するべきものですが、上記の設定に至るまでしばらくは試行錯誤しました。その時にログをみたり状況をGUIベースで確認するのにとても便利だったのがportainerです。

Traefikや他のアプリをインストールする前にこのPortainerをインストールすることをおすすめします。まあ他にもいいのがあるのでいろいろと変わるでしょうが、docker-compose.ymlだけですむのでおすすめです。
$ mkdir -p portainer && cd portainer
$ mkdir -p data
$ vi docker-compose.yml
portainer/docker-compose.yml
version: '3'
services:
# Web UI for containers
portainer:
image: portainer/portainer
container_name: portainer
restart: always
command: -H unix:///var/run/docker.sock
ports:
- '9000:9000'
labels:
- traefik.enable=true
- traefik.port=9000
- traefik.backend=portainer
- traefik.frontend.rule=PathPrefix:/portainer
volumes:
- /var/run/docker.sock:/var/run/docker.sock
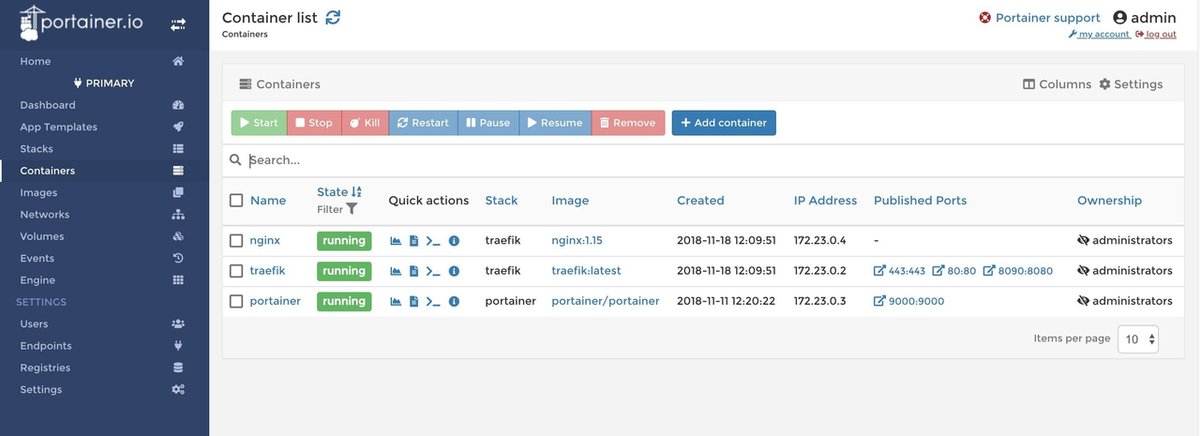
- ./data:/data以上です。作成後はdocker-compose up -dとするだけです。Traefikを設定する前であれば、http://localhost:9000もしくはhttp://yourdomainname.com:9000とすれば管理者用のIDとパスワードの設定画面がでるので設定します。それが終わればDashboard画面にいくので左のメニュー欄からContainerを選択すれば次のような画面になります。
私がよく使うのは、Quick actionsのログです。例えば上記のTraefikを設定して起動させたもののうまく動いていなかったりする時、Container内部の情報をみようとするとちょっとした設定が必要ですが、これなら簡単にログが見れます。下記の場合だと.htpasswdが見つからないわけなのでPathの設定を確認するだけです。

他にもよくあるのが、acme.jsonのパーミッションの設定です。Docker-composeやTraefik.tomlの設定が全て問題ないのにうまくいかない場合も、下記のようにすぐ何が問題かわかります。

Portainerを設定した後で、Traefikを設定してもなんの問題もありません。Traefikが起動した場合は、https://yourdomainname.com/portainer/で上記の画面を見ることができるようになります。portainer/docker-compose.yml上でtraefik.frontend.rule=PathPrefix:/portainerをtraefik.frontend.rule=Host:portainer.yourdomainname.comにすればサブディレクトリでなくサブドメインの形でPortainerを開くことができます。
なぜTraefik?
以前はReverse ProxyとしてApacheやNginxを使ってきましたが、正直追加するたびに設定をいじくるのは面倒というか、時間がたってたりすると、忘れてしまい調べなおしたり、必ずしも他サービスと同じ状況とは限らないので設定を変えたりする必要がありました。
友人はそういうのが面倒で、Ubuntu、Flask、wSGI環境をDockerで構築し、1アプリ1サーバーの考えで作っています。それでReverse ProxyはApacheを使っていました。私もしばらくはApacheのReverse Proxyを使っていたのですが、1サーバー上にいくつかのマクロサービスを使用したい。そしてリソースを有効につかいたいと思っていました。そんな時、今さらながらですが、Reverse proxy+Load Balancer+SSL+Dockerをダイナミックに実施してくれるTraefikの存在を知って、今から使ってみようと設定しました。
上記のTraefikの設定が終われば、後の設定はすべてそれぞれのサービス上のdocker-compose.ymlで設定すればいいだけになります。例えば、Nuxtを利用して簡単なVuejsベースの静的なウェブアプリを作成したとします。distフォルダ上にindex.htmlからjs/css/imagesなどが生成されます。これをDockerコンテナ上で起動する場合は以下のDockerfileとdocker-compose.ymlを作成します
FROM node:alpine

# Create app directory
RUN mkdir -p /usr/src/app
WORKDIR /usr/src/app
ADD . /usr/src/app

ONBUILD RUN npm install
ONBUILD RUN npm run build

ENV HOST 0.0.0.0
EXPOSE 8001

CMD ["npm", "run", "generate"]

# based on Nginx, to have only the compiled app, ready for production with Nginx
FROM nginx:1.15
COPY ./dist /usr/share/nginx/html
WORKDIR /usr/share/nginx/html
RUN chmod 644 *
version: "3"
services:
  web:
    build: ./
    image: skobara/xyz
    container_name: xyz
    ports:
      - "8001:80"
    volumes:
      - "./dist/:/usr/share/nginx/html"
    labels:
      - "traefik.enable=true"
      - "traefik.frontend.rule=Host:yourdomainname.com;PathPrefixStrip:/xyz;"
      - "traefik.port=80"
      - "traefik.docker.network=traefik_net"
    networks:
      - traefik_net

networks:
  traefik_net:
    external: true
docker-compose up -d --buildを実行しhttps://yourdomainname.com/xyz/を開けば作成したウェブアプリが見ることができます。この場合、http://yourdomainname.com:8001/でも確認できますが、あくまで確認でPortsセクションは必要ありません。
動的アプリケーションを作成した場合も、基本的にはdocker-compose.ymlの作成だけで、後はTraefikが自動で認識してくれます。以下はMongoDBをDBに、FlaskをBackendにNuxtのUniversal ApplicationをFrontendとしています。
version: '3'

services:
# MONGODB
  mongodb:
    image: mongo
    container_name: mongodb
    restart: always
    volumes:
      - "./data/db:/data/db" #これはちゃんと決めること
    ports:
      - "27000:27017" #Portは適当
    labels:
      - "traefik.enable=false"
    command: --smallfiles
    networks:
      - traefik_net

# Backend
  backend:
    build: ./backend
    image: skobara/xyz_backend
    container_name: flask
    restart: always
    ports:
      - "5000:5000"
    labels:
      - "traefik.frontend.rule=Host:yourodomainname.com;PathPrefix:/api"
      - "traefik.enable=true"
      - "traefik.port=5000"
    volumes:
      - "./backend/app:/app"
    environment:
      - "FLASK_APP=main.py"
    #  - "FLASK_DEBUG=1"
      - "RUN=flask run --host=0.0.0.0 --port=5000"
    command: flask run --host=0.0.0.0 --port=5000
    networks:
      - traefik_net

# Frontend
  frontend:
    build: ./frontend
    image: skobara/xyz_frontend
    container_name: nuxt
    restart: always
    ports:
      - "8000:8000"
    labels:
      - "traefik.enable=true"
      - "traefik.frontend.rule=Host:yourdomainname.com;PathPrefixStrip:/xyz"
      - "traefik.port=8000"
    volumes:
      - "./frontend:/usr/src/app"
    networks:
      - traefik_net

networks:
  traefik_net:
    external: true
Productionで使用するには、あくまでFirewallの設定がちゃんとされているという条件付きですが、これでhttps://yourdomainname.com/api 経由でBackendのDBにアクセスした結果をOutputし、nuxtからはaxiosを使ってこのAPIにアクセスするようになっています。
Dockerの設定ファイル上で数行のTraefikに関わる設定を書くだけで、後はTraefikの設定をいじることなく、Traefikが自動でDocker Containerを認識し、かつLet's encryptを用いたhttps経由でのアクセスを可能にしてくれます。こうなるともうApacheやnginxに戻る気になれないですね。
追記
これは私の専門に関わるので最後に載せますが、ArcGIS Enterprise ServerのProxyの設定です。ArcGIS EnterpriseはGeographic Information System (GIS)データを扱うサーバーですが、基本的にポート番号6080(http)か6443(https)で動きます。Firewallでは大体これらの番号はオープンにされないので、開発元のESRIは他にWeb AdaptorというTomcat(やその他)上で動くアプリを提供。これはHTTP requestをArcGIS Server上に送る働きをしてくれます。
Tomcatを利用する場合、大体ポート番号は8080です。これが上記のTraefikのモニターのポート番号を8080にせず8090にした理由ですが、このままではまだポート番号を入力しなければ(http://yourdomainname.com:8080/arcgis)ArcGIS Serverに繋がりません。これを今までは Apache Proxyの設定をして8080/arcgisをポート番号なしでそのまま/arcgisでもつながるようにしていました。Traefikではそのへんが最初わからなかったのですが、分かってみればとてもシンプルでした。
[file]以降の数行をtraefik.tomlに追加すれば設定完了です。
debug = false

logLevel = "ERROR"
defaultEntryPoints = ["https", "http"]

[entryPoints]
  [entryPoints.dashboard]
    address = ":8090"
    [entryPoints.dashboard.auth]
      [entryPoints.dashboard.auth.basic]
        userFile = '.htpasswd'
  [entryPoints.http]
    address = ":80"
    [entryPoints.http.redirect]
      entryPoint = "https"
  [entryPoints.https]
    address = ":443"
      [entryPoints.https.tls]

[retry]

[api]
entrypoint = "dashboard"

[acme]
email = "abc.xyz@gmail.com"
storage = "acme.json"
caServer = 'https://acme-staging-v02.api.letsencrypt.org/directory'
onHostRule = true
entryPoint = "https"
[acme.httpChallenge]
entryPoint = "http"

[docker]
endpoint = "unix:///var/run/docker.sock"
domain = "yourdomainname.com"
watch = true

[file]

[backends]
  [backends.backend1]
    [backends.backend1.servers.server1]
      url = "https://yourdomainname.com:6443"

[frontends]
  [frontends.frontend1]
  entryPoints = ["https"]
  backend = "backend1"
  passHostHeader = true
    [frontends.frontend1.routes]
      [frontends.frontend1.routes.route1]
        rule = "Host:yourdomainname.com"
    [frontends.frontend1.redirect]
      entryPoint = 'https'
      regex = "^https://yourdomainname.com:6443/arcgis/(.*)"
      replacement = "https://yourdomainname.com/arcgis/$1"
      permanent = true
https://yourdomainname.com/arcgis/rest/servicesで以下のような画面につながりました。Yay

この記事が気に入ったらサポートをしてみませんか?