Laravelが動くDockerfileを初心者が作成してみた

初めに
皆さん、はじめまして。商品開発部のエンジニアでSと申します。
株式会社セキュアには、2021年に新卒で入社しました。
大学では数学を学び、大学院では深層学習について研究していました。
最近はE資格取得を目指して、勉強中です。社内では入社1年目ということもあり、先輩に色々と教えてもらいながら日々開発に取り組んでいます。
今回、自分自身の学習の為にこの記事を書きました。より良い方法等がありましたら、twitterからコメント等頂けると嬉しいです。
今回は、新たにLaravel 環境を1から構築するのは大変なので、 DockerFileで構築できるようにしてみました。
Dockerのインストール方法は省略します。詳細はこちらを参照して下さい。
環境構築
今回実際に利用した環境
・Windows:Windows10 Business 20H2
・Docker for Windows:20.10.6
・VScode:1.59.0
今回Dockerfileで作成する環境
・Ubuntu:20.03
・composer:2.0.9
・PHP:8.0
・Nginx version: nginx/1.18.0 (Ubuntu)
・Laravel Framework 8.47.0
用語説明
ここでは、簡単に今回必要な用語の説明を行います。
PHPとは
動的なウェブページを作成するための機能を多く備えていることが特徴の言語です。(動的→ページの内容を変更、更新等)
公式URLはこちらです。

Laravelとは
PHP言語におけるwebアプリケーションを作成するためのフレームワークです。(pythonのdjangoみたいなもの)
今回は、webサーバーとして、Nginxを用います。
公式URLはこちらです。

Nginx(エンジンエックス)とは
軽量で処理が早いことに定評のあるwebサーバーの一つです。
公式URLはこちらです。

Dockerとは
コンテナを用いた仮想環境を指します。
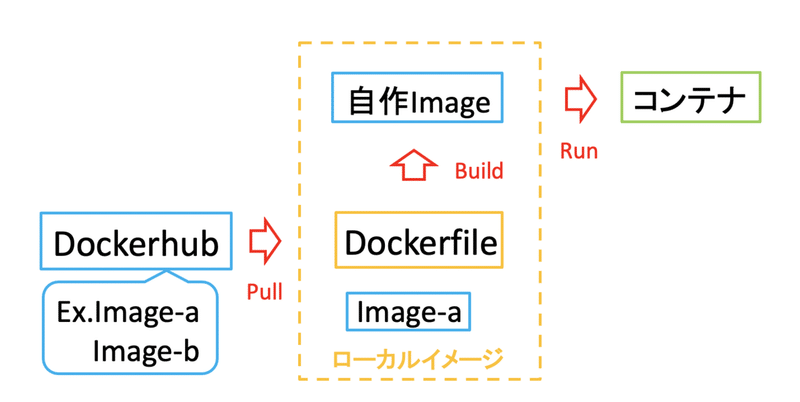
DockerfileをビルドすることでDockerimageを作成し、Dockerimageを実行することでコンテナが作成されます。
公式URLはこちらです。
コンテナとは
Dockerの1単位(仮想環境)を指します。
Dockerfileとは
DockerにおけるDockerimageを作成するためのファイルを指します。
Dockerimageとは
大雑把に説明すると、コンテナを作成するための雛形のようなものです。
作成手順
LaravelをDockerfileで動かすためには、Dockerfile,laravel.conf,run.shという3つのファイルが必要となります。laravel.confは、Nginxの設定をLaravel用に変更されているファイル、run.shは、php-fpm,Nginxを起動するためのファイルを指します。
Dockerfile内では、Nginxの設定ファイル(/etc/nginx/sites-avaiable/default)をlaravel.confに変更し、run.shを用いてphp-fpm,Nginxの実行が行われています。そして、ターミナルでDockerfileをビルドし、Dockerimageを起動することで、Laravelページが出力されます。
Dockerfileの作成
今回は、以下のようなDockerfileを作成します。
###DockerhubからUbuntuイメージをpull###
FROM ubuntu:20.04

###環境設定を指定###
ENV DEBIAN_FRONTEND=noninteractive

###composerイメージをインストール###
COPY --from=composer:2.0.9 /usr/bin/composer /usr/local/bin/composer

###Laravelに必要なソフトウェアをインストール###
RUN apt-get update && \
   apt-get -y upgrade && \
   apt-get -y install software-properties-common && \
   LC_ALL=C.UTF-8 add-apt-repository ppa:ondrej/php && \
   apt-get -y install tzdata && \
   apt-get -y install php8.0 php8.0-dom php8.0-mbstring php8.0-curl php8.0-mysql php8.0-fpm php8.0-redis php8.0-zip php8.0-gd && \
   apt-get -y install git zip unzip mysql-client && \
   apt-get -y remove apache2 && \
   apt-get -y install nginx

###laravelprojectの作成###
WORKDIR /var/www/html
RUN composer create-project --prefer-dist laravel/laravel SampleProject
RUN chmod -R 777 ./SampleProject/storage

###Nginxの処理###
WORKDIR /etc/nginx
COPY laravel.conf ./sites-available
RUN ln -s /etc/nginx/sites-available/laravel.conf sites-enabled/ && \
   rm sites-enabled/default && \
   rm sites-available/default && \
   nginx -t
ADD run.sh /root/
RUN chmod a+x /root/run.sh

###run.sh→php-fpmの起動,Nginxの起動###
CMD ["/root/run.sh"]
ここからは、Dockerfileのコード説明に入ります。
基本的には、コード一行一行に説明を追加しています。
1. DockerhubからUbuntuイメージをpull
FROM ubuntu:20.04 2. 環境変数設定を指定
ENV DEBIAN_FRONTEND=noninteractiveDEBIAN_FRONTEND=noninteractive→インストール時にダイアログ・ボックスを開こうとして、エラーがあっても停止しないようにするもの
(Dockerイメージを Debian と Ubuntu 上で構築する時、エラーが出ることがある)
3. composerイメージをインストール
COPY --from=composer:2.0.9 /usr/bin/composer /usr/local/bin/composer・--from→一時的にイメージを持ってくる
・composer COPY元 COPY先
4. Laravelに必要なソフトウェアをインストール
RUN apt-get update && \
   apt-get -y upgrade && \
   apt-get -y install software-properties-common && \
   LC_ALL=C.UTF-8 add-apt-repository ppa:ondrej/php && \
   apt-get -y install tzdata && \
   apt-get -y install php8.0 php8.0-dom php8.0-mbstring php8.0-curl php8.0-mysql php8.0-fpm php8.0-redis php8.0-zip php8.0-gd && \
   apt-get -y install git zip unzip mysql-client && \
   apt-get -y remove apache2 && \
   apt-get -y install nginx
・ apt-get→linuxのコマンド、インストールする
・&&→その行のコマンドがtureの時、次のコマンド実行,\→次の行に継続
・ update→リストを最新
・ upgrade→モジュールを最新
・ -y→返答を返すオプション(upgradeを実行するとy/nを聞かれる為)
・ software-propeties-common→UbuntuLinuxのaptコマンド(UbuntuLinuxにソフトウェアをインストール、更新(アップデート)、アンインストールなどの管理をするためのコマンド )を含んだもの
・ tzdata→世界各地域の標準時や常用時の時間帯(TimeZone)をまとめたDB
・ php8.0-dom→HTMLやXMLをJavaScriptを使って操作するためのプログラミングインターフェイス
・php8.0-mbstring→日本語等マルチバイト文字を使用可能とする拡張モジュール
・ php8.0-curl→HTTPリクエスト(クライアントがウェブサーバへリクエスト内容を要求すること)による外部サイトとの送受信処理を行うもの
・ php8.0-mysql→データベースを管理するためのシステム
・ php8.0-fpm→Nginxの場合、phpファイルをphp-fpmに処理を受け渡すことでphpプログラムが実行可能
・ php8.0-redis→メモリ上で動作するキーバリューストア型のデータベース
・ php8.0-zip→ファイル圧縮等
・php8.0-gd→イメージファイルを作成・編集
・git zip unzip mysql-client→unzip(mysql-client.zipファイルを解凍する)
・ remove apache2→今回は、Nginxを使用するため
・ nginx(webサーバー)
5. laravelprojectの作成
WORKDIR /var/www/html
RUN composer create-project --prefer-dist laravel/laravel SampleProject
RUN chmod -R 777 ./SampleProject/storage
・ WORKDIR→継続して同じディレクトリで作業する場合、RUN cd→一度だけディレクトリを移動する場合
・composer create-project→SampleProjectというタグのLaravelのパッケージ(laravel/laravel)を使用したプロジェクトを作成
・ chmod→管理者権限の変更(管理者権限を変更しないと、Laravelが動かない(詳細は公式リファレンスを参照))
6. Nginxの処理
WORKDIR /etc/nginx

COPY laravel.conf ./sites-available

RUN ln -s /etc/nginx/sites-available/laravel.conf sites-enabled/ && \
   rm sites-enabled/default && \
   rm sites-available/default && \
   nginx -t

ADD run.sh /root/

RUN chmod a+x /root/run.sh
・ln -s→シンボリックリンク作成(ショートカットのようなもの)
・ rm sites-enabled/default,sites-available/default→laravel.confに置き換えるので2つとも削除
・nginx -t→laravel.confの構文確認
・ ADD A B(BにAを追加する)
・chmod a(全ての権限ユーザー(所有者、グループ、その他のユーザー))+x(実行権限)
7. php-fpm,Nginxの起動(run.sh)
CMD ["/root/run.sh"]CMD ["command"]→commandを1度だけ実行
laravel.confとrun.shの作成
1. laravel.confの作成
laravel.confは、以下の通りです。これをコピーして、laravel.confとして、Dockerfileと同じ階層に配置して下さい。
laravel.conf
##
# You should look at the following URL's in order to grasp a solid understanding
# of Nginx configuration files in order to fully unleash the power of Nginx.
# https://www.nginx.com/resources/wiki/start/
# https://www.nginx.com/resources/wiki/start/topics/tutorials/config_pitfalls/
# https://wiki.debian.org/Nginx/DirectoryStructure
#
# In most cases, administrators will remove this file from sites-enabled/ and
# leave it as reference inside of sites-available where it will continue to be
# updated by the nginx packaging team.
#
# This file will automatically load configuration files provided by other
# applications, such as Drupal or Wordpress. These applications will be made
# available underneath a path with that package name, such as /drupal8.
#
# Please see /usr/share/doc/nginx-doc/examples/ for more detailed examples.
##

# Default server configuration
#
server {
	listen 80 default_server;
	listen [::]:80 default_server;

	 disable_symlinks off;

	# SSL configuration
	#
	# listen 443 ssl default_server;
	# listen [::]:443 ssl default_server;
	#
	# Note: You should disable gzip for SSL traffic.
	# See: https://bugs.debian.org/773332
	#
	# Read up on ssl_ciphers to ensure a secure configuration.
	# See: https://bugs.debian.org/765782
	#
	# Self signed certs generated by the ssl-cert package
	# Don't use them in a production server!
	#
	# include snippets/snakeoil.conf;

	root /var/www/html/SampleProject/public;

	# Add index.php to the list if you are using PHP
	index index.php index.html index.htm index.nginx-debian.html;

	server_name _;

	location / {
		# First attempt to serve request as file, then
		# as directory, then fall back to displaying a 404.
		try_files $uri $uri/ =404;
	}

	# pass PHP scripts to FastCGI server
	#
	location ~ \.php$ {
		# include snippets/fastcgi-php.conf;

		# With php-fpm (or other unix sockets):
		fastcgi_pass unix:/var/run/php/php8.0-fpm.sock;
		fastcgi_index index.php;
		fastcgi_param  SCRIPT_FILENAME  $document_root$fastcgi_script_name;
       include        fastcgi_params;
		# With php-cgi (or other tcp sockets):
		# fastcgi_pass 127.0.0.1:9000;
	}

	# deny access to .htaccess files, if Apache's document root
	# concurs with nginx's one
	#
 #location  ~ /\.ht {
	#	deny all;
	#}
}


# Virtual Host configuration for example.com
#
# You can move that to a different file under sites-available/ and symlink that
# to sites-enabled/ to enable it.
# #server  {
#	listen 80;
#	listen [::]:80;
#
#	server_name example.com;
#
#	root /var/www/example.com;
#	index index.html;
#
#	location / {
#		try_files $uri $uri/ =404;
#	}
#}
laravel.confの作成方法に興味がある方は記事最後に記載させていただいた[付録]をお読み下さい。
2. run.shの作成
run.shを作成します。下記をコピーして、run.shとしてDockerfileと同じ階層に配置して下さい。
run.sh
#!/bin/bash
service php8.0-fpm start
/usr/sbin/nginx -g 'daemon off;' -c /etc/nginx/nginx.conf
echo "main start"
・ #!/bin/bash→Shebang 詳細はこちら
・start→実行
・'daemon off;'→daemonではなく、foregroundでコマンドを動かす為
・echo→出力
エラー対処法
run.shを実行した際に、エラーが出た場合こちらを参照して下さい。
「standard_init_linux.go:219: exec user process caused: exec format error」が表示される場合は「#!/bin/bash」が抜けている場合があるので、run.shの一行目に追加して下さい。
Shebangの詳細はこちらを参照して下さい。
「standard_init_linux.go:219: exec user process caused: no such file or directory」が表示される場合は、run.shがCRLF(Windowsの改行コード)になってることが原因です。
今回の理由としては、gitの仕様でLF(linuxの改行コード)がCRLFに変更されてるからでした。
git config --global core.autocrlf input
を実行すればCRLFへの変更が無くなります。
ターミナルで実行
1. Dockerfileをビルド
docker build -t laravel:latest ./-t→タグを作成
出力結果
[+] Building 4.6s (19/19) FINISHED
=> [internal] load build definition from Dockerfile                                                                                                                                     0.2s
=> => transferring dockerfile: 2.00kB                                                                                                                                                   0.1s
=> [internal] load .dockerignore                                                                                                                                                        0.0s
↓
↓
↓
Use 'docker scan' to run Snyk tests against images to find vulnerabilities and learn how to fix them
上記のように出力されれば成功です。(↓は省略を意味)
2. Dockerimageを起動しコンテナを作成
docker run -p 8081:80 -it laravel・ -p→外部のポートとコンテナ内部のポートを接続するオプション
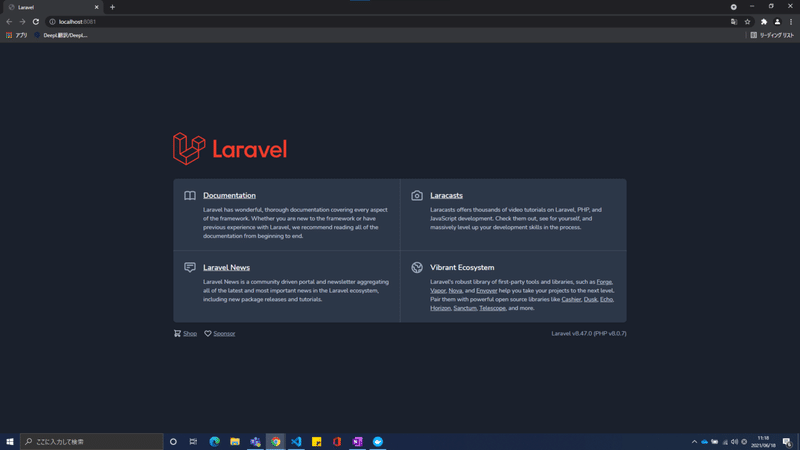
・ -p 8081:80でローカルのポート8081(localhost:8081)にアクセスすると、dockerコンテナの内部でポート80(http)で動いているアプリケーションに接続できる
・ -it→-iと-tをあわせたもの(-iはtty(コンテナを起動し続ける設定)を有効にするもの)
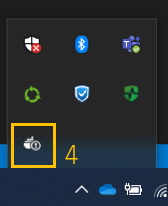
3. タスクバーのタブをクリック
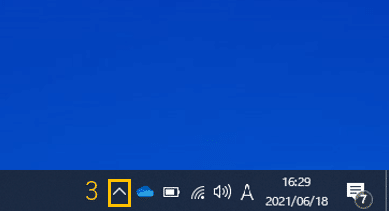
4. タブのDockerをクリック
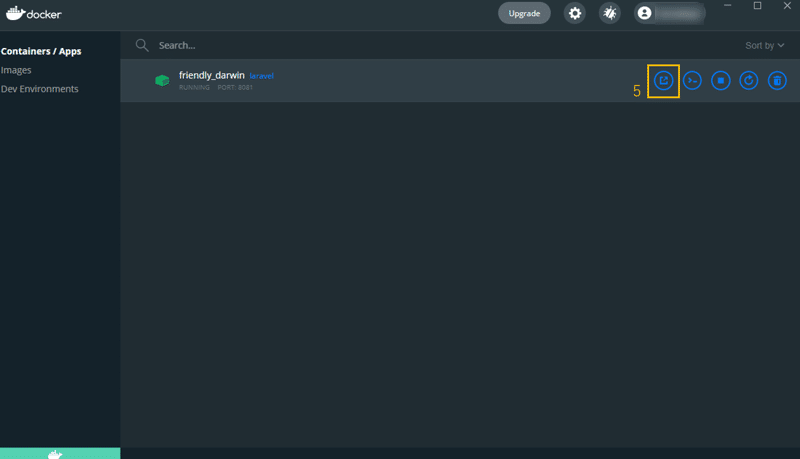
5. DockerDesktopの右のバーの一番左ボタンをクリック
6. Laravelページが出力
終わりに
いかがでしたでしょうか?
今回初めてDockerを触ってみましたが、新しく覚えることが多くとても勉強になりました。これからも様々な技術に触れていこうと思います。
付録
ここから下はlaravel.confの作成方法に興味がある方だけお読み下さい
今回使用したlaravel.confは、nginxのサーバーにある/etc/nginx/sites-avaiable/default をLaravel用に変更して、作成されています。
defaultの取得方法
1. 下記のコマンドを実行します。
docker run -d --name nginx-container -e TZ=UTC -p 8080:80 ubuntu/nginx:1.18-21.04_beta2. http://localhost:8080 に接続してサーバーが立っているか確認します。
3. コンテナに入ります。
VScodeでDockerを取得しておき、Dockerアイコンを選択し、nginx-containerを右クリック→Attach Visual Studio Codeを選択してください。
4. /etc/nginx/sites-avaiable/defaultを確認します。
defaultは以下の通りです。
default
##
# You should look at the following URL's in order to grasp a solid understanding
# of Nginx configuration files in order to fully unleash the power of Nginx.
# https://www.nginx.com/resources/wiki/start/
# https://www.nginx.com/resources/wiki/start/topics/tutorials/config_pitfalls/
# https://wiki.debian.org/Nginx/DirectoryStructure
#
# In most cases, administrators will remove this file from sites-enabled/ and
# leave it as reference inside of sites-available where it will continue to be
# updated by the nginx packaging team.
#
# This file will automatically load configuration files provided by other
# applications, such as Drupal or Wordpress. These applications will be made
# available underneath a path with that package name, such as /drupal8.
#
# Please see /usr/share/doc/nginx-doc/examples/ for more detailed examples.
##

# Default server configuration
#
server {
	listen 80 default_server;
	listen [::]:80 default_server;

	# SSL configuration
	#
	# listen 443 ssl default_server;
	# listen [::]:443 ssl default_server;
	#
	# Note: You should disable gzip for SSL traffic.
	# See: https://bugs.debian.org/773332
	#
	# Read up on ssl_ciphers to ensure a secure configuration.
	# See: https://bugs.debian.org/765782
	#
	# Self signed certs generated by the ssl-cert package
	# Don't use them in a production server!
	#
	# include snippets/snakeoil.conf;

	root /var/www/html;

	# Add index.php to the list if you are using PHP
	index index.html index.htm index.nginx-debian.html;

	server_name _;

	location / {
		# First attempt to serve request as file, then
		# as directory, then fall back to displaying a 404.
		try_files $uri $uri/ =404;
	}

	# pass PHP scripts to FastCGI server
	#
 #location  ~ \.php$ {
	#	include snippets/fastcgi-php.conf;
	#
	#	# With php-fpm (or other unix sockets):
	#	fastcgi_pass unix:/var/run/php/php7.4-fpm.sock;
	#	# With php-cgi (or other tcp sockets):
	#	fastcgi_pass 127.0.0.1:9000;
	#}

	# deny access to .htaccess files, if Apache's document root
	# concurs with nginx's one
	#
 #location  ~ /\.ht {
	#	deny all;
	#}
}


# Virtual Host configuration for example.com
#
# You can move that to a different file under sites-available/ and symlink that
# to sites-enabled/ to enable it.
# #server  {
#	listen 80;
#	listen [::]:80;
#
#	server_name example.com;
#
#	root /var/www/example.com;
#	index index.html;
#
#	location / {
#		try_files $uri $uri/ =404;
#	}
#}defaultを下記のように変更し、laravel.confが作成されています。
コード表現上、先頭の記号 - がdefault、 + がlaravel.confを指します。
- server {
-  listen 80 default_server;
-  listen [::]:80 default_server;
+ server {
+  listen 80 default_server;
+  listen [::]:80 default_server;
+
+   disable_symlinks off;
- root /var/www/html;
-
- # Add index.php to the list if you are using PHP
- index index.html index.htm index.nginx-debian.html;
+ root /var/www/html/SampleProject/public;
+
+ # Add index.php to the list if you are using PHP
+ index index.php index.html index.htm index.nginx-debian.html;- #location ~ \.php$ {
+ location ~ \.php$ {- # fastcgi_pass unix:/var/run/php/php7.4-fpm.sock;
+ fastcgi_pass unix:/var/run/php/php8.0-fpm.sock;
+ fastcgi_index index.php;
+ fastcgi_param SCRIPT_FILENAME $document_root$fastcgi_script_name;
+ include fastcgi_params;上記の変更を行うと、laravel.confが作成されます。
この記事が気に入ったらサポートをしてみませんか?