QGIS First Steps (1) Starting a project
Installing QGIS on your computer
QGIS is a multi-lingual FOSS (free and open source software)
Follow the instructions on the download page . Download and install the latest Long Term Release (LTR) version. As of December 2024, the latest LTR is 3.34. A new LTR is usually released once every year in the spring. If you are a Mac user, you may need to tinker with the security setting to install QGIS ("..was blocked for use because it is not from an identified developer", "..can't be opened because Apple cannot check it for malicious software".)
If your computer speaks, for example, Russian, the installed QGIS probably speaks Russian. To change the (human) language QGIS speaks, go to Settings-Options-General. Check "Override System Locale" to change the language.
Start a project: add vector layers
Natural Earth
Natural Earth is one of the best known, global sources of public domain geospatial data. To get started, let's grab several vector layers. On the large scale cultural vector page, you will find the following sources of data. "Cultural" here means the layers mostly represent aspects of built (not natural) environment. To access data that depict natural environment (e.g. coastlines), go to the Physical data page.
Download and extract ("unzip") the following "Cultural" data files.
Admin 0 Countries
Populated Places
Roads
Railroads
Airports
Ports
Urban Areas
Starting a project with one vector layer
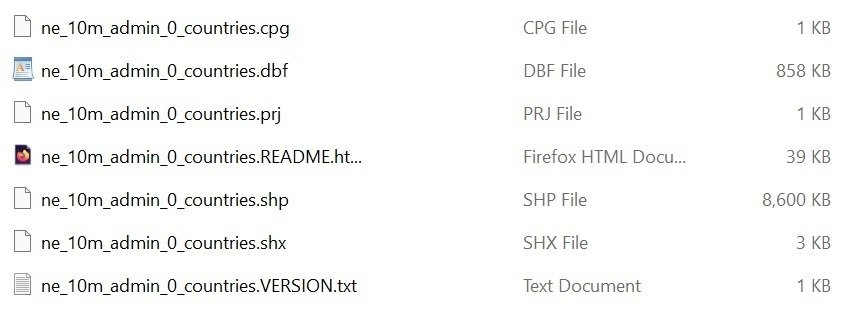
The Admin 0 countries files should look like this. There are seven files associated with this layer. This file format is called "Shapefile". Keep in mind we need most if not all of these files to create a countries of the world layer in QGIS. The file names cannot be modified; the files must be located in the same directory.
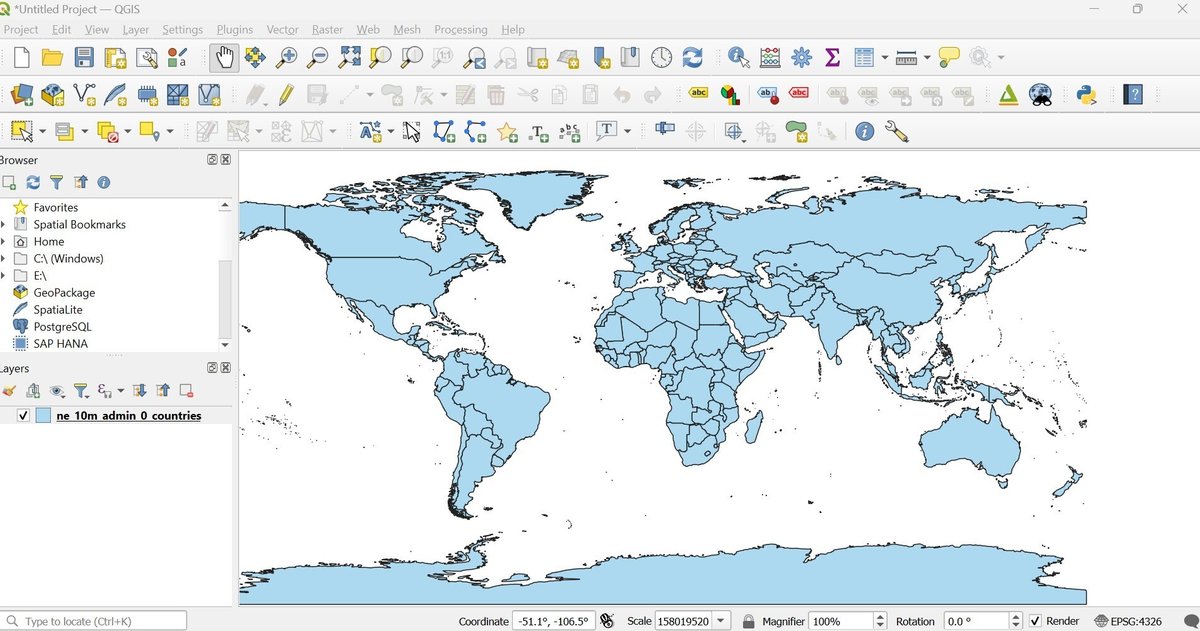
Add this vector layer (Layer-- Add Layer-- Add Vector Layer) and voila, here's the map of the world with the country boundary.
Creating a simple category map
In the initial map of the world, all countries of the world are painted in a single hue. This is single symbol. Let's use one of the variables ("fields" in database language) to create a category map of the world showing income of the countries (the income groups are defined by the World Bank). Highlight the layer (currently the ne_10m_admin_0_countries is the only layer in the project), right click and go to Properties and then Symbology. Change "Single" to "Categorized". In the "Value" window, select "INCOME_GRP" then click on "Classify". Uncheck the invalid values ("-99", all others) and click on "Apply."
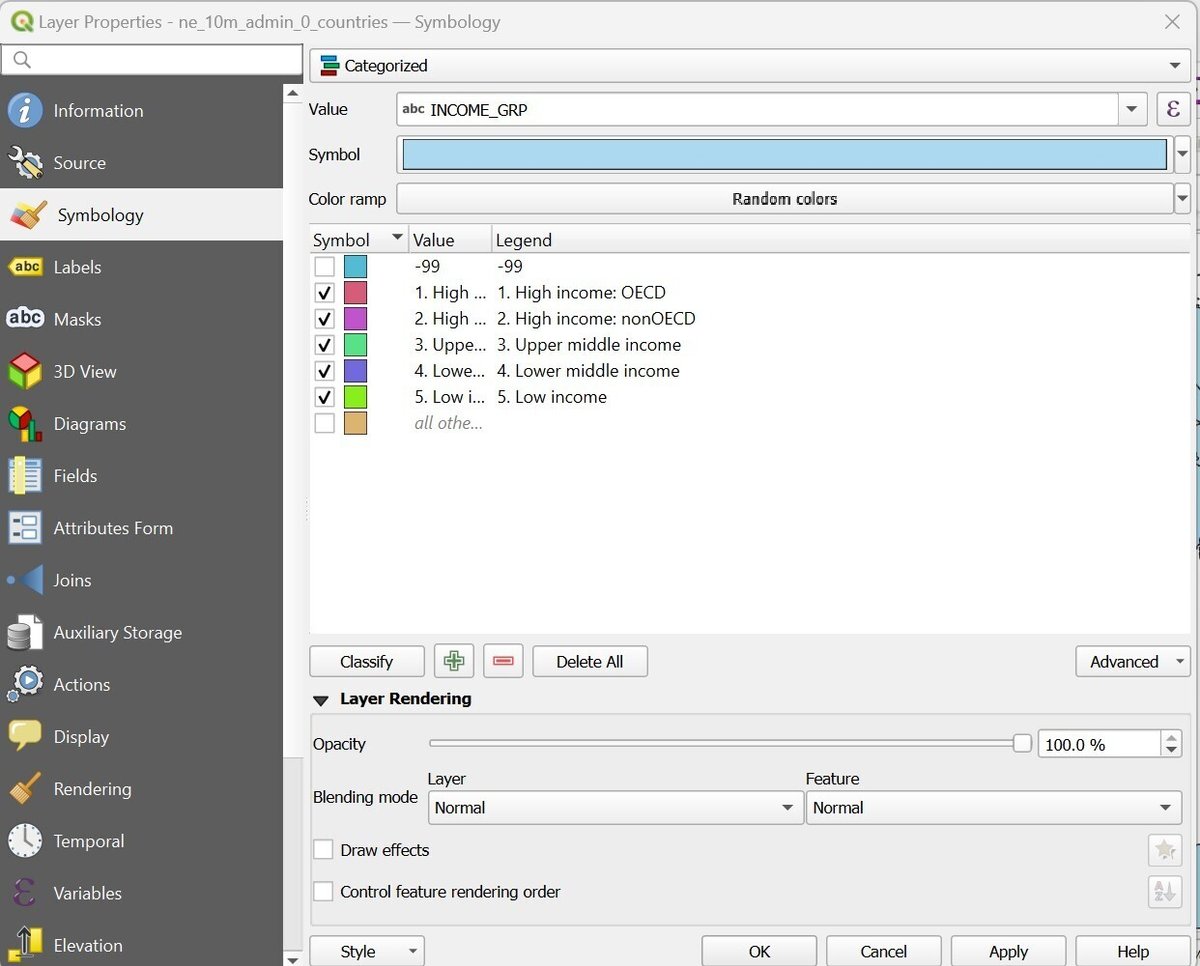
The colors are randomly assigned. If you do not like these colors, you can either 1) Shuffle random colors (Color ramp -- random colors) or 2) specify the exact color you like for each of the income group (highlight one income group at a time and go to "Symbol").
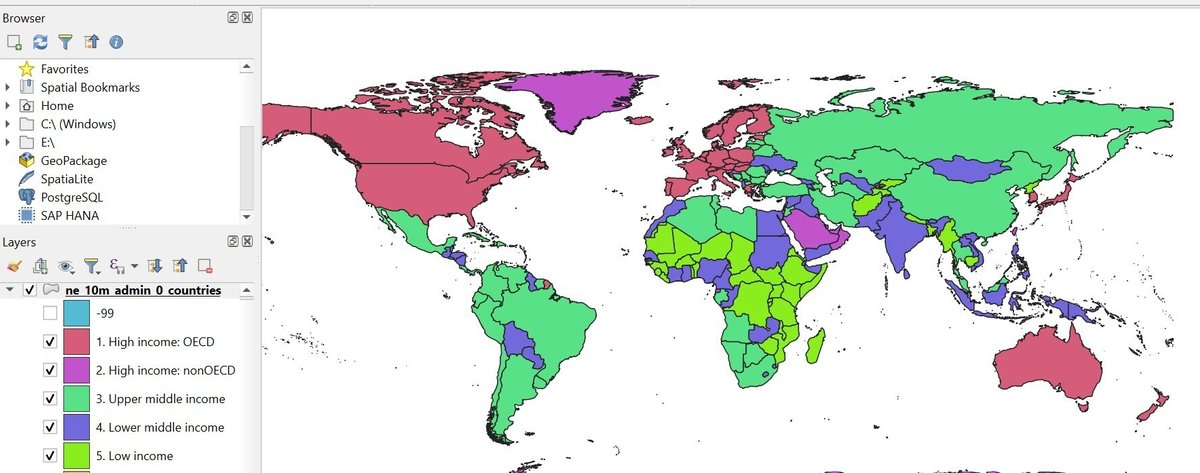
Add rail, road, urban places, and other layers
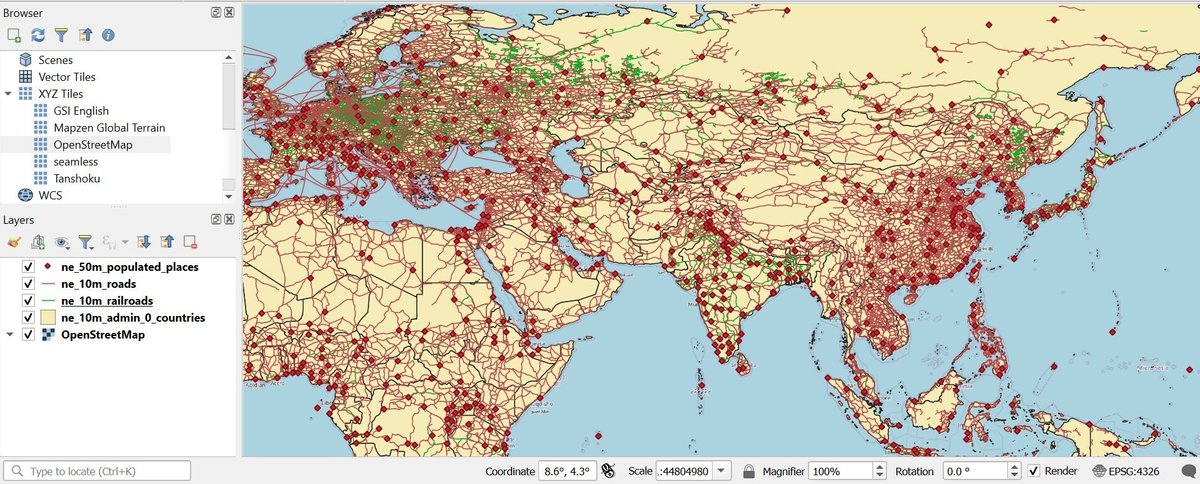
Add a few more Natural Earth cultural layers. In this example (below), the country layer symbology is changed back to "single" symbol. The map shows railroads (green lines), roads (red lines) and populated places (red diamonds).
To change the appearance of these, use symbology (highlight one layer, right click and choose layer properties -- then symbology).
