Google Colab ではじめる Instruct-Pix2Pix

Google Colab で「Instruct-Pix2Pix」を試したのでまとめました。
・diffusers v0.12.0
1. Instruct-Pix2Pix
「Instruct-Pix2Pix」は、人間の指示で画像編集するためにファインチューニングされた「Stable Diffusion」モデルです。 入力画像と、モデルに何をすべきかを与えると、モデルがそれに従って画像編集を行います。
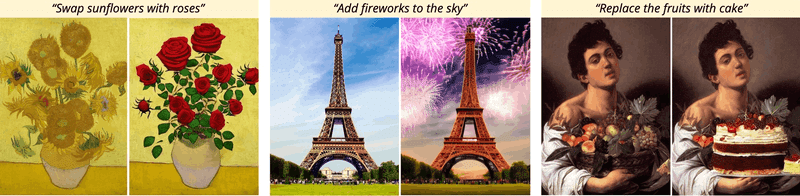
画像に対して、次のような指示を与えることができます。
・swap sunflowers with roses (ひまわりをバラと交換)
・add fireworks to the sky (空に花火を追加)
・replace the fruits with cake (果物をケーキに置き換える)
2. Colabでの実行
Google Colabでの実行手順は、次のとおりです。
(1) 新規のColabのノートブックを開き、メニュー「編集 → ノートブックの設定」で「GPU」を選択
(2) パッケージのインストール。
# パッケージのインストール
!pip install diffusers transformers safetensors accelerate
(3) パイプラインの準備。
StableDiffusionInstructPix2PixPipelineクラスを使い、モデルIDに"timbrooks/instruct-pix2pix"を指定します。
import torch
from diffusers import StableDiffusionInstructPix2PixPipeline

# パイプラインの準備
pipe = StableDiffusionInstructPix2PixPipeline.from_pretrained(
    "timbrooks/instruct-pix2pix",
    torch_dtype=torch.float16
).to("cuda")
(4) 画像のアップロード。
左端のフォルダアイコンでファイル一覧を表示し、画像 (cat.png) をドラッグ&ドロップします。
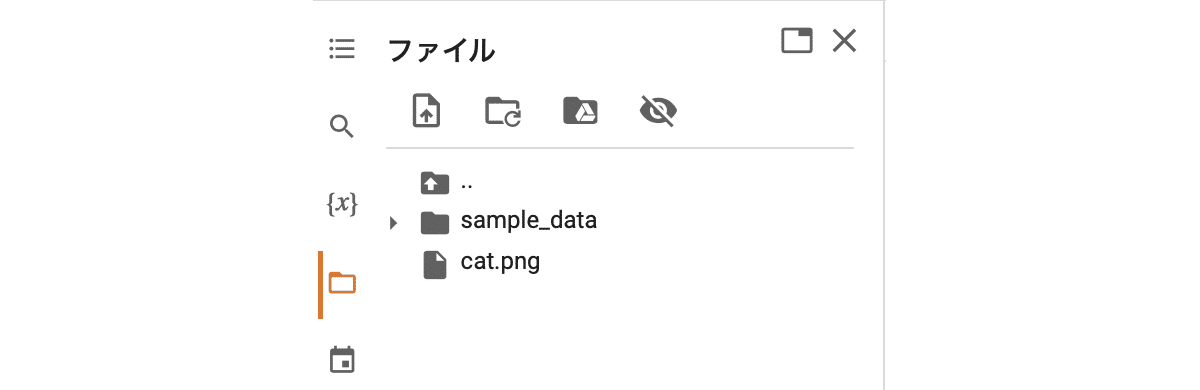
・cat.png
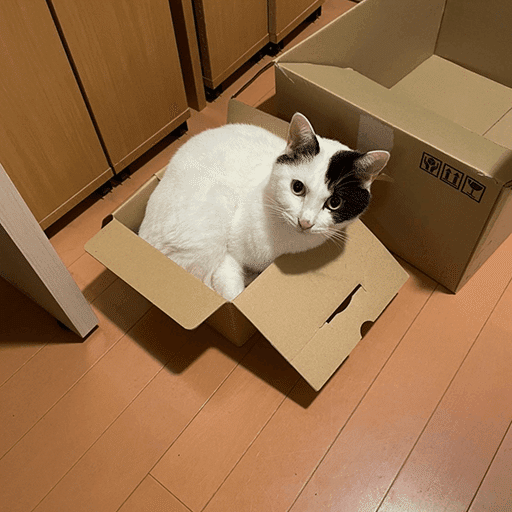
(5) 画像の読み込み。
cat.pngを読み込み、512x512のRGB画像に補正しています。
from PIL import Image

# 画像の読み込み
image = Image.open("cat.png").resize((512, 512)).convert("RGB")
image
(6) 画像編集。
今回の指示は、"replace the cat with teddy bear" (猫をクマのぬいぐるみに置き換え)としました。
# 画像編集
prompt = "replace the cat with teddy bear"
edit_image = pipe(prompt,
    image=image,
    num_inference_steps=20,
    image_guidance_scale=1.5,
    guidance_scale=7).images[0]
edit_image
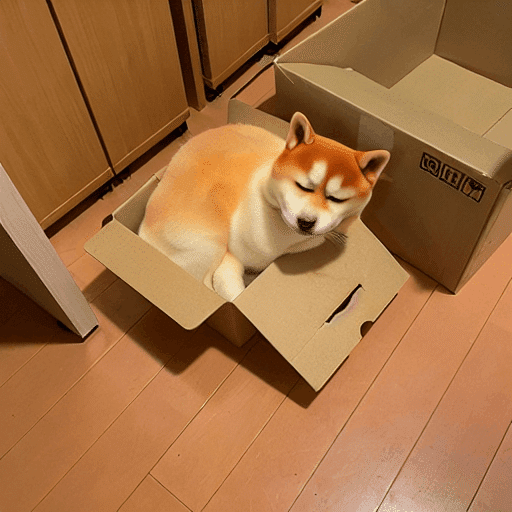
"shiba inu" や "tiger" にすると、次のようになりました。