myCobot 入門 (2) - Pythonによる操作

「myCobot」のPythonによる操作方法をまとめました。
・pymycobot 2.5.2
【最新版の情報は以下で紹介】
前回
1. pymycobot
「myCobot」をPythonで操作するには、「pymycobot」を使います。
2. pymycobotの準備
「pymycobot」の準備の手順は、次のとおりです。
(1) PCとmyCobotの「Basic」(土台の方のM5STACK)をUSBケーブルで接続。
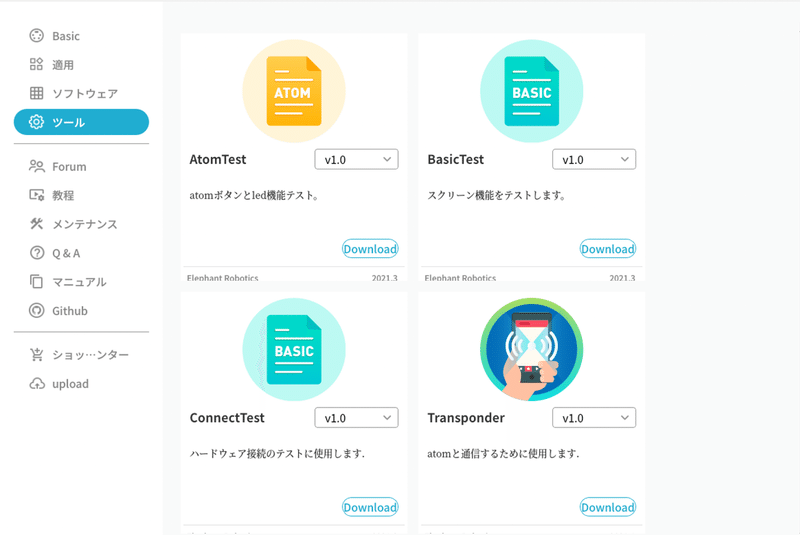
(2) 「myStudio」で「Basic」に「Transponder」をDownloadしてFlash。
(3) Python仮想環境に「pyserial」と「pymycobot」をインストール。
$ pip3 install pyserial
$ pip3 install pymycobot==2.5.2
(4) 「lsusb」でUSB接続されてることを確認。
「Silicon Labs CP210x UART Bridge」がmyCobotの接続です。
$ lsusb
Bus 001 Device 001: ID 1d6b:0002 Linux Foundation 2.0 root hub
Bus 002 Device 003: ID 10c4:ea60 Silicon Labs CP210x UART Bridge
Bus 002 Device 002: ID 80ee:0021 VirtualBox USB Tablet
Bus 002 Device 001: ID 1d6b:0001 Linux Foundation 1.1 root hub
(5) 「ls -l /dev/ttyUSB*」で「デバイス名」を確認。
自分の環境では「ttyUSB0」となりました。
$ ls -l /dev/ttyUSB*
crw-rw---- 1 root dialout 188, 0  6月 17 2:15 /dev/ttyUSB0
(6) デバイスのパーミッションを変更。
$ sudo chmod 666 /dev/ttyUSB03. LEDの色の変更
LEDの色を変更するコードは、次のとおりです。
from pymycobot.mycobot import MyCobot
mycobot = MyCobot('/dev/ttyUSB0')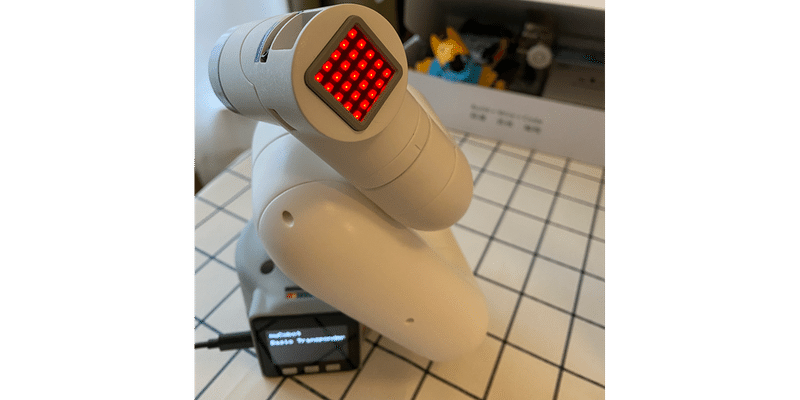
mycobot.set_color(255, 0, 0)LEDの色の変更は、set_color(r, g, b)を使います。
set_color(r, g, b) : LEDの色の変更
・r : 赤 (0~255)
・g :緑 0~255)
・b : 青 (0~255)
成功すると、手先のLEDの色が赤になります。
3. 関節の角度の変更
関節の角度を変更するコードは、次のとおりです。
from pymycobot.mycobot import MyCobot
from pymycobot.genre import Angle
mycobot = MyCobot('/dev/ttyUSB0')
mycobot.send_angle(Angle.J2.value, 0, 80)関節の角度の変更は、send_angle(id, degree, speed)を使います。
send_angle(id, degree, speed) : 関節の角度の変更
・id : 関節ID (genre.Angle, int, 1〜6)
・degree : 関節の角度 (float, -170~170)
・speed : 速度 (int, 0~100)
成功すると、第2関節が真っ直ぐになります。
4. 複数の関節の角度の変更
複数の関節の角度を変更するコードは、次のとおりです。
from pymycobot.mycobot import MyCobot
from pymycobot.genre import Angle
mycobot = MyCobot('/dev/ttyUSB0')
mycobot.send_angles([0,0,0,0,0,0], 80)複数の関節の角度の変更は、send_angles(degrees, speed)を使います。
send_angles(degrees, speed) : 複数の関節の角度の変更
・degree : 関節の角度のリスト ([float], -170~170, 長さ6)
・speed : 速度 (int, 0~100)
成功すると、第2関節が真っ直ぐになります。
5. その他の主なAPI
その他の主なAPIは、次のとおりです。
◎ 電源とフリーモード
power_on() : 電源ON
power_off() : 電源OFF
is_power_on() : 電源ONかどうか
・戻り値 : 電源ONかどうか
・1 : 電源ON
・0 : 電源OFF
・-1 : エラー
set_free_mode() : フリーモードに変更。
◎ MDIモード
「MDI」は、関節の角度または座標の目標値を入力して、位置と姿勢を教える操作です。
send_angle(id, degree, speed) : 関節の角度(度)の変更
・id : 関節ID (genre.Angle, int, 1〜6)
・degree : 関節の角度 (float, -170~170, 度)
・speed : 速度 (int, 0~100)
send_angles(degrees, speed) : 複数関節の角度(度)の変更
・degree : 関節の角度のリスト ([float], -170~170, 度, 長さ6)
・speed : 速度 (int, 0~100)
get_radians() : 関節の角度(ラジアン)の取得
・戻り値 : 関節の角度 ([float], ラジアン, 長さ6)
send_radians(degrees, speed) : 関節の角度(ラジアン)の変更
・degrees : 関節の角度 ([float], ラジアン, 長さ6)
・speed : 速度 (int, 0~100)
get_coords() : 座標の取得
・戻り値 : 座標のリスト ([x, y, z, rx, ry, rz])
send_coord(id, coord, speed) : 座標の変更
・id : 座標ID (genre.Coord)
・coord : 座乗値 (float)
・speed : 速度 (int, 0~100)
send_coords(coords, speed, mode) : 複数の座標の変更
・coords : 座標のリスト ([float])
・speed : 速度 (int, 0~100)
・mode : モード (int)
・0 : angluar
・1 : linear
sync_send_angles(degrees, speed) : 同期による複数関節の角度(度)の変更。目標点に到達するまで戻らない
・degree : 関節の角度のリスト ([float], -170~170, 度, 長さ6)
・speed : 速度 (int, 0~100)
sync_send_coords(coords, speed, mode) : 同期による複数の座標の変更。目標点に到達するまで戻らない
・coords : 座標のリスト ([float])
・speed : 速度 (int, 0~100)
・mode : モード (int)
・0 : angluar
・1 : linear
pause() : 動作の一時停止
resume() : 動作の再開
stop() : 動作の停止
is_paused() : 動作の一時停止中かどうか
・戻り値 : 動作の一時停止中かどうか
・1 : True
・0 : False
・-1 : エラー
is_in_position(data, flag) : その位置にいるかどうか
・data : 角度または座標のリスト ([float])
・flag : 角度または座標 (0:angles, 1:coords)
・戻り値 : その位置にいるかどうか
・1 : True
・0 : False
・-1 : エラー
◎ JOGモード
「JOG」は、関節の角度または座標を少しずつ動かして、目標の位置と姿勢を教える操作です。
jog_angle(joint_id, direction, speed) : 関節の角度を一方向に移動
・joint_id : 関節ID (int, 1~6)
・direction : 方向 (0:decrease, 1:increase)
・speed : 速度 (0~100)
jog_coord(coord_id, direction, speed) : 関節の座標を一方向に移動
・coord_id : 座標ID (int, 1~6)
・direction : 方向 (0:decrease, 1:increase)
・speed : 速度 (0~100)
jog_stop() : JOG動作の停止
◎ 速度と最大・最小移動角度
get_speed() : 速度の取得
・戻り値 : 速度 (int)
set_speed(speed) : 速度の指定
・speed : 速度 (int, 0~100)
get_joint_min_angle(joint_id) : 関節の最小移動角度の取得
・joint_id : 関節ID (int)
・戻り値 : 関節の最小移動角度 (float)
get_joint_max_angle(joint_id) : 観察最大移動角度の取得
・joint_id : 関節ID (int)
・戻り値 : 関節の最大移動角度 (float)
◎ サーボコントロール
is_servo_enable(servo_id) : ステアリングギアが接続されているかどうか
・servo_id : サーボID (int, 1~6)
・戻り値 : ステアリングギアが接続されているかどうか
・0 : disable
・1 : enbale
・-1 : エラー
is_all_servo_enable() : 全てのステアリングギアが接続されているかどうか
・戻り値 : 全てのステアリングギアが接続されているかどうか
・0 : disable
・1 : enbale
・-1 : エラー
release_servo(servo_id) : Description : サーボの電源OFF
・servo_id : サーボID (1~6)
focus_servo(servo_id) : Description : サーボの電源ON
・servo_id : サーボID (1~6)
◎ Atom IO
set_color(r, g, b) : LEDの色の変更
・r : 赤 (0~255)
・g :緑 0~255)
・b : 青 (0~255)
set_pin_mode(pin_no, pin_mode) : ピンモードの指定
・pin_no : ピンNo (int)
・pin_mode : ピンモード (int)
・0 : input
・1 : output
・2 : input_pullup
set_digital_output(pin_no, pin_signal) : デジタル出力の指定
・pin_no : ピンNo (int)
・pin_signal : ピンシグナル (int, 0 / 1)
get_digital_input(pin_no) : デジタル入力の取得
・pin_no : ピンNo (int)
・戻り値 : シグナル値
get_gripper_value() : グリッパー値の取得
・戻り値 : グリッパー値 (int)
set_gripper_state(flag, speed) : グリッパー状態の指定
・flag : フラグ (int, 0:open, 1:close)
・speed : 速度 (int, 0~100)
set_gripper_value(value, speed) : グリッパー値の指定
・value : グリッパー値 (int, 0~4096)
・speed : 速度 (int, 0~100)
set_gripper_ini() : 現在の位置を0、現在のグリッパー値を2048に指定
is_gripper_moving() : グリッパーが動いているかどうか
・戻り値 : グリッパーが動いているかどうか
・0 : false
・1 : true
・-1 : エラー
参考
次回
この記事が気に入ったらサポートをしてみませんか?