HuggingFace Diffusers v0.22.0の新機能

「Diffusers v0.22.0」の新機能についてまとめました。
前回
1. Diffusers v0.22.0 のリリースノート
情報元となる「Diffusers 0.22.0」のリリースノートは、以下で参照できます。
2. Latent Consistency Models (LCM)
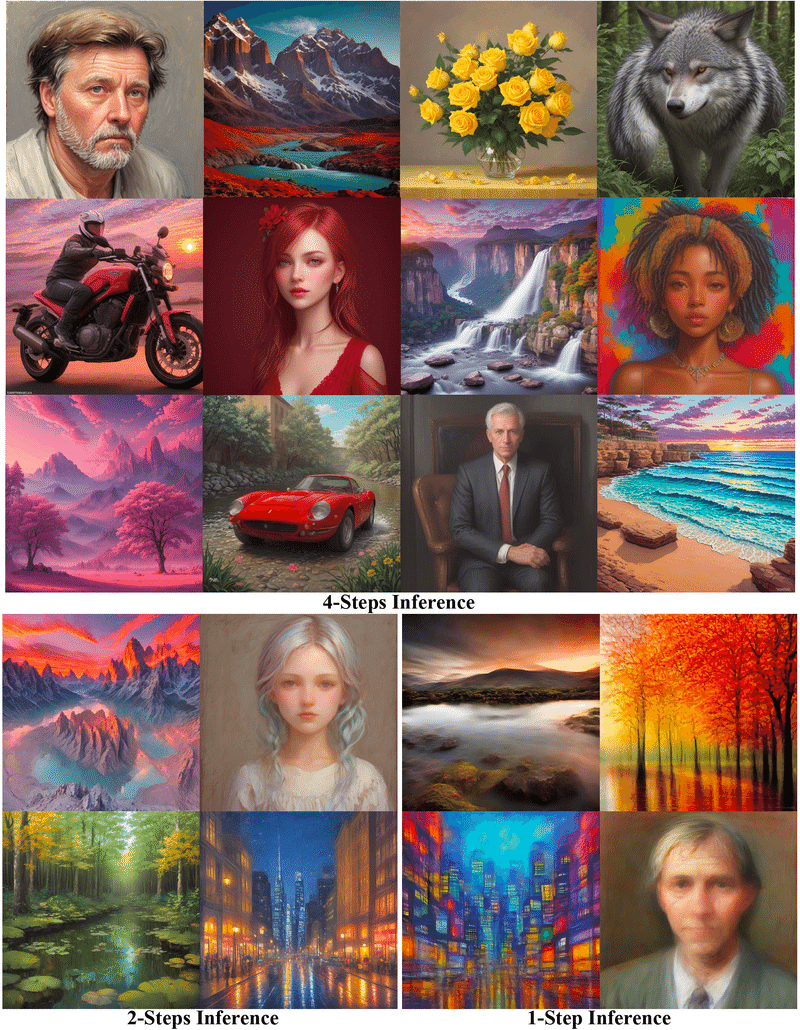
「LCM」により、拡散モデルの推論処理が大幅に高速化されます。画質をあまり損なうことなく高解像度の画像を生成するために必要な推論ステップがはるかに少なくなります。以下に使用例を示します。
import torch
from diffusers import DiffusionPipeline

pipe = DiffusionPipeline.from_pretrained("SimianLuo/LCM_Dreamshaper_v7", torch_dtype=torch.float32)

# GPUメモリ節約にはtorch.float16を使用できるが画質が低下する可能性あり
pipe.to(torch_device="cuda", torch_dtype=torch.float32)

prompt = "Self-portrait oil painting, a beautiful cyborg with golden hair, 8k"

# 1~50ステップまで設定可能。LCMは、4ステップ以下でも高速推論をサポート。推奨: 1~8ステップ
num_inference_steps = 4

images = pipe(prompt=prompt, num_inference_steps=num_inference_steps, guidance_scale=8.0).images詳しくは、ドキュメントを参照。
3. PixArt-Alpha
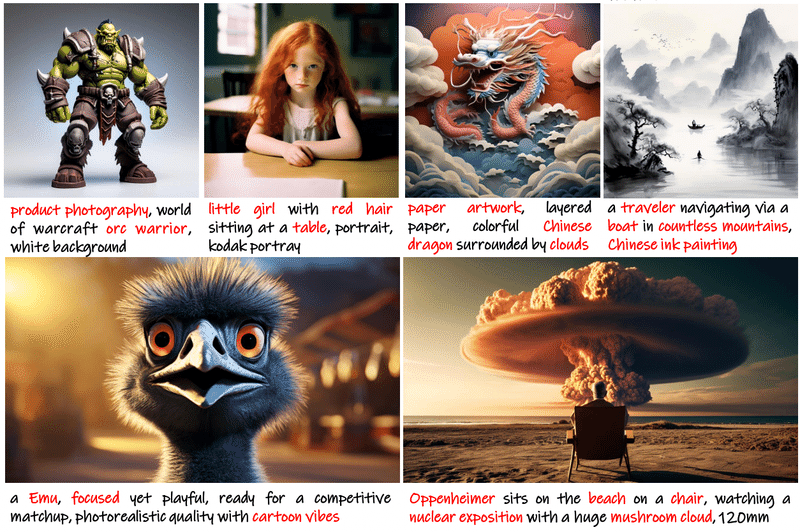
「PixArt-Alpha」は、TransformerベースのText-to-Imageの拡散モデルであり、「Stable Diffusion XL」「Imagen」「DALL-E 2」 などの既存の最先端のものの品質に匹敵すると同時に、より効率的です。
これはT5テキスト埋め込みで学習されており、最大シーケンス長は120です。したがって、より詳細なプロンプト入力が可能になり、より高品質の生成が可能になります。
大きなテキスト エンコーダにもかかわらず、モデルのオフロードを使用すると、PixArtAlphaPipeline を実行するには 11 GB 弱の VRAM が必要になります。
from diffusers import PixArtAlphaPipeline
import torch

pipeline_id = "PixArt-alpha/PixArt-XL-2-1024-MS"
pipeline = PixArtAlphaPipeline.from_pretrained(pipeline_id, torch_dtype=torch.float16)
pipeline.enable_model_cpu_offload()

prompt = "A small cactus with a happy face in the Sahara desert."
image = pipe(prompt).images[0]
image.save("sahara.png")詳しくは、ドキュメントを参照。
4. AnimateDiff
「AnimateDiff」は、既存の「Stable Diffusion」のText-to-Imageモデルを使用して動画を作成するモデリングフレームワークです。これは、モーションモジュール レイヤーをフリーズされたテキストから画像へのモデルに挿入し、動画クリップ上で学習してモーションを事前に抽出することで実現しています。
これらのモーションモジュールは、「Stable Diffusion UNet」の「ResNetブロック」と「Attendanceブロック」の後に適用されます。その目的は、画像フレーム全体に一貫した動きを導入することです。これらのモジュールをサポートするために、「MotionAdapter」と「UNetMotionModel」の概念を導入します。これらは、これらのモーションモジュールを既存のStableDiffusionモデルで使用する便利な方法として機能します。
import torch
from diffusers import MotionAdapter, AnimateDiffPipeline, DDIMScheduler
from diffusers.utils import export_to_gif

# Load the motion adapter
adapter = MotionAdapter.from_pretrained("guoyww/animatediff-motion-adapter-v1-5-2")

# load SD 1.5 based finetuned model
model_id = "SG161222/Realistic_Vision_V5.1_noVAE"
pipe = AnimateDiffPipeline.from_pretrained(model_id, motion_adapter=adapter)
scheduler = DDIMScheduler.from_pretrained(
    model_id, subfolder="scheduler", clip_sample=False, timestep_spacing="linspace", steps_offset=1
)
pipe.scheduler = scheduler

# enable memory savings
pipe.enable_vae_slicing()
pipe.enable_model_cpu_offload()

output = pipe(
    prompt=(
        "masterpiece, bestquality, highlydetailed, ultradetailed, sunset, "
        "orange sky, warm lighting, fishing boats, ocean waves seagulls, "
        "rippling water, wharf, silhouette, serene atmosphere, dusk, evening glow, "
        "golden hour, coastal landscape, seaside scenery"
    ),
    negative_prompt="bad quality, worse quality",
    num_frames=16,
    guidance_scale=7.5,
    num_inference_steps=25,
    generator=torch.Generator("cpu").manual_seed(42),
)
frames = output.frames[0]
export_to_gif(frames, "animation.gif")
既存の「2D UNet」を「UNetMotionModel」に変換できます。
from diffusers import MotionAdapter, UNetMotionModel, UNet2DConditionModel

unet = UNetMotionModel()

# Load from an existing 2D UNet and MotionAdapter
unet2D = UNet2DConditionModel.from_pretrained("SG161222/Realistic_Vision_V5.1_noVAE", subfolder="unet")
motion_adapter = MotionAdapter.from_pretrained("guoyww/animatediff-motion-adapter-v1-5-2")

# load motion adapter here
unet_motion = UNetMotionModel.from_unet2d(unet2D, motion_adapter: Optional = None)

# Or load motion modules after init
unet_motion.load_motion_modules(motion_adapter)

# freeze all 2D UNet layers except for the motion modules for finetuning
unet_motion.freeze_unet2d_params()

# Save only motion modules
unet_motion.save_motion_module(<path to save model>, push_to_hub=True)
「AnimateDiff」にはモーション LoRA モジュールも付属しており、微妙なコントロールが可能です。
import torch
from diffusers import MotionAdapter, AnimateDiffPipeline, DDIMScheduler
from diffusers.utils import export_to_gif

# Load the motion adapter
adapter = MotionAdapter.from_pretrained("guoyww/animatediff-motion-adapter-v1-5-2")
# load SD 1.5 based finetuned model
model_id = "SG161222/Realistic_Vision_V5.1_noVAE"
pipe = AnimateDiffPipeline.from_pretrained(model_id, motion_adapter=adapter)
pipe.load_lora_weights("guoyww/animatediff-motion-lora-zoom-out", adapter_name="zoom-out")

scheduler = DDIMScheduler.from_pretrained(
    model_id, subfolder="scheduler", clip_sample=False, timestep_spacing="linspace", steps_offset=1
)
pipe.scheduler = scheduler

# enable memory savings
pipe.enable_vae_slicing()
pipe.enable_model_cpu_offload()

output = pipe(
    prompt=(
        "masterpiece, bestquality, highlydetailed, ultradetailed, sunset, "
        "orange sky, warm lighting, fishing boats, ocean waves seagulls, "
        "rippling water, wharf, silhouette, serene atmosphere, dusk, evening glow, "
        "golden hour, coastal landscape, seaside scenery"
    ),
    negative_prompt="bad quality, worse quality",
    num_frames=16,
    guidance_scale=7.5,
    num_inference_steps=25,
    generator=torch.Generator("cpu").manual_seed(42),
)
frames = output.frames[0]
export_to_gif(frames, "animation.gif")
詳しくは、ドキュメントを参照。
5. PEFT Diffusers
さまざまな効果を実現するために、さまざまなスタイルで学習されたアダプタ (LoRA など) が多数あります。複数のアダプタを組み合わせて、新しい独自の画像を作成することもできます。「diffusers」に「PEFT」統合すると、推論用アダプタのロードと管理が非常に簡単になります。
この新しい統合を使用して複数のLoRAを組み合わせる例を次に示します。
from diffusers import DiffusionPipeline
import torch

pipe_id = "stabilityai/stable-diffusion-xl-base-1.0"
pipe = DiffusionPipeline.from_pretrained(pipe_id, torch_dtype=torch.float16).to("cuda")

# Load LoRA 1.
pipe.load_lora_weights("CiroN2022/toy-face", weight_name="toy_face_sdxl.safetensors", adapter_name="toy")
# Load LoRA 2.
pipe.load_lora_weights("nerijs/pixel-art-xl", weight_name="pixel-art-xl.safetensors", adapter_name="pixel")

# Combine the adapters.
pipe.set_adapters(["pixel", "toy"], adapter_weights=[0.5, 1.0])

# Perform inference.
prompt = "toy_face of a hacker with a hoodie, pixel art"
image = pipe(
    prompt, num_inference_steps=30, cross_attention_kwargs={"scale": 1.0}, generator=torch.manual_seed(0)
).images[0]
image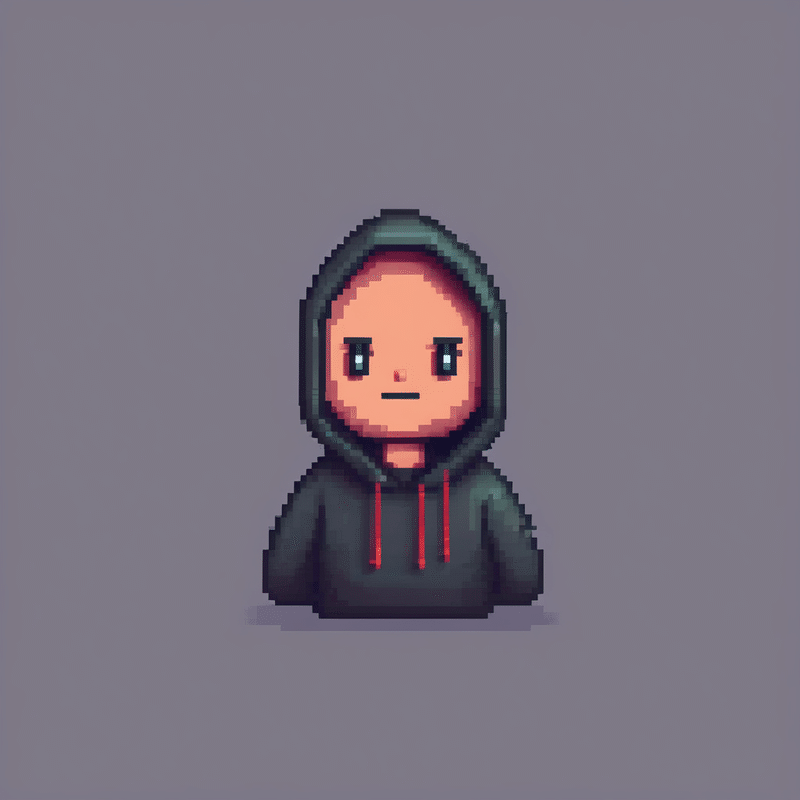
詳しくは、ドキュメントを参照。
6. コミュニティパイプラインを備えたコミュニティコンポーネント
これまで、コミュニティパイプラインをサポートしてきました。これにより、ライブラリのコアコードベース内に直接統合できないパイプラインの迅速な統合が可能になります。ただし、コミュニティパイプラインは常に「diffusers」の構成要素に依存しているため、高度なユースケースでは制限が生じる可能性があります。
これを強化するために、このリリースからコミュニティ コンポーネントを使用してコミュニティパイプラインを強化します。trust_remote_code=True を指定し、特定の方法でパイプラインリポジトリを記述することで、ユーザーはパイプラインとコンポーネント コードを可能な限り柔軟にカスタマイズできます。
from diffusers import DiffusionPipeline
import torch

pipeline = DiffusionPipeline.from_pretrained(
    "<change-username>/<change-id>", trust_remote_code=True, torch_dtype=torch.float16
).to("cuda")

prompt = "hello"

# Text embeds
prompt_embeds, negative_embeds = pipeline.encode_prompt(prompt)

# Keyframes generation (8x64x40, 2fps)
video_frames = pipeline(
    prompt_embeds=prompt_embeds,
    negative_prompt_embeds=negative_embeds,
    num_frames=8,
    height=40,
    width=64,
    num_inference_steps=2,
    guidance_scale=9.0,
    output_type="pt"
).frames詳しくは、ドキュメントを参照。
7. 動的コールバック
ほとんどの diffusersパイプラインは、カスタム定義関数を使用してノイズ除去ループのデフォルトの動作を変更できる callback_on_step_end 引数を受け入れるようになりました。以下は、パフォーマンスのトレードオフを最小限に抑えて計算を節約するために、推論ステップの 40% 後に分類子なしガイダンスを無効にするために作成できるコールバック関数の例です。
def callback_dynamic_cfg(pipe, step_index, timestep, callback_kwargs):
    # adjust the batch_size of prompt_embeds according to guidance_scale
    if step_index == int(pipe.num_timestep * 0.4):
        prompt_embeds = callback_kwargs["prompt_embeds"]
        prompt_embeds =prompt_embeds.chunk(2)[-1]

    # update guidance_scale and prompt_embeds
    pipe._guidance_scale = 0.0
    callback_kwargs["prompt_embeds"] = prompt_embeds
    return callback_kwargs
使用方法は次のとおりです。
import torch
from diffusers import StableDiffusionPipeline

pipe = StableDiffusionPipeline.from_pretrained("runwayml/stable-diffusion-v1-5", torch_dtype=torch.float16)
pipe = pipe.to("cuda")

prompt = "a photo of an astronaut riding a horse on mars"

generator = torch.Generator(device="cuda").manual_seed(1)
out= pipe(prompt, generator=generator, callback_on_step_end=callback_custom_cfg, callback_on_step_end_tensor_inputs=['prompt_embeds'])

out.images[0].save("out_custom_cfg.png")詳しくは、ドキュメントを参照。
次回
この記事が気に入ったらサポートをしてみませんか?