
react-three-fiber のはじめ方

「react-three-fiber」のはじめ方をまとめました。
前回
1. react-three-fiber
「react-three-fiber」は「three.js」用のReactレンダラーです。
2. エコシステム
「react-three-fiber」の周りには、ライブラリ、ヘルパー、抽象化など活気に満ちた広範なエコシステムがあります。
・@react-three/drei : 役に立つヘルパー
・@react-three/gltfjsx : GLTFをJSXコンポーネントに変換
・@react-three/postprocessing : 後処理効果
・@react-three/test-renderer : ノードのユニットテスト
・@react-three/flex : react-three-fiber用のflexbox
・@react-three/xr : VR/ARコントローラとイベント
・@react-three/csg : 構成的立体幾何学
・@react-three/rapier : Rapierを使用した3D物理
・@react-three/cannon : キャノンを使った3D物理
・@react-three/p2 : P2を使用した2D物理
・@react-three/a11y : シーンのための本当のa11y
・@react-three/gpu-pathtracer : リアルなパストレース
・create-r3f-app next : nextjsスターター
・lamina : レイヤーベースのシェーダーマテリアル
・zustand : フラックスベースの状態管理
・jotai : アトムベースの状態管理
・valtio : プロキシベースの状態管理
・react-spring : スプリング物理ベースのアニメーションライブラリ
・framer-motion-3d : アニメーションライブラリ
・use-gesture : マウス/タッチジェスチャー
・leva : 数秒でGUIコントロールを作成
・maath : 数学のユーティリティ
・miniplex : ECS (Entity Management System)
・composer-suite : シェーダー、パーティクル、エフェクト、ゲームメカニクスの作成
3. Reactプロジェクトの準備
Reactプロジェクトの準備手順は、次のとおりです。
(1) Reactプロジェクトの生成。
$ npx create-react-app my-app --template typescript
$ cd my-app
(2) three と @react-three/fiber のインストール。
$ npm install three @types/three @react-three/fiber(3) 実行。
$ npm run start4. HelloWorldの作成
HelloWorldの作成手順は次のとおりです。
(1) キャンバスの追加。
src/App.tsxにCanvasコンポーネントを追加します。
import React from 'react';
import { Canvas } from '@react-three/fiber';

const App: React.FC = () => {
  return (
    <div id="canvas-container">
      <Canvas>
        {null}
      </Canvas>
    </div>
  );
}

export default App;
Canvasコンポーネントは、裏でいくつかの重要なセットアップを実行します。
・レンダリングに必要な基本的な構成要素であるシーンとカメラを設定
・フレームごとにシーンをレンダリングするため、従来のレンダリングループは必要なし
(2) メッシュの追加
Canvasコンポーネント に meshコンポーネント を追加します。
      <Canvas>
        <mesh>
          <boxGeometry />
          <meshStandardMaterial />
        </mesh>
      </Canvas>
このコードは、次の three.jsのコードと同等です。
const scene = new THREE.Scene()
const camera = new THREE.PerspectiveCamera(75, width / height, 0.1, 1000)

const renderer = new THREE.WebGLRenderer()
renderer.setSize(width, height)
document.querySelector('#canvas-container').appendChild(renderer.domElement)

const mesh = new THREE.Mesh()
mesh.geometry = new THREE.BoxGeometry()
mesh.material = new THREE.MeshStandardMaterial()

scene.add(mesh)

function animate() {
  requestAnimationFrame(animate)
  renderer.render(scene, camera)
}

animate()
・コンストラクタ引数
BoxGeometryのドキュメントによると、コンストラクタで幅、長さ、深さの引数を渡すことができます。
new THREE.BoxGeometry(2, 2, 2)Fiberでこれを実行するには、args prop を使用します。prop は常に、コンストラクタの引数を表す項目を持つ配列を受け取ります。
<boxGeometry args={[2, 2, 2]} />(3) ライトの追加
      <Canvas>
        <ambientLight intensity={0.1} />
        <directionalLight color="red" position={[0, 0, 5]} />
        <mesh>
          <boxGeometry />
          <meshStandardMaterial />
        </mesh>
      </Canvas>
・Props
Fiber コンポーネントにプロパティを設定すると、three.jsインスタンスに同名のプロパティが設定されます。
ambientLightのドキュメントによると、オプションで色を指定できますが、プロパティで受け取ることもできます。
<ambientLight intensity={0.1} />これは以下と同様です。
const light = new THREE.AmbientLight()
light.intensity = 0.1
・ショートカット
.set()を持つプロパティ (色、ベクターなど) には、いくつかのショートカットがあります。
const light = new THREE.DirectionalLight()
light.position.set(0, 0, 5)
light.color.set('red')
これは次のJSXと同等です。
<directionalLight position={[0, 0, 5]} color="red" />詳しい説明については API を参照してください。
(4) ボックスを回転。
RotateBoxをコンポーネント化し、useFrame()で回転させます。
import React, { useRef } from 'react';
import { Canvas, useFrame } from '@react-three/fiber';
import { Mesh } from 'three';

// 回転する立方体
const RotatingBox: React.FC = () => {
  const meshRef = useRef<Mesh>(null);

  useFrame(() => {
    if (meshRef.current) {
      meshRef.current.rotation.x += 0.01;
      meshRef.current.rotation.y += 0.01;
    }
  });

  return (
    <mesh ref={meshRef}>
      <boxGeometry />
      <meshStandardMaterial />
    </mesh>
  );
};

// アプリ
const App: React.FC = () => {
  return (
    <div id="canvas-container">
      <Canvas>
        <ambientLight intensity={0.1} />
        <directionalLight color="red" position={[0, 0, 5]} />
        <RotatingBox />
      </Canvas>
    </div>
  );
}

export default App;
5. @react-three/drei
「@react-three/drei」は、役立つヘルパーです。
5-1. インストール
$ npm install @react-three/drei5-2. OrbitControls
OrbitControlsを追加することで、マウスで3Dモデルの回転・拡縮が可能になります。
import React, { useRef } from 'react';
import { Canvas, useFrame } from '@react-three/fiber';
import { Mesh } from 'three';
import { OrbitControls } from '@react-three/drei';

// 回転する立方体
const RotatingBox: React.FC = () => {
  const meshRef = useRef<Mesh>(null);

  useFrame(() => {
    if (meshRef.current) {
      meshRef.current.rotation.x += 0.01;
      meshRef.current.rotation.y += 0.01;
    }
  });

  return (
    <mesh ref={meshRef}>
      <boxGeometry />
      <meshStandardMaterial />
    </mesh>
  );
};

// アプリ
const App: React.FC = () => {
  return (
    <div id="canvas-container">
      <Canvas>
        <ambientLight intensity={0.1} />
        <directionalLight color="red" position={[0, 0, 5]} />
        <RotatingBox />
        <OrbitControls />
      </Canvas>
    </div>
  );
}

export default App;
5-3. useGLTF
(1) モデルをpublicフォルダに配置。
今回は、「VRoid Studio」で出力した「model.vrm」を配置しました。
(2) コードの編集と実行。
import { Canvas } from '@react-three/fiber';
import { useGLTF } from '@react-three/drei';
import { OrbitControls } from '@react-three/drei';

// モデルプロパティ
interface ModelProps {
  url: string
}

// モデル
const Model: React.FC<ModelProps> = ({ url }) => {
  const { scene } = useGLTF(url);

  scene.position.set(0, -1, 0);
  return <primitive object={scene} />;
}

// アプリ
const App: React.FC = () => {
  return (
    <Canvas>
      <ambientLight intensity={2.0} />
      <directionalLight color="white" position={[0, 0, 5]} />
      <OrbitControls />
      <Model url="./model.vrm" />
    </Canvas>
  );
}

export default App;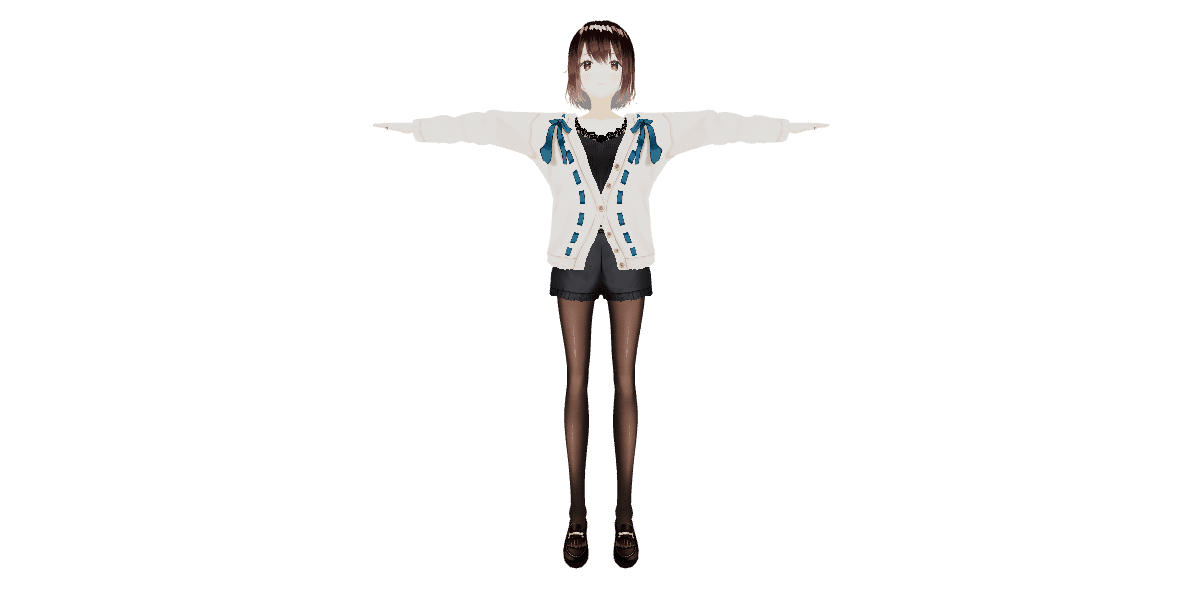
5-4. useFBX
(1) モデルをpublicフォルダに配置。
今回は、「Mixamo」で出力した「model.fbx」を配置しました。
(2) コードの編集と実行。
import React, { useRef, useEffect } from 'react';
import { Canvas, useFrame } from '@react-three/fiber'
import { useFBX } from '@react-three/drei';
import { OrbitControls } from '@react-three/drei';
import { AnimationMixer } from 'three';

// モデルプロパティ
interface ModelProps {
  url: string
}

// モデル
const Model: React.FC<ModelProps> = ({ url }) => {
  const fbx = useFBX(url);
  const mixerRef = useRef<AnimationMixer | null>(null);

  useEffect(() => {
    // モーション再生
    if (fbx.animations.length > 0) {
      const mixer = new AnimationMixer(fbx);
      mixer.clipAction(fbx.animations[1]).play();
      mixerRef.current = mixer;
    }
  }, [fbx]);

  useFrame((state, delta) => {
    mixerRef.current?.update(delta);
  });

  return <primitive object={fbx} />;
}

// アプリ
const App: React.FC = () => {
  return (
    <Canvas>
      <ambientLight intensity={2.0} />
      <directionalLight color="white" position={[0, 0, 5]} />
      <OrbitControls />
      <Model url="./model.fbx" />
    </Canvas>
  );
}

export default App;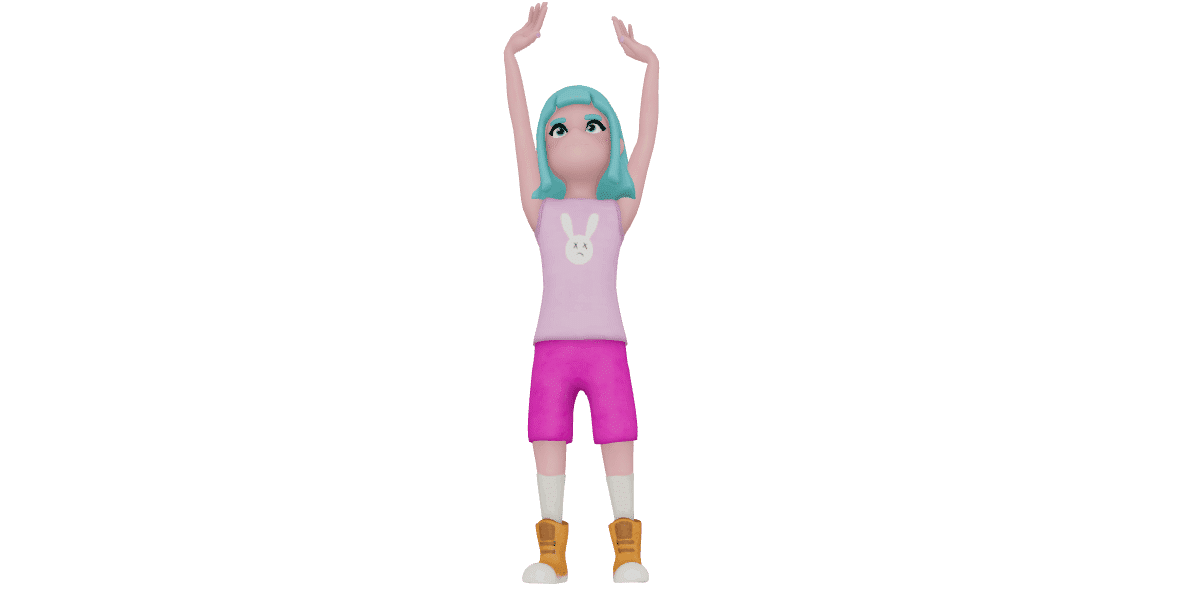
5-5. PolyLoader
(1) パッケージのインストール。
npm install three-stdlib(2) モデルをpublicフォルダに配置。
assets/ に three.jsのサンプルモデル「dolphins_colored.ply」を配置。
(3) ポイントでレンダリング。
import React, { useRef, useEffect } from 'react';
import { Canvas, useLoader } from '@react-three/fiber';
import { OrbitControls } from '@react-three/drei';
import { PLYLoader } from 'three-stdlib';
import * as THREE from 'three';

// モデルプロパティ
interface ModelProps {
  url: string
}

// モデル
const Model: React.FC<ModelProps> = ({ url }) => {
  const ref = useRef<THREE.Points>(null);
  const geometry = useLoader(PLYLoader, url);

  useEffect(() => {
    if (geometry && ref.current) {
      ref.current.geometry = geometry;
    }
  }, [geometry]);

  return (
    <points ref={ref}>
      <pointsMaterial size={10.0} vertexColors />
    </points>
  );
}

// アプリ
const App: React.FC = () => {
  return (
    <div id="canvas-container">
      <Canvas>
        <ambientLight intensity={2.0} />
        <directionalLight color="white" position={[0, 0, 5]} />
        <OrbitControls />
        <Model url="./dolphins_colored.ply" />
      </Canvas>
    </div>
  );
}

export default App;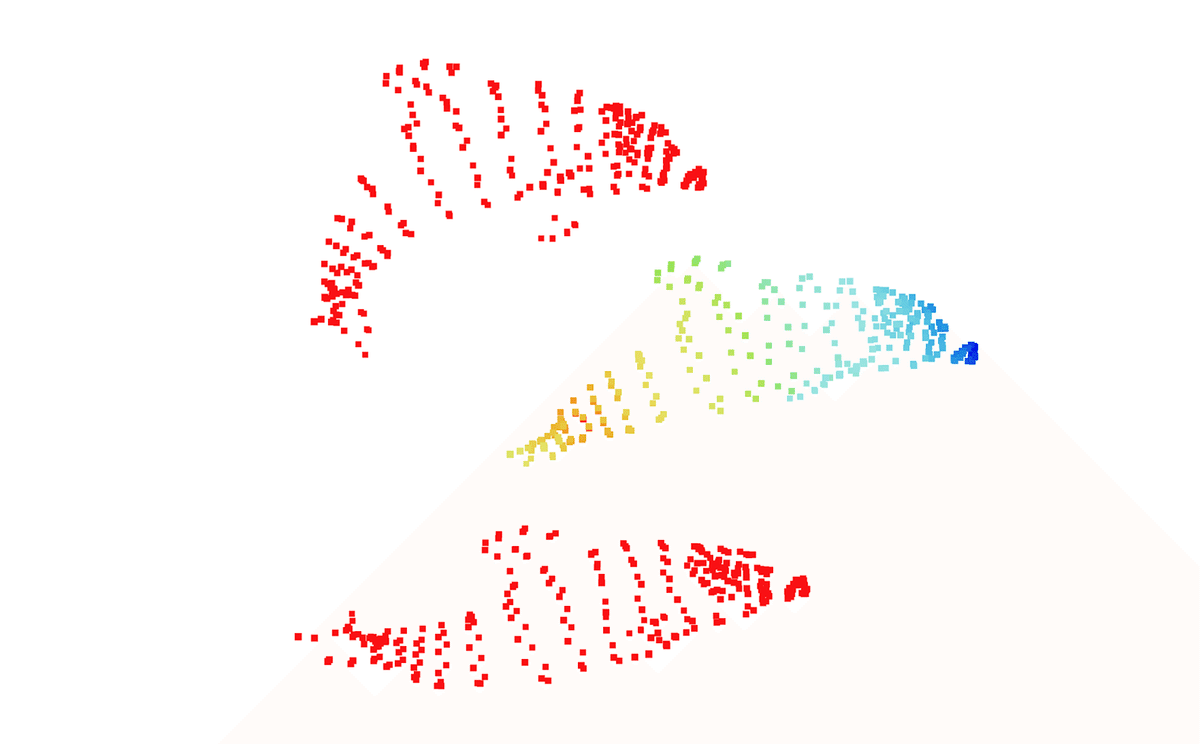
(4) メッシュでレンダリング。
import React, { useRef, useEffect } from 'react';
import { Canvas, useLoader } from '@react-three/fiber';
import { OrbitControls } from '@react-three/drei';
import { PLYLoader } from 'three-stdlib';
import * as THREE from 'three';

// モデルプロパティ
interface ModelProps {
  url: string
}

// モデル
const Model: React.FC<ModelProps> = ({ url }) => {
  const ref = useRef<THREE.Mesh>(null);
  const geometry = useLoader(PLYLoader, url);

  useEffect(() => {
    if (geometry && ref.current) {
      ref.current.geometry = geometry;
    }
  }, [geometry]);

  return (
    <mesh ref={ref}>
      <meshStandardMaterial attach="material" vertexColors />
    </mesh>
  );
}

// アプリ
const App: React.FC = () => {
  return (
    <div id="canvas-container">
      <Canvas>
        <ambientLight intensity={2.0} />
        <directionalLight color="white" position={[0, 0, 5]} />
        <OrbitControls />
        <Model url="./dolphins_colored.ply" />
      </Canvas>
    </div>
  );
}

export default App;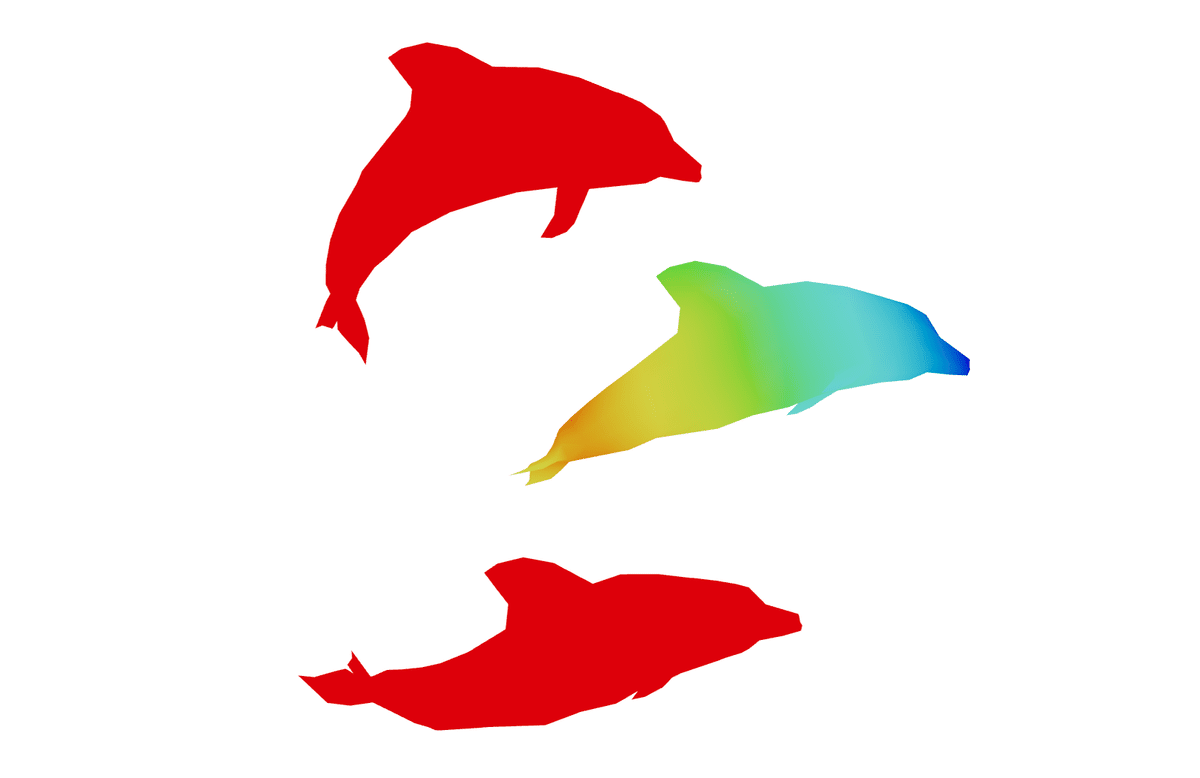
6. 全画面表示
(1) styles.cssの作成。
html, body {
  margin: 0;
  padding: 0;
  width: 100%;
  height: 100%;
  overflow: hidden;
}

canvas {
  display: block;
  width: 100vw;
  height: 100vh;
}
(2) App.tsxにstyles.cssのimportを追加。
import './styles.css';7. React Native
7-1. インストール
(1) React Nativeプロジェクトの生成。
npx react-native init my_app
cd my_app
(2) パッケージのインストール。
npm install expo-gl
npx install-expo-modules@latest
npm install three @types/three @react-three/fiber @react-three/drei
7-2. HelloWorldの作成
(1) App.tsxの編集。
import React, { useRef } from 'react';
import { View } from 'react-native';
import { Canvas, useFrame } from '@react-three/fiber/native';
import { Mesh } from 'three';

// 回転する立方体
const RotatingBox: React.FC = () => {
  const meshRef = useRef<Mesh>(null);

  useFrame(() => {
    if (meshRef.current) {
      meshRef.current.rotation.x += 0.01;
      meshRef.current.rotation.y += 0.01;
    }
  });

  return (
    <mesh ref={meshRef}>
      <boxGeometry />
      <meshStandardMaterial />
    </mesh>
  );
};

// アプリ
const App: React.FC = () => {
  return (
    <View style={{flex: 1}}>
      <Canvas style={{flex: 1}}>
        <ambientLight intensity={0.1} />
        <directionalLight color="red" position={[0, 0, 5]} />
        <RotatingBox />
      </Canvas>
    </View>
  );
}

export default App;
ReactとReact Nativeの変更点は、次のとおりです。
・'@react-three/fiber' → '@react-three/fiber/native'
・'@react-three/drei' → '@react-three/drei/native'
・<div> → <View>
7-3. useGLTF
(1) モデルを配置。
assets/ に three.jsのサンプルモデル「Horse.glb」を配置。
(2) metro.config.jsの config を以下のように編集。
const config = {
  resolver: {
    sourceExts: ['js', 'jsx', 'json', 'ts', 'tsx', 'cjs', 'mjs'],
    assetExts: ['fbx', 'glb', 'gltf', 'png', 'jpg'],
  },
};
・resolver : インポートされたモジュールやアセットの解決方法を指定
・sourceExts : ソースファイルとして認識されるファイル拡張子のリスト
・assetExts : アセットファイルとして認識されるファイル拡張子のリスト
(3) App.tsxの編集。
import React, { Suspense } from 'react';
import { View } from 'react-native';
import { Canvas } from '@react-three/fiber/native';
import { useGLTF } from '@react-three/drei/native';

// モデルプロパティ
interface ModelProps {
  url: string;
}

// モデル
const Model: React.FC<ModelProps> = ({ url }) => {
  const { scene } = useGLTF(url)
  scene.position.set(0, 0, -500);
  return <primitive object={scene} />;
};

// ローディングコンポーネント
const Loader: React.FC = () => {
  return <mesh />;
};

// アプリ
const App: React.FC = () => {
  return (
    <View style={{flex: 1}}>
      <Canvas style={{flex: 1}}>
        <ambientLight intensity={0.1} />
        <directionalLight color="white" position={[0, 0, 5]} />
        <Suspense fallback={<Loader />}>
          <Model url={require('./assets/Horse.glb')} />
        </Suspense>
      </Canvas>
    </View>
  );
}

export default App;
・Suspense
「Suspense」は、非同期処理のコンポーネントです。非同期で発生する操作を待機し、その間にローディングインジケーターなどの代替コンテンツを表示します。useGLTFで時間かかるとエラーになるので非同期処理にしています。
7-4. useFBX
(1) モデルを配置。
assets/ に three.jsのサンプルモデル「Samba_Dancing.fbx」を配置。
(3) App.tsxの編集。
import React, { Suspense, useRef, useEffect } from 'react';
import { View } from 'react-native';
import { Canvas, useFrame } from '@react-three/fiber/native';
import { useFBX } from '@react-three/drei/native';
import { AnimationMixer } from 'three';

// モデルプロパティ
interface ModelProps {
  url: string;
}

// モデル
const Model: React.FC<ModelProps> = ({ url }) => {
  const fbx = useFBX(url)
  const mixerRef = useRef<AnimationMixer | null>(null);

  useEffect(() => {
    // モーション再生
    if (fbx.animations.length > 0) {
      const mixer = new AnimationMixer(fbx);
      mixer.clipAction(fbx.animations[0]).play();
      mixerRef.current = mixer;
    }
  }, [fbx]);

  useFrame((state, delta) => {
    mixerRef.current?.update(delta);
  });

  fbx.position.set(0, 0, -500);
  return <primitive object={fbx} />;
};

// ローディングコンポーネント
const Loader: React.FC = () => {
  return <mesh />;
};

// アプリ
const App: React.FC = () => {
  return (
    <View style={{flex: 1}}>
      <Canvas style={{flex: 1}}>
        <ambientLight intensity={0.1} />
        <directionalLight color="white" position={[0, 0, 5]} />
        <Suspense fallback={<Loader />}>
          <Model url={require('./assets/Samba_Dancing.fbx')} />
        </Suspense>
      </Canvas>
    </View>
  );
}

export default App;
・不要なログの除去
不要なログが大量に表示されます。
LOG EXGL: gl.pixelStorei() doesn't support this parameter yet!「node_modules/three/build/three.cjs」の以下をコメントアウトすると消すことができます。
//_gl.pixelStorei( _gl.UNPACK_PREMULTIPLY_ALPHA_WEBGL, texture.premultiplyAlpha );
//_gl.pixelStorei( _gl.UNPACK_ALIGNMENT, texture.unpackAlignment );
//_gl.pixelStorei( _gl.UNPACK_COLORSPACE_CONVERSION_WEBGL, unpackConversion );
次回
この記事が気に入ったらサポートをしてみませんか?