diffusersのアダプタ まとめ

以下の記事が面白かったので、かるくまとめました。
1. diffusersのアダプタ
画像生成モデルをパーソナライズして、特定の被写体の画像のスタイルの画像を生成するための学習手法がいくつかあります。
・DreamBooth
・Textual Inversion
・LoRA
・IP-Adapter
これらの学習方法ごとに、「diffusers」では異なるタイプの「アダプタ」を提供しています。「アダプタ」は、そのモデルが生成する画像のスタイルや特性を調整するための追加的なコンポーネントを指します。
2. DreamBooth
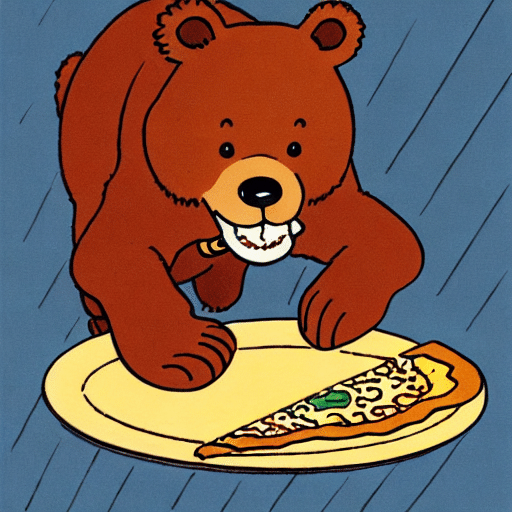
「DreamBooth」は、数枚の画像をもとに特定の被写体や絵柄を学習します。モデル全体を学習するため、ファイルサイズは大きく (数GB) なります。プロンプトにスペシャルワード (トリガーワード) を含めることで、学習内容が画像生成に反映されます。
「DreamBooth」の使用例は、次のとおりです。
from diffusers import AutoPipelineForText2Image
import torch

# パイプラインの準備
pipeline = AutoPipelineForText2Image.from_pretrained(
    "sd-dreambooth-library/herge-style",
    torch_dtype=torch.float16
).to("cuda")

# 画像生成
prompt = "A cute herge_style brown bear eating a slice of pizza, stunning color scheme, masterpiece, illustration"
image = pipeline(prompt).images[0]
image
・DreamBoothのモデル : sd-dreambooth-library/herge-style
・スペシャルワード : herge_style
3. Textual inversion
3-1. Textual inversion
「Textual Inversion」は、数枚の画像をもとに特定の被写体や絵柄を学習します。モデル全体ではなく新しい埋め込みのみ学習するため、ファイルサイズは小さく (数KB) なります。プロンプトにスペシャルワードを含めることで、学習内容が画像生成に反映されます。
「Textual Inversion」の使用例は、次のとおりです。
from diffusers import AutoPipelineForText2Image
import torch

# パイプラインの準備
pipeline = AutoPipelineForText2Image.from_pretrained(
    "runwayml/stable-diffusion-v1-5",
    torch_dtype=torch.float16
).to("cuda")

# Textual Inversionの埋め込みの読み込み
pipeline.load_textual_inversion(
    "sd-concepts-library/gta5-artwork"
)

# 画像生成
prompt = "A cute brown bear eating a slice of pizza, stunning color scheme, masterpiece, illustration, <gta5-artwork> style"
image = pipeline(prompt).images[0]
image
・ベースモデル : runwayml/stable-diffusion-v1-5
・Textual Inversionの埋め込み : sd-concepts-library/gta5-artwork
・スペシャルワード : <gta5-artwork>
load_textual_inversion() のパラメータは、次のとおりです。
・weight_name : ウェイトファイル名
・token : プロンプトで使用するスペシャルワード
3-2. EasyNegative
「Textual Inversion」は、望ましくない画像をもとにネガティブな埋め込みを作成し、望ましくないものを含む画像の生成防止にも利用できます。
# パイプラインの準備
pipeline = AutoPipelineForText2Image.from_pretrained(
    "runwayml/stable-diffusion-v1-5",
    torch_dtype=torch.float16
).to("cuda")

# Textual Inversionの埋め込みの読み込み
pipeline.load_textual_inversion(
    "sayakpaul/EasyNegative-test",
    weight_name="EasyNegative.safetensors",
    token="EasyNegative"
)

# 画像生成
prompt = "A cute brown bear eating a slice of pizza, stunning color scheme, masterpiece, illustration, EasyNegative"
negative_prompt = "EasyNegative"
image = pipeline(
    prompt,
    negative_prompt=negative_prompt,
    num_inference_steps=50
).images[0]
image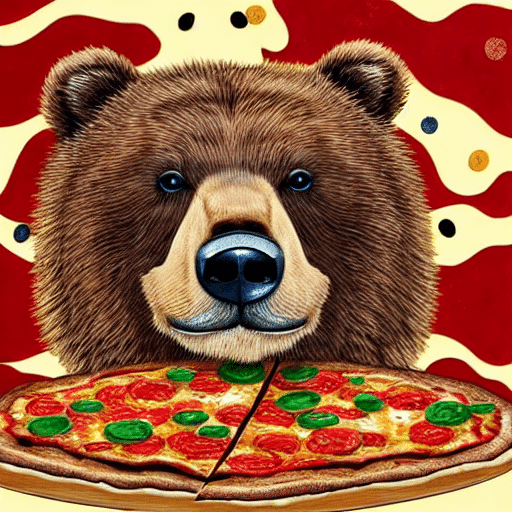
4. LoRA
4-1. LoRA
「LoRA」(Low-Rank Adaptation) は、数枚の画像をもとに特定の被写体や絵柄を学習します。モデル全体ではなく新しい埋め込みのみ学習するため、ファイルサイズは小さく (数MB) なります。プロンプトにスペシャルワードを含めることで、学習内容が画像生成に反映されます。
「LoRA」の使用例は、次のとおりです。
from diffusers import AutoPipelineForText2Image
import torch

# パイプラインの準備
pipeline = AutoPipelineForText2Image.from_pretrained(
    "stabilityai/stable-diffusion-xl-base-1.0",
    torch_dtype=torch.float16
).to("cuda")

# LoRAウェイトの読み込み
pipeline.load_lora_weights(
    "ostris/super-cereal-sdxl-lora",
    weight_name="cereal_box_sdxl_v1.safetensors"
)

# 画像生成
prompt = "bears, pizza bites"
image = pipeline(prompt).images[0]
image
・ベースモデル : stabilityai/stable-diffusion-xl-base-1.0
・LoRAウェイト : ostris/super-cereal-sdxl-lora
・スペシャルワード : 必要なし

load_lora_weights() は、LoRAウェイトを「UNet」と「テキストエンコーダ」の両方にロードします。
load_attn_procs() は、LoRAウェイトを「UNet」のみロードします。
from diffusers import AutoPipelineForText2Image
import torch
# パイプラインの準備
pipeline = AutoPipelineForText2Image.from_pretrained(
"stabilityai/stable-diffusion-xl-base-1.0",
torch_dtype=torch.float16
).to("cuda")
# LoRAウェイトの読み込み
pipeline.unet.load_attn_procs(
"jbilcke-hf/sdxl-cinematic-1",
weight_name="pytorch_lora_weights.safetensors"
)
# 画像生成
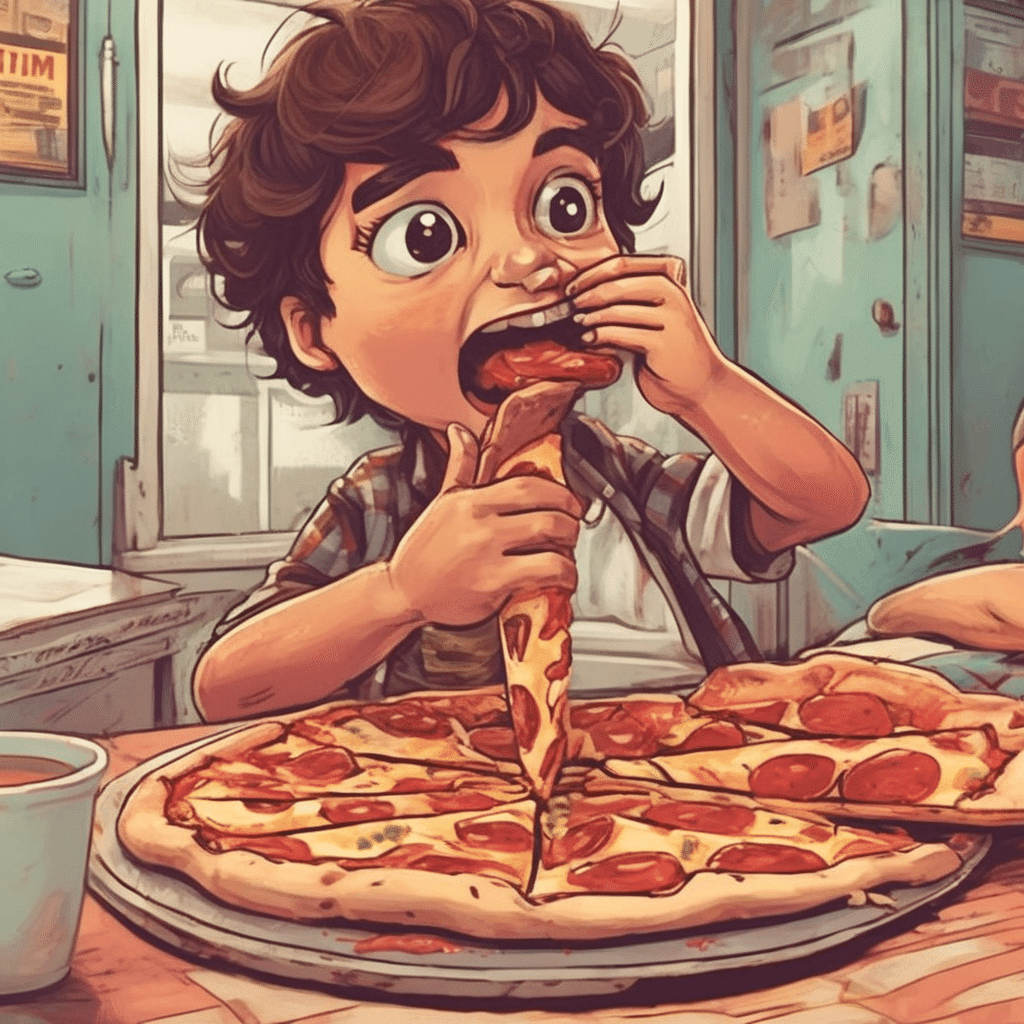
prompt = "A cute cnmt eating a slice of pizza, stunning color scheme, masterpiece, illustration"
image = pipeline(prompt).images[0]
image・ベースモデル : stabilityai/stable-diffusion-xl-base-1.0
・LoRAウェイト: jbilcke-hf/sdxl-cinematic-1
・スペシャルワード : cnmt
unload_lora_weights() は、LoRAウェイトを破棄し、モデルを元の重みに復元します。
pipeline.unload_lora_weights()4-2. Multiple LoRAs
fuse_lora() で、ベースモデルのウェイトとLoRAウェイトを融合できます。
from diffusers import StableDiffusionXLPipeline, AutoencoderKL
import torch

# パイプラインの準備
vae = AutoencoderKL.from_pretrained(
    "madebyollin/sdxl-vae-fp16-fix",
    torch_dtype=torch.float16
)
pipeline = StableDiffusionXLPipeline.from_pretrained(
    "stabilityai/stable-diffusion-xl-base-1.0",
    vae=vae,
    torch_dtype=torch.float16,
).to("cuda")

# LoRAウェイトの読み込み
pipeline.load_lora_weights(
    "ostris/ikea-instructions-lora-sdxl"
)

# LoRAウェイトの融合
pipeline.fuse_lora(lora_scale=0.7)
次のLoRAウェイトを読み込んで融合します。
# LoRAウェイトの読み込み
pipeline.load_lora_weights("ostris/super-cereal-sdxl-lora")

# LoRAウェイトの融合
pipeline.fuse_lora(lora_scale=0.7)
これで、両方の LoRAウェイトを使用して画像生成できます。
# 画像生成
prompt = "A cute brown bear eating a slice of pizza, stunning color scheme, masterpiece, illustration"
image = pipeline(prompt).images[0]
image元のモデルのウェイトに戻したい場合は、unfuse_lora() を使います。
# LoRAウェイトの融合の解除
pipeline.unfuse_lora()
4-3. Multiple LoRAs (PEFT版)
複数のLoRAウェイトを読み込んで使用するもう1つの方法は、load_lora_weights() で adapter_name を指定して、set_adapters() で複数のLoRAウェイトを有効化します。この方法では「PEFT」を利用します。
from diffusers import DiffusionPipeline
import torch

# パイプラインの準備
pipeline = DiffusionPipeline.from_pretrained(
    "stabilityai/stable-diffusion-xl-base-1.0",
    torch_dtype=torch.float16
).to("cuda")

# adapter_name付きでLoRAウェイトの読み込み
pipeline.load_lora_weights(
    "ostris/ikea-instructions-lora-sdxl",
    weight_name="ikea_instructions_xl_v1_5.safetensors",
    adapter_name="ikea"
)
pipeline.load_lora_weights(
    "ostris/super-cereal-sdxl-lora",
    weight_name="cereal_box_sdxl_v1.safetensors",
    adapter_name="cereal"
)

# 複数のLoRAウェイトの有効化
pipeline.set_adapters(
    ["ikea", "cereal"],
    adapter_weights=[0.7, 0.5]
)
4-4. Kohya と TheLastBen
コミュニティで人気のあるLoRAトレーナーには、「Kohya」と「TheLastBen」があります。これらのトレーナーは、diffusersによって学習されたものとは異なる LoRAチェックポイントを作成しますが、同じ方法で読み込むことができます。
「Civitai」から「Blueprintify SD XL 1.0」をダウンロードします。
!wget https://civitai.com/api/download/models/168776 -O blueprintify-sd-xl-10.safetensorsLoRAウェイトを load_lora_weights() で読み込み、weight_name にファイル名を指定します。
from diffusers import AutoPipelineForText2Image
import torch

# パイプラインの準備
pipeline = AutoPipelineForText2Image.from_pretrained(
    "stabilityai/stable-diffusion-xl-base-1.0",
    torch_dtype=torch.float16
).to("cuda")

# LoRAウェイトの読み込み
pipeline.load_lora_weights(
    ".",
    weight_name="blueprintify-sd-xl-10.safetensors"
)

# 画像生成
prompt = "bl3uprint, a highly detailed blueprint of the eiffel tower, explaining how to build all parts, many txt, blueprint grid backdrop"
image = pipeline(prompt).images[0]
image
・ベースモデル : stabilityai/stable-diffusion-xl-base-1.0
・LoRAウェイト : blueprintify-sd-xl-10.safetensors
・スペシャルワード : bl3uprint
5. IP-Adapter
5-1. IP-Adapter
「IP-Adapter」は、モデルに画像プロンプト機能を追加する、効果的で軽量なアダプタです。 このアダプタは、画像とテキストの機能のクロスアテンションレイヤーを分離することで機能します。他のすべてのモデルコンポーネントはフリーズされ、UNetに埋め込まれた画像特徴のみが学習されます。その結果、IP-Adapterファイルは通常、100MB 程度になります。
「IP-Adapter」を使用すると、画像とテキストの両方を使用して画像生成できます。
from diffusers import AutoPipelineForText2Image
import torch
from diffusers.utils import load_image

# パイプラインの準備
pipeline = AutoPipelineForText2Image.from_pretrained(
    "runwayml/stable-diffusion-v1-5",
    torch_dtype=torch.float16
).to("cuda")

# IP-Adapterの読み込み
pipeline.load_ip_adapter(
    "h94/IP-Adapter",
    subfolder="models",
    weight_name="ip-adapter_sd15.bin"
)

# IP-Adapterのスケールの指定
pipeline.set_ip_adapter_scale(0.6)

# 画像の準備
image = load_image("https://huggingface.co/datasets/huggingface/documentation-images/resolve/main/diffusers/load_neg_embed.png")

# 画像生成
generator = torch.Generator(device="cpu").manual_seed(33)
images = pipeline(
    prompt='best quality, high quality, wearing sunglasses',
    ip_adapter_image=image,
    negative_prompt="monochrome, lowres, bad anatomy, worst quality, low quality",
    num_inference_steps=50,
    generator=generator,
).images
images[0]
「IP-Adapter」は、Image-to-Image パイプラインや Inpainting パイプラインでもうまく動作します。
from diffusers import AutoPipelineForImage2Image
import torch
from diffusers.utils import load_image

# パイプラインの準備
pipeline = AutoPipelineForImage2Image.from_pretrained(
    "runwayml/stable-diffusion-v1-5",
    torch_dtype=torch.float16
).to("cuda")

# 画像の準備
image = load_image("https://huggingface.co/datasets/YiYiXu/testing-images/resolve/main/vermeer.jpg")
ip_image = load_image("https://huggingface.co/datasets/YiYiXu/testing-images/resolve/main/river.png")

# IP-Adapterの読み込み
pipeline.load_ip_adapter(
    "h94/IP-Adapter",
    subfolder="models",
    weight_name="ip-adapter_sd15.bin"
)

# 画像生成
generator = torch.Generator(device="cpu").manual_seed(33)
images = pipeline(
    prompt='best quality, high quality',
    image = image,
    ip_adapter_image=ip_image,
    num_inference_steps=50,
    generator=generator,
    strength=0.6,
).images
images[0]
「IP-Adapter」はSDXLでも使用可能です。
from diffusers import AutoPipelineForText2Image
from diffusers.utils import load_image
import torch

# パイプラインの準備
pipeline = AutoPipelineForText2Image.from_pretrained(
    "stabilityai/stable-diffusion-xl-base-1.0",
    torch_dtype=torch.float16
).to("cuda")

# 画像の準備
image = load_image("https://huggingface.co/datasets/sayakpaul/sample-datasets/resolve/main/watercolor_painting.jpeg")

# IP-Adapterの読み込み
pipeline.load_ip_adapter(
    "h94/IP-Adapter",
    subfolder="sdxl_models",
    weight_name="ip-adapter_sdxl.bin"
)

# 画像生成
generator = torch.Generator(device="cpu").manual_seed(33)
image = pipeline(
    prompt="best quality, high quality",
    ip_adapter_image=image,
    negative_prompt="monochrome, lowres, bad anatomy, worst quality, low quality",
    num_inference_steps=25,
    generator=generator,
).images[0]
image.save("sdxl_t2i.png")
5-2. IP-Adapter + LCM-LoRA
「LCM-Lora」で「IP-Adapter」を使用すると、画像生成の速度の高速化を実現できます。 LCM-Loraウェイトを読み込む前に、IP-Adapterウェイトを読み込む必要があります。
from diffusers import DiffusionPipeline, LCMScheduler
import torch
from diffusers.utils import load_image

# ID
model_id =  "sd-dreambooth-library/herge-style"
lcm_lora_id = "latent-consistency/lcm-lora-sdv1-5"

# パイプラインの準備
pipe = DiffusionPipeline.from_pretrained(
    model_id,
    torch_dtype=torch.float16
)

# IP-Adapterの読み込み
pipe.load_ip_adapter(
    "h94/IP-Adapter",
    subfolder="models",
    weight_name="ip-adapter_sd15.bin"
)

# LCM-LoRAウェイトの読み込み
pipe.load_lora_weights(lcm_lora_id)

# スケジューラの準備
pipe.scheduler = LCMScheduler.from_config(pipe.scheduler.config)
pipe.enable_model_cpu_offload()

# 画像生成
prompt = "best quality, high quality"
image = load_image("https://user-images.githubusercontent.com/24734142/266492875-2d50d223-8475-44f0-a7c6-08b51cb53572.png")
images = pipe(
    prompt=prompt,
    ip_adapter_image=image,
    num_inference_steps=4,
    guidance_scale=1,
).images[0]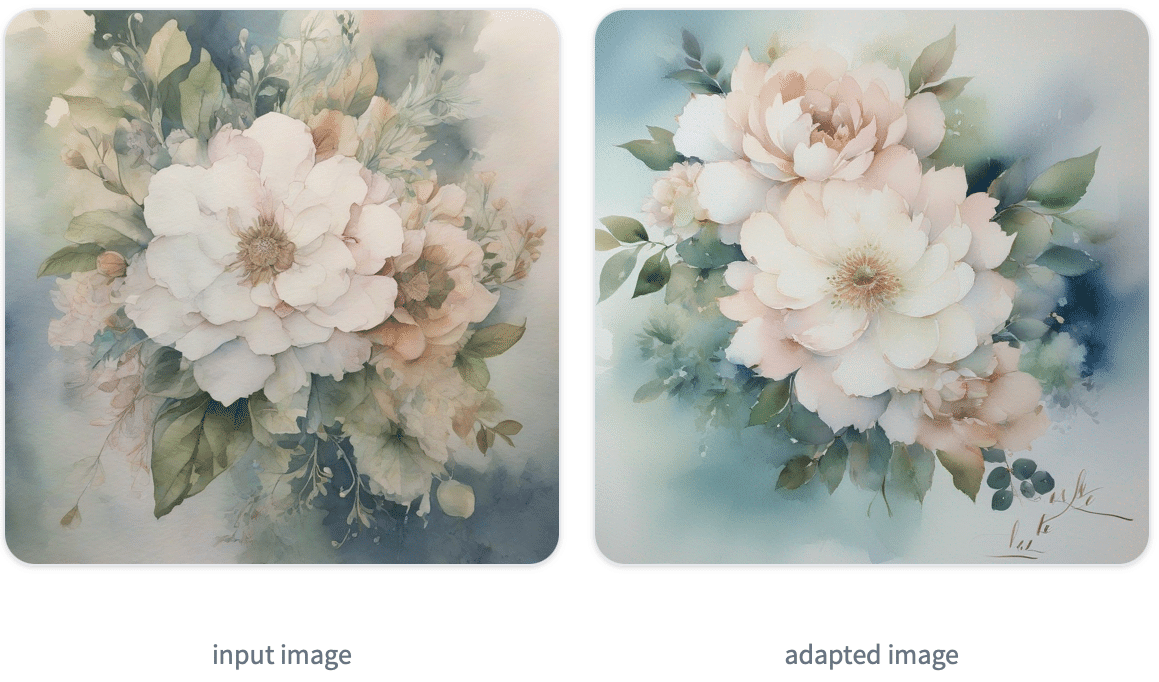
5-3. IP-Adapter + 他のパイプライン
「IP-Adapter」は、(1) テキスト プロンプトを使用し、(2) Stable Diffusion または Stable Diffusion XL チェックポイントを使用するパイプラインと互換性があります。 別のパイプラインで「IP-Adapter」を使用するには、パイプラインの作成後に load_ip_adapter() を実行し、イメージを ip_adapter_image としてパイプラインに渡すだけです。
from diffusers import StableDiffusionControlNetPipeline, ControlNetModel
import torch
from diffusers.utils import load_image

# ControlNetモデルの準備
controlnet_model_path = "lllyasviel/control_v11f1p_sd15_depth"
controlnet = ControlNetModel.from_pretrained(
    controlnet_model_path,
    torch_dtype=torch.float16
)

# パイプラインの準備
pipeline = StableDiffusionControlNetPipeline.from_pretrained(
    "runwayml/stable-diffusion-v1-5",
    controlnet=controlnet,
    torch_dtype=torch.float16
)
pipeline.to("cuda")

# 画像の準備
image = load_image("https://huggingface.co/datasets/YiYiXu/testing-images/resolve/main/statue.png")
depth_map = load_image("https://huggingface.co/datasets/YiYiXu/testing-images/resolve/main/depth.png")

# IP-Adapterの読み込み
pipeline.load_ip_adapter(
    "h94/IP-Adapter",
    subfolder="models",
    weight_name="ip-adapter_sd15.bin"
)

# 画像生成
generator = torch.Generator(device="cpu").manual_seed(33)
images = pipeline(
    prompt='best quality, high quality',
    image=depth_map,
    ip_adapter_image=image,
    negative_prompt="monochrome, lowres, bad anatomy, worst quality, low quality",
    num_inference_steps=50,
    generator=generator,
).images
images[0]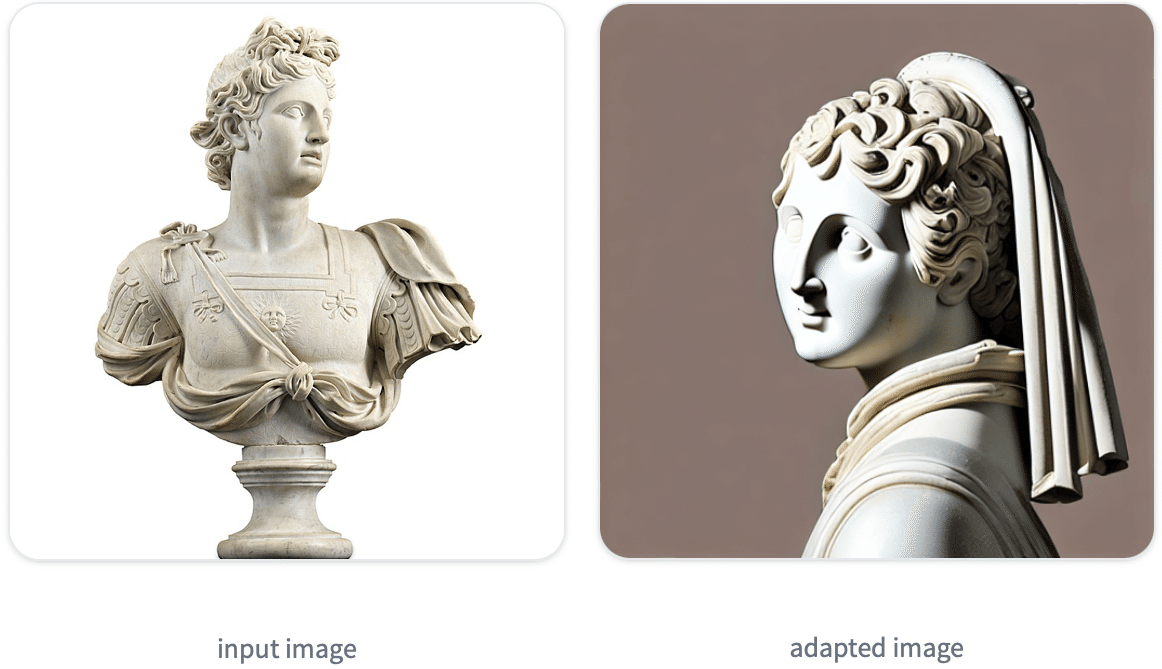
この記事が気に入ったらサポートをしてみませんか?