
Lightning Experience Reports & Dashboards Specialist②

続きです。
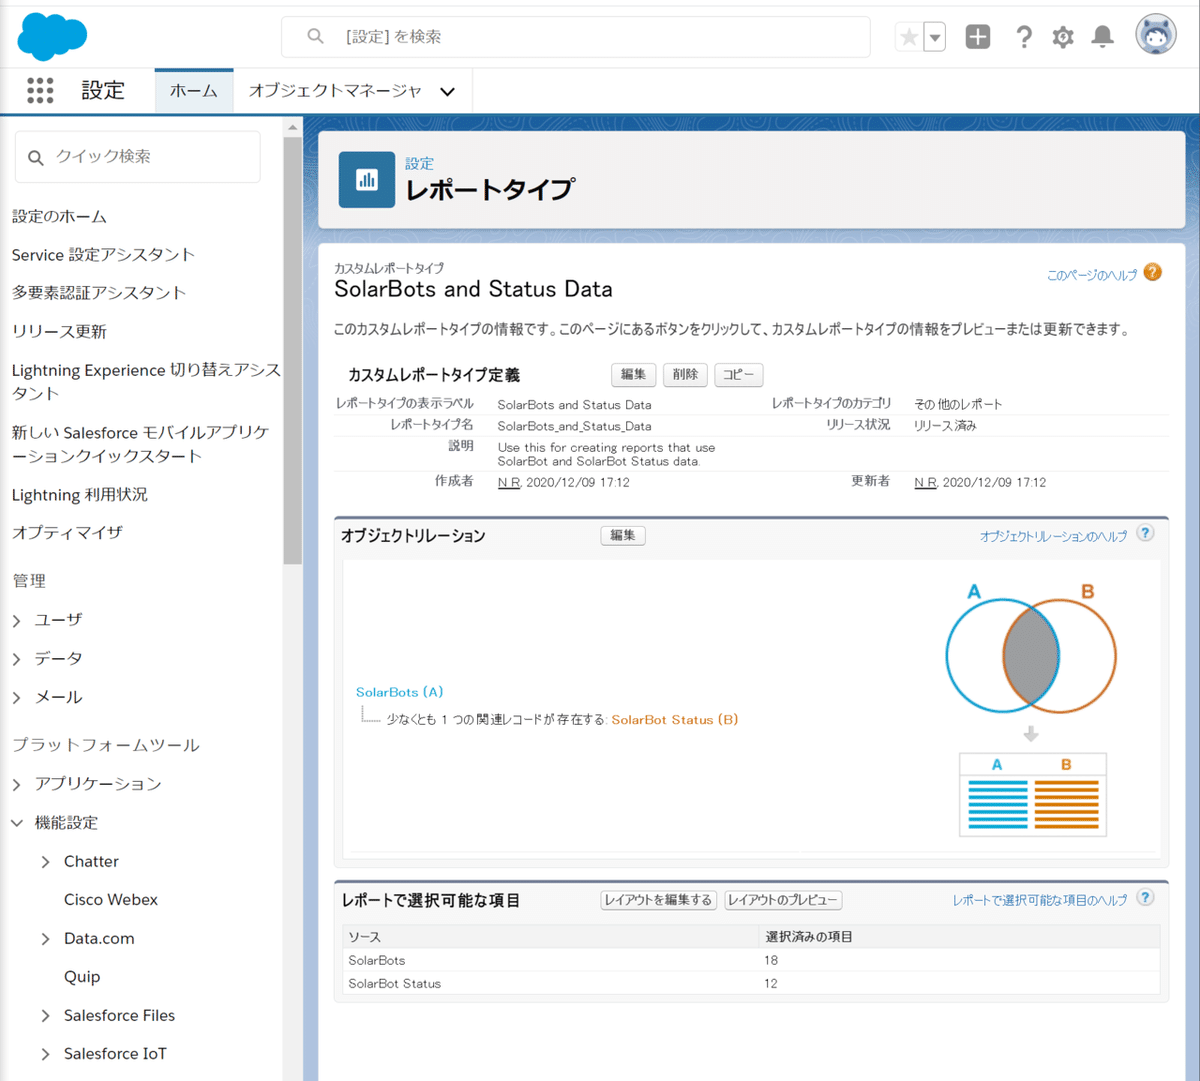
まずカスタムレポートタイプを作成します

指定された記事にて作成します
Label the solution SolarBots and Status Data.
Give the solution this description: Use this for creating reports that use SolarBot and SolarBot Status data.
Store the solution in the Other Reports category.
Reports using this solution should include SolarBot information, whether or not they have related SolarBot Status records. The SolarBot might not be activated yet.
These fields should not be selectable for reports using this solution.
kWh Roll-Up
Temp Roll-Up
Obscured Roll-Up
Number of Status Records
Maintenance Requested
↓
ソリューションに「SolarBotsとStatus Data」というラベルを付けてください。
ソリューションにこの説明を付けます。SolarBotとSolarBotステータスデータを使用するレポートの作成に使用します。
このソリューションは、[その他のレポート]カテゴリに保存します。
このソリューションを使用したレポートには、関連するSolarBot Statusレコードがあるかどうかに関わらず、SolarBot情報を含める必要があります。SolarBotがまだ有効化されていない可能性があります。
これらのフィールドは、このソリューションを使用したレポートでは選択できません。
kWh Roll-Up
Temp Roll-Up
Obscured Roll-Up
Number of Status Records
Maintenance Requested

からの

関連付けを行います。
完了したら次に「レイアウトを編集」を実行します。
項目レイアウトのプロパティで以下の項目を左の「SolarBot」「SolarBotStatus」から→にドラッグします。
「SolarBot」
・kWh Roll-Up
・Temp Roll-Up
・Obscured Roll-Up
・Number of Status Records
「SolarBotStatus」
・Maintenance Requested


項目の感受性が悪く、ドロップしづらくなっていますが頑張って持っていってください。
完了したら「保存」をクリック

次にまた、SolarBotアプリに戻り

フォルダの管理・権限について設定していきます。
Folder Administration
You know that feeling of dread as you search your pockets, bags, jackets, and countertop for missing car keys? And that feeling of contentment when everything is in the right place? Let’s kick off this reporting project with a solid folder and information security backbone, so you can feel comfortable and content. Maria Jimenez, Ursa Major’s Salesforce administrator, helped you organize folder and access requirements.
SolarBot report folders use the naming convention SolarBot [team/group] Reports. The teams and groups are:
Executive
Sales
Support
R&D
↓
フォルダ管理
あなたは、ポケット、バッグ、ジャケット、行方不明の車のキーのためのカウンタートップを検索するようにその恐怖の感覚を知っていますか?そして、すべてが適切な場所にあるときの満足感を知っていますか?堅固なフォルダーと情報セキュリティのバックボーンで、この報告プロジェクトを開始しましょう。ウルサメジャーのSalesforce管理者であるマリア・ヒメネス氏は、フォルダとアクセス要件の整理を手伝ってくれました。
SolarBotレポートフォルダは、SolarBot [チーム/グループ]レポートという命名規則を使用しています。チームやグループは以下の通りです。
Executive
Sales
Support
R&D
「レポート」タブ→「すべてのフォルダ」へ遷移

「新規フォルダ」より上記に記載のように4つのフォルダを作成していきます。

名前は自由ですが一意にわかりやすくなるように
SolarBot + 各フォルダ名 + Reports
としています。すべてを同階層に作ることも注意してください。
(SFDCは一つフォルダを作るとそのフォルダ内に展開されます)
全部作ったらこちらのようになると思います。

いまさらですが、TrailheadPlayGroundも新しく作ってSuperBadgesチャレンジするようにしてください。何かしらが悪さする恐れがあるので。
フォルダを作ったら次に共有設定を行っていきます。

条件としては
Remember those car keys that went missing? Turns out your cat knocked them behind the bookcase again. You decide to grant shelf access only to those in your household who need it—the humans. Following the same principle, at Ursa Major you grant report folder access only to existing public groups, based on these requirements.
Report and Dashboard Administrators can see and control access to all folders.
Sales Leadership Team members can control access to sales reports and look at support reports.
Sales Team members can look at sales reports.
Support Team members can look at and change support reports.
Executive Team members can see all reports and change executive reports.
Research and Development team members can manage R&D (Research and Development) reports and view support reports.
↓
行方不明になった車の鍵を覚えていますか?あなたの猫が本棚の後ろで再びそれらをノックしたことが判明しました。あなたは棚へのアクセスを必要としている家庭内の人間にのみ許可することにしました。同じ原則に従って、アーサメジャーでは、これらの要件に基づいて、既存のパブリックグループにのみレポートフォルダへのアクセスを許可します。
レポートとダッシュボードの管理者は、すべてのフォルダを表示し、アクセスを制御することができます。
セールスリーダーシップチームのメンバーは、セールスレポートへのアクセスを制御し、サポートレポートを見ることができます。
営業チームのメンバーは、営業レポートを見ることができます。
サポートチームのメンバーは、サポートレポートを見たり変更したりできます。
エグゼクティブチームのメンバーは、すべてのレポートを閲覧したり、エグゼクティブレポートを変更することができます。
研究開発チームのメンバーは、R&D(研究開発)レポートを管理し、サポートレポートを閲覧することができます。
となっています。まずはExcutiveから。

Report and Dashboead Admin:管理
Executive Team:編集
を追加して完了します。続いてSales。

Executive Team:表示
Report and Dashboead Admin:管理
Sales Leadership Team:管理
Sales Team:表示
を追加。続いてSupport。

上記のように追加。最後にR&D。

上記参考に。
フォルダ設定を終えたら「すべてのレポート」→「Erin's SB Opp Matrix for Sales」の▽「編集」

「保存」横の▽「プロパティ」

「フォルダを選択」

先ほど作成したフォルダが表示されていることを確認し、その中の
「SolarBot Sales Reports」を選択して「保存」

レポート自体も「保存」

続いて下のLincoln's SolarBot Research to removeの編集。
こちらは「ReportRecycle Bin」を選択し保存します。
のように操作していき、4つのレポートを以下のように設定します。

最後に「すべてのフォルダ」より「Support Reports」フォルダ内に新しく「Status Reports」フォルダを作成します。

これでSuperBadge内Challenge1の「challengeを確認」を押すと

①クリア~といった形になります。
こんな感じにかなり長くなりますが、全クリまでいましばし、頑張っていきましょう。ではまた。
N
私の常日頃の生活をベースに、皆さんの役に立てたり、探しているものを紹介できたらと思っています。今後もよろしくお願いします!