Laravel で エディタ(ckeditor)を実装する ①

今回は、laravelでエディタを使って投稿できるようにする方法について書きます。
エディタ
使うエティタはckeditorというものを使います。ckeditorを表示するとこんな感じです。ブログ記事などでもしかしたら、一度使ったことがある方もいるかも知れません。

上の例はメニューを減らしたので、初期の状態よりはかなり少なくなっています。本来はこれだけ機能があり、かなり高機能です。

ckeditor を使えるようにする
まずコマンドで以下を実行します。
composer require unisharp/laravel-ckeditorそして、config/app.php内のprovidersの中にUnisharp\Ckeditor\ServiceProvider::class,を追加します。
'providers' => [
        .
        .
        .

        Unisharp\Ckeditor\ServiceProvider::class,
    ],
コマンドで以下を実行
php artisan vendor:publish --tag=ckeditorこれで完了です。
ckeditor の表示
view
resources/view/app.blade.phpはこのようにします。
<!doctype html>
<html lang="ja">
    <head>
        <meta charset="utf-8">
        <meta name="viewport" content="width=device-width, initial-scale=1">

        <title>Laravel</title>

        <!-- Fonts -->
        <link href="https://fonts.googleapis.com/css?family=Nunito:200,600" rel="stylesheet" type="text/css">

        <!--Style-->
        <link rel="stylesheet" href="https://maxcdn.bootstrapcdn.com/bootstrap/4.0.0/css/bootstrap.min.css" integrity="sha384-Gn5384xqQ1aoWXA+058RXPxPg6fy4IWvTNh0E263XmFcJlSAwiGgFAW/dAiS6JXm" crossorigin="anonymous">

        <!--js-->
        <script src="/vendor/unisharp/laravel-ckeditor/ckeditor.js"></script>

    </head>
    <body>
      @yield('content')
      @yield('js')
    </body>

</html>
resources/views/post.blade.phpはこのようにします。
@extends('app')

@section('content')

<div class="container">
<div class="row justify-content-center">
<div class="col-md-8">
<br>
<br>
<br>

         <form action="#" method="post">
           {{csrf_field()}}

           <div class="form-group">
             <textarea class="form-control" name="description">

             </textarea>
           </div>

           <button class="btn btn-block btn-info">決定</botton>
          </form>

</div>
</div>
</div>

@endsection

@section('js')
<script>
 CKEDITOR.replace('description',{
   extraPlugins:'codesnippet',
   codeSnippet_theme:'dark',
   height:'370px',
   //removeButtons:'Unlink,Anchor, NewPage,DocProps,Preview,Print,Templates,Cut,Copy,Paste,PasteText,PasteFromWord,Undo,Redo,Find,Replace,SelectAll,Scayt,RemoveFormat,Outdent,Indent,Blockquote,Styles,About'

   });

</script>
@endsection
web.phpに以下を追加します。
Route::get('/post',function(){
    return view('post');
});
これで localhost:8000/post を入力するとこんな感じに表示されると思います。

ckeditor をカスタマイズ
今の段階では、メニューに全ての機能が表示されているので、そのメニュー欄を自分の好みや作るサイトにあうようにカスタマイズしていきます。
![]()
ボタンの名前は左からname: Source、NewPage、DocProps、Preview、Print、Templates
![]()
name: Cut、Copy、Paste、PasteText、PasteFromWord、Undo、Redo
![]()
name: Find、Replace、SelectAll、Scayt
![]()
name: Form、Checkbox、Radio、TextField、Textarea、Select、Button、ImageButton、HiddenField
![]()
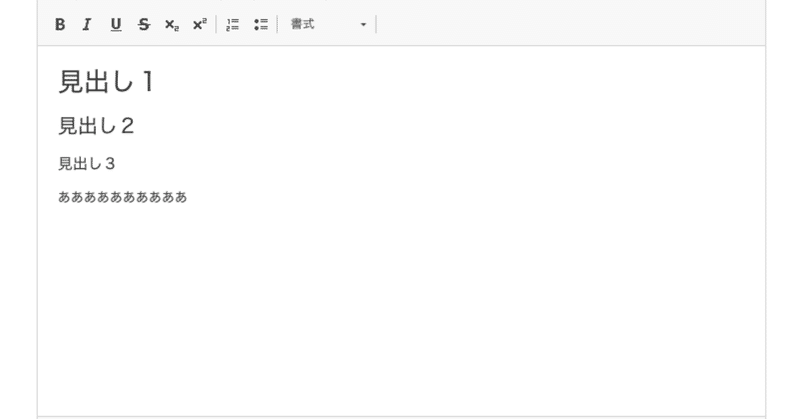
name: Bold、Italic、Underline、Strike、Subscript、Superscript、RemoveFormat
![]()
name: NumberedList、BulletedList、Outdent、Indent、Blockquote、CreateDiv、JustifyLeft、JustifyCenter、JustifyRight、JustifyBlock、BidiLtr、BidiRtl、Language
![]()
name: Link、Unlink、Anchor
![]()
name: Image、Flash、Table、HorizontalRule、SpecialChar、Smiley、PageBreak、Iframe
![]()
name: Styles、Format、Font、FontSize
![]()
name: TextColor、BGColor
![]()
name: Maximize、ShowBlocks
![]()
name: About
今回は機能を絞って表示できるようにします。
<script>
 CKEDITOR.replace('description',{
   extraPlugins:'codesnippet',
   codeSnippet_theme:'dark',
   height:'370px',

//以下を追加する
   removeButtons:'Unlink,Anchor, NewPage,DocProps,Preview,Print,Templates,Cut,Copy,Paste,PasteText,PasteFromWord,Undo,Redo,Find,Replace,SelectAll,Scayt,RemoveFormat,Outdent,Indent,Blockquote,Styles,About'
});

</script>
removeButtonsでツールバーに表示しない機能を使えなくします。removeButtons:'消したい機能のname' で消したい機能を消すことができます。
やってみるとこんな感じで機能がさっきのやつより減るのがわかります。。

ここまではckeditorの入力画面を表示することと、メニュー欄をカスタマイズする方法について書きました。次回は、入力画面で入力したものをデータベースに保存し表示するところまで書きたいと思います。