
Qt 6 QML 和訳文書 P674~P700

Qt for Python
This chapter describes the PySide6 module from the Qt for Python project. You will learn how to install it and how to leverage QML together with Python.
この章はQt for PythonプロジェクトからPySide6モジュールを記述します。あなたはそれをインストールする方法と、Pythonと共にQMLも活用する方法を学びます。
Introduction
The Qt for Python project provides the tooling to bind C++ and Qt to Python, and a complete Python API to Qt. This means that everything that you can do with Qt and C++, you can also do with Qt and Python. This ranges from headless services to widget based user interfaces. In this chapter, we will focus on how to integrate QML and Python. Currently, Qt for Python is available for all desktop platforms, but not for mobile. Depending on which platform you use, the setup of Python is slightly different, but as soon as you have a Python (https://www.python.org/) and PyPA (https://www.pypa.io/en/latest/) environment setup, you can install Qt for Python using pip . This is discussed in more detail further down. As the Qt for Python project provides an entirely new language binding for Qt, it also comes with a new set of documentation. The following resources are good to know about when exploring this module. Reference documentation: https://doc.qt.io/qtforpython/ Qt for Python wiki: https://wiki.qt.io/Qt_for_Python Caveats: https://wiki.qt.io/Qt_for_Python/Considerations The Qt for Python bindings are generated using the Shiboken tool. At times, it might be of interest to read about it as well to understand what is going on. The preferred point for finding information about Shiboken is the reference documentation (https://doc.qt.io/qtforpython/shiboken6/index.html) . If you want to mix your own C++ code with Python and QML, Shiboken is the tool that you need.
Qt for Python プロジェクトは、C++ と Qt を Python にバインドするためのツールと、完全な Python API を Qt にバインドするためのツールを提供します。これは、QtとC ++でできることはすべて、QtとPythonでも実行できることを意味します。これは、①ヘッドレスサービスからウィジェットベースのユーザーインターフェイスにまで及びます。この章では、QMLとPythonを統合する方法に焦点を当てます。現在、Qt for Pythonはすべてのデスクトッププラットフォームで利用できますが、モバイルでは使用できません。使用するプラットフォームによってPythonのセットアップは若干異なりますが、Python(https://www.python.org/)とPyPA(https://www.pypa.io/en/latest/)の環境設定ができ次第、pipを使ってQt for Pythonをインストールできます。これについては、後で詳しく説明します。Qt for PythonプロジェクトはQtにまったく新しい言語バインディングを提供するため、新しいドキュメントセットも付属しています。次のリソースは、このモジュールを探索する際に知っておくとよいでしょう。
リファレンスドキュメント:https://doc.qt.io/qtforpython/
Qt for Python wiki: https://wiki.qt.io/Qt_for_Python
注意事項:https://wiki.qt.io/Qt_for_Python/Considerations
Qt for Pythonバインディングは、シボケンツールを使用して生成されます。時々、何が起こっているのかを理解するためにそれについても読むことは興味深いかもしれません。Shibokenに関する情報を見つけるための好ましいポイントは、リファレンスドキュメント(https://doc.qt.io/qtforpython/shiboken6/index.html)です。独自のC ++コードをPythonおよびQMLと混在させたい場合は、シボケンが必要なツールです。
①
ヘッドレスサービスっていう言葉はありますか?
ChatGPT
はい、"ヘッドレスサービス"(Headless Service)という言葉は存在します。これは、クライアントとサーバーの間で通信を行う際に、UI(ユーザーインターフェース)を持たないサービスやアプリケーションを指す用語です。
通常、Webサーバーやマイクロサービスなどのバックエンドのコンポーネントは、ユーザーインターフェースの表示や操作を行いません。そのような場合、ヘッドレスサービスとして知られるサービスを利用することがあります。ヘッドレスサービスは、API(Application Programming Interface)を介して他のシステムやクライアントアプリケーションとやり取りし、データの処理や結果の提供を行います。
ヘッドレスサービスの例としては、コンテンツ管理システム(CMS)や電子商取引プラットフォームなどがあります。これらのサービスは、データの作成や更新、取得を行いながら、フロントエンドのUI表示は別のシステムやクライアントが担当します。ヘッドレスサービスを使用することで、バックエンドとフロントエンドの独立性が高まり、柔軟なシステム構築が可能となります。
したがって、"ヘッドレスサービス"は、ユーザーインターフェースを持たず、APIを通じてデータの処理や提供を行うサービスやアプリケーションを指す用語として使用されます。
TIP
Through-out this chapter we will use Python 3.7
この章を通して私たちはPython3.7を使います。
Installing Qt for Python is available through PyPA using pip under the name pyside6 . In the example below we setup a venv environment in which we will install the latest version of Qt for Python:
Qt for Pythonはpyside6の名の元、pipを使ってPyPAを通して利用可能です。下記の例では私たちがQt for Pythonの最新バージョンをインストールする仮想環境をセットアップします。
mkdir qt-for-python
cd qt-for-python
python3 -m venv .
source bin/activate
(qt-for-python) $ python --version
Python 3.9.6
When the environment is setup, we continue to install pyside6 using pip :
環境がセットアップされるとき、私たちはpipを使ってpyside6をインストールすることを続けます。
(qt-for-python) $ pip install pyside6
Collecting pyside6
Downloading [ ... ] (60.7 MB)
Collecting shiboken6==6.1.2
Downloading [ ... ] (1.0 MB)
Installing collected packages: shiboken6, pyside6
Successfully installed pyside6-6.1.2 shiboken6-6.1.2
After the installation, we can test it by running a Hello World example from the interactive Python prompt:
インストールの後、私たちは相互作用のPythonプロンプトからHello Worldエグザンプルを実行することでそれをテストします。
(qt-for-python) $ python
Python 3.9.6 (default, Jun 28 2021, 06:20:32)
[Clang 12.0.0 (clang-1200.0.32.29)] on darwin
Type "help", "copyright", "credits" or "license" for more infor
>>> from PySide6 import QtWidgets
>>> import sys
>>> app = QtWidgets.QApplication(sys.argv)
>>> widget = QtWidgets.QLabel("Hello World!")
>>> widget.show()
>>> app.exec()
0
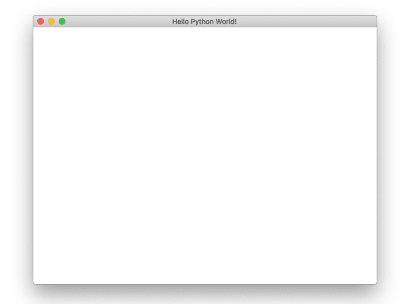
>>>The example results in a window such as the one shown below. To end the program, close the window.
ウィンドウ内のエグザンプルの結果は例えば下記に示された一つです。プログラムを終わらせるため、ウィンドウを閉じます。

Building an Application
In this chapter we will look at how you can combine Python and QML. The most natural way to combine the two worlds is to do as with C++ and QML, i.e. implement the logic in Python and the presentation in QML. To do this, we need to understand how to combine QML and Python into a single program, and then how to implement interfaces between the two worlds. In the sub-sections below, we will look at how this is done. We will start simple and progress to an example exposing the capabilities of a Python module to QML through a Qt item model.
この章では私たちはどのようにPythonとQMLを組み合わせることができるのかを見ます。二つの世界をつなぐ最も自然な方法は、C++とQMLで行うこと同様に、例えば、QML内の表現とPythonのロジックを実装することです。これを行うために、QMLとPythonを一つのプログラムに組み合わせる方法を理解する必要があります。下記のサブセクションでは、私たちはこれがどのように行われるのかを見ます。単純なものをはじめて、Qtアイテムモデルを通してQMLへPythonモジュールの能力を公開する例へ進みます。
Running QML from Python
The very first step is to create a Python program that can host the Hello World QML program shown below.
まさに最初のステップは下記に示されたHello World QMLプログラムを①ホストすることができるPythonプログラムをつくることです。
プログラミングでホストというと、どのような意味を持ちますか。
ChatGPT
プログラミングの文脈では、"ホスト"(host)という用語は複数の意味を持つことがあります。以下にいくつかの一般的な意味を示します。
ホストコンピュータ(Host Computer): プログラムやアプリケーションが実行される物理的なコンピュータやサーバーを指します。例えば、ウェブサイトをホストするためには、ウェブサーバーがホストコンピュータとして機能します。
ホスト言語(Host Language): プログラミング言語の文脈で使用される用語で、他の言語や環境に埋め込まれる形で使用される言語を指します。たとえば、C言語は、他のプログラミング言語(ホスト言語)に埋め込まれて使用されることがあります。
ホスト環境(Host Environment): プログラムが実行されるための実行環境やフレームワークを指します。例えば、JavaScriptの場合、ウェブブラウザがホスト環境となり、JavaScriptプログラムが実行されます。
ホストアプリケーション(Host Application): プラグインや拡張機能などが組み込まれる主要なアプリケーションを指します。プラグインがホストアプリケーションと連携して機能する場合、ホストアプリケーションはプラグインをホストします。
ここでは、3?
これらは一般的な意味であり、文脈によって異なる場合もあります。そのため、具体的な文脈に応じて、"ホスト"の意味を適切に理解する必要があります。
import QtQuick
import QtQuick.Window
Window {
    width: 640
    height: 480
    visible: true
    title: qsTr("Hello Python World!")
}
To do this, we need a Qt mainloop provided by QGuiApplication from the QtGui module. We also need a QQmlApplicationEngine from the QtQml module. In order to pass the reference to the source file to the QML application engine, we also need the QUrl class from the QtCore module. In the code below we emulate the functionality of the boilerplate C++ code generated by Qt Creator for QML projects. It instantiates the application object, and creates a QML application engine. It then loads the QML and then ensures that the QML was loaded by checking if a root object was created. Finally, it exits and returns the value returned by the exec method of the application object.
これを行うために、私たちはQtGuiモジュールからのQGuiApplicationによって提供されるQtのメインループを必要とします。私たちはQtQmlモジュールからQQmlApplicationEngineも必要とします。QMLアプリケーションエンジンへソースファイルへのリファレンスを渡すために、私たちはQUrlクラスをQtCoreモジュールからも必要とします。下記のコード内では、QMLプロジェクトのためのQt Creatorによって造られた①ボイラープレートのC++コードの機能をエミュレートしています。それはアプリケーションオブジェクトを制し、そしてQMLアプリケーションエンジンを作ります。その時、QMLを読込、もしルートオブジェクトが作られたらQMLはチェックすることによって読み込まれることを保証します。最後に、アプリケーションオブジェクトのexecメソッドによって返される値を返し、ループを抜けます。
これらは一般的な意味であり、文脈によって異なる場合もあります。そのため、具体的な文脈に応じて、"ホスト"の意味を適切に理解する必要があります。
import sys
from PySide6.QtGui import QGuiApplication
from PySide6.QtQml import QQmlApplicationEngine
from PySide6.QtCore import QUrl
if __name__ == '__main__':
    app = QGuiApplication(sys.argv)
    engine = QQmlApplicationEngine()
    engine.load(QUrl("main.qml"))
    if not engine.rootObjects():
       sys.exit(-1)
       sys.exit(app.exec())
Executing the example results in a window with the title Hello Python World.
例を実行することはHello Python Worlldというタイトルのウィンドウが結果になります。
TIP
The example assumes that it is executed from the directory containing the main.qml source file. You can determine the location of the Python file being executed using the __file__ variable. This can be used to locate the QML files relative to the Python file as shown in this blog post (http://blog.qt.io/blog/2018/05/14/qml-qt-python/) .
例は、main.qmlソースファイルを持つディレクトリから実行されることを想定しています。あなたは__file__変数を使って実行されているPythonファイルの位置を決定することができます。これはこのブログポスト内で示されている通りPythonファイルに関連するQMLファイルを位置づけるために利用することができます。
Exposing Python Objects to QML
The easiest way to share information between Python and QML is to expose a Python object to QML. This is done by registering a context property through the QQmlApplicationEngine . Before we can do that, we need to define a class so that we have an object to expose. Qt classes come with a number of features that we want to be able to use. These are: signals, slots and properties. In this first example, we will restrict ourselves to a basic pair of signal and slot. The rest will be covered in the examples further on.
PythonとQML間で情報を共有する最も簡単な方法はPythonオブジェクトをQMLへ公開することです。これはQQmlApplicationEngineを通して、context propertyを登録することによって行われます。私たちがそれを行う前に、私たちは公開するオブジェクトをもつためにクラスを定義する必要があります。Qtクラスは私たちが使うことができるようになりたい多くの機能を持っています。これらは、signals, slotsそしてpropertiesです。この最初の例では、私たちは基本的なペアのシグナルとスロットに制限します。残りはさらなるエグザンプルの中でカバーされます。
Signals and Slots
We start with the class NumberGenerator . It has a constructor, a method called updateNumber and a signal called nextNumber . The idea is that when you call updateNumber , the signal nextNumber is emitted with a new random number. You can see the code for the class below, but first we will look at the details. First of all we make sure to call QObject.__init__ from our constructor. This is very important, as the example will not work without it. Then we declare a signal by creating an instance of the Signal class from the PySide6.QtCore module. In this case, the signal carries an integer value, hence the int . The signal parameter name, number , is defined in the arguments parameter. Finally, we decorate the updateNumber method with the @Slot() decorator, thus turning it into a slot. There is no concept of invokables in Qt for Python, so all callable methods must be slots. In the updateNumber method we emit the nextNumber signal using the emit method. This is a bit different than the syntax for doing so from QML or C++ as the signal is represented by an object instead of being a callable function.
NumberGeneratorクラスで始めます。updateNumberと呼ばれるコンストラクタ、メソッドを持ち、nextNumberと呼ばれるシグナルを持ちます。あなたがupdateNumberと呼ぶとき、signal nextNumberが新しいランダムの数で発行されるという考えです。あなたは下記のクラスのためのコードを見ることができますが、最初に私たちは詳細に目を向けます。とりわけ私たちは、QObject._init_ from our constructorを確実に呼びます。これはとても重要で、それなくしてエグザンプルは動かないからです。PySide6.QtCoreモジュールからSignalクラスのインスタンスをつくることによってシグナルを宣言します。シグナル引数name, number, は引数内で定義されます。最後に、私たちは@Slotデコレータを使ってupdateNumberメソッドをデコレートし、そのようにしてそれをスロットへ変えます。Qt for Python内で引き起こすことが可能な概念はまったくなく、全てのコール可能なメソッドはslotsでなければなりません。updateNumberメソッド内で私たちはnextNumberシグナルをemitメソッドを使って発行します。シグナルは呼び出し可能な関数である代わりにオブジェクトによって表現されるので、これはQMLあるいはC++からのそれを行うためのシンタックスとはちょっと異なっています。
import random
from PySide6.QtCore import QObject, Signal, Slot
class NumberGenerator(QObject):
    def __init__(self):
        QObject.__init__(self)
        nextNumber = Signal(int, arguments=['number'])
    @Slot()
    def giveNumber(self):
        self.nextNumber.emit(random.randint(0, 99))
Next up is to combine the class we just created with the boilerplate code for combining QML and Python from earlier. This gives us the following entrypoint code. The interesting lines are the one where we first instantiate a NumberGenerator . This object is then exposed to QML using the setContextProperty method of the rootContext of the QML engine. This exposes the object to QML as a global variable under the name numberGenerator .
次にあげるのは私たちがQMLとPythonを早くから組み合わせるためのボイラープレートコードでつくられたクラスを組み合わせることです。①これは次のエントリポイントコードを与えてくれます。興味深い行は私たちがNumberGeneratorを最初にインスタンス化するところです。このオブジェクトはQMLエンジンのrootContextのsetContextPropertyメソッドを使ってQMLに公開されます。これはnumberGeneratorという名前でオブジェクトをグローバル変数としてQMLへ公開します。
①エントリポイントとは
ChatGPT
エントリポイント(Entry Point)とは、プログラムの実行が開始される場所や、外部からアクセスされるメインのポイントを指します。プログラムの実行が始まる際、エントリポイントは最初に実行されるコードや関数のことを指します。
エントリポイントは、プログラムの起動や実行フローの制御を担当します。多くのプログラミング言語やフレームワークでは、エントリポイントの特定の命名規則や構造が定義されています。プログラムが実行されるとき、エントリポイントが呼び出され、それによって他のコードや関数が実行されるようになります。
具体的な例としては、以下のような場合があります。
C言語でのエントリポイント: C言語では、通常、main関数がエントリポイントとして機能します。プログラムが実行されると、最初にmain関数が呼び出され、プログラムの実行が開始されます。
cCopy codeint main() {
    // プログラムの実行フローが始まる
    // ...
    return 0;
}
Javaでのエントリポイント: Javaでは、エントリポイントはmainメソッドとして知られています。Javaプログラムが実行されると、mainメソッドが呼び出され、プログラムの実行が開始されます。
javaCopy codepublic class Main {
    public static void main(String[] args) {
        // プログラムの実行フローが始まる
        // ...
    }
}
Webアプリケーションでのエントリポイント: Webアプリケーションでは、一般的に特定のURLやエンドポイントがエントリポイントとして機能します。クライアントからのリクエストが特定のURLに到達すると、そのURLに関連付けられたコードやハンドラが実行されます。
エントリポイントはプログラムの制御を開始する重要なポイントであり、プログラムの挙動や機能に大きな影響を与えます。プログラムの実行フローを理解し、適切にエントリポイントを設定することが重要です。
import sys
from PySide6.QtGui import QGuiApplication
from PySide6.QtQml import QQmlApplicationEngine
from PySide6.QtCore import QUrl
if __name__ == '__main__':
    app = QGuiApplication(sys.argv)
    engine = QQmlApplicationEngine()
    number_generator = NumberGenerator()
    engine.rootContext().setContextProperty("numberGenerator",
    engine.load(QUrl("main.qml"))
    if not engine.rootObjects():
        sys.exit(-1)
        sys.exit(app.exec())
Continuing to the QML code, we can see that we’ve created a Qt Quick Controls 2 user interface consisting of a Button and a Label . In the button’s onClicked handler, the numberGenerator.updateNumber() function is called. This is the slot of the object instantiated on the Python side. To receive a signal from an object that has been instantiated outside of QML we need to use a Connections element. This allows us to attach a signal handler to an existing target.
QMLコードで続けるために、ボタンとラベルで構成するQt Quick Controls2 ユーザーインターフェースを作ったということがわかります。ボタンのonClickedハンドラ内では、numberGenerator.updateNumber()関数が呼ばれます。これはPython側で生成されるオブジェクトのスロットです。QMLの外部で生成されたオブジェクトからのシグナルを受け取るためには、私たちはConnections要素を使う必要があります。これは存在しているターゲットへシグナルハンドラを取り付けるようにするものです。
import QtQuick
import QtQuick.Window
import QtQuick.Controls
Window {
    id: root
    width: 640
    height: 480
    visible: true
    title: qsTr("Hello Python World!")
    Flow {
        Button {
            text: qsTr("Give me a number!")
            onClicked: numberGenerator.giveNumber()
    }
    Label {
        id: numberLabel
        text: qsTr("no number")
        }
    }
    Connections {
        target: numberGenerator
        function onNextNumber(number) {
        numberLabel.text = number
                }
        }
}
Properties
Instead of relying solely on signals and slots, the common way to expose state to QML is through properties. A property is a combination of a setter, getter and notification signal. The setter is optional, as we can also have read-only properties. To try this out we will update the NumberGenerator from the last example to a property based version. It will have two properties: number , a readonly property holding the last random number, and maxNumber , a readwrite property holding the maximum value that can be returned. It will also have a slot, updateNumber that updates the random number. Before we dive into the details of properties, we create a basic Python class for this. It consists of the relevant getters and setters, but not Qt signalling. As a matter of fact, the only Qt part here is the inheritance from QObject . Even the names of the methods are Python style, i.e. using underscores instead of camelCase. Take notice of the underscores (“ __ ”) at the beginning of the __set_number method. This implies that it is a private method. So even when the number property is read-only, we provide a setter. We just don’t make it public. This allows us to take actions when changing the value (e.g. emitting the notification signal).
シグナルとスロットだけに依存する代わりに、QMLへステート(状態)を公開する一般的な方法は、プロパティを通す事です。プロパティはセッター、ゲッターと、通知シグナルの組み合わせです。セッターは任意であり、私たちは読取専用のプロパティも持つことができます。これを試してみるに、私たちは最後のエグザンプルからNumberGeneratorを更新し、プロパティを基本としたバージョンにします。二つのプロパティを持ちます。number, 最後のランダムナンバーをもつ読取り専用プロパティです。maxNumber,戻り値として返せる最大値を持つ読書可能プロパティです。私たちがプロパティの詳細に飛び込む前に、このための基本的なPythonクラスを作ります。関連するゲッターとセッターを構成しますが、Qtのシグナルはありません。実際に重要なのは、ここで唯一のQtの部品はQObjectからの継承であるということです。メソッドの名前さえもPythonスタイルで、キャメルケースの代わりにアンダースコアを用います。__set_numberメソッドの始まりの__に注意して下さい。これはプライベートメソッドであることを意味しています。だからnumber propertyが読取専用であるときでさえ、私たちはセッターを提供します。私たちはそれを公開しません。これは値を変更するときにアクションをとることができます。(例えば、notificationシグナルを発行することです。)
class NumberGenerator(QObject):
    def __init__(self):
        QObject.__init__(self)
        self.__number = 42
        self.__max_number = 99
    def set_max_number(self, val):
        if val < 0:
            val = 0
        if self.__max_number != val:
            self.__max_number = val
        if self.__number > self.__max_number:
            self.__set_number(self.__max_number)
     def get_max_number(self):
         return self.__max_number
     def __set_number(self, val):
         if self.__number != val:
             self.__number = val
     def get_number(self):
         return self.__number
In order to define properties, we need to import the concepts of Signal , Slot , and Property from PySide2.QtCore . In the full example, there are more imports, but these are the ones relevant to the properties.
プロパティを定義するために、私たちは、Signal, Slot,そして①PySide2.QtCoreからPropertyの概念をインポートする必要があります。完全な例では、よりたくさんのインポートがありますが、これらはプロパティに関連するものです。
①PySide6の間違い?
from PySide6.QtCore import QObject, Signal, Slot, PropertyNow we are ready to define the first property, number . We start off by declaring the signal numberChanged , which we then invoke in the __set_number method so that the signal is emitted when the value is changed. After that, all that is left is to instantiate the Property object. The Property constructor takes three arguments in this case: the type ( int ), the getter ( get_number ) and the notification signal which is passed as a named argument ( notify=numberChanged ). Notice that the getter has a Python name, i.e. using underscore rather than camelCase, as it is used to read the value from Python. For QML, the property name, number , is used.
今私たちは最初のプロパティを定義する準備が整っています。私たちはシグナル numberChangedを宣言することからスタートし、私たちはそれから__set_numberメソッド内で値が変更されるときにそのシグナルが発行されるように呼び出します。その後、残されている全ては、Propertyオブジェクトを生成することです。Propertyコンストラクタはこの場合に3つの引数を取ります。type(int), getter(get_number)そしてそして、(notify=numberChanged)と名付けられた引数として渡される通知シグナルです。ゲッターはPythonの名前を持ち、(キャメルケースよりアンダースコアをつかっていて、)パイソンから値を読むために使われることに注意してください。QMLのためには、プロパティの名前は、ナンバーが使われます。
class NumberGenerator(QObject):
# ...
# number
    numberChanged = Signal(int)
    def __set_number(self, val):
        if self.__number != val:
            self.__number = val
            self.numberChanged.emit(self.__number)
    def get_number(self):
        return self.__number
    number = Property(int, get_number, notify=numberChanged)
This leads us to the next property, maxNumber . This is a read-write property, so we need to provide a setter, as well as everything that we did for the number property.
これは次のプロパティ、maxNumberを導きます。これは読み書き可能プロパティで、numberプロパティに対して行った全てだけでなく、私たちはセッターを必要とします。
First up we declare the maxNumberChanged signal. This time, using the @Signal decorator instead of instantiating a Signal object. We also provide a setter slot, setMaxNumber with a Qt name (camelCase) that simply calls the Python method set_max_number alongside a getter with a Python name. Again, the setter emits the change signal when the value is updated. Finally we put the pieces together into a read-write property by instantiating a Property object taking the type, getter, setter and notification signal as arguments.
最初に私たちはmaxNumberChangedシグナルを宣言します。この時、@Signalデコレータを、Signalオブジェクトを生成する代わりに使います。私たちはセッタースロットsetMaxNumberをQt名で(キャメルケース)も提供し、単純にPython名でのゲッターにのそばにあるPythonのメソッドset_max_numberを呼ぶだけです。また、セッターは値が更新されるとchangeシグナルを発行します。最後に、引数として、getter, setter,そして通知シグナルを取るプロパティオブジェクトをインスタンス化することによって読込書き込みプロパティへコード片をまとめて組み立てます。
class NumberGenerator(QObject):
# ...
# maxNumber
    @Signal
    def maxNumberChanged(self):
        pass
    @Slot(int)
    def setMaxNumber(self, val):
        self.set_max_number(val)
    def set_max_number(self, val):
        if val < 0:
            val = 0
        if self.__max_number != val:
           self.__max_number = val
           self.maxNumberChanged.emit()
        if self.__number > self.__max_number:
           self.__set_number(self.__max_number)
        def get_max_number(self):
           return self.__max_number
    maxNumber = Property(int, get_max_number, set_max_number, n
Now we have properties for the current random number, number , and the maximum random number, maxNumber . All that is left is a slot to produce a new random number. It is called updateNumber and simply sets a new random number.
今私たちは現在のrandom number, number, そしてmaximum random number, maxNumberのためにプロパティを持ちます。残されている全ては新しいrandomナンバーを作るためのスロットです。新しいランダムナンバーを単純にセットし、updateNumberを呼びます。
class NumberGenerator(QObject):
# ...
    @Slot()
    def updateNumber(self):
        self.__set_number(random.randint(0, self.__max_number))
Finally, the number generator is exposed to QML through a root context property.
最後に、numberジェネレータはルートコンテキストプロパティを通してQMLに公開されます。
if __name__ == '__main__':
    app = QGuiApplication(sys.argv)
    engine = QQmlApplicationEngine()
    number_generator = NumberGenerator()
    engine.rootContext().setContextProperty("numberGenerator",
    engine.load(QUrl("main.qml"))
    if not engine.rootObjects():
        sys.exit(-1)
        sys.exit(app.exec())
In QML, we can bind to the number as well as the maxNumber properties of the numberGenerator object. In the onClicked handler of the Button we call the updateNumber method to generate a new random number and in the onValueChanged handler of the Slider we set the maxNumber property using the setMaxNumber method. This is because altering the property directly through Javascript would destroy the bindings to the property. By using the setter method explicitly, this is avoided.
QMLでは、私たちはnumberGeneratorオブジェクトのmaxNumberプロパティだけでなく、数にバインドできます。ボタンのonClickedハンドラ内に私たちは新しいランダムナンバーを発生させるためのupdateNumberメソッドを、スライダーのonValueChangedハンドラ内には、setMaxNumberメソッドを使っているmaxNumberプロパティをセットします。これはJavaScroptから直接プロパティを変更することは、プロパティへのバインディングを破壊するためです。明示的にセッターメソッドを使うことにより、これは避けられます。
import QtQuick
import QtQuick.Window
import QtQuick.Controls
Window {
    id: root
    width: 640
    height: 480
    visible: true
    title: qsTr("Hello Python World!")
    Column {
        Flow {
            Button {
                text: qsTr("Give me a number!")
                onClicked: numberGenerator.updateNumber()
            }
        Label {
                id: numberLabel
                text: numberGenerator.number
               }
            }
        Flow {
               Slider {
                 from: 0
                 to: 99
                 value: numberGenerator.maxNumber
                 onValueChanged: numberGenerator.setMaxNumber(va}
                    }
             }
}
Exposing a Python class to QML
Up until now, we’ve instantiated an object Python and used the setContextProperty method of the rootContext to make it available to QML. Being able to instantiate the object from QML allows better control over object life-cycles from QML. To enable this, we need to expose the class, instead of the object, to QML. The class that is being exposed to QML is not affected by where it is instantiated. No change is needed to the class definition. However, instead of calling setContextProperty , the qmlRegisterType function is used. This function comes from the PySide2.QtQml module and takes five arguments:
今まで、私たちはあるオブジェクトPythonを初期化し、QMLで利用可能にするrootContextのうちsetContextPropertyメソッドを使いました。QMLからオブジェクトを生成することができるということは、QMLからオブジェクトのライフサイクルを越えてよりよいコントロールをすることができます。これを可能にするには、私たちはそのクラスを、そのオブジェクトの代わりにQMLに公開する必要があります。QMLに公開されているクラスは生成されている場所によって影響をうけません。クラス定義へは全く変更が必要ありません。しかし、setContextPropertyを呼ぶ代わりに、qmlRegisterType関数が使われます。この関数はPySide2.QtQmlモジュールからきていて、5つの引数を取ります。
A reference to the class, NumberGenerator in the example below.
A module name, 'Generators' .
A module version consisting of a major and minor number, 1 and 0 meaning 1.0 .
The QML name of the class, 'NumberGenerator'
クラスへのリファレンス、下記の例の中のNumberGenerator
モジュール名'Generators'
メジャーとマイナーのナンバーを構成しているモジュールバージョン。1と0は、1.0を意味します。
クラスのQML名,'NumberGenerator'
import random
import sys
from PySide6.QtGui import QGuiApplication
from PySide6.QtQml import QQmlApplicationEngine, qmlRegisterTyp
from PySide6.QtCore import QUrl, QObject, Signal, Slot
class NumberGenerator(QObject):
    def __init__(self):
        QObject.__init__(self)
        nextNumber = Signal(int, arguments=['number'])
    @Slot()
    def giveNumber(self):
        self.nextNumber.emit(random.randint(0, 99))
    if __name__ == '__main__':
        app = QGuiApplication(sys.argv)
        engine = QQmlApplicationEngine()
        qmlRegisterType(NumberGenerator, 'Generators', 1, 0, 'Numbe
        engine.load(QUrl("main.qml"))
        if not engine.rootObjects():
            sys.exit(-1)
            sys.exit(app.exec())
In QML, we need to import the module, e.g. Generators 1.0 and then instantiate the class as NumberGenerator { ... } . The instance now works like any other QML element.
QMLでは、私たちはimport moduleをする必要があります。例えば、Generators 1.0とそれからNumberGenerator{…}としてクラスを初期化します。インスタンスは今や他のQML要素のように動きます。
import QtQuick
import QtQuick.Window
import QtQuick.Controls
import Generators
Window {
    id: root
    width: 640
    height: 480
    visible: true
    title: qsTr("Hello Python World!")
    Flow {
        Button {
            text: qsTr("Give me a number!")
            onClicked: numberGenerator.giveNumber()
            }
        Label {
            id: numberLabel
            text: qsTr("no number")
            }
         }
        NumberGenerator {
            id: numberGenerator
            }
        Connections {
            target: numberGenerator
            function onNextNumber(number) {
            numberLabel.text = number
            }
      }
}
A Model from Python
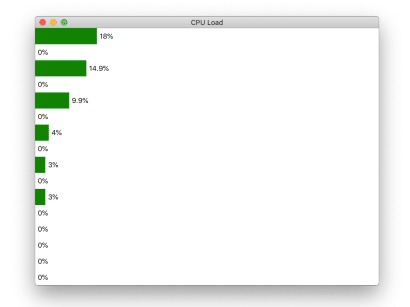
One of the more interesting types of objects or classes to expose from Python to QML are item models. These are used with various views or the Repeater element to dynamically build a user interface from the model contents. In this section we will take an existing python utility for monitoring CPU load (and more), psutil , and expose it to QML via a custom made item model called CpuLoadModel . You can see the program in action below:
PythonからQMLへ公開されるより興味深いタイプのオブジェクトやクラスの一つはアイテムモデルです。これらはいろいろなビューや、動的にモデルコンテンツからユーザーインターフェースを組み立てるためのリピーター要素で使われるものです。このセクションでは、CPU読みこみ(そしてそれ以上に)、psutil,そしてそれをカスタムで作成されたアイテムモデル(CpuLoadModel)と呼ばれるモデルを通してQMLへ公開するための存在しているPythonユーティリティを取ります。あなたは下記で動作中のプログラムを見ることができます。
QMLでリピーターという言葉が出てくるのですが、どのような意味ですか。
ChatGPT
QML(Qt Meta-Object Language)は、Qtフレームワークで使用されるDeclarative UI(宣言的なUI)言語です。QMLは、GUI(グラフィカルユーザーインターフェース)を作成するための柔軟で強力な手段を提供します。
QMLにおける「リピーター(Repeater)」は、特定のアイテムやコンポーネントを複数回繰り返し表示するために使用されるコントロールです。リピーターは、データモデルやリストなどの要素の数に基づいて、同じコンポーネントの複数のインスタンスを自動的に生成します。
リピーターを使用することで、データの一覧や項目の表示、ダイナミックなUIの作成など、重複する要素の処理を簡素化できます。リピーターは、QML内でループや繰り返し処理を行うための強力なツールとして活用されます。
以下に、QMLでのリピーターの使用例を示します:
qmlCopy codeRepeater {
    model: 10 // 10回繰り返す
    delegate: Rectangle {
        width: 100
        height: 100
        color: index % 2 === 0 ? "red" : "blue" // 偶数回目は赤、奇数回目は青
    }
}
上記の例では、Repeaterコンポーネントが10回繰り返し、各繰り返しでRectangleコンポーネントが生成されます。delegateプロパティには、生成される各インスタンスの外観や振る舞いを定義するコンポーネントが指定されます。
このように、リピーターを使用することで、簡潔なコードで複数の要素を反復的に生成することができます。
TIP
The psutil library can be found at https://pypi.org/project/psutil/ (https://pypi.org/project/psutil/) .
“psutil (process and system utilities) is a cross-platform library for retrieving information on running processes and system utilization (CPU, memory, disks, network, sensors) in Python.” You can install psutil using pip install psutil . We will use the psutil.cpu_percent function (documentation (https://psutil.readthedocs.io/en/latest/#psutil.cpu_percent) ) to sample the CPU load per core every second. To drive the sampling we use a QTimer . All of this is exposed through the CpuLoadModel which is a QAbstractListModel .
psutil(process and system utilities)はパイソンで、(CPU, memory, disks, network, sensors)のようなシステムゆーてぃりゼーションと、実行プロセス上の情報を取得するためのクロスプラットフォームライブラリです。あなたはpsutilを、pip install psutilを使ってインストールできます。私たちは、psutil.cpu_percent関数を使います。(ドキュメントは(https://psutil.readthedocs.io/en/latest/#psutil.cpu_percent))で、CPUぉー路を一秒ごとに、コアごとにサンプルします。サンプリングを処理するために、QTimerを使います。これの全てはQAbstractListModelであるCpuLoadModelを通して公開されます。
Item models are interesting. They allow you to represent a two dimensional data set, or even nested data sets, if using the QAbstractItemModel . The QAbstractListModel that we use allow us to represent a list of items, so a one dimensional set of data. It is possible to implement a nested set of lists, creating a tree, but we will only create one level. To implement a QAbstractListModel , it is necessary to implement the methods rowCount and data . The rowCount returns the number of CPU cores which we get using the psutil.cpu_count method. The data method returns data for different roles. We only support the Qt.DisplayRole , which corresponds to what you get when you refer to display inside the delegate item from QML. Looking at the code for the model, you can see that the actual data is stored in the __cpu_load list. If a valid request is made to data , i.e. the row, column and role is correct, we return the right element from the __cpu_load list. Otherwise we return None which corresponds to an uninitialized QVariant on the Qt side. Every time the update timer ( __update_timer ) times out, the __update method is triggered. Here, the __cpu_load list is updated, but we also emit the dataChanged signal, indicating that all data was changed. We do not do a modelReset as that also implies that the number of items might have changed. Finally, the CpuLoadModel is exposed to QML are a registered type in the PsUtils module.
アイテムモデルは面白いです。それらは2次元のデータセットを表現することができ、もしQAbstractItemModelを利用するのであれば、ネストしたデータセットでさえも表現することができます。QAbstractListModelはリストのアイテムを表現することができ、1次元のデータセットです。ツリーをつくることで、ネストされたセットのリストを実装することができますが、一つの段を作るだけです。QAbstractListModelを実装するために、rowCountとdataメソッドを実装する必要があります。rowCountはpsutil.cpu_countメソッドを使うCPUコアの数を返します。Qt.DisplayRoleだけをサポートします。これはQMLからデリゲート内で表示するために参照するときに得るものに対応しています。そのモデルのためのコードをみると、実際のデータは__cpu_loadリスト内に格納されていることがわかります。もし有効なリクエストがデータになされると、たとえば、行、列、そしてロールが正確であると、__cpu_loadリストから正しい要素が返されてきて、そうでなければNoneを返します。NoneはQtサイドでは初期化されなかったQVariantに対応するものです。update timerがタイムアウトするごとに、__updateメソッドが呼ばれます。こちらでは、_cpu_loadリストが更新されますが、全てのデータが変更されることを指示するdataChangedシグナルも発行します。アイテムの数が変化したかもしれないということも意味するので、modelResetはしません。最後に、CpuLoadModelはPsUtilsモジュール内に登録された型であるQMLへ公開されます。
import psutil
import sys
from PySide6.QtGui import QGuiApplication
from PySide6.QtQml import QQmlApplicationEngine, qmlRegisterTyp
from PySide6.QtCore import Qt, QUrl, QTimer, QAbstractListModel

class CpuLoadModel(QAbstractListModel):
    def __init__(self):
        QAbstractListModel.__init__(self)
        self.__cpu_count = psutil.cpu_count()
        self.__cpu_load = [0] * self.__cpu_count
        self.__update_timer = QTimer(self)
        self.__update_timer.setInterval(1000)
        self.__update_timer.timeout.connect(self.__update)
        self.__update_timer.start()
# The first call returns invalid data
        psutil.cpu_percent(percpu=True)
    def __update(self):
        self.__cpu_load = psutil.cpu_percent(percpu=True)
        self.dataChanged.emit(self.index(0,0), self.index(self.
        def rowCount(self, parent):
        return self.__cpu_count
    def data(self, index, role):
        if (role == Qt.DisplayRole and
            index.row() >= 0 and
            index.row() < len(self.__cpu_load) and
            index.column() == 0):
            return self.__cpu_load[index.row()]
        else:
            return None
if __name__ == '__main__':
    app = QGuiApplication(sys.argv)
    engine = QQmlApplicationEngine()
    qmlRegisterType(CpuLoadModel, 'PsUtils', 1, 0, 'CpuLoadMode
    engine.load(QUrl("main.qml"))
    if not engine.rootObjects():
        sys.exit(-1)
    sys.exit(app.exec())
On the QML side we use a ListView to show the CPU load. The model is bound to the model property. For each item in the model a delegate item will be instantiated. In this case that means a Rectangle with a green bar (another Rectangle ) and a Text element displaying the current load.
QMLサイドでは、私たちはListViewをCPU読込を見せるために使います。モデルはモデルプロパティと結びついています。モデル内のそれぞれのアイテムのために、デリゲートアイテムが初期化されます。このケースでは、green barつきのRectangleと現在の読込を表示するText要素とを意味しています。
import QtQuick
import QtQuick.Window
import PsUtils
Window {
    id: root
    width: 640
    height: 480
    visible: true
    title: qsTr("CPU Load")
    ListView {
        anchors.fill: parent
        model: CpuLoadModel { }
        delegate: Rectangle {
        id: delegate
        required property int display
        width: parent.width
        height: 30
        color: "white"
    Rectangle {
        id: bar
        width: parent.width * delegate.display / 100.0
        height: 30
        color: "green"
     }
     Text {
         anchors.verticalCenter: parent.verticalCenter
         x: Math.min(bar.x + bar.width + 5, parent.width
         text: delegate.display + "%"
          }
      }
   }
}
Limitations
At the moment, there are some things that are not easily available. One of them is that you cannot easily create QML plugins using Python. Instead you need to import the Python QML “modules” into your Python program and then use qmlRegisterType to make it possible to import them from QML.
制限
今の時点では、簡単に利用できないいくつかの物事があります。それらのうちの一つは、あなたは簡単にPythonを使ってQMLプラグインを作ることができないということです。代わりにあなたがPython QML "modules"をPythonプログラムの中にインポートし、QMLからそれらをインポートすることが可能になるようにqmlRegisterTypeを使う必要があります。
Summary
In this chapter we have looked at the PySide6 module from the Qt for Python project. After a brief look at installation, we focused on how Qt concepts are used from Python. This included slots, signals and properties. We also looked at a basic list model and how to expose both Python objects and classes from Python to QML.
この章では、Qt for PythonからのPySide6モジュールを見ました。インストールを手短に見た後、Qtの概念がPythonからどのように利用されているのかに焦点を当てました。これはスロット、シグナルそしてプロパティを含んでいました。私たちは基本的なリストモデルも見ましたし、PythonからQMLのPythonオブジェクトとクラスの両方を公開する方法を見ました。