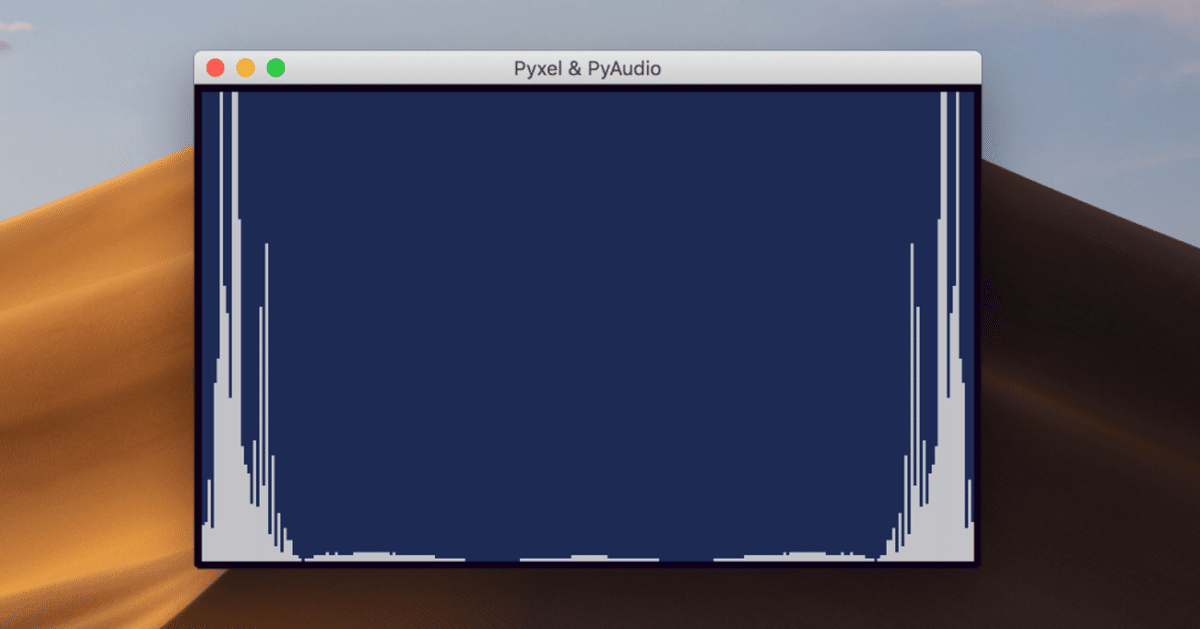
音をリアルタイムでFFT解析して表示【Pyxel】

環境
・MacBook (macOS Mojave)
・Python 3.6
使用したライブラリ
・PyAudio
・Pyxel
・numpy
全体のコード (GitHub)
# coding: utf-8

import pyxel, pyaudio
import numpy as np

class App:
    def __init__(self):
        pyxel.init(255, 155, fps=60, scale=2, border_width=10, border_color=0x0d0015, caption='Pyxel & PyAudio')
        self.CHUNK = pyxel.width
        self.RATE = 44100
        self.P = pyaudio.PyAudio()
        self.stream = self.P.open(format=pyaudio.paInt16, channels=1, rate=self.RATE, frames_per_buffer=self.CHUNK, input=True, output=False)
        pyxel.run(self.update, self.draw)

    def update(self):
        if pyxel.btnp(pyxel.KEY_Q):
            pyxel.quit()

    def draw(self):
        # 画面を一度クリアする
        pyxel.cls(1)

        input = self.stream.read(self.CHUNK, exception_on_overflow=False)
        # bufferからndarrayに変換
        ndarray = np.frombuffer(input, dtype='int16')
        # 高速フーリエ変換をして時間領域から周波数領域にする
        f = np.fft.fft(ndarray)
        # 値が大きいので1500で割る
        F = (np.abs(f)/1500).astype(np.int16)

        for i in range(pyxel.width):
            pyxel.line(i,pyxel.height, i,pyxel.height-F[i], 6)

if __name__=='__main__':
    App()
説明 ( __init__ )
PyAudioで取得した音の波形データをnumpyでFFTした後にPyxelで表示をしています。
pyxel.initで画面サイズ(MAX: 255x255)や動作フレームレート等の設定をします。
pyxel.init(255, 155, fps=60, scale=2, border_width=10, border_color=0x0d0015, caption='Pyxel & PyAudio')次にPyAudioの初期設定をします。
self.CHUNK = pyxel.width
self.RATE = 44100
self.P = pyaudio.PyAudio()
self.stream = self.P.open(format=pyaudio.paInt16, channels=1, rate=self.RATE, frames_per_buffer=self.CHUNK, input=True, output=False)
フレーム更新の関数と描画の関数を指定してPyxelアプリを開始します。
pyxel.run(self.update, self.draw)説明 ( update )
実行中にキーボードの「Q」を押したらプログラムが終了するようにします。
if pyxel.btnp(pyxel.KEY_Q):
    pyxel.quit()
説明 ( draw )
画面に前回描画されたものが残っているとダメなので一回クリアします。
pyxel.cls(1)次に音の波形のデータを取得し、扱いやすくする為にnumpyのndarrayに変換します。
input = self.stream.read(self.CHUNK, exception_on_overflow=False)
ndarray = np.frombuffer(input, dtype='int16')
numpyにある高速フーリエ変換の関数を利用して、音の波形のデータを時間領域から周波数領域にします。また、値がとても大きいので1500で割ってますが、マイクの感度に応じて値を変えても問題ありません。
f = np.fft.fft(ndarray)
F = (np.abs(f)/1500).astype(np.int16)
画面に左から一行ずつ線を引いていきますが、Pyxelでは(0, 0)が左上なのでpyxel.heightから引いています。
for i in range(pyxel.width):
    pyxel.line(i,pyxel.height, i,pyxel.height-F[i], 6)
この記事でわからないことや間違っていること、その他意見等ありましたらコメントをください。