cropper.js + react + inertia.js (cropper-react) で画像クロッピングアプリを作る

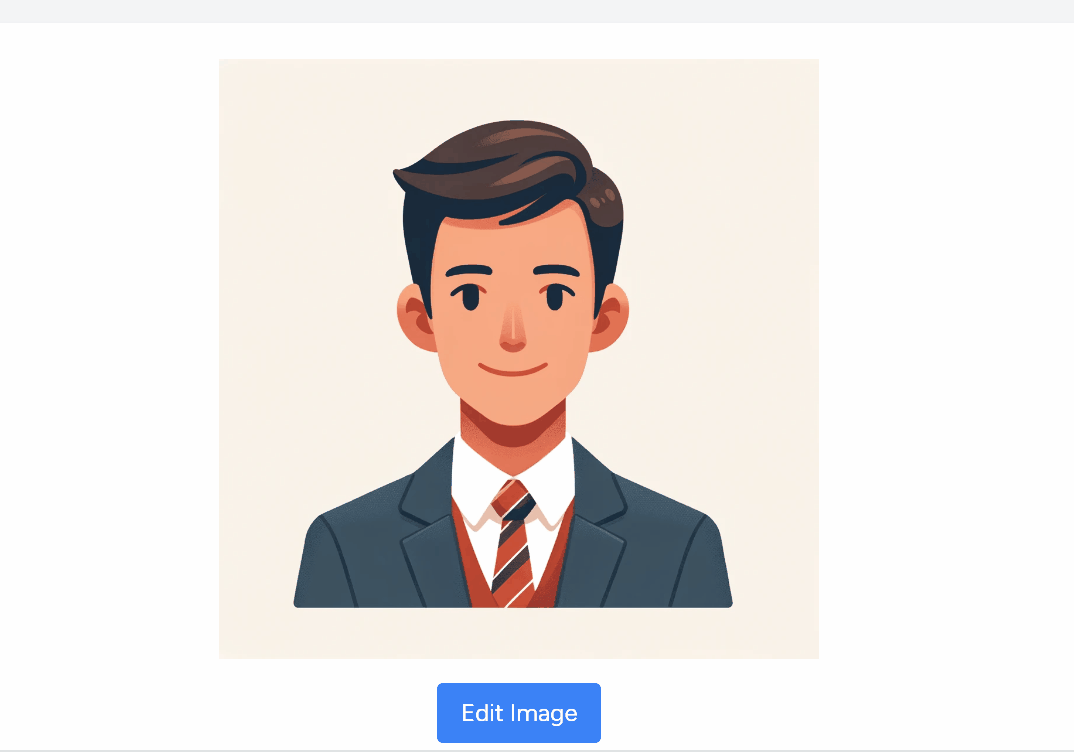
こういうものを作る
install
npm install react-cropper事前準備
import AuthenticatedLayout from '@/Layouts/AuthenticatedLayout'
import { Head } from '@inertiajs/react'
import Cropper from 'react-cropper';
import 'cropperjs/dist/cropper.css';

export default function CropIndex({ auth }) {
  return (
    <AuthenticatedLayout
      user={auth.user}
      header={
        <h2 className="font-semibold text-xl text-gray-800 leading-tight">
          Cropper
        </h2>
      }
    >
      <Head title="Cropper" />

      <div className="py-12">
        <div className="max-w-7xl mx-auto sm:px-6 lg:px-8">
          <div className="bg-white overflow-hidden shadow-sm sm:rounded-lg">
            <div className="p-6 text-gray-900">
              <img src={route("crops.avatar")} />
            </div>
          </div>
        </div>
      </div>
    </AuthenticatedLayout>
  )
}
こんなので表示できるとする。
ちなみにroute("crops.avatar")は
    public function avatar(): BinaryFileResponse
    {
        $path = storage_path('app/avatar.png');

        if (!file_exists($path)) {
            abort(404, 'Avatar version not found');
        }

        return response()->file($path);
    }
このようにしている
imgタグからCropperコンポーネントへ
<div className="p-6 text-gray-900">
  <img src={route("crops.avatar")} />
</div>
この辺の奴を
<div className="p-6 text-gray-900">
  <Cropper src={route("crops.avatar")} />
</div>
、とすると
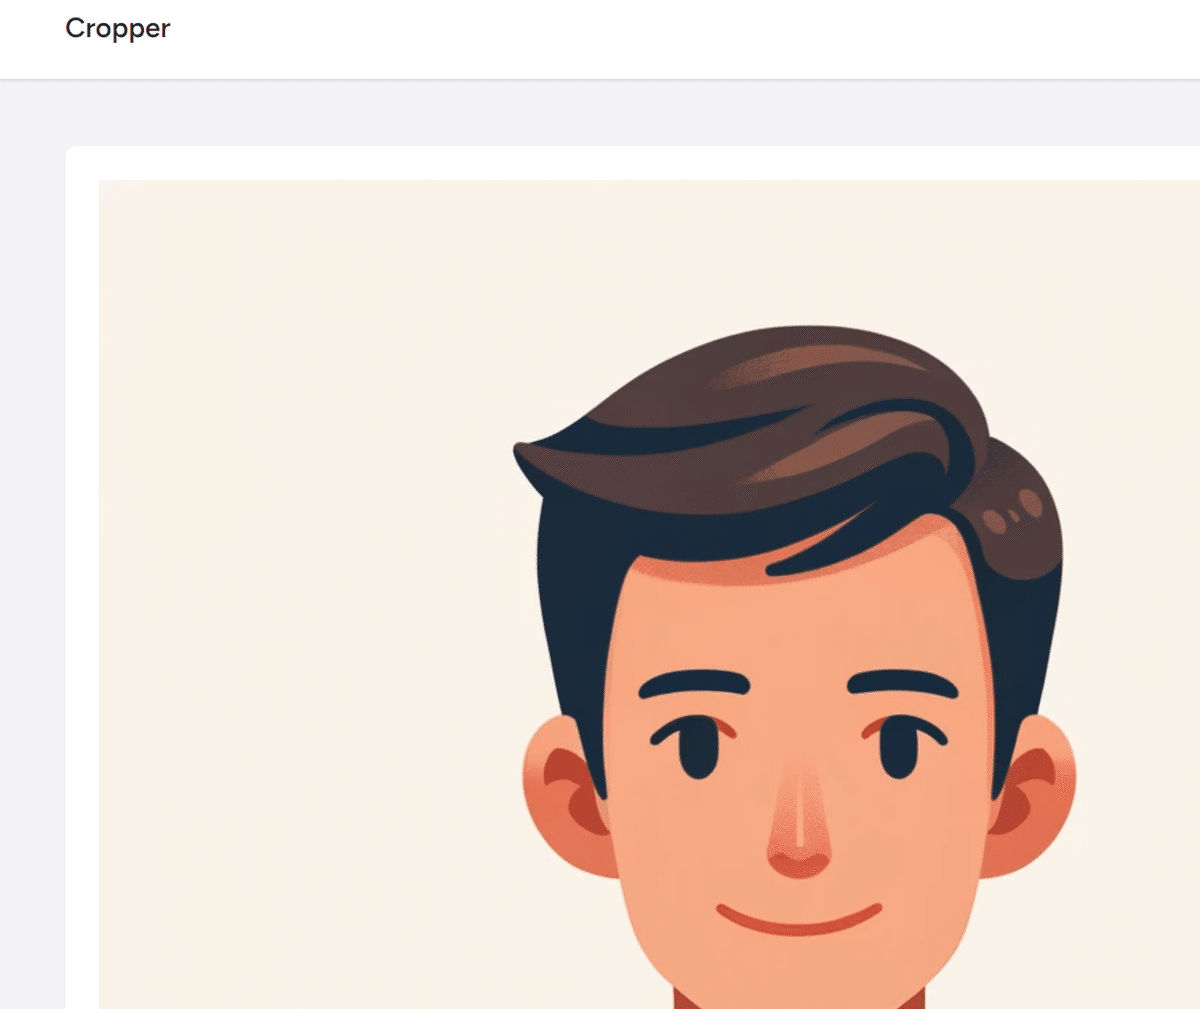
それっぽいものが現われる、が、今はまだ何もできない
オプションを足していく
まあこれは例によっていろいろある
  const onCrop = () => {
    console.log("cropped");
  }
// <snip...>
export default function CropIndex({ auth }) {
// <snip...>
              <Cropper
                src={route("crops.avatar")}
                style={{ height: 400, width: '100%' }}
                initialAspectRatio={1}
               crop={onCrop}
              />

コンソールをみると一目瞭然だけど、このonCropはすさまじい勢いで発動する。
onCropにrefを渡す
大抵、onCropの中でCropperを操作する必要があるので定番の流れとしてuseRefでリファレンスを取ってonCropに受け渡す必要がある。
import React, { useRef } from 'react';でimportしてきて
export default function CropIndex({ auth }) {
  const cropperRef = useRef(null);
<Cropper
src={route("crops.avatar")}
style={{ height: 400, width: '100%' }}
initialAspectRatio={1}
crop={onCrop}
ref={cropperRef}
/>ってのが定番の流れになるだろう。
さらに、ここでcroppingされたURLをセットするためのstateもuseStateで確保する
import AuthenticatedLayout from '@/Layouts/AuthenticatedLayout'
import { Head } from '@inertiajs/react'
import Cropper from 'react-cropper';
import 'cropperjs/dist/cropper.css';
import React, { useRef, useState } from 'react';
export default function CropIndex({ auth }) {
const cropperRef = useRef(null);
const [croppedDataUrl, setCroppedDataUrl] = useState('');ここでcroppedDataUrl ってのが出てきた。
URLというとどうしてもサーバーぽいものを意識するかもしれないがこれは実はローカルURL であり、croppingされたものをローカルに保存してあるURLである。ここでそのローカルURLをimgタグで表示してみよう。
<Cropper
  src={route("crops.avatar")}
  style={{ height: 400, width: '100%' }}
  initialAspectRatio={1}
  crop={onCrop}
  ref={cropperRef}
/>
{croppedDataUrl && (
<img src={croppedDataUrl} />
)}croppedDataUrlがある時はそれをimgタグで表示している。ただし今は何もsetしてないので当然croppedDataUrlが無いので何も表示されない。ではcroppingされたときonCropでこのURLを操作してみる
切り取られた画像のセット
  const onCrop = () => {
    const imageElement = cropperRef.current;
    if (imageElement !== null) {
      const cropper = imageElement.cropper;
      setCroppedDataUrl(cropper.getCroppedCanvas().toDataURL());
    }
}このように、imageElementでcropperのリファレンスを挿入し、それが存在したときにcropper.jsのメソッドを通じてsetCroppedDataUrlしている。setCroppedDataUrlに関してはこれは
const [croppedDataUrl, setCroppedDataUrl] = useState('');ここのuseState定義したものであり、最終的にはcroppedDataUrlという変数から参照可能となるわけだ。
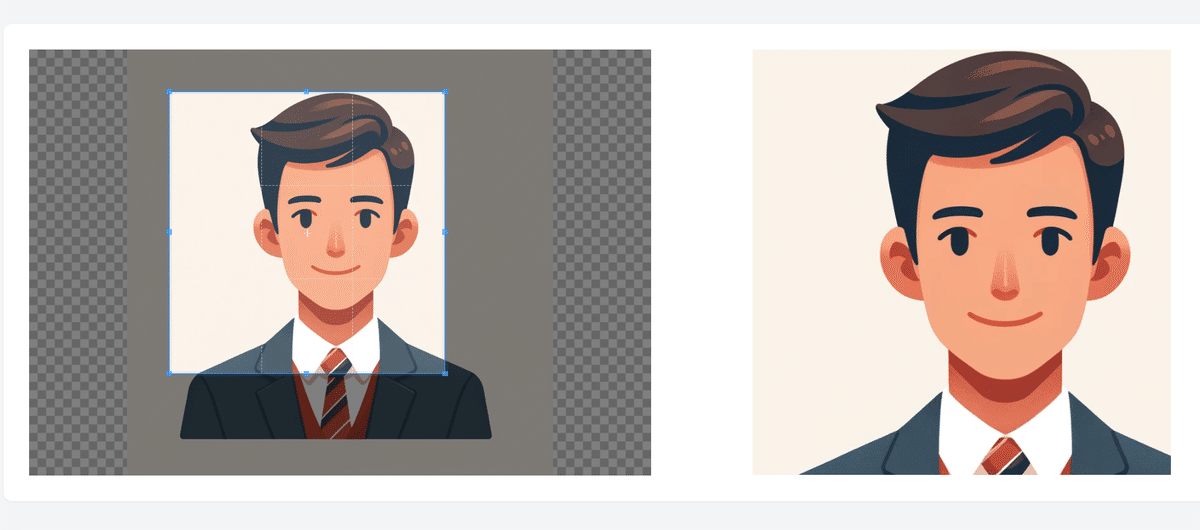
そうすると
このようにcroppingしている部分の下に切り取られた画像が表示されるようになる。これはもちろん
{croppedDataUrl && (
  <img src={croppedDataUrl} />
)}
この部分が作用しているのであり、結果としてローカルURLが参照されている事となる。
もうちょいデザインしていく
今は下にpreviewが出てて面倒くさいのでflexボックスで左に出してみる。ここで一気にゴチャゴチャとコードが増えるがこの辺は大体デザイン面なので本質とはさほど関係しない、が、
    <AuthenticatedLayout
      user={auth.user}
      header={(
        <h2 className="font-semibold text-xl text-gray-800 leading-tight">
          Cropper
        </h2>
      )}
    >
      <Head title="Cropper" />

      <div className="py-12">
        <div className="max-w-7xl mx-auto sm:px-6 lg:px-8">
          <div className="bg-white overflow-hidden shadow-sm sm:rounded-lg">
            <div className="p-6 text-gray-900 flex justify-start items-start">
              {/* Cropperコンポーネントのコンテナ */}
              <div className="w-1/2 flex flex-col items-center">
                <Cropper
                  src={route('crops.avatar')}
                  style={{ height: 400, width: '100%' }}
                  initialAspectRatio={1}
                  crop={onCrop}
                  ref={cropperRef}
                />
              </div>

              {/* クロップされた画像のプレビューコンテナ */}
              {croppedDataUrl && (
                <div className="w-1/2 flex justify-center items-center">
                  <img
                    src={croppedDataUrl}
                    className="max-h-400 w-auto object-contain bg-gray-200"

                    style={{ maxHeight: 400 }}
                  />
                </div>
              )}
            </div>
          </div>
        </div>
      </div>
    </AuthenticatedLayout>
これでちょっとアプリっぽくなってきた
cropボタンと送信
そしたらcropボタンを付けてみよう。
<div className="w-1/2 flex flex-col items-center">
  <Cropper
    src={route('crops.avatar')}
    style={{ height: 400, width: '100%' }}
    initialAspectRatio={1}
    crop={onCrop}
    ref={cropperRef}
  />
  <button
    className="mt-4 px-4 py-2 text-white bg-green-500 rounded hover:bg-green-700 focus:outline-none"
    onClick={handleSave}
  >
    Save Cropped Image
  </button>
</div>
そしたらhandleSaveを書く
const handleSave = () => {
  router.post(route('crops.store'), { image: croppedDataUrl })
};
そうすると
public function store(Request $request)
{
    dd($request->all());
}
なんかで
array:1 [▼ // app/Http/Controllers/ReactCropController.php:36
  "image" => "data:image/png;base64,iVBORw0KGgoAAAANSUhEUgAAAzMAAAMzCAYAAACSq0y2AAAAAXNSR0IArs4c6QAAIABJREFUeF7svXm0dFlVJ7jvGMObviEzSSQzIYEE1EwGmaVQUbQEpEqRxkJLmyp12SqI8+q17K ▶"
]
とかいうbase64されたデーターが渡ってくるのがわかるので、これを加工して保存する。
base64されると元データーの約33%増えるようなのでデカい画像にはそもそも施さない方がよいかも
ここで
    public function avatar(): BinaryFileResponse
    {
        $path = storage_path('app/avatar.png');

        if (!file_exists($path)) {
            abort(404, 'Avatar version not found');
        }

        return response()->file($path);
    }
ここで取得していることからわかるように
storage_path('app/avatar.png');に入っている。これを書き換えてしまう。この処理はもちろんオリジナルが失われるので注意(ここではバージョン管理されているので元に戻せるからよいが、デモを作るときはそういうのも考えるといいかもしれない)
    public function store(Request $request): RedirectResponse
    {
        $imageData = $request->image;
        // Base64エンコードされた文字列から、データ部分のみを取り出す
        list($type, $imageData) = explode(';', $imageData);
        list(, $imageData)      = explode(',', $imageData);
        // Base64デコードしてバイナリデータを取得
        $imageData = base64_decode($imageData);
        $path = storage_path('app/avatar.png');
        file_put_contents($path, $imageData);

        redirect('crops.index');
    }
これでまあ実態は切り取られるんだけどUIに変化が無いのでちょっとアレ感はある
もうちょいアプリっぽくする
初回はオリジナル画像を表示し、ボタンを押すと編集モード的なフロウ考える
まずeditかどうかのstateを入れる
export default function CropIndex({ auth }) {
  const cropperRef = useRef(null);
  const [croppedDataUrl, setCroppedDataUrl] = useState('');

  const [editingMode, setEditingMode] = useState(false);
これに応じて切り替えていく
{editingMode ? (
  // 編集モード
  <div className="w-full flex justify-between items-start">
    {/* Cropperコンポーネントのコンテナ */}
    <div className="w-1/2">
      <Cropper
        src={`${route('crops.avatar')}?t=${imageTimestamp}`}
        style={{ height: 400, width: '100%' }}
        initialAspectRatio={1}
        crop={onCrop}
        ref={cropperRef}
      />
      <button
        className="mt-4 px-4 py-2 text-white bg-green-500 rounded hover:bg-green-700 focus:outline-none"
        onClick={handleSave}
      >
        Save Cropped Image
      </button>
    </div>
    {/* クロップされた画像のプレビューコンテナ */}
    <div className="w-1/2">
      {croppedDataUrl && (
        <img
          src={croppedDataUrl}
          className="max-h-400 w-auto object-contain bg-gray-200"
          style={{ maxHeight: 400 }}
        />
      )}
    </div>
  </div>
) : (
  // 初期表示モード
  <div className="w-full flex flex-col items-center">
    <img
      src={`${route('crops.avatar')}?t=${imageTimestamp}`}
      alt="Avatar"
      className="max-h-400 w-auto object-contain bg-gray-200"
      style={{ maxHeight: 400 }}
    />
    <button
      className="mt-4 px-4 py-2 text-white bg-blue-500 rounded hover:bg-blue-700 focus:outline-none"
      onClick={handleEdit}
    >
      Edit Image
    </button>
  </div>
)}
ここで大きく2つのブロックにわけている(コンポーネントにした方が見易いとは思うけど)
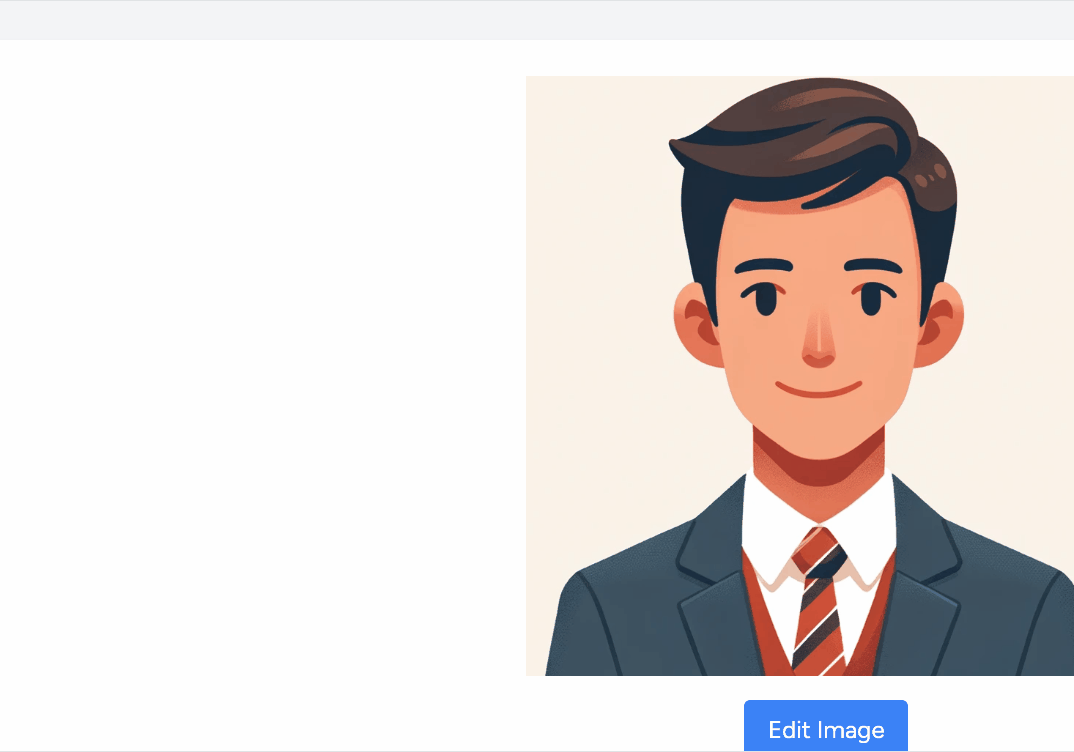
初期状態(オリジナル画像を表示するブロック)
  // 初期表示モード
  <div className="w-full flex flex-col items-center">
    <img
      src={`${route('crops.avatar')}?t=${imageTimestamp}`}
      alt="Avatar"
      className="max-h-400 w-auto object-contain bg-gray-200"
      style={{ maxHeight: 400 }}
    />
    <button
      className="mt-4 px-4 py-2 text-white bg-blue-500 rounded hover:bg-blue-700 focus:outline-none"
      onClick={handleEdit}
    >
      Edit Image
    </button>
  </div>
これは
    <button
      className="mt-4 px-4 py-2 text-white bg-blue-500 rounded hover:bg-blue-700 focus:outline-none"
      onClick={handleEdit}
    >
      Edit Image
    </button>
このボタンで編集モードへと切り替えるようにしている。ボタンはtailwind cssで適当にデザインしているが、laravel breezeのPrimary Buttonなどを使ってもよい。
そして
    <img
      src={`${route('crops.avatar')}?t=${imageTimestamp}`}
      alt="Avatar"
      className="max-h-400 w-auto object-contain bg-gray-200"
      style={{ maxHeight: 400 }}
    />
ここで初期画像に関して少し変えている。例によって画像を変更された場合キャッシュが効いているとうまいこと更新されないので
src={`${route('crops.avatar')}?t=${imageTimestamp}`}のようにtimestampを付与している。
従って
export default function CropIndex({ auth }) {
  const cropperRef = useRef(null);
  const [croppedDataUrl, setCroppedDataUrl] = useState('');

  const [editingMode, setEditingMode] = useState(false);

const [imageTimestamp, setImageTimestamp] = useState(Date.now());このようにuseStateでタイムスタンプを操作している。
編集モード
  // 編集モード
  <div className="w-full flex justify-between items-start">
    {/* Cropperコンポーネントのコンテナ */}
    <div className="w-1/2">
      <Cropper
        src={`${route('crops.avatar')}?t=${imageTimestamp}`}
        style={{ height: 400, width: '100%' }}
        initialAspectRatio={1}
        crop={onCrop}
        ref={cropperRef}
      />
      <button
        className="mt-4 px-4 py-2 text-white bg-green-500 rounded hover:bg-green-700 focus:outline-none"
        onClick={handleSave}
      >
        Save Cropped Image
      </button>
    </div>
    {/* クロップされた画像のプレビューコンテナ */}
    <div className="w-1/2">
      {croppedDataUrl && (
        <img
          src={croppedDataUrl}
          className="max-h-400 w-auto object-contain bg-gray-200"
          style={{ maxHeight: 400 }}
        />
      )}
    </div>
  </div>
これは今まで作ってきたものがほとんど適用されるのだが、ここでも
      <Cropper
        src={`${route('crops.avatar')}?t=${imageTimestamp}`}
このようにここでもimageTimestampを付けている
timestampの更新
handleSaveにて
  const handleSave = () => {
    router.post(route('crops.store'), { image: croppedDataUrl }, {
      onSuccess: () => {
        setEditingMode(false);
        setImageTimestamp(Date.now()); // 保存が成功したらタイムスタンプを更新
      },
    });
  };
このようにする
最終的なソースコード
import AuthenticatedLayout from '@/Layouts/AuthenticatedLayout';
import { Head, router } from '@inertiajs/react';
import Cropper from 'react-cropper';
import 'cropperjs/dist/cropper.css';
import React, { useRef, useState } from 'react';

export default function CropIndex({ auth }) {
  const cropperRef = useRef(null);
  const [croppedDataUrl, setCroppedDataUrl] = useState('');

  const [editingMode, setEditingMode] = useState(false);

  const [imageTimestamp, setImageTimestamp] = useState(Date.now());

  const onCrop = () => {
    const imageElement = cropperRef.current;
    if (imageElement !== null) {
      const { cropper } = imageElement;
      setCroppedDataUrl(cropper.getCroppedCanvas().toDataURL());
    }
  };

  const handleSave = () => {
    router.post(route('crops.store'), { image: croppedDataUrl }, {
      onSuccess: () => {
        setEditingMode(false);
        setImageTimestamp(Date.now()); // 保存が成功したらタイムスタンプを更新
      },
    });
  };

  const handleEdit = () => {
    setEditingMode(true);
    setImageTimestamp(Date.now());
  };

  return (
    <AuthenticatedLayout
      user={auth.user}
      header={<h2 className="font-semibold text-xl text-gray-800 leading-tight">Cropper</h2>}
    >
      <Head title="Cropper" />
      <div className="py-12">
        <div className="max-w-7xl mx-auto sm:px-6 lg:px-8">
          <div className="bg-white overflow-hidden shadow-sm sm:rounded-lg">
            <div className="p-6 text-gray-900 flex justify-center items-center">
              {editingMode ? (
                // 編集モード
                <div className="w-full flex justify-between items-start">
                  {/* Cropperコンポーネントのコンテナ */}
                  <div className="w-1/2">
                    <Cropper
                      src={`${route('crops.avatar')}?t=${imageTimestamp}`}
                      style={{ height: 400, width: '100%' }}
                      initialAspectRatio={1}
                      crop={onCrop}
                      ref={cropperRef}
                    />
                    <button
                      className="mt-4 px-4 py-2 text-white bg-green-500 rounded hover:bg-green-700 focus:outline-none"
                      onClick={handleSave}
                    >
                      Save Cropped Image
                    </button>
                  </div>
                  {/* クロップされた画像のプレビューコンテナ */}
                  <div className="w-1/2">
                    {croppedDataUrl && (
                      <img
                        src={croppedDataUrl}
                        className="max-h-400 w-auto object-contain bg-gray-200"
                        style={{ maxHeight: 400 }}
                      />
                    )}
                  </div>
                </div>
              ) : (
                // 初期表示モード
                <div className="w-full flex flex-col items-center">
                  <img
                    src={`${route('crops.avatar')}?t=${imageTimestamp}`}
                    alt="Avatar"
                    className="max-h-400 w-auto object-contain bg-gray-200"
                    style={{ maxHeight: 400 }}
                  />
                  <button
                    className="mt-4 px-4 py-2 text-white bg-blue-500 rounded hover:bg-blue-700 focus:outline-none"
                    onClick={handleEdit}
                  >
                    Edit Image
                  </button>
                </div>
              )}
            </div>
          </div>
        </div>
      </div>
    </AuthenticatedLayout>
  );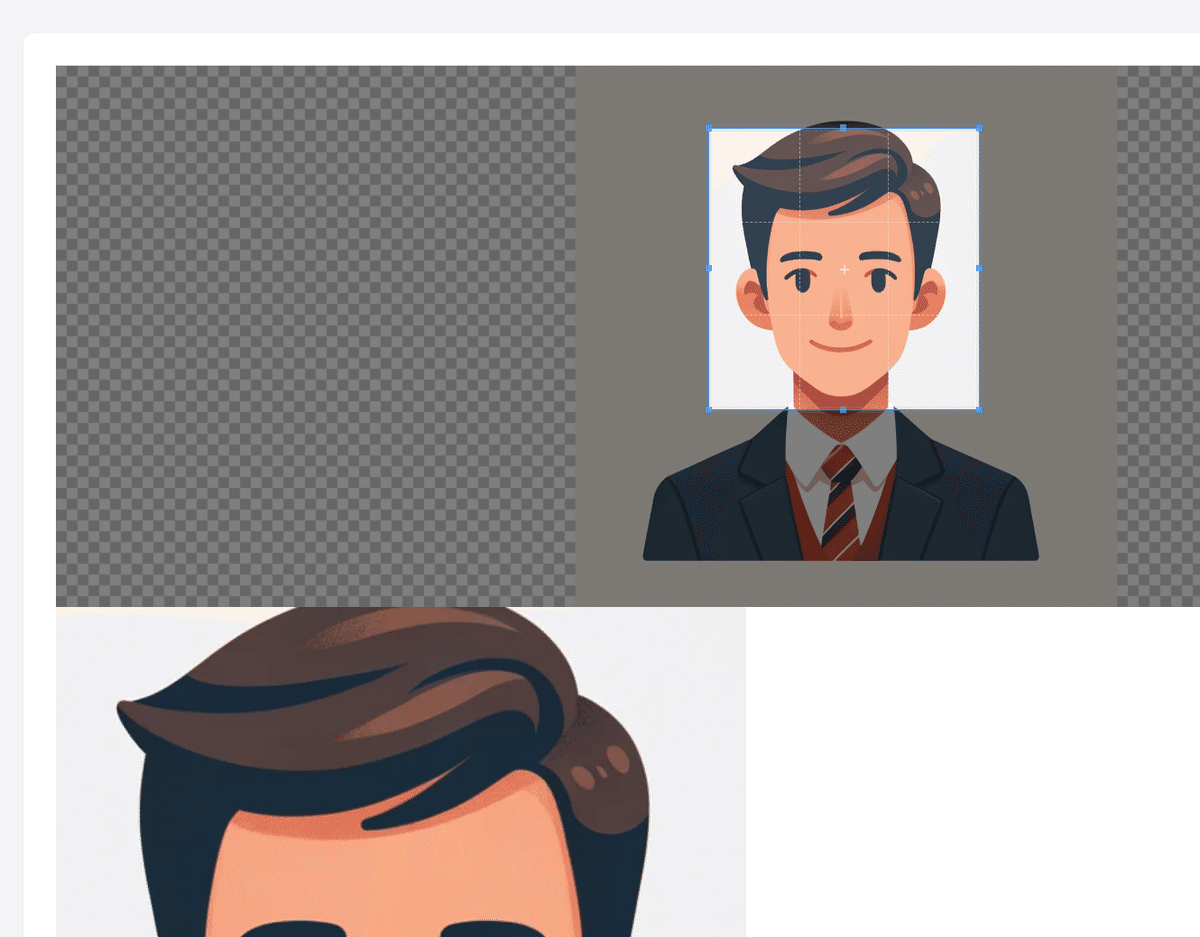
}スクウエアに保つ切り抜き方法
avatar用なんかのcroppingだとグリグリ動いちゃうと面倒くさい
<Cropper
src={`${route('crops.avatar')}?t=${imageTimestamp}`}
style={{ height: 400, width: '100%' }}
initialAspectRatio={1}
crop={onCrop}
ref={cropperRef}
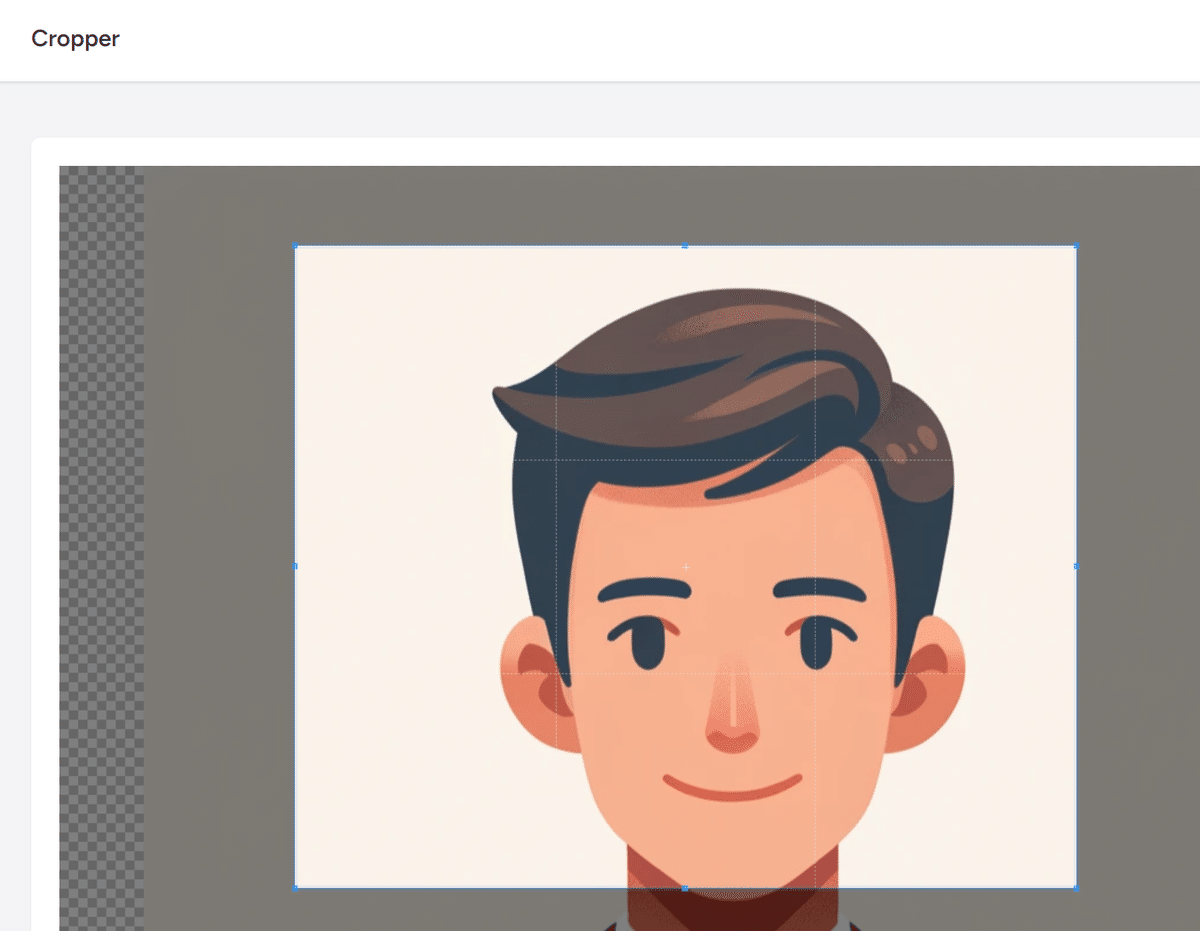
aspectRatio={1}
/>このようにaspectRationに1をセットすると
このようにスクエアに保つ事ができる。
まあ他にもオプションはいろいろあると思うからもっと細かい事をしたい場合はreact-cropperあるいはcropper.jsを調査する事。
この記事が気に入ったらサポートをしてみませんか?