
laravel sailとxdebug(シリーズ的にvdebug)

laravelプロジェクトを起動する
いつものごとくlaravel.build から持ってくるわよ
% curl -s "https://laravel.build/lara11?with=mysql" | bash
ってupgrade多すぎじゃねえか?….完了まで長いわw
./vendor/bin/sail upして
% ./vendor/bin/sail artisan --version
Laravel Framework 11.10.0
こんな感じ
xdebugの設定値を確認する
sailの場合xdebugのモジュールはdefaultで組まれているので、特に組込みを明示的に行う必要は無い。
設定においては前段で申しあげたように重要なポイントは
xdebug.mode
xdebug.start_with_request
xdebug.client_host
xdebug.client_port
xdebug.output_dir
とかである、sailのdefaultをshellに入って確認してみた
xdebug.mode => develop => develop
xdebug.start_with_request => default => default
xdebug.client_host => localhost => localhost
xdebug.client_port => 9003 => 9003
xdebug.output_dir => /tmp => /tmp
以上のようにほぼほぼxdebugのdefaultになっているので、少なくともxdebug.modeの値を変更しないとstep実行できない。
これは実は.envで設定できる
profileはともかくとして、step実行してみる
とにかく簡単にstep実行するためにはxdebug.modeをdebugにセットしなくてはいけない。それからxdebug.hostをhost.docker.internalにセットする必要がある。で、laravel sailはまずlinuxでのhost.docker.internalの問題をdocker-compose.ymlで自動的にセットしている
services:
    laravel.test:
        build:
            context: ./vendor/laravel/sail/runtimes/8.3
            dockerfile: Dockerfile
            args:
                WWWGROUP: '${WWWGROUP}'
        image: sail-8.3/app
        extra_hosts: # これとか
            - 'host.docker.internal:host-gateway'
        ports:
            - '${APP_PORT:-80}:80'
            - '${VITE_PORT:-5173}:${VITE_PORT:-5173}'
        environment:
            WWWUSER: '${WWWUSER}'
            LARAVEL_SAIL: 1
            XDEBUG_MODE: '${SAIL_XDEBUG_MODE:-off}'
            XDEBUG_CONFIG: '${SAIL_XDEBUG_CONFIG:-client_host=host.docker.internal}' #これもか
# ...
のでcontainerの調整はおいといてxdebugの設定値を変更するだけだ。とりあえずsailをdownする
% ./vendor/bin/sail down
Stopping lara11_laravel.test_1 ... done
Stopping lara11_mysql_1        ... done
Removing lara11_laravel.test_1 ... done
Removing lara11_mysql_1        ... done
Removing network lara11_sail
xdebugの設定を変更する方法
実はこの辺にドキュメントがある。単純に.envをセットすればその値に変更してくれる。
SAIL_XDEBUG_MODE=debug
SAIL_XDEBUG_CONFIG="client_host=host.docker.internal"
しかし
SAIL_XDEBUG_CONFIG="client_host=host.docker.internal"に関しては実はdocker-compose.ymlの
XDEBUG_CONFIG: '${SAIL_XDEBUG_CONFIG:-client_host=host.docker.internal}'により
としてsailをupする。そしてhostで
% nc -l -p 9003として待ち受けた後、ブラウザーのエクステンションをdebugにしてアクセスする。

とまあこんな感じでxmlが出てきたらokとする。
debugしてみる
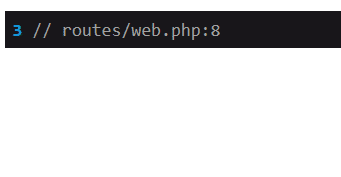
たとえばroutes/web.php で
<?php

use Illuminate\Support\Facades\Route;

Route::get('/', function () {
    return view('welcome');
});
を
<?php

use Illuminate\Support\Facades\Route;

Route::get('/', function () {
    $a = 1;
    $b = 2;
    dd($a+$b);
    return view('welcome');
});
みたいにする
でもやっぱりdd()するのはイマイチだなーって場合


このように左が消滅する時は大抵パスマッピングがおかしい。
let g:vdebug_options['path_maps'] = { '/var/www/html': 'path/to/lara11' }としよう。
コネクションを得られたら


多分、設定がdefaultだとこういう動きになっていく。でもlaravel frameworkのコードの中で停止されるのが面倒っていう場合は.vimrcで
let g:vdebug_options['break_on_open'] = 0としておこう

てか最終的に $a + $b の値を書くの忘れてたけどまあ1と2が見えてればいいか…(投げやり)
この記事が気に入ったらサポートをしてみませんか?