
Unityで画面遷移をしてみる

1. Unityで画面遷移をしてみる
Unityはゲームを効率よく開発するゲームエンジンの一つである。このツールを使用すると、ツール上でゲーム開発が可能である。
今回は、画面遷移をUnityを使用してやってみようと思う。
環境:Mac OS venetura
Unityのバージョン:2022.3.15f1
2. Unityで画面遷移を実現しよう
2.1 新規プロジェクトを作成する
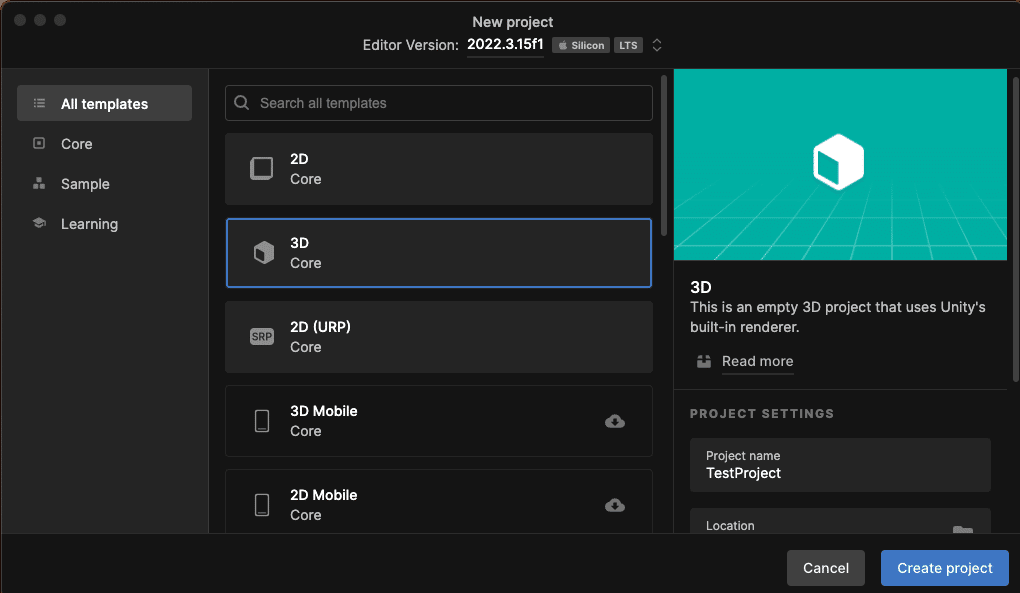
まず、新規プロジェクトを作成する。Unity Hubを開き、「New Project」を押下する。

次に、プロジェクトを作成する。
・All Templateから3D Coreを選択し、「Create Project」を選択する。
・Create projectを選択する。
2.2 シーンを作成する
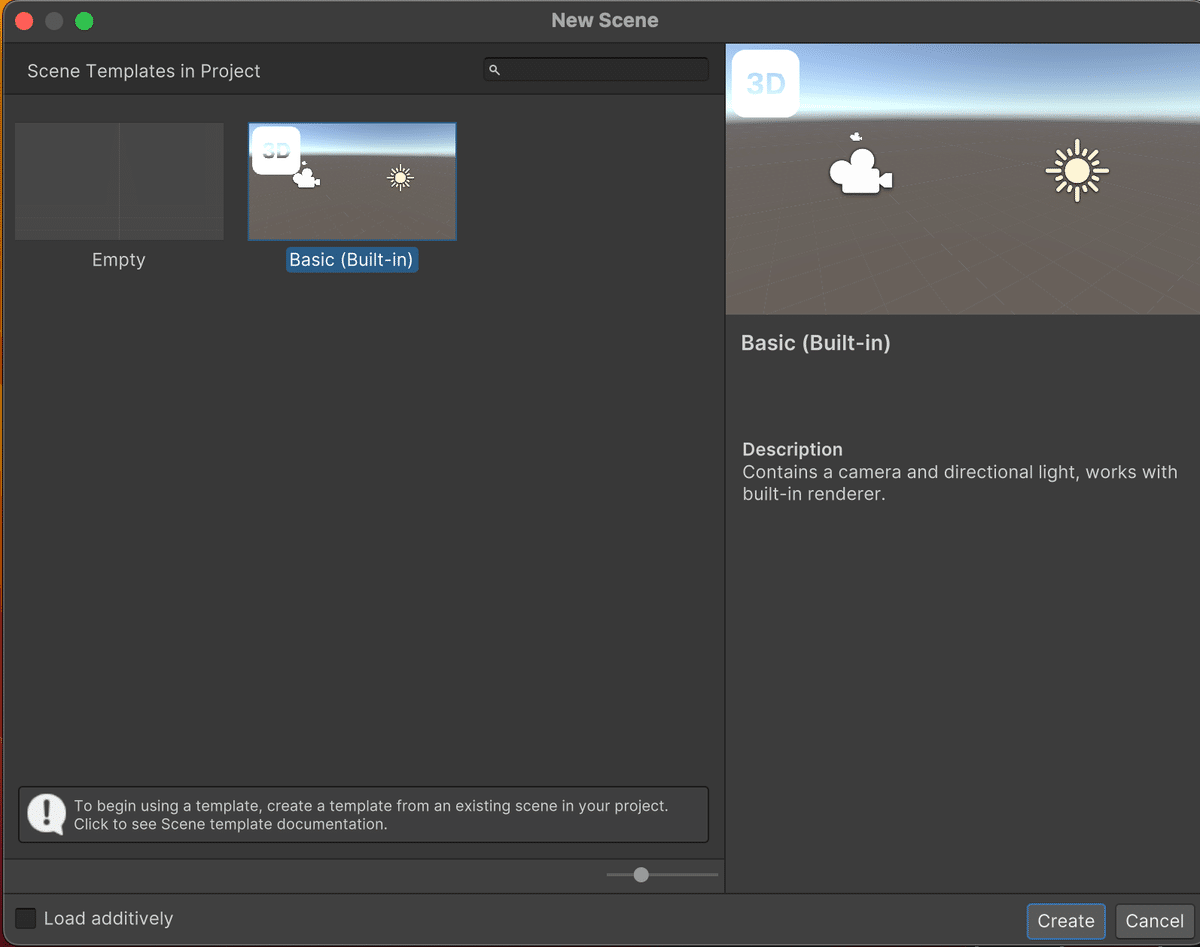
遷移する画面のSceneを作成する。「File」から「New Scene」を選択し、新規のSceneを作成する。

「Basic (Build-in)」を選択し、「Create」を選択する。
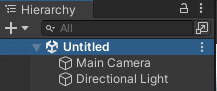
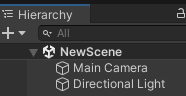
作成すると、Hierarchyに「Untitiled」というSceneが作成できる。名称を変更し、わかりやすい名前にする。Ctrl + sで保存画面を開く。
Save AsにNewSceneと入力し、新しいシーンを作成する。
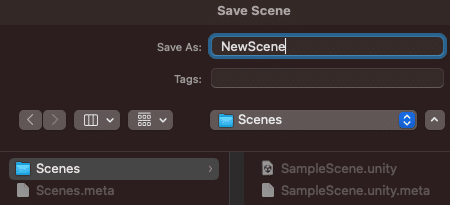
先ほどのシーンの名前が変更されていることを確認する。
2.3 もう一つシーンを作成する
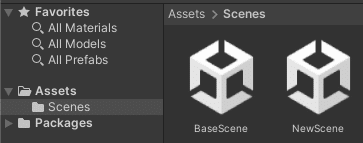
先ほどと同じ手順で、もう一つのシーンを作成する。筆者は、BaseSceneという名前で作成した。
ここまでの操作内容を確認する。
(1) 新規プロジェクトを作成
(2) NewSceneとBaseSceneの二つのシーンを作成した。
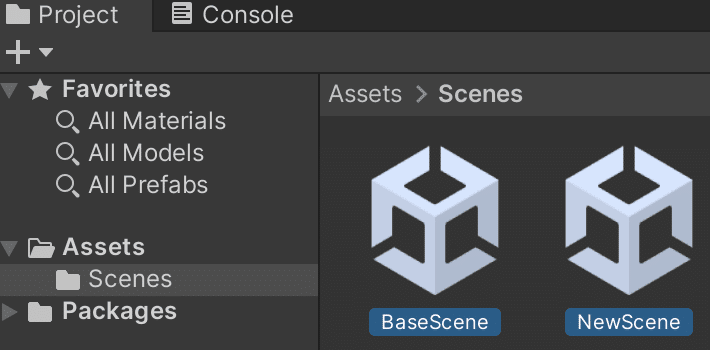
今回は、BaseSceneからNewSceneへ画面遷移することを目標とする。Assets/Scenesの中にあるシーンを確認する。
2.4 シーンを登録する
次は、作成したSceneをUnityに登録する。「File」から「Build Settings」を選択する。
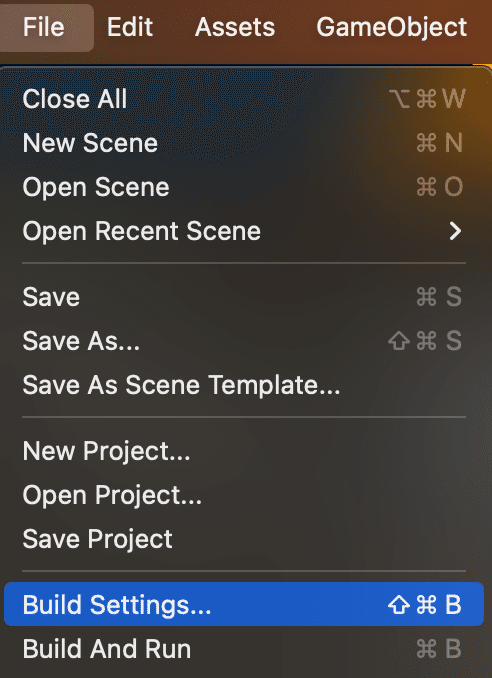
Build Settingsを開き、先ほど作成したSceneを選択し、Build Settingsにドラッグアンドドロップする。

上記の通り、作成したSceneが登録できればOKである。
2.5 目印となるオブジェクトを配置する
このままの状態だと、同じ画面のため、画面を遷移しても切り替わりがわからない。そこで、オブジェクトを配置して目印をつける。
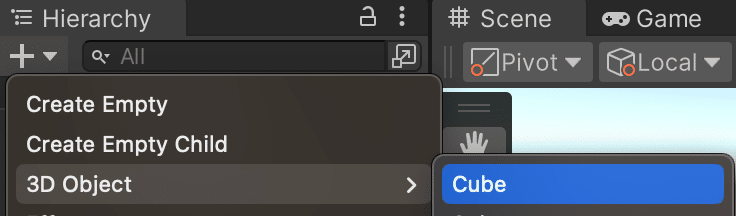
BaseSceneには、Cubeを配置する。Hierarchyの➕ボタンを選択し、から3D ObjectのCubeを選択する。
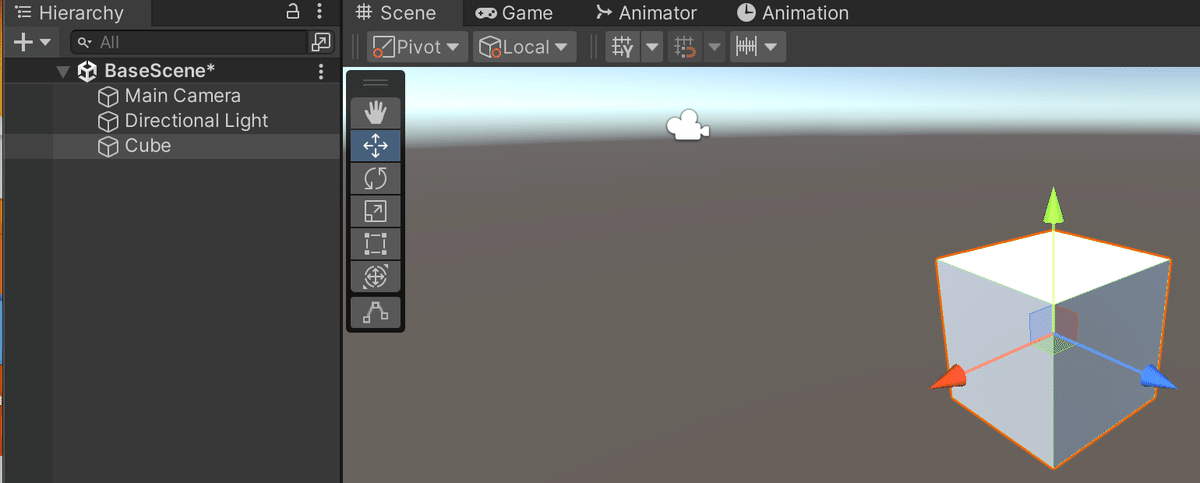
Cubeを選択すると、下記のようにCubeが配置されていることがわかる。
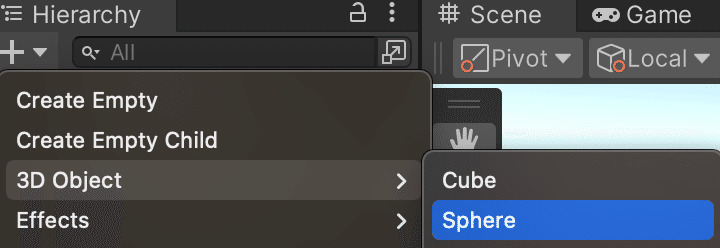
NewSceneには、Sphereを配置する。Hierarchyの➕ボタンを選択し、3DObjectからSphereを選択する。
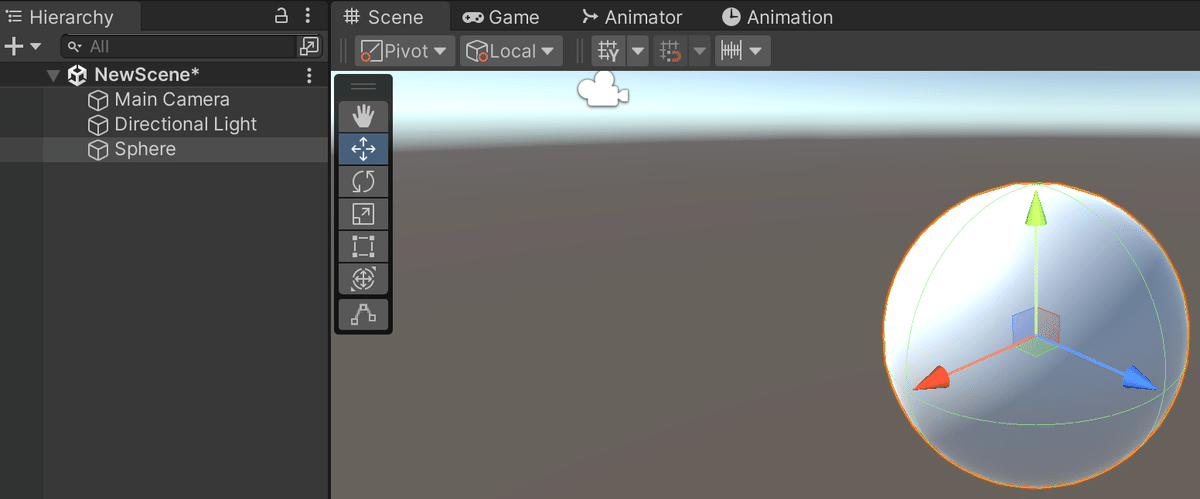
選択すると、Sphereが作成される。
2.6 C#スクリプトを作成する
画面遷移の制御は、C#のスクリプトから行う。Projectビューで右クリックを押し、CreateからC# Scriptを選択する。

ファイル名は、SceneChangeとした。

ファイルをダブルクリックすると、エディタが立ち上がる。初期状態のコードは以下のようになっている。
using System.Collections;
using System.Collections.Generic;
using UnityEngine;

public class SceneChange : MonoBehaviour
{
    // Start is called before the first frame update
    void Start()
    {

    }

    // Update is called once per frame
    void Update()
    {

    }
}
今回、画面遷移は、Start()にinvokeメソッドを追加して実現する。Unityにおいて、invokeとは、指定した時間遅延の後に実行するコードを指定するものである。今回は、invokeで3秒後に画面遷移を行うと記述する。
using System.Collections;
using System.Collections.Generic;
using UnityEngine;
//Usingを追加
using UnityEngine.SceneManagement;

public class SceneChange : MonoBehaviour
{
    // Start is called before the first frame update
    void Start()
    {
        //3s後に画面遷移する
        Invoke("ChangeNewScene", 3.0f);
    }

    // Update is called once per frame
    void Update()
    {

    }
    void ChangeNewScene()
    {
        //NewSceneを呼び出す
        SceneManager.LoadScene("NewScene");
    }
}
上記は、画面遷移のプログラムの記述例である。下記に処理の内容を振り返る。
(1) ゲームを開始するとStartメソッドを実行する
(2) Invokeを使用してゲームを開始して3秒後にChangeNewSceneメソッドを実行する。
(3) ChangeNewSceneメソッドを実行し、NewSceneをロードする。
2.7 Scriptをアタッチする
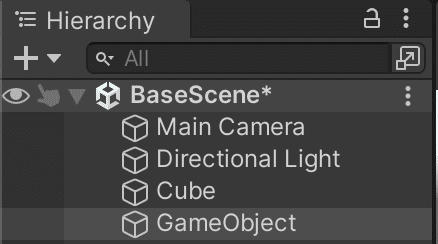
作成したC#のスクリプトをシーンに読み込んで実行する。BaseSceneを開き、Game Objectを作成する。Unityでは、GameObjectにスクリプトなどを割り当てて実行することができる。
Hierarchyから➕ボタンを押して、「Create Empty」を選択する。
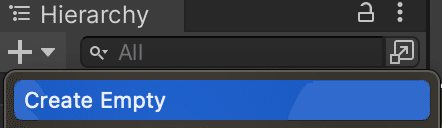
選択すると、GameObjectが作成される。
GameObjectを選択した状態で、Inspectorビューを確認すると、「Add Component」と書かれているボタンがある。そこを選択し、先ほど作成したScene Changeを選択する。検索欄に作成した名称を入れると、自動的に現れる。
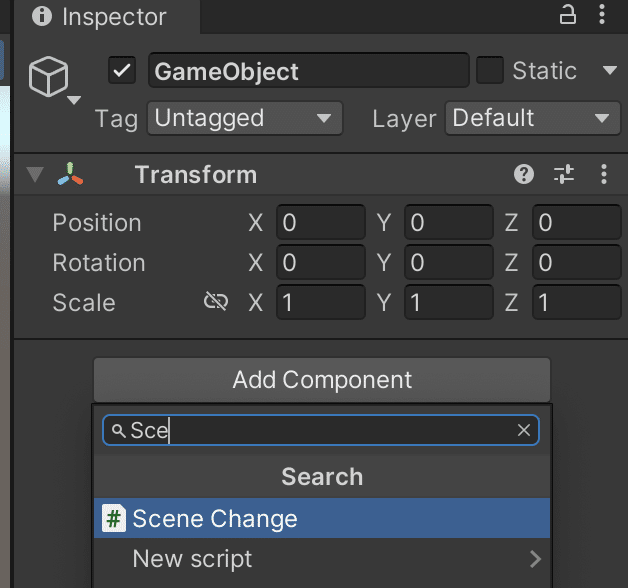
選択すると、InspectorビューにScene Changeのスクリプトが登録される。

2.8 実行して確かめよう
準備は完了したので、実行して確かめてみましょう。BaseSceneを読み込んだ状態で、実行ボタンを押してみましょう。

実行すると、CubeのオブジェクトからSphereのオブジェクトに画面が遷移することがわかります。
3. 終わりに
今回は、Unityでの簡単な画面遷移のやり方を手順立ててまとめた。より深く学ぶことで、例えば、ゲームタイトルからゲーム画面へ遷移するといったことも可能である。興味がある人は試してみてほしい。