Shader Graph の Emission Node を使って、発光させたい。【Unity HDRP】

Shader Graph の Emission Node を使って発光させるのに、少し手間がかかったので覚書。すでに Shader Graph を使っている人に向けての内容です。
環境:Unity 2022.3 LTS HDRP
The amount of light emitted by the "Emission Node" is affected by the exposure." It is recommended that the "Color", "Intensity" and "Exposure Weight" of the "Emission Node" be controlled from the "Material".
"Color" should be set to a high brightness (V = 100).
"Intensity" makes the image more luminous as the number increases.
"Exposure Weight" is brighter the lower the number. Specifically, a value between 0.1 and 0.5 is appropriate.
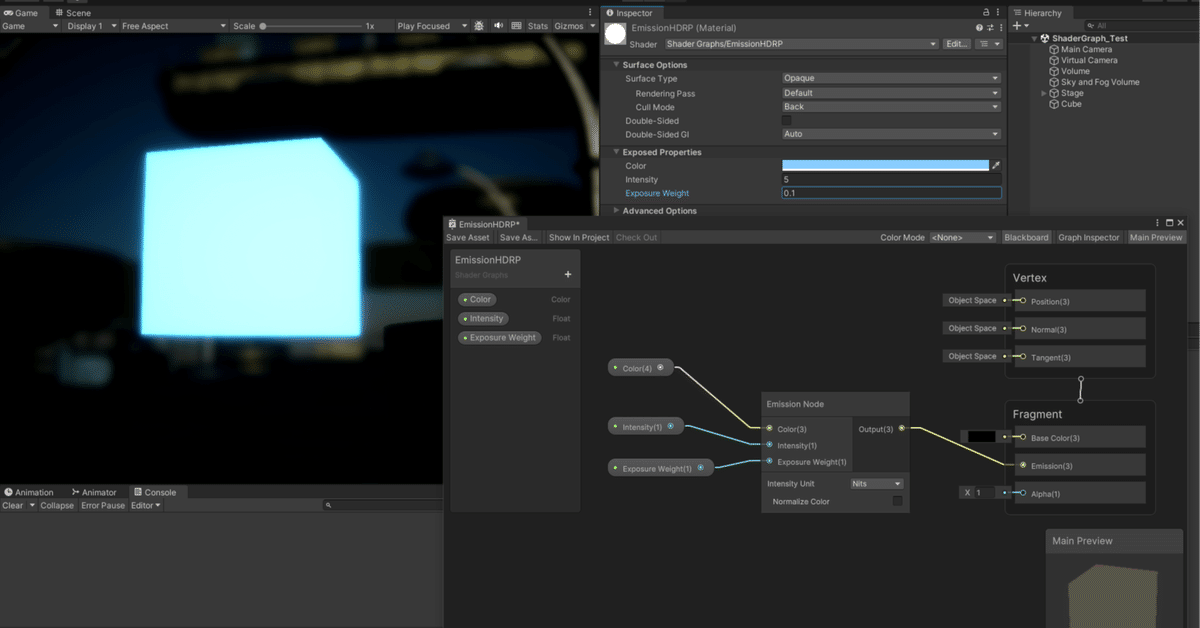
Emission Node の使い方
Color, Intensity, Exposure Weight の組み合わせで発光するが、発光量は Scene で設定した露出が影響する。
Shader Graph 内の Main Preview が、参考にならない。

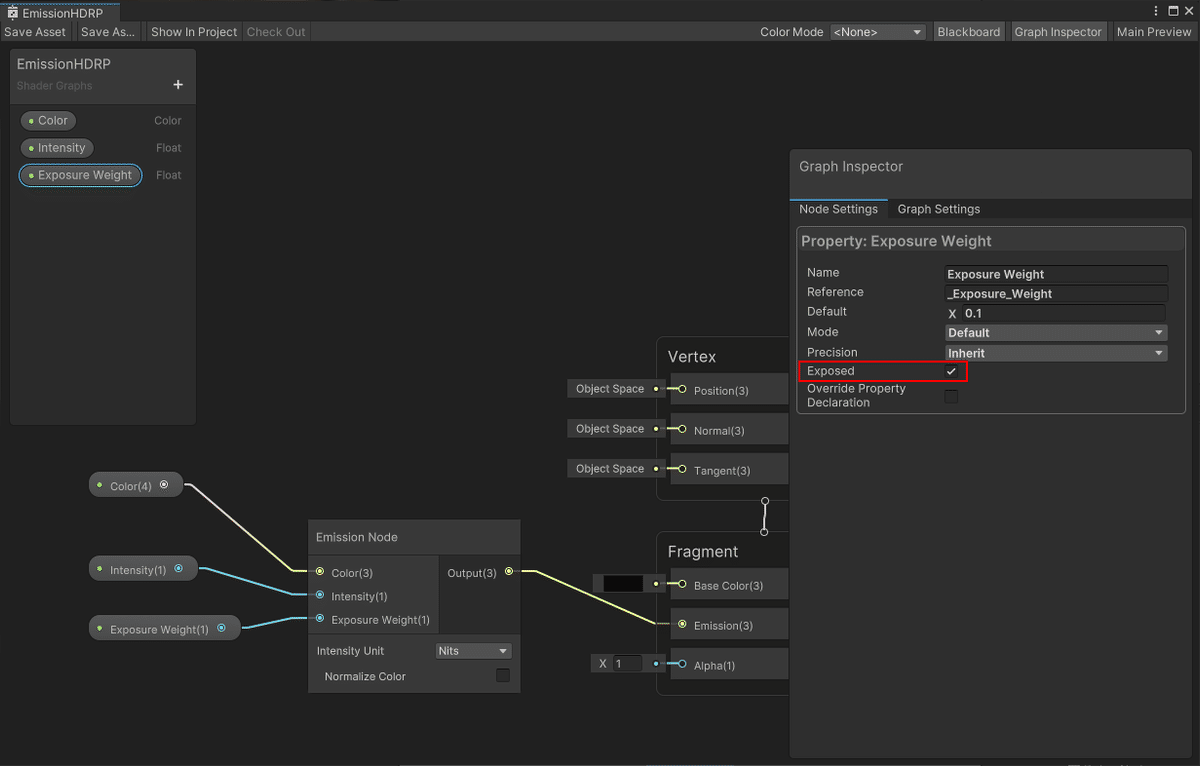
Color, Intensity, Exposure Weight を Exposed して、マテリアル上から操作すると、容易に設定できる。
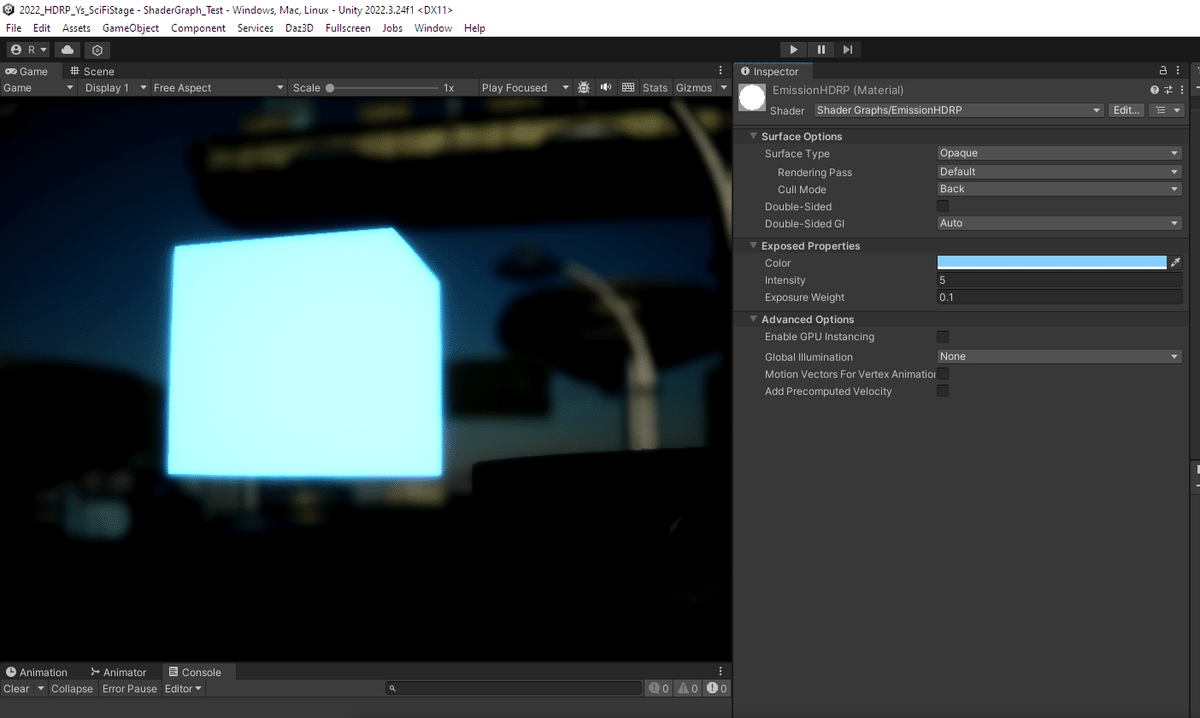
Color は、明度を高くしておく。
RGB より HSV が設定しやすい。
V を 100 にして、光量を Intensity で調節するのがお勧め。
Scene の露出量にもよるが、Intensity は 2- 20 あたりが適当、数値を上げるほど明るくなる。
Exposure Weight は、0.1 - 0.5 くらいが適当、数値が小さいほど明るい。
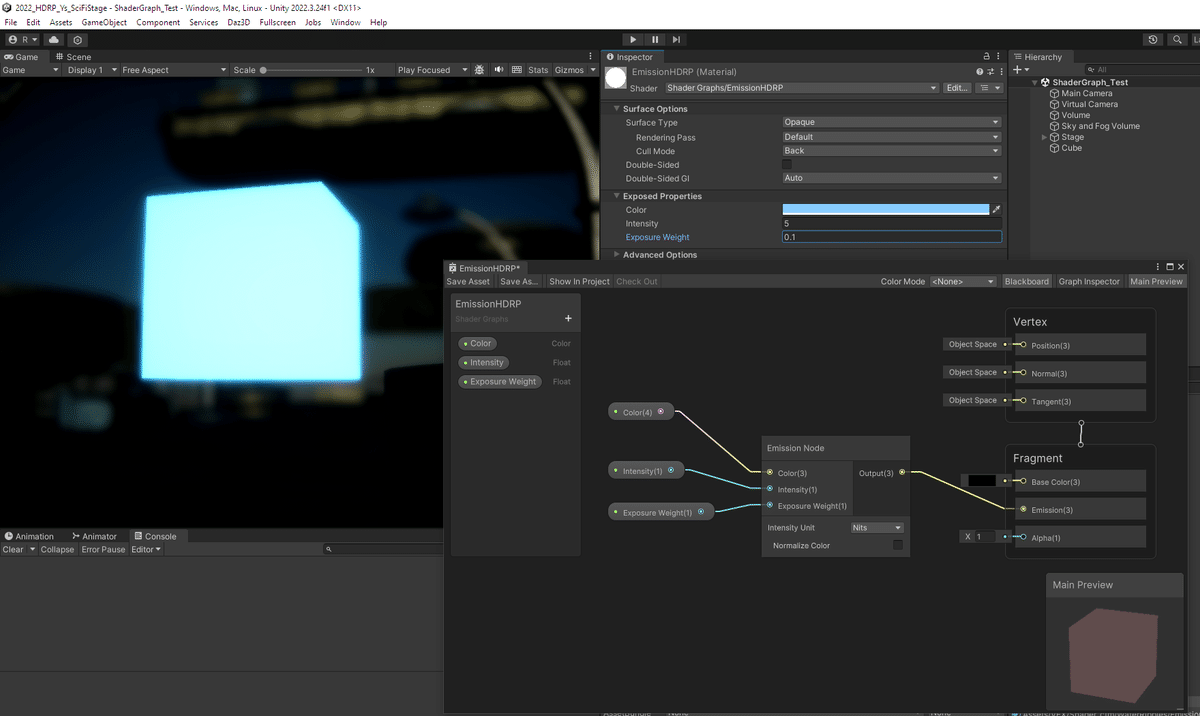
Main Preview が利用できないのは使い勝手が悪い。最初は、Base Color につないで作業をすすめ、仕上げの段階になったら、Emission に接続を変えるのがよさそう。
周囲を暗くして、Bloom と Vignette を使えば、発光感が増します。
ここ最近、 Shader Graph が楽しい ♪
****
Emission Node を使って発光させる方法が、ネット上でなかなかみつからなくて、ざっくりだけど、投稿してみました。
この記事が気に入ったらサポートをしてみませんか?