
4. 無料テンプレートを使ったデザインの組み込み #Laravelの教科書 #Laravelを使ったウェブサイトの開発

こちらの記事はLaravelを使ったウェブサイトの開発の4回目です。
表紙はこちらです。
# 課題
本稿の課題は以下です
・テンプレートファイルをダウンロードして、HTMLやCSSを適切に配置する
・複雑なテンプレートファイルを分割して組み込みを行う
・Bootstrapを少し理解する
※ 2021-10-27 Bootstrap5にテンプレートが切り替わっているようなのでコンテンツをアップデートしました。
# テンプレートファイルのダウンロード
本稿では無償で公開されているBootstrapを利用したテンプレート「Landing Page」を利用していきます。
BootstrapはTwitterが開発したWebサイト開発の様々な基礎となるライブラリです。様々な場面で応用が効くように作られているため、多くのサイトで利用されています。
StartBootstrap.comはBootstrapを利用したテンプレートを配布しているサイトです。テンプレートは有料のものも多数存在しています。
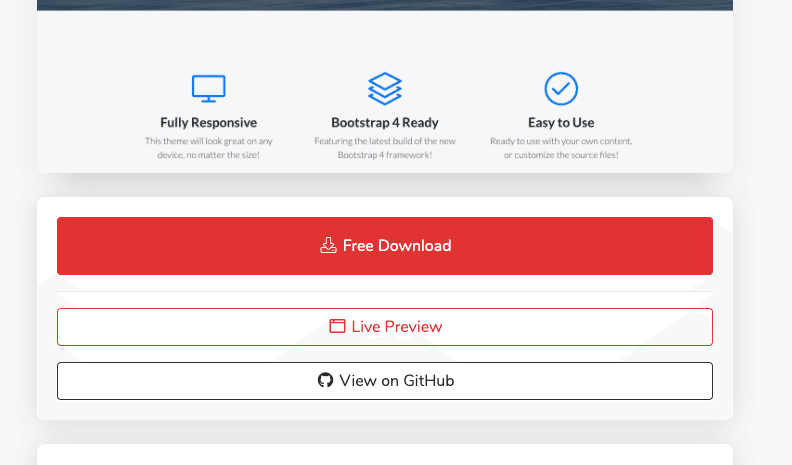
まずはこの「Free Download」ボタンを押してzipファイルをダウンロードして解凍してください。
# プロジェクトへの取り込み
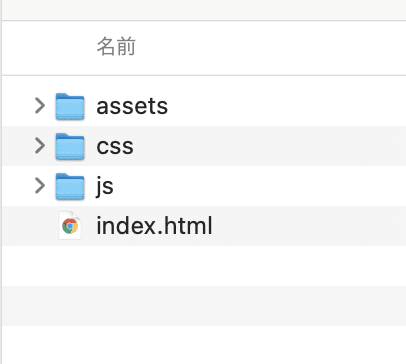
解凍したファイルの中から「css」「js」「assets」ディレクトリをコピーして、Laravelプロジェクトに取り込みます。
設置先はpublicディレクトリの中です。上記ディレクトリをコピーしてpublicディレクトリ以下にペーストしてください。
次のような構造になります。
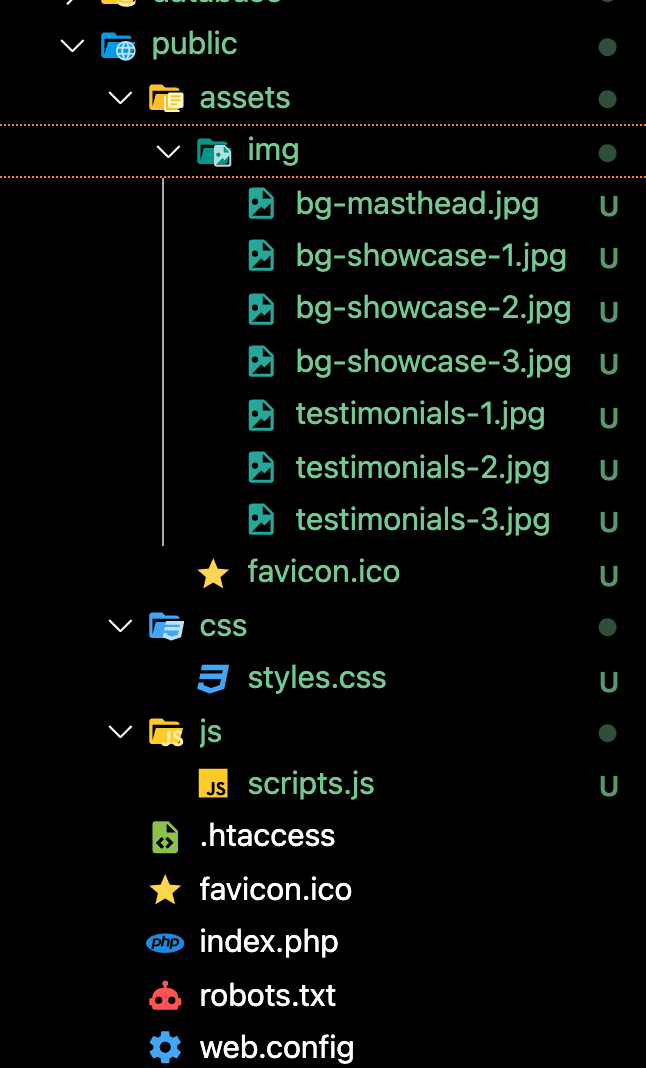
とりこんだ画像をブラウザで表示確認して取り込みが成功しているか確認してください
http://localhost:8000/assets/img/bg-masthead.jpg
# HTMLのコーディングの組み込み
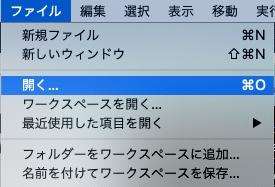
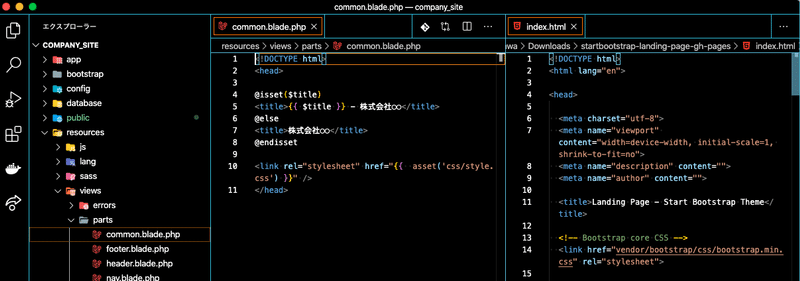
解凍したファイルのindex.htmlをVisual Studio Codeで開いてください。メニューのファイル→開くから開くか、index.htmlをドラッグ・アンド・ドロップするだけで開くことが出来ます。※
組み込み時はこんな風に左右に並べると組み込みがしやすいです。
# parts.commonの組み込み
index.htmlの<!DOCTYPE html>〜</head>までをcommon.blade.phpに組み込んでいきます。
1. コピーアンドペーストで移す
2. 日本語サイトなので、lang="ja"に変更
3. <title>タグ部分をもともとあった@isset〜@endissetに差し替える
4. CSSやJSを読み込んでいる部分を全て{{ asset('CSSやJSの場所') }}に差し替える
という順番で行います。
index.html
<!DOCTYPE html>
<html lang="en">
<head>
 <meta charset="utf-8">
 <meta name="viewport" content="width=device-width, initial-scale=1, shrink-to-fit=no">
 <meta name="description" content="">
 <meta name="author" content="">
 <title>Landing Page - Start Bootstrap Theme</title>
 <!-- Bootstrap core CSS -->
 <link href="vendor/bootstrap/css/bootstrap.min.css" rel="stylesheet">
 <!-- Custom fonts for this template -->
 <link href="vendor/fontawesome-free/css/all.min.css" rel="stylesheet">
 <link href="vendor/simple-line-icons/css/simple-line-icons.css" rel="stylesheet" type="text/css">
 <link href="https://fonts.googleapis.com/css?family=Lato:300,400,700,300italic,400italic,700italic" rel="stylesheet" type="text/css">
 <!-- Custom styles for this template -->
 <link href="css/landing-page.min.css" rel="stylesheet">
</head>
こちらを組み込むと次のようになります。
resources/views/parts/common.blade.php
<!DOCTYPE html>
<html lang="ja">

<head>

	<meta charset="utf-8">
	<meta name="viewport" content="width=device-width, initial-scale=1, shrink-to-fit=no">
	<meta name="description" content="">
	<meta name="author" content="">

	@isset($title)
	<title>{{ $title }} - 株式会社○○</title>
	@else
	<title>株式会社○○</title>
	@endisset

	<!-- Favicon-->
	<link rel="icon" type="image/x-icon" href="{{ asset('assets/favicon.ico') }}" />
	<!-- Bootstrap icons-->
	<link href="https://cdn.jsdelivr.net/npm/bootstrap-icons@1.5.0/font/bootstrap-icons.css" rel="stylesheet" type="text/css" />
	<!-- Google fonts-->
	<link href="https://fonts.googleapis.com/css?family=Lato:300,400,700,300italic,400italic,700italic" rel="stylesheet" type="text/css" />

	<!-- Core theme CSS (includes Bootstrap)-->
	<link href="{{ asset('css/styles.css') }}" rel="stylesheet" />

</head>
public以下にassetsを設置したのでそのままasset()関数に切り替える形で出来ています。
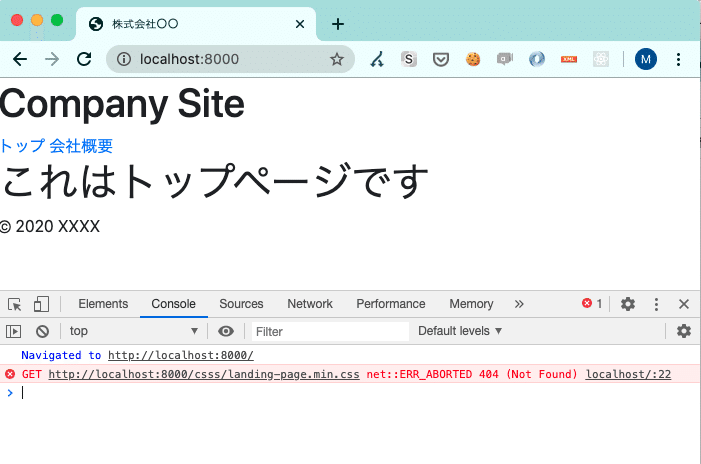
組み込みが終わったらブラウザでリロードしてエラーが出ていないか確認してください。
ファイルが正しく設置出来ていない場合はDeveloper ToolsのConsoleにエラーの表示があります。
URLを間違えてエラーが出ている例
# ナビゲーションの組み込み
index.htmlの<nav>〜</nav>をナビゲーションに組み込みます。
index.html
<!-- Navigation-->
<nav class="navbar navbar-light bg-light static-top">
   <div class="container">
       <a class="navbar-brand" href="#!">Start Bootstrap</a>
       <a class="btn btn-primary" href="#signup">Sign Up</a>
   </div>
</nav>
↓
resources/views/parts/nav.blade.php
<!-- Navigation-->
<nav class="navbar navbar-light bg-light static-top">
	<div class="container">
		<a class="navbar-brand" href="{{ url('/') }}">トップ</a>
		<a class="btn btn-primary" href="{{ url('/about') }}">会社概要</a>
	</div>
</nav>
リンク先やテキストはもともとのファイルを使って設定しています。
# ヘッダーの組み込み
index.htmlの<header>〜</header>をヘッダーに組み込みます。
index.html
<!-- Masthead-->
<header class="masthead">
   <div class="container position-relative">
       <div class="row justify-content-center">
           <div class="col-xl-6">
               <div class="text-center text-white">
                   <!-- Page heading-->
                   <h1 class="mb-5">Generate more leads with a professional landing page!</h1>
                   <!-- Signup form-->
                   <!-- * * * * * * * * * * * * * * *-->
                   <!-- * * SB Forms Contact Form * *-->
                   <!-- * * * * * * * * * * * * * * *-->
                   <!-- This form is pre-integrated with SB Forms.-->
                   <!-- To make this form functional, sign up at-->
                   <!-- https://startbootstrap.com/solution/contact-forms-->
                   <!-- to get an API token!-->
                   <form class="form-subscribe" id="contactForm" data-sb-form-api-token="API_TOKEN">
                       <!-- Email address input-->
                       <div class="row">
                           <div class="col">
                               <input class="form-control form-control-lg" id="emailAddress" type="email" placeholder="Email Address" data-sb-validations="required,email" />
                               <div class="invalid-feedback text-white" data-sb-feedback="emailAddress:required">Email Address is required.</div>
                               <div class="invalid-feedback text-white" data-sb-feedback="emailAddress:email">Email Address Email is not valid.</div>
                           </div>
                           <div class="col-auto"><button class="btn btn-primary btn-lg disabled" id="submitButton" type="submit">Submit</button></div>
                       </div>
                       <!-- Submit success message-->
                       <!---->
                       <!-- This is what your users will see when the form-->
                       <!-- has successfully submitted-->
                       <div class="d-none" id="submitSuccessMessage">
                           <div class="text-center mb-3">
                               <div class="fw-bolder">Form submission successful!</div>
                               <p>To activate this form, sign up at</p>
                               <a class="text-white" href="https://startbootstrap.com/solution/contact-forms">https://startbootstrap.com/solution/contact-forms</a>
                           </div>
                       </div>
                       <!-- Submit error message-->
                       <!---->
                       <!-- This is what your users will see when there is-->
                       <!-- an error submitting the form-->
                       <div class="d-none" id="submitErrorMessage"><div class="text-center text-danger mb-3">Error sending message!</div></div>
                   </form>
               </div>
           </div>
       </div>
   </div>
</header>
↓
resources/views/parts/header.blade.php
@include("parts.nav")
<!-- Masthead-->
<header class="masthead">
<div class="container position-relative">
<div class="row justify-content-center">
<div class="col-xl-6">
<div class="text-center text-white">
<!-- Page heading-->
<h1 class="mb-5">株式会社○○のサイトにようこそ</h1>
<!-- Signup form-->
<!-- * * * * * * * * * * * * * * *-->
<!-- * * SB Forms Contact Form * *-->
<!-- * * * * * * * * * * * * * * *-->
<!-- This form is pre-integrated with SB Forms.-->
<!-- To make this form functional, sign up at-->
<!-- https://startbootstrap.com/solution/contact-forms-->
<!-- to get an API token!-->
<form class="form-subscribe" id="contactForm" data-sb-form-api-token="API_TOKEN">
<!-- Email address input-->
<div class="row">
<div class="col">
<input class="form-control form-control-lg" id="emailAddress" type="email" placeholder="Email Address" data-sb-validations="required,email" />
<div class="invalid-feedback text-white" data-sb-feedback="emailAddress:required">Email Address is required.</div>
<div class="invalid-feedback text-white" data-sb-feedback="emailAddress:email">Email Address Email is not valid.</div>
</div>
<div class="col-auto"><button class="btn btn-primary btn-lg disabled" id="submitButton" type="submit">Submit</button></div>
</div>
<!-- Submit success message-->
<!---->
<!-- This is what your users will see when the form-->
<!-- has successfully submitted-->
<div class="d-none" id="submitSuccessMessage">
<div class="text-center mb-3">
<div class="fw-bolder">Form submission successful!</div>
<p>To activate this form, sign up at</p>
<a class="text-white" href="https://startbootstrap.com/solution/contact-forms">https://startbootstrap.com/solution/contact-forms</a>
</div>
</div>
<!-- Submit error message-->
<!---->
<!-- This is what your users will see when there is-->
<!-- an error submitting the form-->
<div class="d-none" id="submitErrorMessage"><div class="text-center text-danger mb-3">Error sending message!</div></div>
</form>
</div>
</div>
</div>
</div>
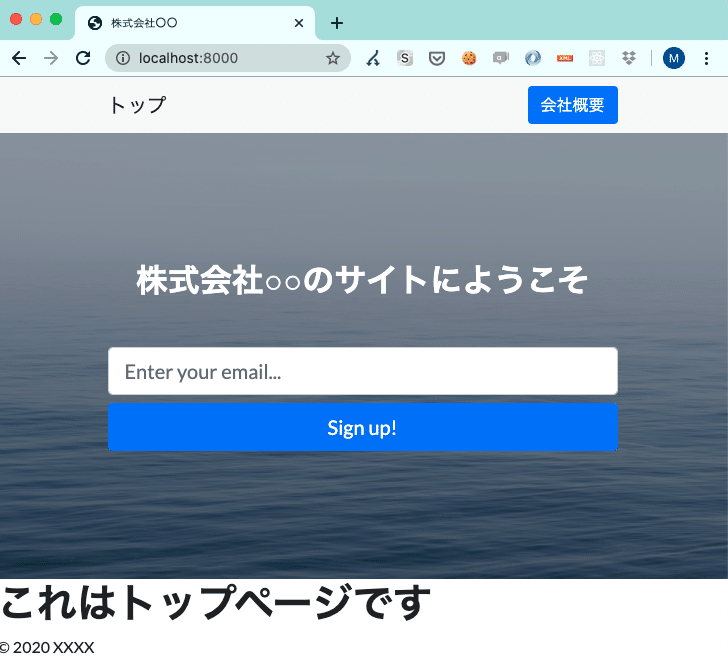
</header>中央のテキストを「株式会社○○のサイトにようこそ」という形に書き換えています。また、ヘッダーからナビゲーションを読み込む形で作っていたため、<nav> -> <header>の順になるように先頭で読み込んでいます。
ここまで組み込むと次のようなページが表示されます。
# フッターの組み込み
index.htmlの<footer>〜</footer>と、</body>
</html>まで、</body>の直前で読み込んでいるJavaScriptをフッターに組み込みます。</body></html>は各ページに必ず出てくるのでフッターに組み込んでしまいます。
index.html
<!-- Footer-->
<footer class="footer bg-light">
<div class="container">
<div class="row">
<div class="col-lg-6 h-100 text-center text-lg-start my-auto">
<ul class="list-inline mb-2">
<li class="list-inline-item"><a href="#!">About</a></li>
<li class="list-inline-item">⋅</li>
<li class="list-inline-item"><a href="#!">Contact</a></li>
<li class="list-inline-item">⋅</li>
<li class="list-inline-item"><a href="#!">Terms of Use</a></li>
<li class="list-inline-item">⋅</li>
<li class="list-inline-item"><a href="#!">Privacy Policy</a></li>
</ul>
<p class="text-muted small mb-4 mb-lg-0">© Your Website 2021. All Rights Reserved.</p>
</div>
<div class="col-lg-6 h-100 text-center text-lg-end my-auto">
<ul class="list-inline mb-0">
<li class="list-inline-item me-4">
<a href="#!"><i class="bi-facebook fs-3"></i></a>
</li>
<li class="list-inline-item me-4">
<a href="#!"><i class="bi-twitter fs-3"></i></a>
</li>
<li class="list-inline-item">
<a href="#!"><i class="bi-instagram fs-3"></i></a>
</li>
</ul>
</div>
</div>
</div>
</footer>
<!-- Bootstrap core JS-->
<script src="https://cdn.jsdelivr.net/npm/bootstrap@5.1.3/dist/js/bootstrap.bundle.min.js"></script>
<!-- Core theme JS-->
<script src="js/scripts.js"></script>
<!-- * * * * * * * * * * * * * * * * * * * * * * * * * * * * * * * * * * * * * * * *-->
<!-- * * SB Forms JS * *-->
<!-- * * Activate your form at https://startbootstrap.com/solution/contact-forms * *-->
<!-- * * * * * * * * * * * * * * * * * * * * * * * * * * * * * * * * * * * * * * * *-->
<script src="https://cdn.startbootstrap.com/sb-forms-latest.js"></script>
</body>
</html>↓
resources/views/parts/footer.blade.php
<!-- Footer -->
<footer class="footer bg-light">
<div class="container">
<div class="row">
<div class="col-lg-6 h-100 text-center text-lg-start my-auto">
<ul class="list-inline mb-2">
<li class="list-inline-item"><a href="{{ url('/') }}">TOP</a></li>
<li class="list-inline-item">⋅</li>
<li class="list-inline-item"><a href="{{ url('/about') }}">会社概要</a></li>
</ul>
<p class="text-muted small mb-4 mb-lg-0">© 2020 株式会社○○. All Rights Reserved.</p>
</div>
<div class="col-lg-6 h-100 text-center text-lg-end my-auto">
<ul class="list-inline mb-0">
<li class="list-inline-item me-4">
<a href="#!"><i class="bi-facebook fs-3"></i></a>
</li>
<li class="list-inline-item me-4">
<a href="#!"><i class="bi-twitter fs-3"></i></a>
</li>
<li class="list-inline-item">
<a href="#!"><i class="bi-instagram fs-3"></i></a>
</li>
</ul>
</div>
</div>
</div>
</footer>
<!-- Bootstrap core JS-->
<script src="https://cdn.jsdelivr.net/npm/bootstrap@5.1.3/dist/js/bootstrap.bundle.min.js"></script>
<!-- Core theme JS-->
<script src="{{ asset('js/scripts.js') }}"></script>
<!-- * * * * * * * * * * * * * * * * * * * * * * * * * * * * * * * * * * * * * * * *-->
<!-- * * SB Forms JS * *-->
<!-- * * Activate your form at https://startbootstrap.com/solution/contact-forms * *-->
<!-- * * * * * * * * * * * * * * * * * * * * * * * * * * * * * * * * * * * * * * * *-->
<script src="https://cdn.startbootstrap.com/sb-forms-latest.js"></script>
</body>
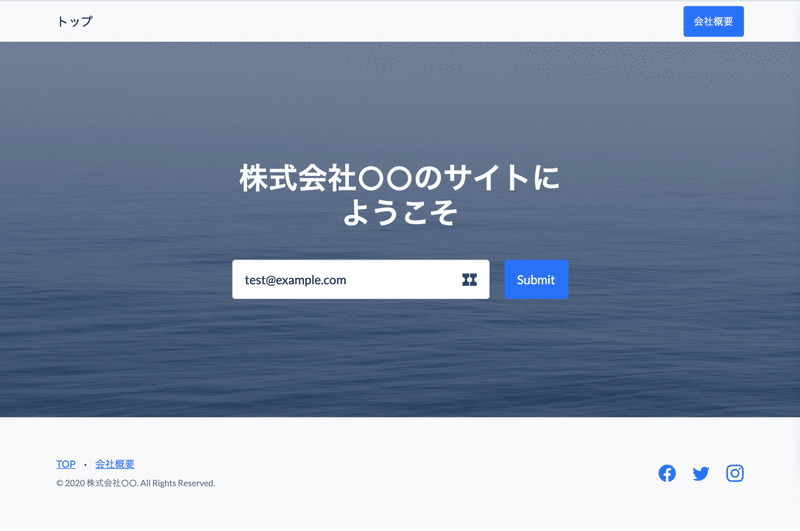
</html>不要なナビゲーションの削除を行っています。また、JavaScriptの読み込みも忘れないようにasset()に切り替えましょう。
ここまで組み込むと次のようなページが表示されます。
# トップページのコンテンツの組み込み
トップページのコンテンツ部分の組み込みを行います。そのまま全てtop.blade.phpに貼り付ける形だとコードが非常に長くなってしまいます。
デザインとコーディングを良く見るとトップページのコンテンツはいくつかの要素に分割ができそうです。
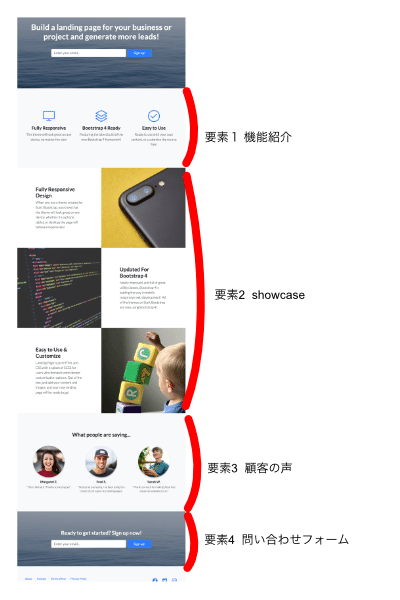
トップページの要素は複数のファイルにわけて組み込みます。
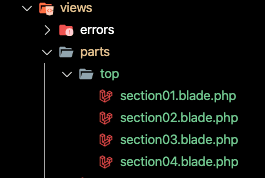
まずはトップページのコンテンツを設置するために次のディレクトリを作成します。
resources/views/parts/top
ここに次の4ファイルを作成します。
- section01.blade.php
- section02.blade.php
- section03.blade.php
- section04.blade.php
各要素を組み込むより前にtop.blade.phpを変更して読み込むようにしましょう。
top.blade.php
@include("parts.common")
@include("parts.header")

@include("parts.top.section01")
@include("parts.top.section02")
@include("parts.top.section03")
@include("parts.top.section04")

@include("parts.footer")
最終的なtop.blade.phpは極限までシンプルになっています。ここまでキレイに分割すると順番を入れ替えたり、コンテンツを差し替えるなどの対応もスムーズに出来ます。
それではsection01.blalde.php〜section04.blade.phpまでindex.htmlの<section>〜</section>まで順に組み込んでいきましょう。
ここでは全文は載せませんが、元のテンプレートにコメントがあるのでヒントとして使いながらファイルを作っていってください。
resources/views/parts/top/section01.blade.php
<!-- Icons Grid -->
<section class="features-icons bg-light text-center">
(中略)
</section>
resources/views/parts/top/section02.blade.php
<!-- Image Showcases -->
<section class="showcase">
(中略)
</section>
section02は書き換えが少し難しい場所があります。
asset()を使って画像のURLを指定する箇所ですが、CSSのurl指定と入れ子になっています、そのためカッコの書き順などに注意が必要です。
<div class="col-lg-6 order-lg-2 text-white showcase-img"
    style="background-image: url('img/bg-showcase-1.jpg');">
</div>

↓

<div class="col-lg-6 order-lg-2 text-white showcase-img"
    style="background-image: url('{{ asset('img/bg-showcase-1.jpg') }}');">
</div>
3箇所ありますのでご注意ください。
resources/views/parts/top/section03.blade.php
<!-- Testimonials -->
<section class="testimonials text-center bg-light">
(中略)
</section>
section03には<img>タグで画像を指定している部分があります。この部分も忘れないようにasset()で書き換えましょう。
<img class="img-fluid rounded-circle mb-3"
    src="img/testimonials-1.jpg" alt="">
↓
<img class="img-fluid rounded-circle mb-3"
    src="{{ asset('img/testimonials-1.jpg') }}" alt="">
resources/views/parts/top/section04.blade.php
<!-- Call to Action -->
<section class="call-to-action text-white text-center">
(中略)
</section>
最後まで組み込めたらリロードして動作を確認してみましょう。
Landing Pageのプレビューと比較して問題がないか確認してみてください。
コンテンツに設置した各要素の中身は自由に変更してみてください。
# 会社概要ページの作成
ここまで組み込んだ段階で、会社概要ページがどうなっているか開いてみると次のような表示になっています。
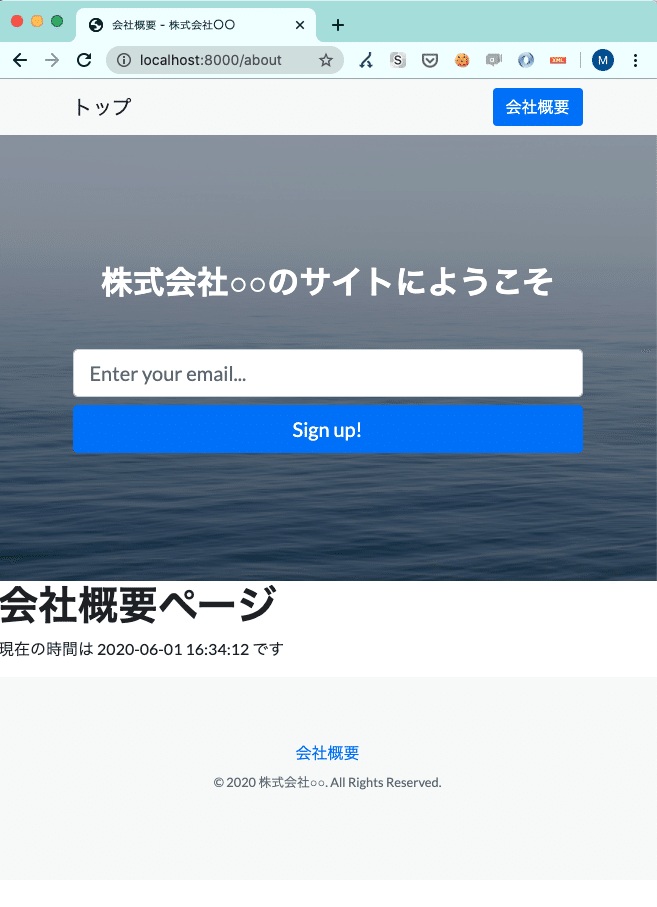
会社概要ページにはヘッダーで組み込んだ「株式会社○○のサイトにようこそ」の要素は不要でした。
また、CSSがこのページだけあたっていないので見栄えが少し悪いです。
about.blade.phpも変更してデザインの調節とちょっと会社概要ページっぽくコンテンツを足してみました。
resources/views/about.blade.php
@include("parts.common", [ "title" => "会社概要" ])
@include("parts.nav")

<!-- Image Showcases -->
<section class="showcase">
   <div class="container-fluid p-0">
     <div class="row no-gutters">
       <div class="col-lg-6 order-lg-1 my-auto showcase-text">
		<h2>会社概要ページ</h2>

		<p class="lead mb-0">
			株式会社○○の会社概要についてお知らせします。<br />
			現在の時間は {{ $current_time }} です<br />
			<br />

			<ul>
				<li>社 名: 株式会社○○</li>
				<li>創 業: 2020年12月31日</li>
				<li>代表者: ○○ △△</li>
				<li>所在地: 東京都千代田区千代田1-1</li>
			</ul>
		</p>
       </div>
	  </div>
	</div>
</section>

@include("parts.footer")
@includer("parts.header")で読み込んでいた箇所@includer("parts.nav")だけにしてナビゲーションバーだけにしています。
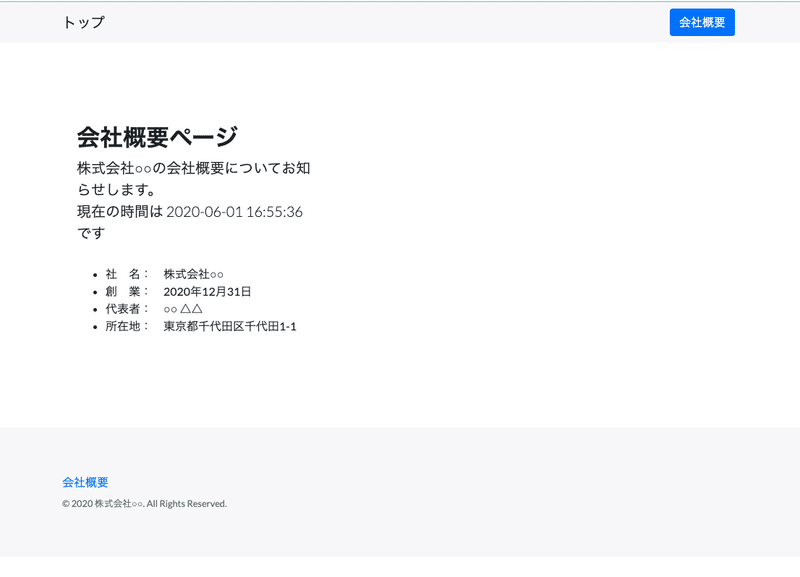
section03.blade.phpの見た目がいい感じだったのでそれを借りてきて会社概要ページを作成しました。
また、footerに</body></html>が含まれているので削除しています。
このように無料でダウンロード出来るテンプレートには必要なレイアウトが不足している場合があります。その時はHTML/CSSの知識を使って自分の力で作ってみましょう。
ブラウザで開くとこんな感じになります。
# まとめ
本稿を振り返り、次のことを確認してください
・ファイルの設置場所と組み込み方の手順
・エラーの確認方法
ここまでの内容をGitHubで公開しています。
会社サイトの作成は今回で完了となります。こういうことが知りたい、こうするにはどうしたらいいの?などの質問がありましたらコメントやTwitterにて是非フィードバックをください!
https://twitter.com/laravelstudy
次回は補講として作成した会社ページをレンタルサーバーで公開するためのテクニックを紹介します。公開はもう少し先になる予定です。
おつかれさまでした!
---
Laravelの教科書
完成まで突っ走る意気込みです。サポートしていただけると非常に嬉しいです。応援よろしくお願いします。