
【第4回Django公式サイト チュートリアル】投票ボタンと投票結果を作成。

こんにちは(@t_kun_kamakiri)
引き続きDjangoの公式サイトにあるチュートリアルを見ながら学習を進めたいと思います。
前回の記事↓
基本はチュートリアルに沿って進めますが、ところどころ不明点があるので、補足しながら進めます。
本日は、以下のような投票ボタンを作成したいと思います。
↓以下のような投票結果を表示させます。
投票ボタンを設定
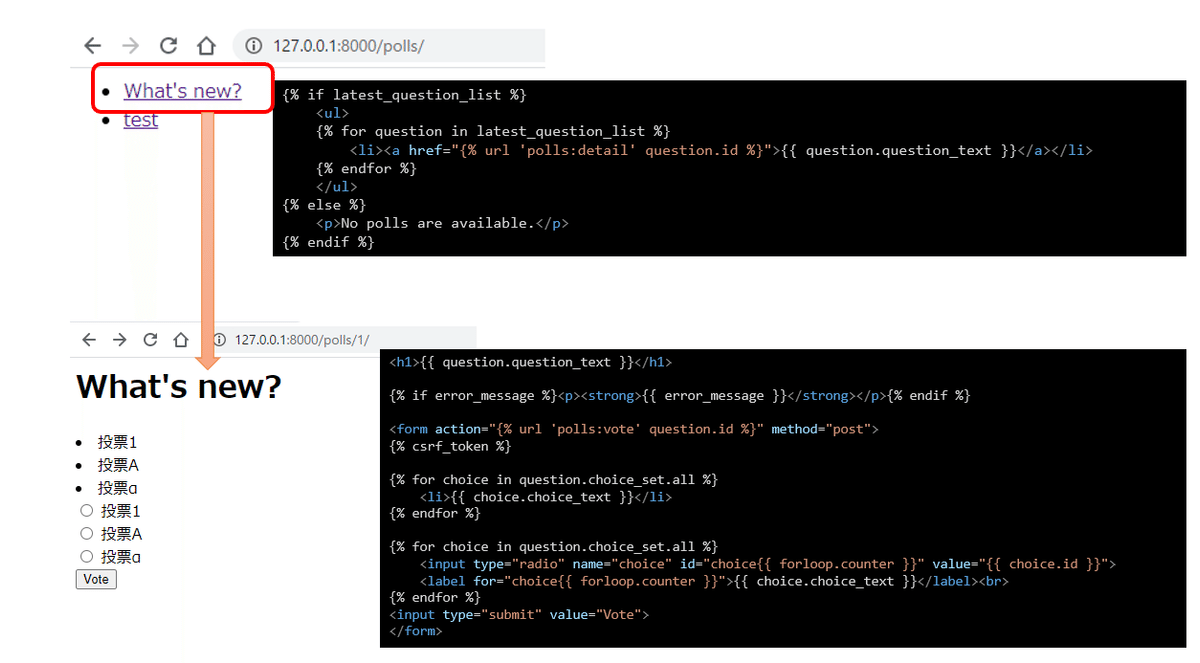
投票ボタンを作成するために、「templates/polls/detail.html」をあたらに作成して、以下のように書きます。
<h1>{{ question.question_text }}</h1>

{% if error_message %}<p><strong>{{ error_message }}</strong></p>{% endif %}

<form action="{% url 'polls:vote' question.id %}" method="post">
{% csrf_token %}

{% for choice in question.choice_set.all %}
   <li>{{ choice.choice_text }}</li>
{% endfor %}

{% for choice in question.choice_set.all %}
   <input type="radio" name="choice" id="choice{{ forloop.counter }}" value="{{ choice.id }}">
   <label for="choice{{ forloop.counter }}">{{ choice.choice_text }}</label><br>
{% endfor %}
<input type="submit" value="Vote">
</form>
これを読み込む関数を「polls/views.py」に書く必要があります。
from django.shortcuts import render, get_object_or_404
from .models import Question, Choice
from django.http import HttpResponse, HttpResponseRedirect
from django.urls import reverse

# Create your views here.
def hellofunc(request):
   return HttpResponse("やっほー")

# def index(request):
#     latest_question_list = Question.objects.order_by('-pub_date')[:5]
#     output = ', '.join([q.question_text for q in latest_question_list])
#     return HttpResponse(output)
def index(request):
   latest_question_list = Question.objects.order_by('-pub_date')[:5]
   context = {'latest_question_list': latest_question_list}
   return render(request, 'polls/index.html', context)


# def detail(request, question_id):
#     return HttpResponse("You're looking at question %s." % question_id)
def detail(request, question_id):
   question = get_object_or_404(Question, pk=question_id)
   return render(request, 'polls/detail.html', {'question': question})


# def results(request, question_id):
#     response = "You're looking at the results of question %s."
#     return HttpResponse(response % question_id)
def results(request, question_id):
   question = get_object_or_404(Question, pk=question_id)
   return render(request, 'polls/results.html', {'question': question})

# ...
def vote(request, question_id):
   question = get_object_or_404(Question, pk=question_id)
   try:
       selected_choice = question.choice_set.get(pk=request.POST['choice'])
   except (KeyError, Choice.DoesNotExist):
       # Redisplay the question voting form.
       return render(request, 'polls/detail.html', {
           'question': question,
           'error_message': "You didn't select a choice.",
       })
   else:
       selected_choice.votes += 1
       selected_choice.save()
       # Always return an HttpResponseRedirect after successfully dealing
       # with POST data. This prevents data from being posted twice if a
       # user hits the Back button.
       return HttpResponseRedirect(reverse('polls:results', args=(question.id,)))
※「def detail(request, question_id):」の部分です。
次にこの関数はどのURLリクエストが来たときに動作するのかを「poll/s/urls.py」に指示する必要があります。
from django.contrib import admin
from django.urls import path
from . import views

app_name = 'polls'
urlpatterns = [
   # ex: /polls/
   path('', views.index, name='index'),
   # ex: /polls/5/
   path('<int:question_id>/', views.detail, name='detail'),
   # ex: /polls/5/results/
   path('<int:question_id>/results/', views.results, name='results'),
   # ex: /polls/5/vote/
   path('<int:question_id>/vote/', views.vote, name='vote'),
]
ただこれだけでは、Web上には以下のように表示してくれません。
なぜなら「detal.html」の中の、「question.choice_set.all」のquestionという変数には何も設定をしていないからです。
※ちなみに、「question 」は「views.py」で設定した変数を「detail.html」に引き渡しているという事をお忘れなく。
def detail(request, question_id):
question = get_object_or_404(Question, pk=question_id)
return render(request, 'polls/detail.html', {'question': question})
questionのデータベースを設定
すでに、データベース自体は「polls/models.py」を以下のようにしたので、データベースはできているのですが、値がまだ入っていません。
from django.db import models

# Create your models here.
class Question(models.Model):
   question_text = models.CharField(max_length=200)
   pub_date = models.DateTimeField('date published')


class Choice(models.Model):
   question = models.ForeignKey(Question, on_delete=models.CASCADE)
   choice_text = models.CharField(max_length=200)
   votes = models.IntegerField(default=0)
そのために、まず開発用サーバーを立ち上げて
python3 manage.py runserverとして、
http://127.0.0.1:8000/admin
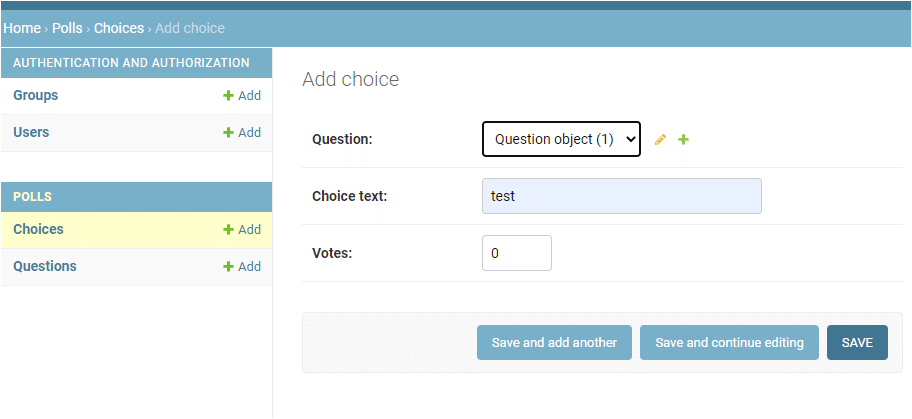
から管理画面に行って以下のようにデータを追加していきます。
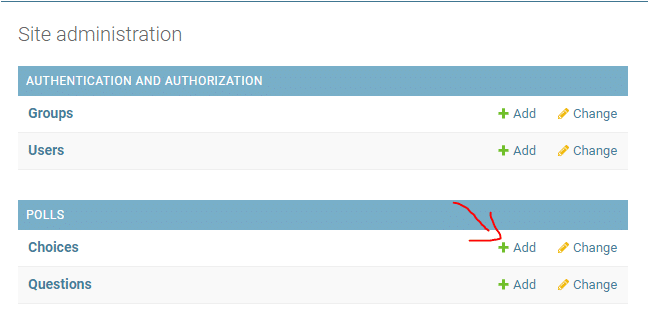
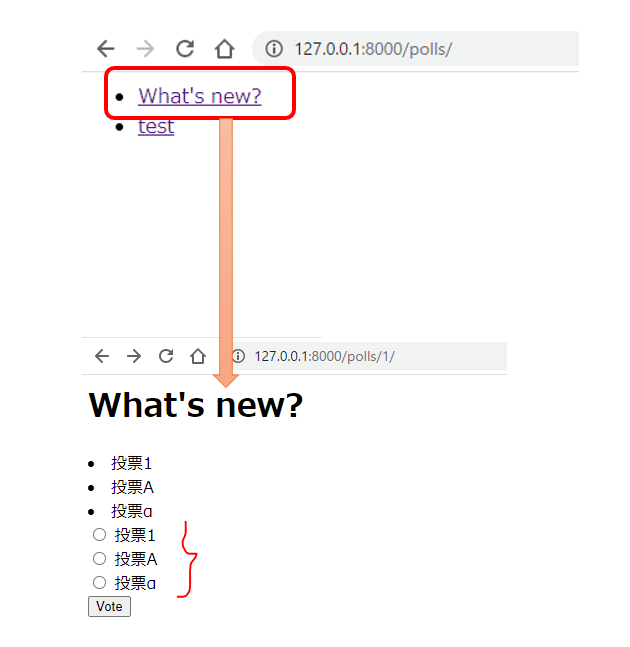
そして、もう一度
http://127.0.0.1:8000/polls/
に行くと以下のように投票ボタンが出ているのが確認できます。
※勉強のため「detail.html」に
{% for choice in question.choice_set.all %}
<li>{{ choice.choice_text }}</li>
{% endfor %}
と書いて何が出力されるか確認をしてみれば、理解が深まると思います。
ただ、今のままだと「Vote」を押してもエラーが出てしまいます。
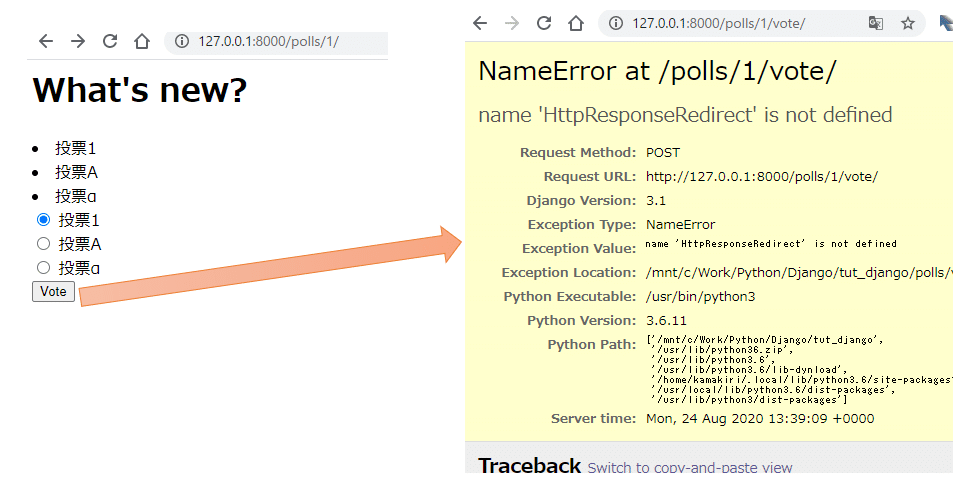
これは「Vote」を押した際には「polls/vote」に行くのですが、「urls.py」で設定した以下の記述より、
path('<int:question_id>/vote/', views.vote, name='vote'),
「views.py」のvote関数呼ばれるのですが、「views.pyのvote」は以下のようになっています。
def vote(request, question_id):
   question = get_object_or_404(Question, pk=question_id)
   try:
       selected_choice = question.choice_set.get(pk=request.POST['choice'])
   except (KeyError, Choice.DoesNotExist):
       # Redisplay the question voting form.
       return render(request, 'polls/detail.html', {
           'question': question,
           'error_message': "You didn't select a choice.",
       })
   else:
       selected_choice.votes += 1
       selected_choice.save()
       # Always return an HttpResponseRedirect after successfully dealing
       # with POST data. This prevents data from being posted twice if a
       # user hits the Back button.
       return HttpResponseRedirect(reverse('polls:results', args=(question.id,)))
最後の「return HttpResponseRedirect(reverse('polls:results', args=(question.id,)))」で、「urls.py」に書かれた「nama='results'」に紐づいた
path('<int:question_id>/results/', views.results, name='results'),
がどうなっているのかというというと、さらに「views.py」の「results関数」を読んでいます。
def results(request, question_id):
question = get_object_or_404(Question, pk=question_id)
return render(request, 'polls/results.html', {'question': question})
これを見ると、「polls/results.html」を呼び出しているのがわかるとおもいますが、まだそのようなファイルを作成していません。
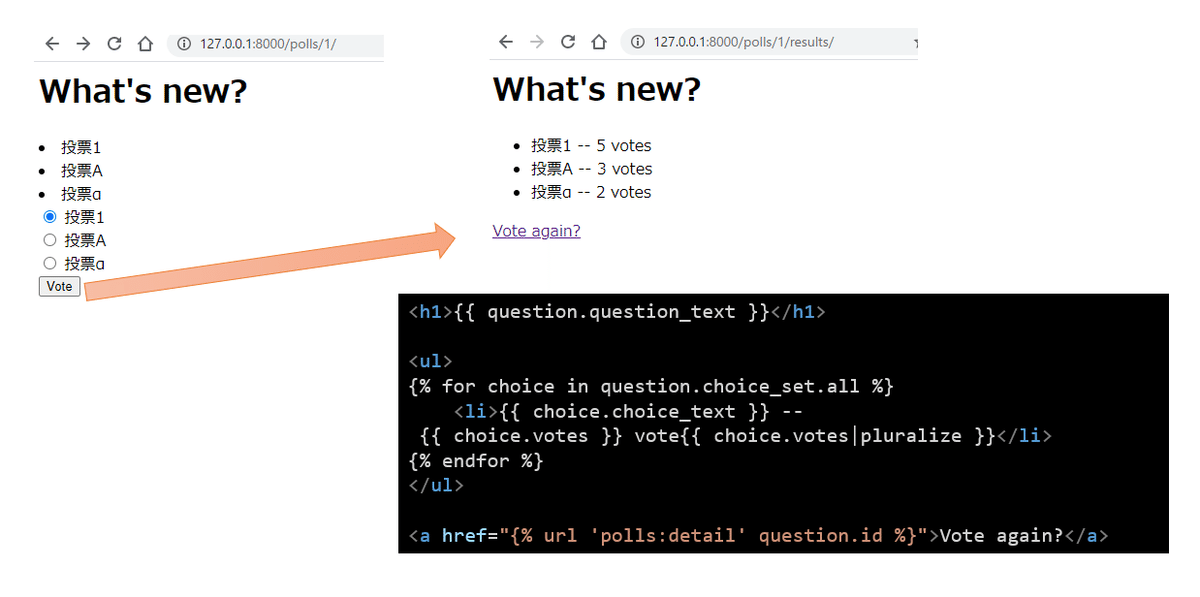
results.htmlの作成
では、「templates/results.html」を新規作成して以下のようにします。
<h1>{{ question.question_text }}</h1>

<ul>
{% for choice in question.choice_set.all %}
   <li>{{ choice.choice_text }} -- {{ choice.votes }} vote{{ choice.votes|pluralize }}</li>
{% endfor %}
</ul>

<a href="{% url 'polls:detail' question.id %}">Vote again?</a>
以上が終わったら、もう一度開発用サーバーを立ち上げてWebを確認してみましょう。
このように、「resutls.html」が呼び出されていればOKです。
本日は以上です。
持ってるDjangoの書籍
僕は以下の2冊の書籍を持っています。
書籍はまとまって勉強できるので、気に入ったやつを手元に置いておくといいですよね。
この2冊は入門としては良いのではないですかね。
とくに、「Pyton Django3超入門」はかなりわかりやすく書かれているので読んでいて楽しいです。
Twitter➡@t_kun_kamakiri
ブログ➡宇宙に入ったカマキリ(物理ブログ)
ココナラ➡物理の質問サポートサービス
この記事が気に入ったらサポートをしてみませんか?