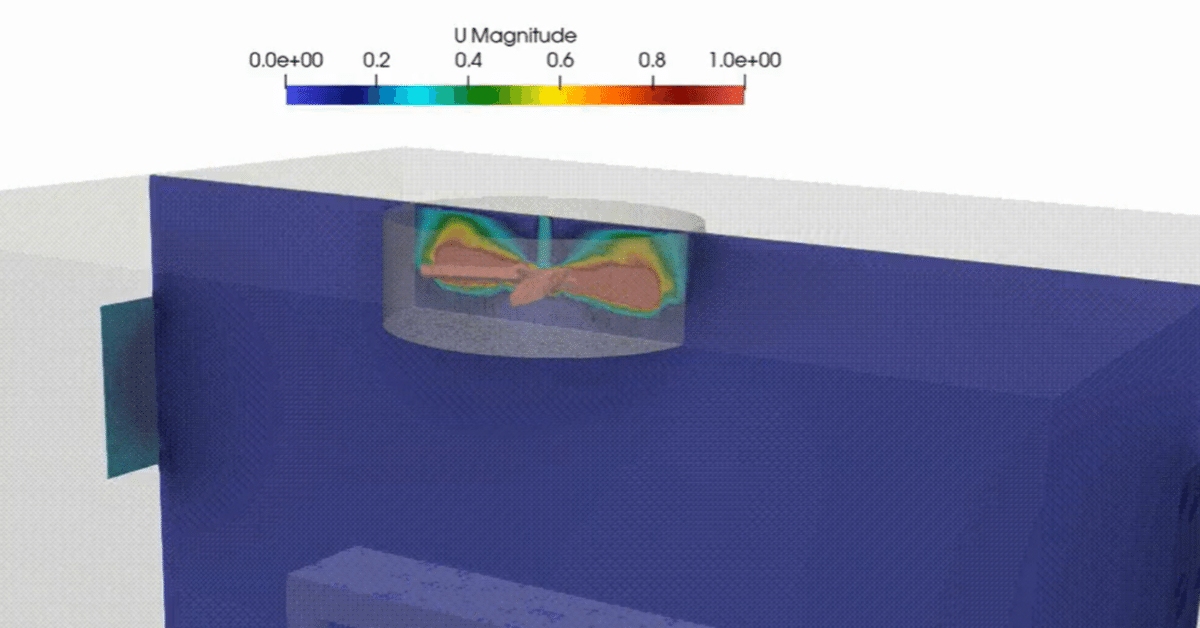
【OpenFOAM(dynamicMesh)】部屋の天井のファンが回転する解析
今回はこちらのチュートリアルの解説を行います。
これをメッシュ数1200万でやったらどうなるのかな。 pic.twitter.com/L1lvTXDzu9
— カマキリ🐲CAE頑張る (@t_kun_kamakiri) May 1, 2023
こちらの公式にも解説がありますが、自身の理解のためにメモとして残しておきます。
OpenFOAMv2212(WSL2)
チュートリアルをコピー
dynamicMeshDictが使われているチュートリアルを探します。
find $FOAM_TUTORIALS -name "dynamicMeshDict"以下のようにいくつか候補が出てきます。

cp -r /usr/lib/openfoam/openfoam2212/tutorials/incompressible/pimpleFoam/RAS/rotatingFanInRoom .フォルダを移動します。
cd rotatingFanInRoomフォルダ構成
フォルダ構成は以下のようになっています。
.
├── 0.orig
│   ├── U
│   ├── k
│   ├── nut
│   ├── omega
│   └── p
├── Allclean
├── Allrun
├── Allrun.pre
├── constant
│   ├── dynamicMeshDict
│   ├── g
│   ├── transportProperties
│   └── turbulenceProperties
└── system
    ├── blockMeshDict
    ├── controlDict
    ├── createPatchDict
    ├── decomposeParDict
    ├── fvSchemes
    ├── fvSolution
    ├── relVelocity
    ├── snappyHexMeshDict
    └── surfaceFeatureExtractDict
計算までに必要なコマンドはAllrunスクリプトで確認することができまるので、まずは確認。
#!/bin/sh
cd "${0%/*}" || exit                                # Run from this directory
. ${WM_PROJECT_DIR:?}/bin/tools/RunFunctions        # Tutorial run functions
#------------------------------------------------------------------------------

cp -rf \
    "$FOAM_TUTORIALS"/resources/geometry/rotatingFanInRoom \
    constant/triSurface

# - meshing
runApplication surfaceFeatureExtract

runApplication blockMesh

runApplication snappyHexMesh -overwrite

# - force removal of fields generated by snappy
rm -rf 0

# renumber the mesh
runApplication renumberMesh -overwrite

# - create the inlet/outlet and AMI patches
runApplication createPatch -overwrite

# - set the initial fields
restore0Dir

#------------------------------------------------------------------------------
Allrun
./Allrun.pre

runApplication decomposePar

runParallel $(getApplication)

runApplication reconstructPar
Allrun.preでプリ処理を行っているようです。
まずは、stlファイルを以下のフォルダからコピーしてきます。
cp -rf \
    "$FOAM_TUTORIALS"/resources/geometry/rotatingFanInRoom \
    constant/triSurface
コピーされたものは以下のように圧縮ファイルにされているため、解凍しないとParaViewでは確認ができないので解凍します。
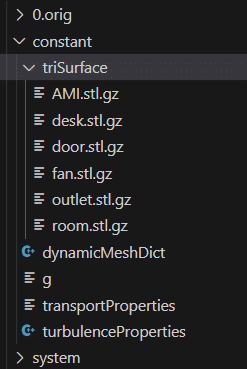
以下のコマンドでstlファイルが解凍されます。
gzip -d constant/triSurface/*.gz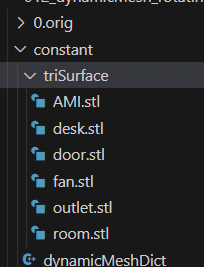
解凍をしなくても計算は実行できますが、ParaViewでモデルを確認したいので今回は解凍したまま進めます。
モデルの確認
解凍したモデルをParaViewで確認するとこのようになっています。
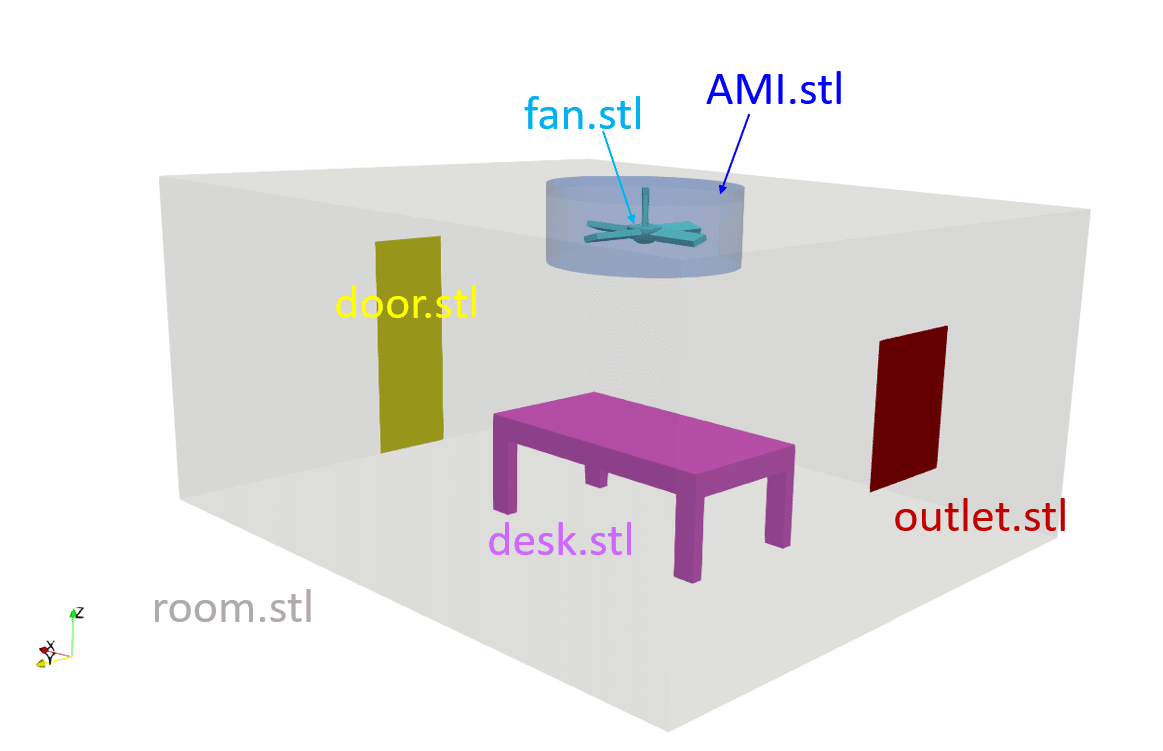
AMI.stlが今回回転するメッシュのcellZoneになります。
特徴線の抽出
まずはsnappyHexMeshでのメッシュ作成で必要な特徴線を抽出します。
system/surfaceFeatureExtractDict
AMI.stl
{
    extractionMethod    extractFromSurface;
    includedAngle       150;
}

door.stl
{
    extractionMethod    extractFromSurface;
    includedAngle       150;
}

fan.stl
{
    extractionMethod    extractFromSurface;
    includedAngle       150;
}

outlet.stl
{
    extractionMethod    extractFromSurface;
    includedAngle       150;
}

room.stl
{
    extractionMethod    extractFromSurface;
    includedAngle       150;
}

desk.stl
{
    extractionMethod    extractFromSurface;
    includedAngle       150;
}
モデルひとつひとつ特徴線を作ります。
surfaceFeatureExtract特徴線はconstant/triSurfaceに拡張子「.eMesh」で作られています。
ベースメッシュの作成
ベースメッシュはblockMeshで作ります。
system/blockMeshDIct
scale   1;

vertices
(
    ( -6.0 -0.5 -0.1)
    (  0.5 -0.5 -0.1)
    (  0.5  5.0 -0.1)
    ( -6.0  5.0 -0.1)
    ( -6.0 -0.5 2.9)
    (  0.5 -0.5 2.9)
    (  0.5  5.0 2.9)
    ( -6.0  5.0 2.9)
);

blocks
(
    hex (0 1 2 3 4 5 6 7) (65 55 30) simpleGrading (1 1 1)
);

edges
(
);

boundary
(
    allBoundary
    {
        type patch;
        faces
        (
            (3 7 6 2)
            (0 4 7 3)
            (2 6 5 1)
            (1 5 4 0)
            (0 3 2 1)
            (4 5 6 7)
        );
    }
);
以下のコマンドを実行します。
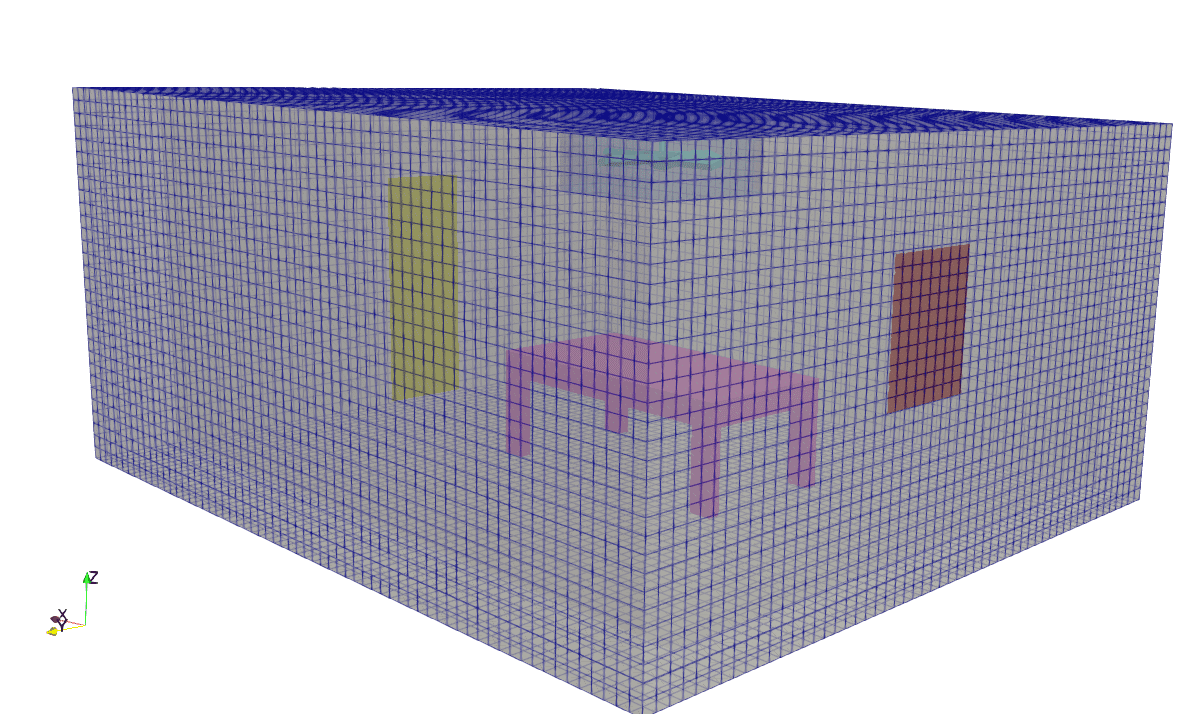
blockMeshモデル全体を覆うようにベースメッシュを作ります。
形状に沿ってメッシュ作成
メッシュ作成はsnappyHexMeshで行います。
system/snappyHexMeshDict
castellatedMesh true;
snap            true;
addLayers       false;

geometry
{
    AMI.stl{ type triSurfaceMesh; name AMI;}
    door.stl{ type triSurfaceMesh; name door;}
    fan.stl{ type triSurfaceMesh; name fan;}
    outlet.stl{ type triSurfaceMesh; name outlet;}
    room.stl{ type triSurfaceMesh; name room;}
    desk.stl{ type triSurfaceMesh; name desk;}
}

castellatedMeshControls
{
    maxLocalCells 100000;
    maxGlobalCells 8000000;
    minRefinementCells 0;
    maxLoadUnbalance 0.10;
    nCellsBetweenLevels 2;

    features
    (
        { file "AMI.eMesh"; level 2;} // Note: better: level 3
        { file "fan.eMesh"; level 2;} // Note: better: level 3
        { file "door.eMesh"; level 0;}
        { file "outlet.eMesh"; level 0;}
        { file "room.eMesh"; level 0;}
        { file "desk.eMesh"; level 1;}
    );

    refinementSurfaces
    {
        AMI
        {
            level (2 2); // Note: better: levels 3 3
            faceType boundary;
            cellZone rotatingZone;
            faceZone rotatingZone;
            cellZoneInside inside;
        }
        fan{ level (2 2);} // Note: better: levels 3 3
        door{ level (0 0);}
        outlet{ level (0 0);}
        room{ level (0 0);}
        desk{ level (1 1);}
    }

    resolveFeatureAngle 30;

    refinementRegions
    {
        // Note: for better mesh quality utilize this refinement region
        // AMI{ mode inside; levels ((1E15 3));}
    }

    locationInMesh (0.1001 0.001 0.0101);
    allowFreeStandingZoneFaces false;
}

snapControls
{
    nSmoothPatch 3;
    tolerance 4.0;
    nSolveIter 300;
    nRelaxIter 5;
    nFeatureSnapIter 10;
    implicitFeatureSnap true;
    explicitFeatureSnap false;
    multiRegionFeatureSnap true;
}

addLayersControls
{
    relativeSizes true;

    layers
    {
    }

    expansionRatio 1.0;
    finalLayerThickness 0.3;
    minThickness 0.1;
    nGrow 0;
    featureAngle 30;
    nRelaxIter 3;
    nSmoothSurfaceNormals 1;
    nSmoothNormals 3;
    nSmoothThickness 10;
    maxFaceThicknessRatio 0.5;
    maxThicknessToMedialRatio 0.3;
    minMedialAxisAngle 90;
    nBufferCellsNoExtrude 0;
    nLayerIter 50;
}

meshQualityControls
{
    maxNonOrtho 65;
    maxBoundarySkewness 20;
    maxInternalSkewness 4;
    maxConcave 80;
    minVol 1e-13;
    minTetQuality -1;
    minArea -1;
    minTwist 0.01;
    minDeterminant 0.001;
    minFaceWeight 0.05;
    minVolRatio 0.01;
    minTriangleTwist -1;
    nSmoothScale 4;
    errorReduction 0.75;
    relaxed
    {
        maxNonOrtho 75;
    }
}

mergeTolerance 1e-6;
重要な部分は次の2点です。
1.AMI.stlを使ってfaceZoneとcellZoneを作る
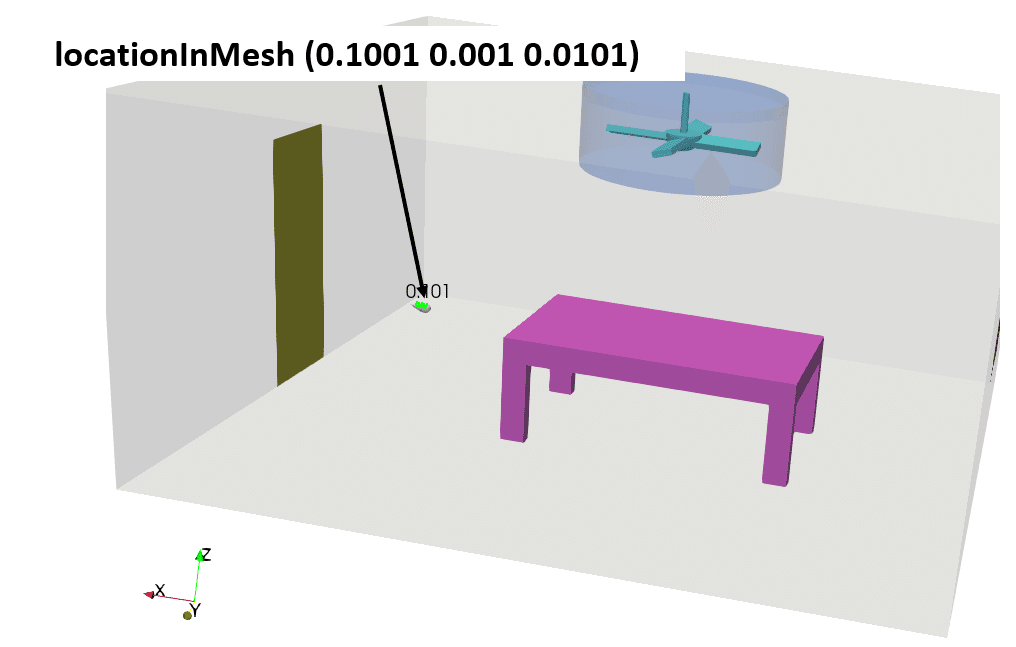
2.locationInMesh (0.1001 0.001 0.0101)をメッシュを作りたい領域に座標設定
1.AMI.stlを使ってfaceZoneとcellZoneを作る
こちらはまずgeometoryでstlに対応する面に名前を付けます。
・faceZoneで回転する領域の境界面を作成
・cellZoneでは回転する体積領域を作成
geometry
{
    AMI.stl{ type triSurfaceMesh; name AMI;}
    door.stl{ type triSurfaceMesh; name door;}
    fan.stl{ type triSurfaceMesh; name fan;}
    outlet.stl{ type triSurfaceMesh; name outlet;}
    room.stl{ type triSurfaceMesh; name room;}
    desk.stl{ type triSurfaceMesh; name desk;}
}
castellatedMeshControls
{

(省略)

    refinementSurfaces
    {
        AMI
        {
            level (2 2); // Note: better: levels 3 3
            faceType boundary;
            cellZone rotatingZone;
            faceZone rotatingZone;
            cellZoneInside inside;
        }
        fan{ level (2 2);} // Note: better: levels 3 3
        door{ level (0 0);}
        outlet{ level (0 0);}
        room{ level (0 0);}
        desk{ level (1 1);}
    }
 (省略)
  }
}
2.locationInMesh (0.1001 0.001 0.0101)をメッシュを作りたい領域に座標設定
こちらはstlで囲まれている領域のどの部分をメッシュ作成したいかを指定する部分です。
snappyHexMesh -overwrite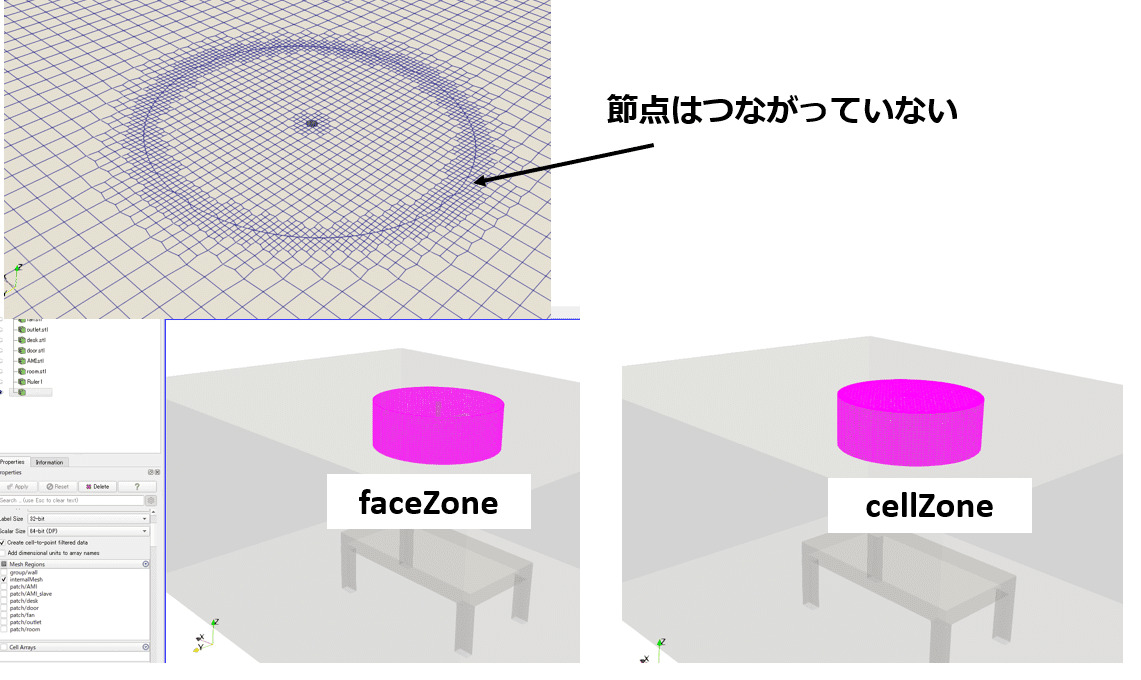
節点のつながっていない境界面は、
・AMI
・AMI_slave
という名前が付けられています。
もし仮に以下の記述がなかった場合
    refinementSurfaces
    {
       /*
        AMI
        {
            level (2 2); // Note: better: levels 3 3
            faceType boundary;
            cellZone rotatingZone;
            faceZone rotatingZone;
            cellZoneInside inside;
        }
       */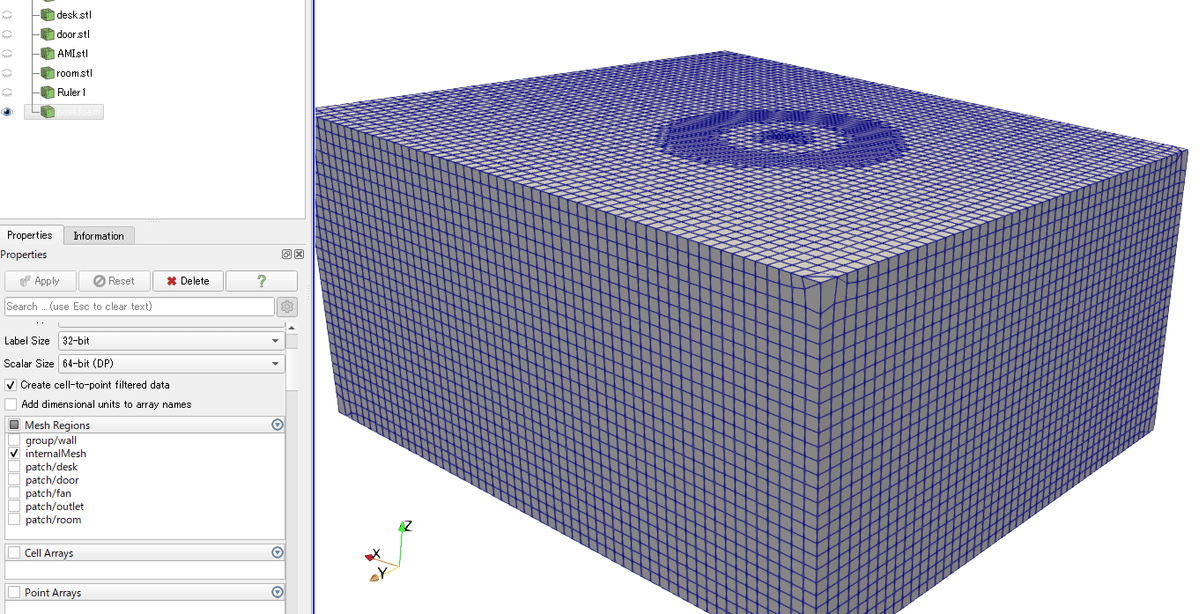
以下のようにメッシュが作られます。
AMI.stlで区切られているのですが、つながってメッシュ生成されてしまいます。
境界のタイプとパッチ名を変更
AMIというパッチ名はAMI1にしてcyclicAMI境界とし、対応する相手の面はAMI2とします。
同様に、AMI_slaveというパッチ名はAMI2にしてcyclicAMI境界とし、対応する相手の面はAMI1とします。
system/createPatchDict
pointSync false;

patches
(
    {
        //- Master side patch
        name            AMI1;
        patchInfo
        {
            type            cyclicAMI;
            matchTolerance  0.0001;
            neighbourPatch  AMI2;
            transform       noOrdering;
        }
        constructFrom patches;
        patches (AMI);
    }

    {
        //- Slave side patch
        name            AMI2;
        patchInfo
        {
            type            cyclicAMI;
            matchTolerance  0.0001;
            neighbourPatch  AMI1;
            transform       noOrdering;
        }
        constructFrom patches;
        patches (AMI_slave);
    }
);
コマンドを実行します。
createPatch -overwrite境界条件を確認
0.origをコピーして境界条件を確認します。
cp -r 0.orig 00/U
dimensions      [0 1 -1 0 0 0 0];

internalField   uniform (0 0 0);

boundaryField
{
    AMI1
    {
        type            cyclicAMI;
        value           uniform (0 0 0);
    }

    AMI2
    {
        type            cyclicAMI;
        value           uniform (0 0 0);
    }

    fan
    {
        type            movingWallVelocity;
        value           uniform (0 0 0);
    }

    door
    {
        type            fixedValue;
        value           uniform (-0.1 0 0);
    }

    outlet
    {
        type            pressureInletOutletVelocity;
        value           uniform (0 0 0);
    }

    room
    {
        type            noSlip;
    }

    desk
    {
        type            noSlip;
    }
}
0/p
dimensions      [0 2 -2 0 0 0 0];

internalField   uniform 0;

boundaryField
{
    AMI1
    {
        type            cyclicAMI;
        value           uniform 0;
    }

    AMI2
    {
        type            cyclicAMI;
        value           uniform 0;
    }

    fan
    {
        type            fixedFluxPressure;
        value           uniform 0;
    }

    door
    {
        type            fixedFluxPressure;
        value           uniform 0;
    }

    outlet
    {
        type            fixedValue;
        value           uniform 0;
    }

    room
    {
        type            fixedFluxPressure;
        value           uniform 0;
    }

    desk
    {
        type            fixedFluxPressure;
        value           uniform 0;
    }
}
0/k
dimensions      [0 2 -2 0 0 0 0];

internalField   uniform 0.00341;

boundaryField
{
    AMI1
    {
        type            cyclicAMI;
        value           uniform 0.00341;
    }

    AMI2
    {
        type            cyclicAMI;
        value           uniform 0.00341;
    }

    fan
    {
        type            kqRWallFunction;
        value           uniform 0.00341;
    }

    door
    {
        type            turbulentIntensityKineticEnergyInlet;
        intensity       0.05;
        value           uniform 0.00341;
    }

    outlet
    {
        type            zeroGradient;
    }

    room
    {
        type            kqRWallFunction;
        value           uniform 0.00341;
    }

    desk
    {
        type            kqRWallFunction;
        value           uniform 0.00341;
    }
}
0/omega
dimensions      [0 0 -1 0 0 0 0];

internalField   uniform 0.1;

boundaryField
{
    AMI1
    {
        type            cyclicAMI;
        value           uniform 0.1;
    }

    AMI2
    {
        type            cyclicAMI;
        value           uniform 0.1;
    }

    fan
    {
        type            omegaWallFunction;
        value           uniform 0.1;
    }

    door
    {
        type            turbulentMixingLengthFrequencyInlet;
        mixingLength    1.2;
        value           uniform 0.1;
    }

    outlet
    {
        type            zeroGradient;
    }

    room
    {
        type            omegaWallFunction;
        value           uniform 0.1;
    }

    desk
    {
        type            omegaWallFunction;
        value           uniform 0.1;
    }
}
0/nut
dimensions      [0 2 -1 0 0 0 0];

internalField   uniform 1e-5;

boundaryField
{
    AMI1
    {
        type            cyclicAMI;
        value           uniform 1e-5;
    }

    AMI2
    {
        type            cyclicAMI;
        value           uniform 1e-5;
    }

    fan
    {
        type            nutkWallFunction;
        value           uniform 1e-5;
    }

    door
    {
        type            zeroGradient;
    }

    outlet
    {
        type            zeroGradient;
    }

    room
    {
        type            nutkWallFunction;
        value           uniform 1e-5;
    }

    desk
    {
        type            nutkWallFunction;
        value           uniform 1e-5;
    }
}
dynamicMeshの確認
今回回転させるセル領域はsnappyHexMeshで作った「cellZone rotatingZone」であることに注意します。
constant/dynamicMeshDict
dynamicFvMesh   dynamicMotionSolverFvMesh;

motionSolverLibs (fvMotionSolvers);

motionSolver    solidBody;

cellZone        rotatingZone;

solidBodyMotionFunction  rotatingMotion;

origin      (-3 2 2.6);
axis        (0 0 1);
omega       10;
dynamicFvMeshには様々な種類がありますが、以下のように適当に「banana」としたら計算実行(pimpleFoam)でエラーが出ます。
dynamicFvMesh banana;エラー内容
dynamicFVMeshに関して
dynamicInkJetFvMesh
dynamicMotionSolverFvMesh
dynamicMotionSolverFvMeshAMI
dynamicMotionSolverListFvMesh
dynamicMotionSolverTopoFvMesh
dynamicMultiMotionSolverFvMesh
dynamicOversetFvMesh
dynamicRefineFvMesh
movingConeTopoFvMesh
rawTopoChangerFvMesh
staticFvMesh
staticOversetFvMesh
これを見て選択するtypeを調べて使うようにすれば良いです。
また、
motionSolver banana;motionSolverに関しては
coded
displacementComponentLaplacian
displacementInterpolation
displacementLaplacian
displacementLayeredMotion
displacementSBRStress
multiSolidBodyMotionSolver
solidBody
solidBodyDisplacementLaplacian
surfaceAlignedSBRStress
velocityComponentLaplacian
velocityDisplacement
velocityLaplacian
さらに、
solidBodyMotionFunction banana;solidBodyMotionFunctionに関して
SDA
axisRotationMotion
drivenLinearMotion
linearMotion
multiMotion
oscillatingLinearMotion
oscillatingRotatingMotion
rotatingMotion
tabulated6DoFMotion
type名から何となく何をするものかイメージが付きますね。
pimpleFoamこれにて部屋の天井のファンが回る解析ができました。
これをメッシュ数1200万でやったらどうなるのかな。 pic.twitter.com/L1lvTXDzu9
— カマキリ🐲CAE頑張る (@t_kun_kamakiri) May 1, 2023
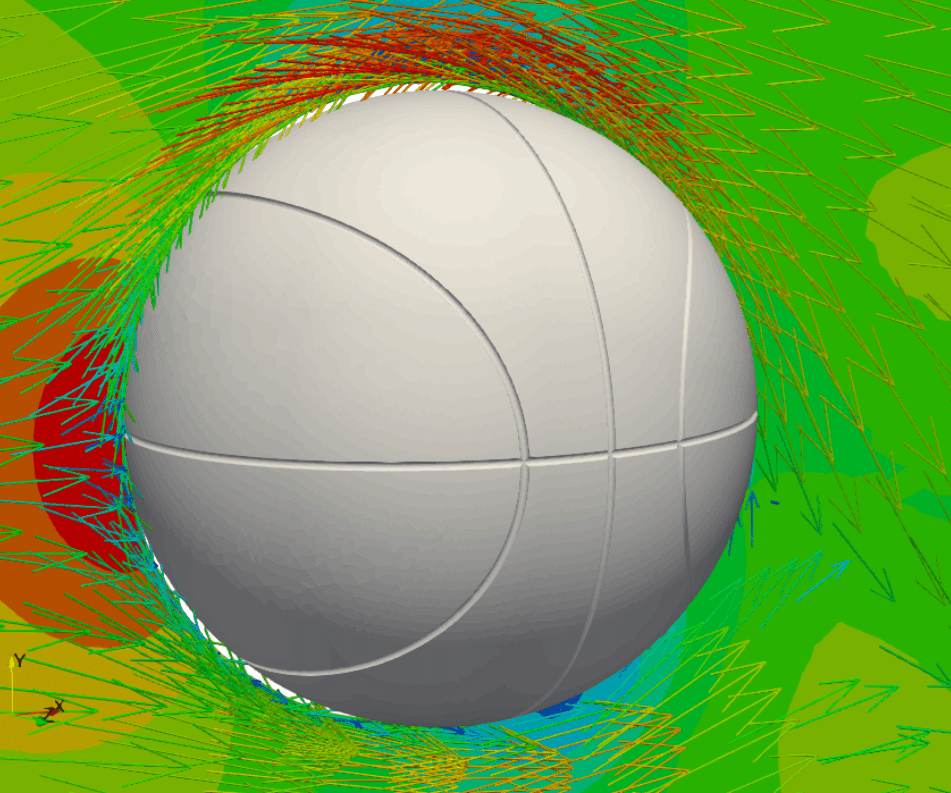
メッシュの回転方法を理解したところで次はバスケットボールの周りを回転させたいと思います。
こんなイメージです。
※こちらは球体周りに回転境界を設けただけですが・・・
OpenFOAMをはじめるなら
OpenFOAMをはじめるなら手にしておきたい日本語の書籍がこちらです。
OpenFOAMをインストールしてこれから深く学んでいこうという方や、使い慣れてもレベルアップのために何回も読みたくなるくらい参考になる内容です。
初心者の方にはチュートリアルを動かしながら学んでいくのが良いでしょう。こちらはOpenFOAMをインストールしてチュートリアルを少し触っていくところからはじめて最後に重合格子をやるなど面白い内容です。
Twitter➡@t_kun_kamakiri
ブログ➡宇宙に入ったカマキリ(物理ブログ)
youtube➡理系ブログ
