
IFTTTを使ってTwitterとMastodonに同時投稿する

ツイッターに投稿した内容をマストドンにも同時投稿する方法の解説記事です。IFTTTを使います。
2023年5月以降、IFTTTでTwitter連携機能を使用する場合は有料プラン(IFTTT ProもしくはIFTTT Pro+)に加入する必要があります。
(2022/02/17 一部修正しました)
(2023/07/17 一部追記しました)
1. マストドン側の設定
ユーザー設定 → </>開発 → 新規アプリ へと進む。
( https://<サーバのURL>/settings/applications/new )
以下の項目を設定する。
アプリの名前…tootに表示される投稿元の名前
アプリのウェブサイト…tootに表示される投稿元URL(任意)
リダイレクトURI…既定値( urn:ietf:wg:oauth:2.0:oob )を使用する
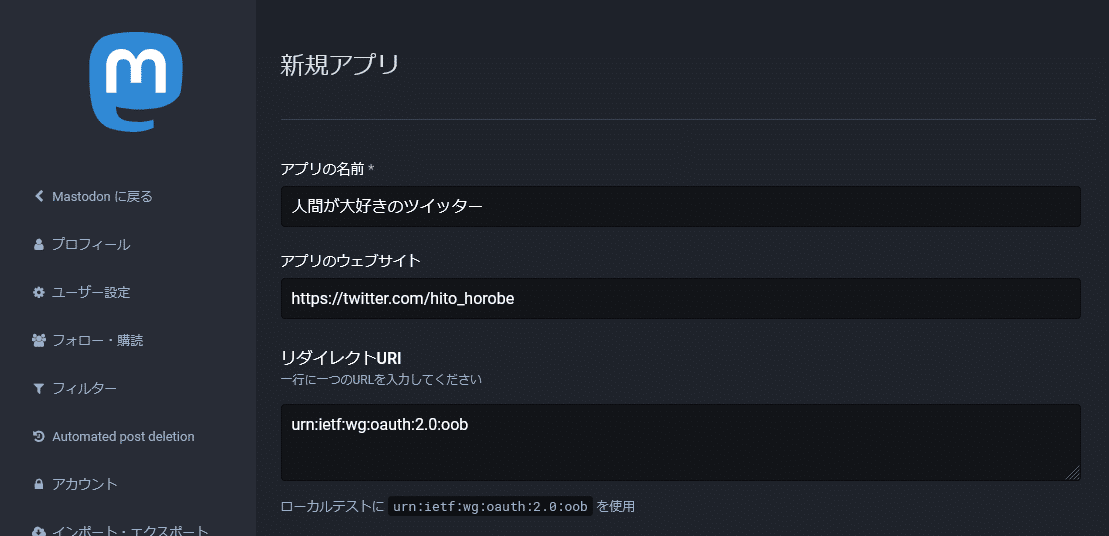
今回は投稿のみを行うので、権限はwrite:statusesのみチェックを入れる。

「送信」ボタンを押し、アプリを作成する。「クライアントキー」「クライアントシークレット」「アクセストークン」の3つが生成されるが、そのうち「アクセストークン」だけを使用する。

2. IFTTT側の設定
事前にIFTTTのアカウントを作成しておく。
画面上部の「Create」ボタンを押して新規アプリを作成する。

「If This」をクリックしてトリガーを作成する。

検索ボックスに「Twitter」と入力してTwitterを選択する。アプリを連携するか尋ねられるので許可してTwitterとIFTTTを連携させる
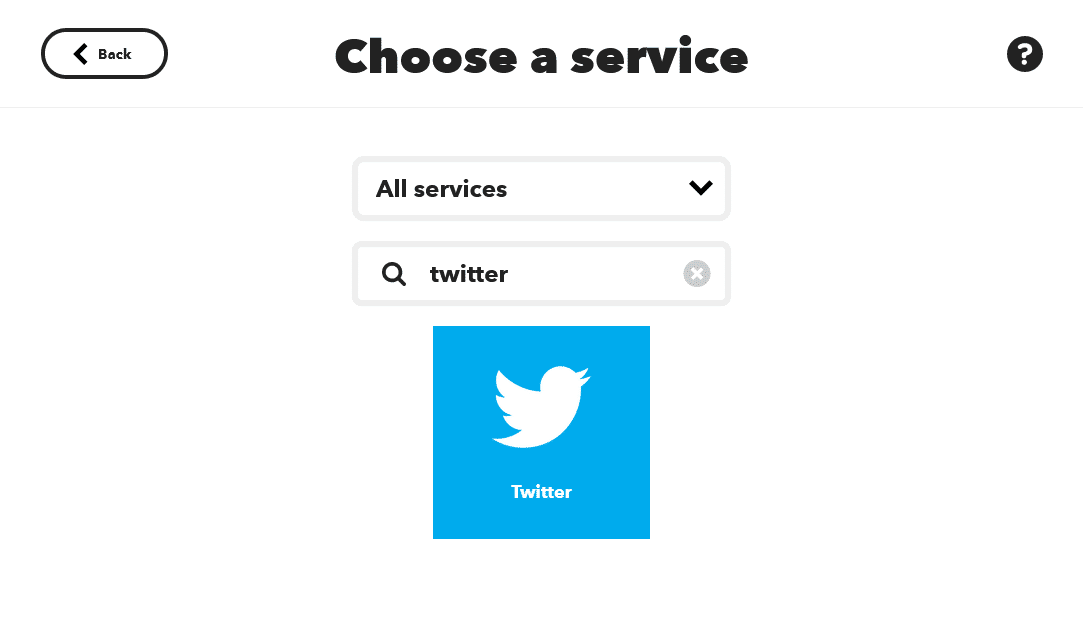
左上の「New tweet by you」を選択する。

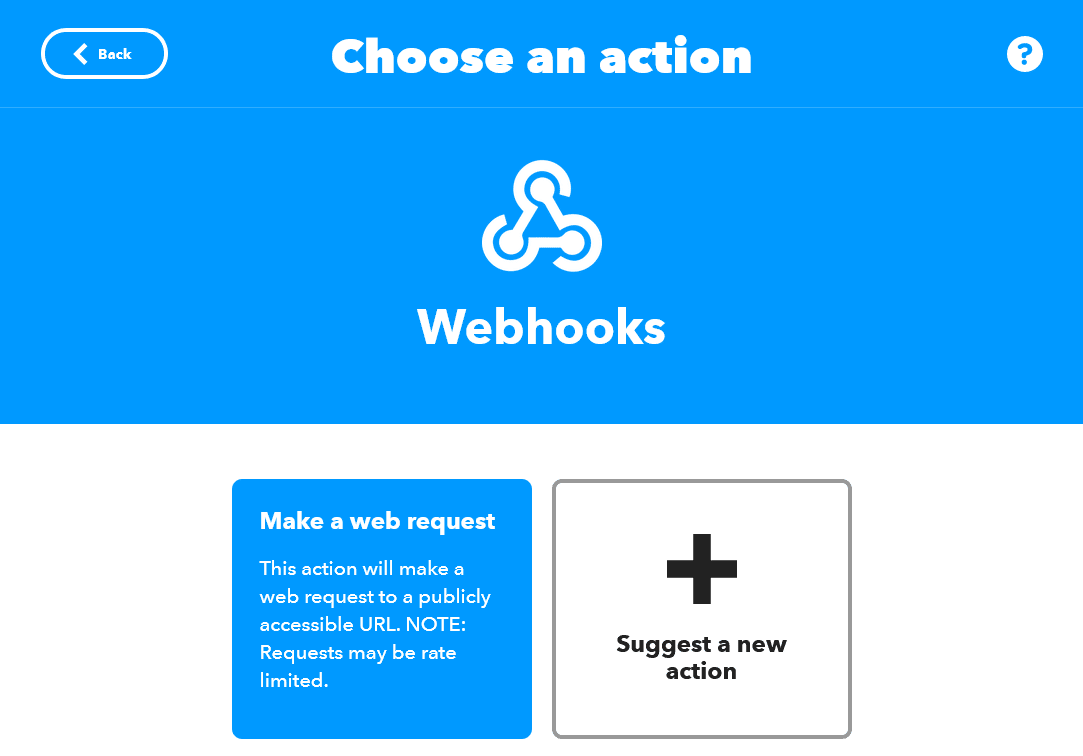
「Then That」をクリックしてアクションを作成する。

検索ボックスに「Webhooks」と入力し、Webhooksを選択する。

「Make a web request」を選択する。
Webhookを作成する。以下のように設定する。
URL
https://<サーバのURL>/api/v1/statusesMethod
POSTContent Type
application/jsonAdditional Headers
※Bearer と トークンの間は半角スペースを空ける
Content-Type: application/json
Authorization: Bearer <アクセストークンをここに入力>
Body
※Textを<<<>>>で囲んでエスケープする
{
  "status": "<<<{{Text}}>>>"
}
公開範囲を制限する場合はvisibilityを設定する。値はpublic, unlisted, private, directのいずれか
{
  "status": "<<<{{Text}}>>>" ,
  "visibility": "unlisted"
}
「Continue」ボタンで次に進む。

アプリに分かりやすい名前を付け、「Finish」ボタンを押して完了する。
3. 完成
Twitterに投稿した内容がMastodonにも投稿される
パオーッ(マストドンが破壊される音)
— 人間が大好き (@hito_horobe) February 12, 2023