素人が翌日の勤務(シフト)を告げるLINEbotを作った話【4】

コードを記述します
今回からいよいよ本格的にコードを書いていきます。
①オウム返しbotを消去
まず、第二回で書いたオウム返しbotのコードを消去します。
②シートの指定
①の次の行に以下のコードをコピペしてください。
var channel_access_token = "トークン";
var headers = {
  "Content-Type": "application/json; charset=UTF-8",
  "Authorization": "Bearer " + channel_access_token
};
var spreadsheet = SpreadsheetApp.openById("ID");
var sheet = spreadsheet.getSheetByName("勤務表");
var userSheet = spreadsheet.getSheetByName("ユーザー");
var logSheet = spreadsheet.getSheetByName("ログ");
1行目の”トークン”には、Messaging APIのチャネルアクセストークンを入力します。
SpreadsheetApp.openById("ID")のIDの部分には、スプレッドシートのIDを入力します。
スプレッドシートのURL、https://script.google.com/d/〇〇〇〇〇/edit・・・の〇〇〇〇○部分の文字列がIDです。
※openById("ID");の部分をgetActiveSpreadsheet();にしちゃってもokです。この場合はIDの入力は省略できます。
③イベント処理
次に、イベント処理を行う関数を書きます。GASにはウェブアプリケーションに関する関数として、doGet関数とdoPost関数が用意されています。実を言うと筆者はこの違いについてよくわかっていませんが、LINEbotを作るときはdoPostを使う、とお約束的な覚え方をしています。
function doPost(e) {
 const webhookData = JSON.parse(e.postData.contents).events[0];
 const eventType = webhookData.type;
 const replyToken = webhookData.replyToken;

 switch(eventType){
   case "follow":
     follow(webhookData);
     break;
   case "message":
     messageEvent(webhookData);
     break;
   case "unfollow":
     unfollow(webhookData);
     break;
 }
}
doPost(e)の(e)に情報が格納されていて、まず最初の行でGASで読めるように置き換えてから、webhookDataという変数に格納しています。
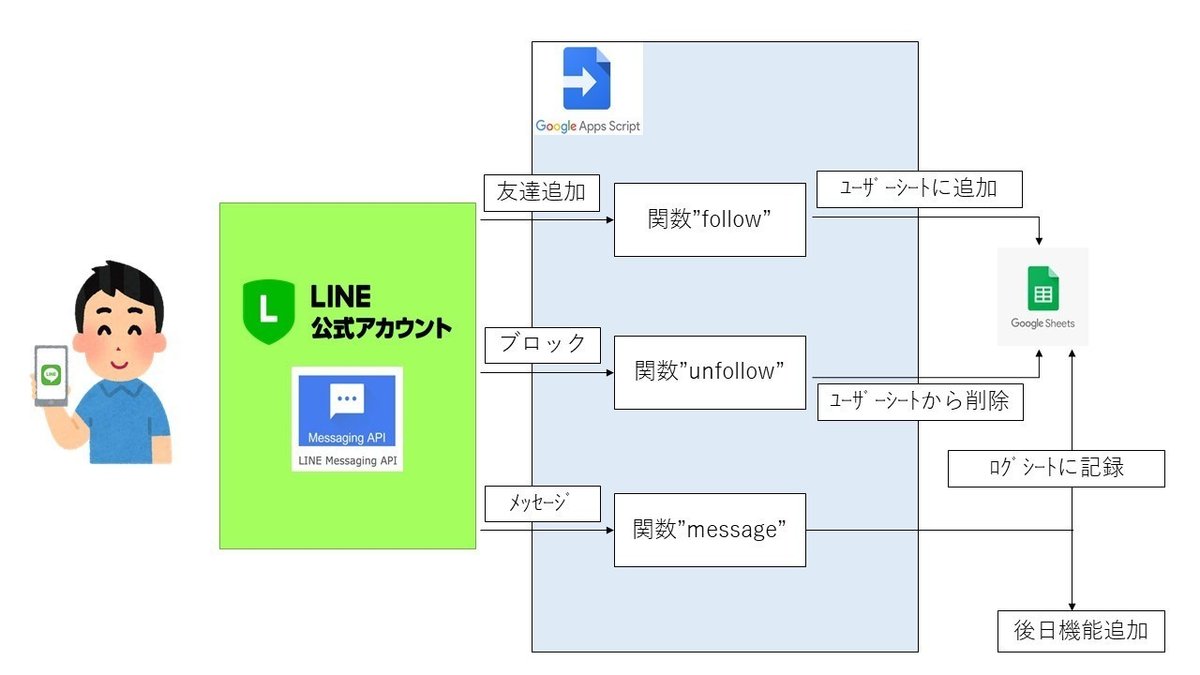
次に、ユーザーの動作の種類(イベント)に対する挙動をswitch文で記述しています。口語訳すると、
"follow(友達追加)"された場合、関数【follow(webhookData)】を実行。
”message(メッセージ受信)”の場合、関数【messageEvent(webhookData)】を実行。
図にするとこんな感じ↓
【余談】関数ってなんだ?
いま当たり前のように関数って言葉を使いましたが、プログラミング初心者には理解しづらいですよね。excelの関数とは違う概念なので、筆者はずいぶん混乱しました。そこで筆者は、プログラムを「会社の組織」に置き換えて便宜的に理解することにしました。
プログラムは基本的に全部ひとつの関数(コードのまとまり)で書くことができます。これは例えると個人経営の小さな会社で、全部一人で業務をこなしているイメージです。
しかし会社の規模が大きく複雑になってくると、一人では回せません。経理や営業の従業員を雇ったり、部署が必要になったりしてきます。プログラミングでも同じことが言えて、複雑になってくると一つ一つの機能を独立させた方が効率的に扱うことができるんですね。この一つ一つの機能、セクションを「関数」と言うのだと理解しています。厳密には正しくない理解かもしれませんが、初心者にとっては便宜的な理解で十分です。
④各イベントの関数を記述
③で振り分けられたイベントごとの実行内容を書いていきます。まずはユーザーが公式アカウントをフォロー(友達登録)したときの挙動です。
function follow(webhookData){
 const userId = webhookData.source.userId;
 const nickname = getUserProfile(userId);
 const last_row = userSheet.getLastRow();

 userSheet.getRange(last_row+1,2).setValue(nickname);
 userSheet.getRange(last_row+1,3).setValue(userId);
 userSheet.getDataRange().removeDuplicates([3])
}
doPostからwebhookDataを渡してもらっているので、そのデータをもとにユーザーシートを更新しています。
次はアンフォロー(ブロック)されたときの挙動です。
function unfollow(webhookData){
 const data = userSheet.getDataRange()
 const userId = webhookData.source.userId;
 const userFinder = data.createTextFinder(userId).findAll();
 for ( var i = 0; i < userFinder.length; i++ ) {
       var userRow = userFinder[i].getRow();
       var user = userFinder[i].offset(0,1).getValue()
   userSheet.deleteRows(userRow);
 }
}
今度は逆に登録されているユーザーのデータを削除する動きです。”follow”の際に固有のidが登録されているので、今度は"unfollow"したユーザーのidを検索し、その行をまるごと削除する流れです。
GASにはexcelのVLOOKUP関数のような便利機能がないので、文字列の検索や操作にはちょっとした工夫が必要です。今回はcreateTextFinderメソッドとfor文の組み合わせで検索、削除しています。
続いてメッセージ受信時の挙動です。ID、表示名(ニックネーム)、タイムスタンプと、メッセージの内容が記録されます。
function messageEvent(webhookData){
 const userId = webhookData.source.userId;
 const nickname = getUserProfile(userId);
 const timestamp = new Date(webhookData.timestamp)
 const message = webhookData.message.text.split("\n");
 const replyToken = webhookData.replyToken;
 const whatToDo = message[0];
 const name = message[1];
 const date = message[2];
 const newshift = message[3];
 const last_row = userSheet.getLastRow();
 const lastRow = logSheet.getLastRow();

 logSheet.getRange(lastRow+1,1).setValue(timestamp);
 logSheet.getRange(lastRow+1,2).setValue(nickname);
 logSheet.getRange(lastRow+1,3).setValue(userId);
 logSheet.getRange(lastRow+1,4).setValue(message[0]);
 logSheet.getRange(lastRow+1,5).setValue(message[1]);
 logSheet.getRange(lastRow+1,6).setValue(message[2]);
 logSheet.getRange(lastRow+1,7).setValue(message[3]);
}
メッセージは改行ごとに分割される仕組みになっていて、あとでこのメッセージを使って機能を追加する予定です。詳しい説明はその時に。
最後に、LINE上の表示名(ニックネーム)を取得する関数を書きます。
function getUserProfile(userId){
 const Url = 'https://api.line.me/v2/bot/profile/' + userId;
 const userProfile = UrlFetchApp.fetch(Url,{
   'headers': {
     'Authorization' :  'Bearer ' + channel_access_token,
   },
 })
 return JSON.parse(userProfile).displayName;
}
ここまでのコードまとめ
const channel_access_token = "トークン";
const headers = {
  "Content-Type": "application/json; charset=UTF-8",
  "Authorization": "Bearer " + channel_access_token
};
const spreadsheet = SpreadsheetApp.openById("ID");
const sheet = spreadsheet.getSheetByName("勤務表");
const userSheet = spreadsheet.getSheetByName("ユーザー");
const logSheet = spreadsheet.getSheetByName("ログ");


function doPost(e) {
 const webhookData = JSON.parse(e.postData.contents).events[0];
 const eventType = webhookData.type;
 const replyToken = webhookData.replyToken;

 switch(eventType){
   case "follow":
     follow(webhookData);
     break;
   case "message":
     messageEvent(webhookData);
     break;
   case "unfollow":
     unfollow(webhookData)
     break;

 }
}

function follow(webhookData){
 const userId = webhookData.source.userId;
 const nickname = getUserProfile(userId);
 const last_row = userSheet.getLastRow();

 userSheet.getRange(last_row+1,2).setValue(nickname);
 userSheet.getRange(last_row+1,3).setValue(userId);
 userSheet.getDataRange().removeDuplicates([3])
}


function messageEvent(webhookData){
 const userId = webhookData.source.userId;
 const nickname = getUserProfile(userId);
 const timestamp = new Date(webhookData.timestamp)
 const message = webhookData.message.text.split("\n");
 const replyToken = webhookData.replyToken;
 const whatToDo = message[0];
 const name = message[1];
 const date = message[2];
 const newshift = message[3];
 const last_row = userSheet.getLastRow();
 const lastRow = logSheet.getLastRow();

 logSheet.getRange(lastRow+1,1).setValue(timestamp);
 logSheet.getRange(lastRow+1,2).setValue(nickname);
 logSheet.getRange(lastRow+1,3).setValue(userId);
 logSheet.getRange(lastRow+1,4).setValue(message[0]);
 logSheet.getRange(lastRow+1,5).setValue(message[1]);
 logSheet.getRange(lastRow+1,6).setValue(message[2]);
 logSheet.getRange(lastRow+1,7).setValue(message[3]);
}

function unfollow(webhookData){
 const data = userSheet.getDataRange()
 const userId = webhookData.source.userId;
 const userFinder = data.createTextFinder(userId).findAll();
 for ( var i = 0; i < userFinder.length; i++ ) {
       var userRow = userFinder[i].getRow();
       var user = userFinder[i].offset(0,1).getValue()
   userSheet.deleteRows(userRow);
 }
}

function getUserProfile(userId){
 const Url = 'https://api.line.me/v2/bot/profile/' + userId;
 const userProfile = UrlFetchApp.fetch(Url,{
   'headers': {
     'Authorization' :  'Bearer ' + channel_access_token,
   },
 })
 return JSON.parse(userProfile).displayName;
}
テストしてみましょう
ウェブアプリとして公開し、WebhookURLを更新したらテストを行ないます
まずメッセージログを見てみましょう。なんでもいいのでコメントしてみましょう。途中で改行を入れたときの挙動もチェックします。

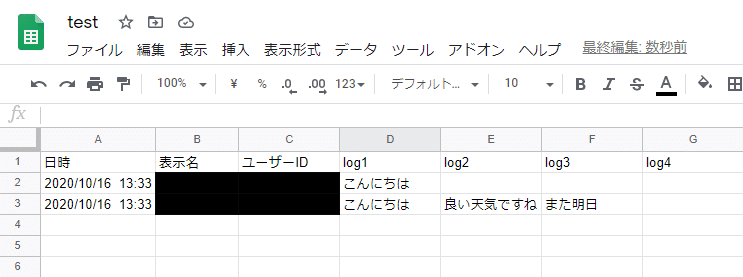
LINE側で入力した内容や時刻が合っていると思います。改行したところは、メッセージが分割されているのがわかると思います。
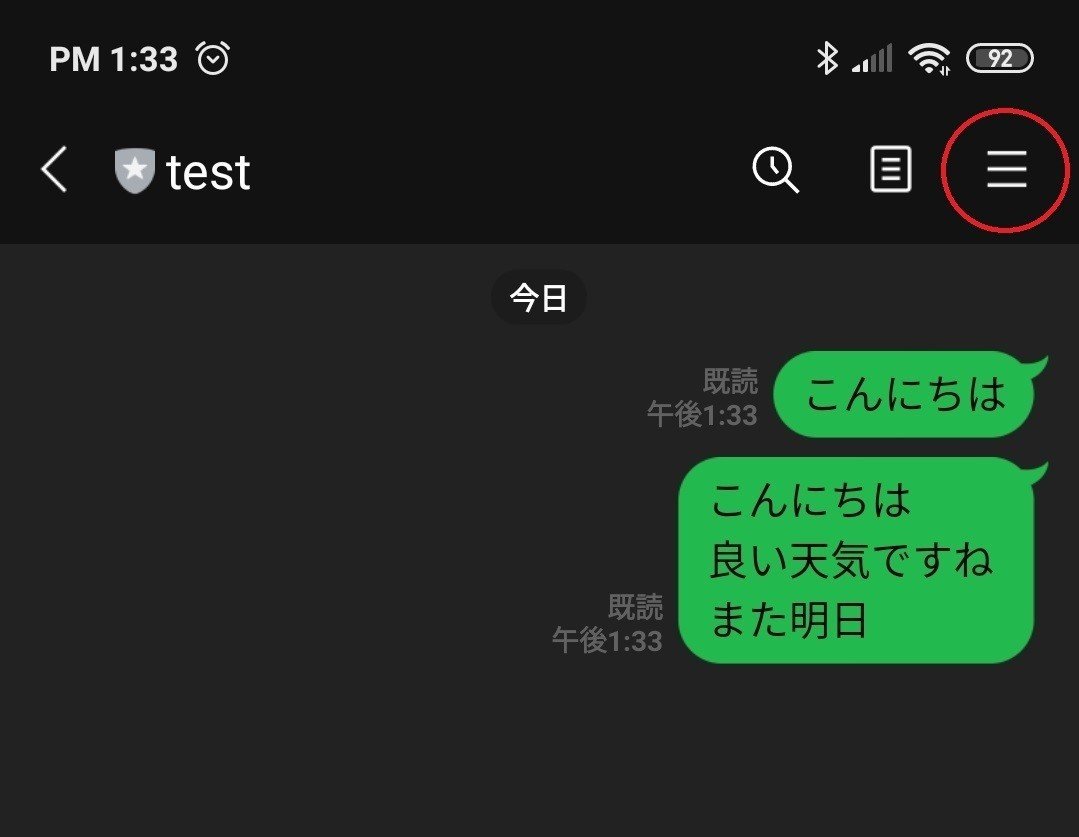
続いて、フォロー関連のチェックです。現時点ではユーザーリストは空欄になっていると思いますが、実際にはすでに友達になっています。ブロックと解除を繰り返してチェックしたいと思います。
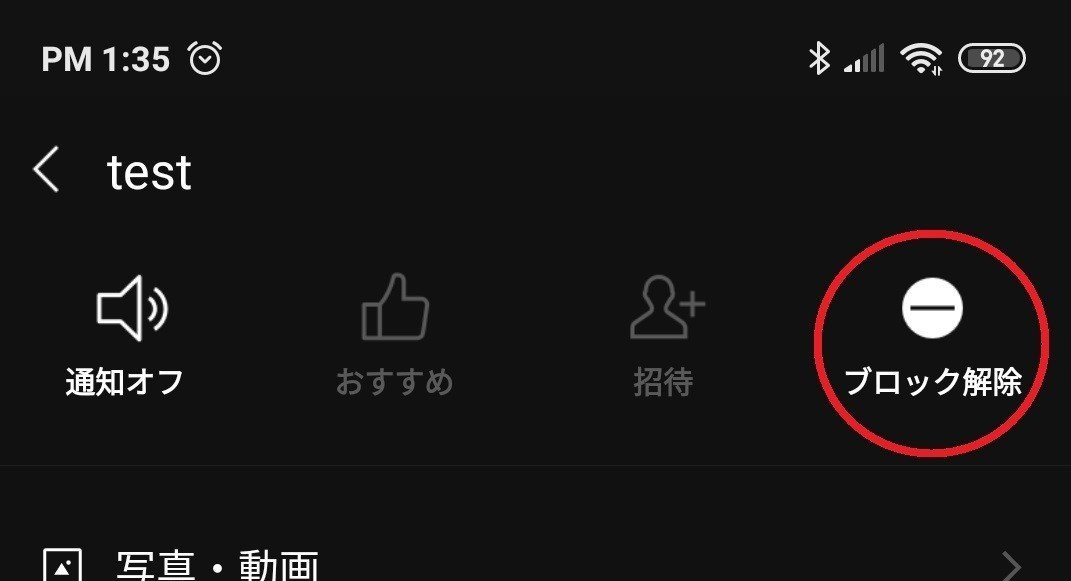
トーク画面の右上のメニューボタン(赤丸部)を押すと
こんな画面が出るので、赤丸部のブロックを押します。
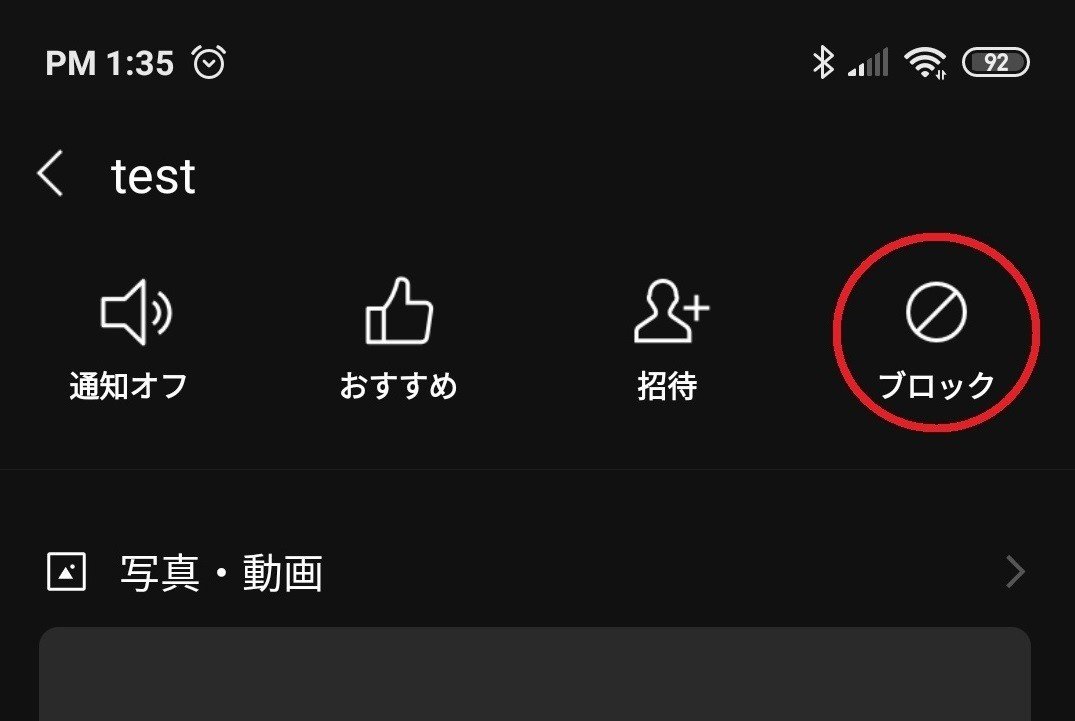
次に、そのままブロック解除を押すと友達登録(フォロー)のイベントが発生し・・・
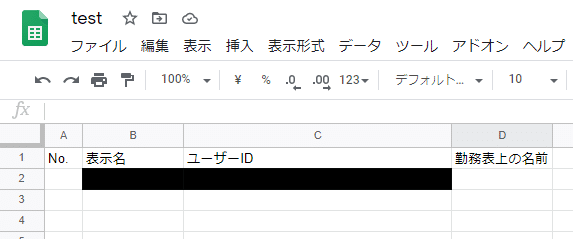
ユーザーシートに登録されます。このまま、フォローとフォロー解除を繰り返してみて、登録↔解除の挙動を確認してみましょう。
A列のNo.とD列の勤務表上の名前は空欄になっていると思います。A列は必ず必要なわけではないですが、1から順に数字を振っていくと、見やすいかなというだけです。D列はユーザーの実際の名前を手打ちで記入します。ここは勤務表の名前と一致させることでのちのち個別にメッセージを送るなどできるようになるので、入力を推奨します。ここでは「たなか」としておきます。

とりあえず今回はここまでです。
次回、メッセージの送信機能を記述します。