
【完全無料】X(Twitter)自動投稿ツール『Botbird』設定ガイド!最新版

はじめまして、まさと申します。
私は会社員のかたわらX(Twitter)を複数アカウント運用しているのですが、とにかく
毎日の投稿がめんどくさい!!
自動投稿ツールを調べていると有料のものが多く、色んな機能は必要ないので自動で投稿だけしてくれるモノはないかな。。と探してると・・
見つけました!
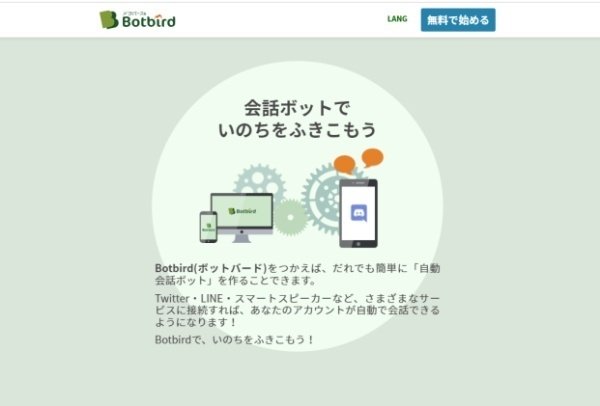
完全無料で自動投稿してくれるツール!
『Botbird』を!
このBotBirdを使えば・・
✅投稿を設定しておけばほぼ放置で運用できる
✅初期費用・月額費用が一切不要
✅アフィリエイトを自動化できる
何と言っても完全無料なのがいいですよね。
Botbirdの機能
✅即時投稿
✅予約投稿(※投稿日時の指定は不可)
投稿間隔の設定・・最短1時間に1回、最長4日に1回
✅画像添付
各投稿毎に画像指定が可能
Botbirdを使用するために必要なものは以下の3つだけです。
・X(twitter)アカウント
・メールアドレス
・パソコン
では、Botbirdの設定をしていきます。
1)Botbirdアカウントの作成
① ChromeブラウザーでX(twitter)にログインする
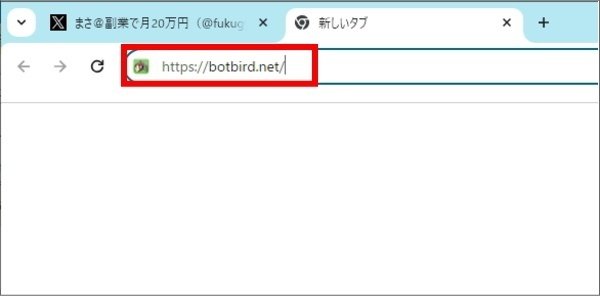
② 新しいタブを開いて、Botbirdのページ(https://botbird.net)を開く
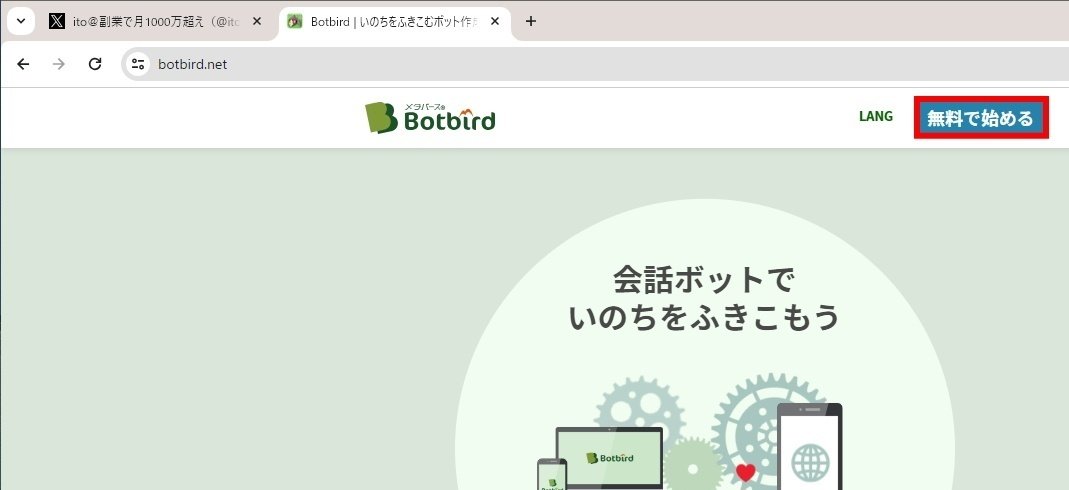
③ [無料で始める]をクリックする。
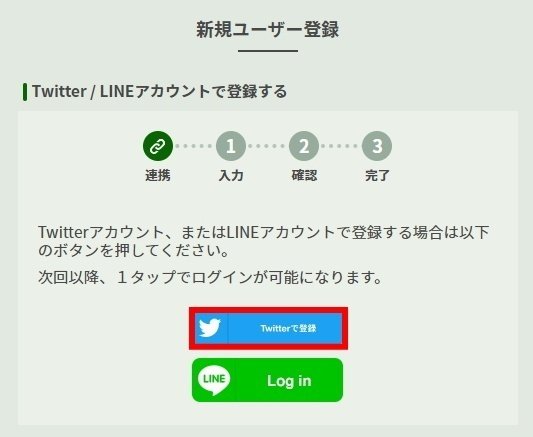
④ [twitterで登録]をクリックする。
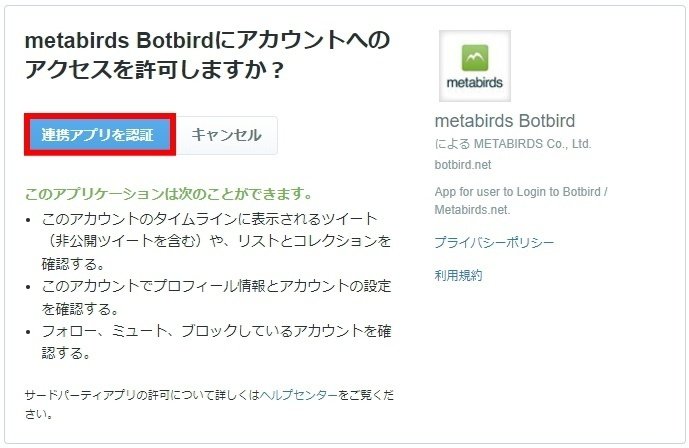
⑤ [連携アプリを認証]をクリックする。
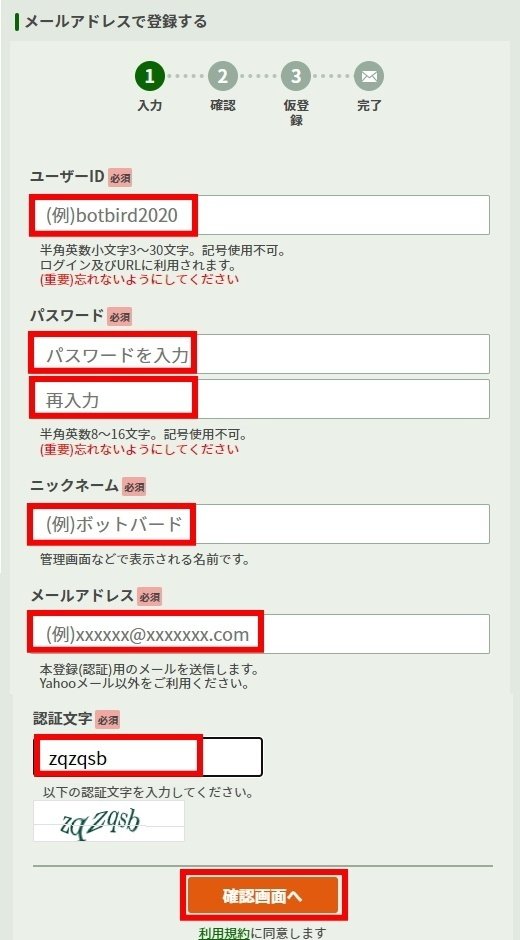
⑥ 必要事項を入力し、[確認画面へ]をクリックする。
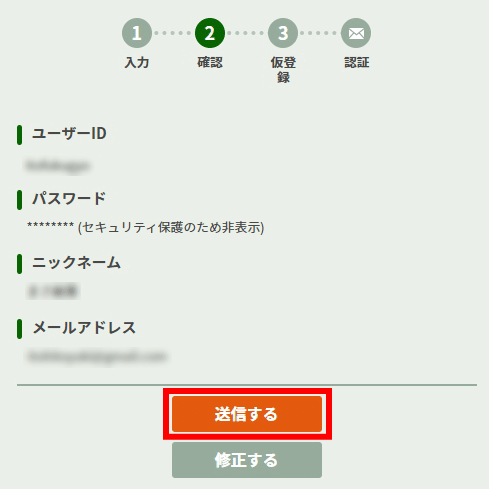
⑦ 登録内容を確認し、[送信する]をクリックする。
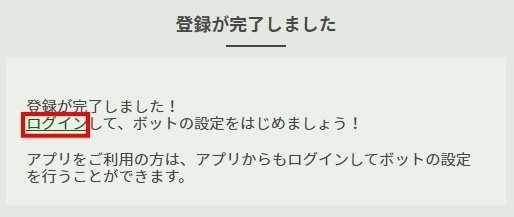
⑧ 完了メッセージが表示されるので、[ログイン]をクリックする。
2)Botbirdの初期設定
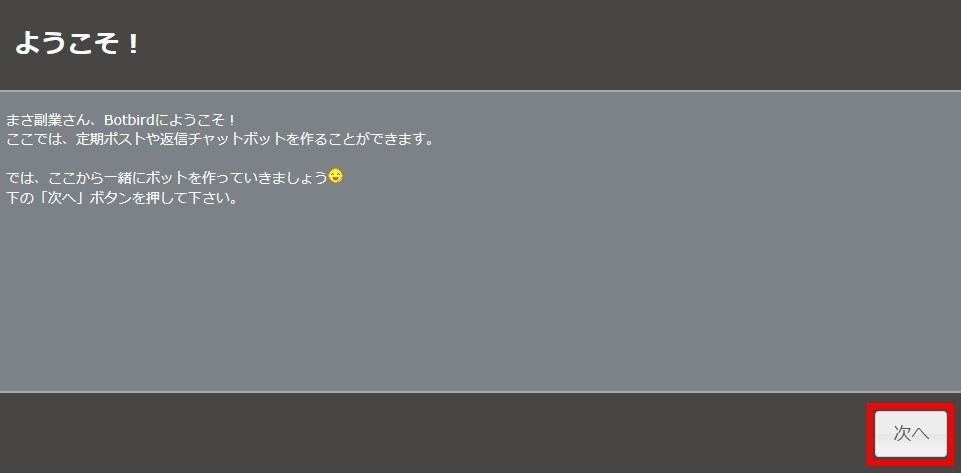
⑨ Botbirdの初期設定が表示されるので、[次へ]をクリックする。
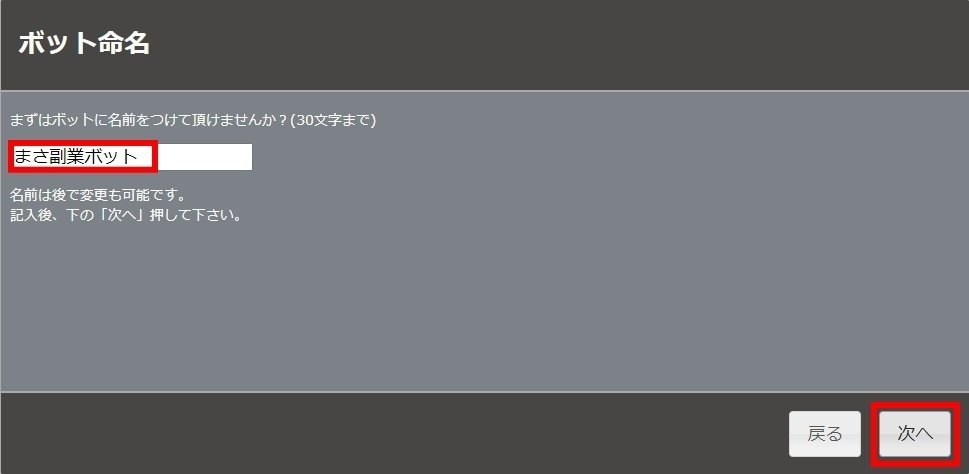
⑩ 任意のボット名を入力し、[次へ]をクリックする。
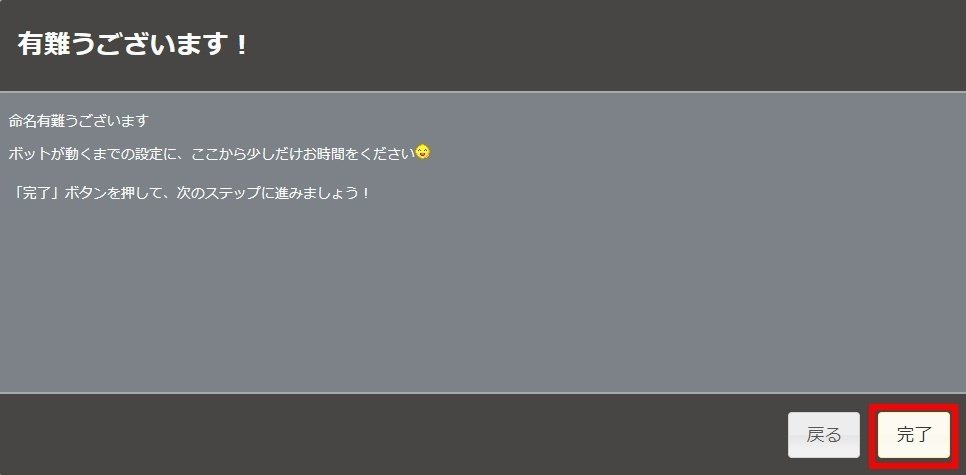
⑪ [完了]をクリックする。
⑫ 定期ボット設定画面が表示されるので、[次へ]をクリックする。
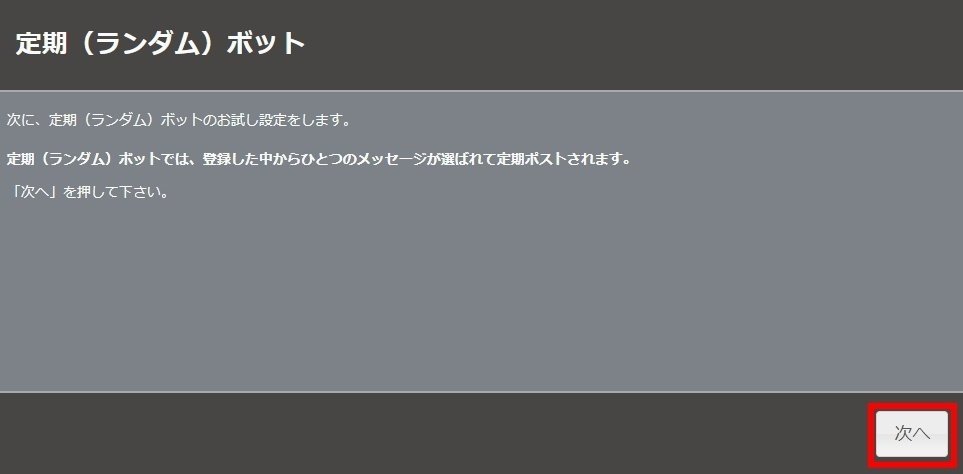
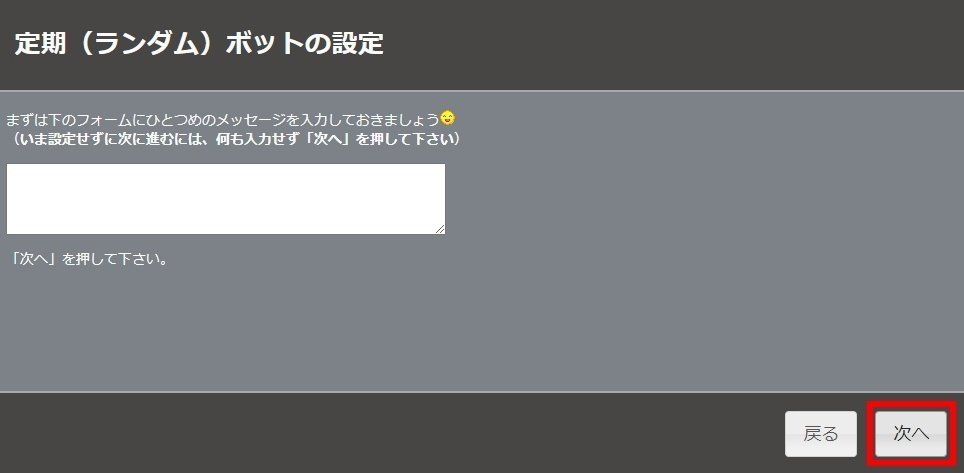
⑬ ここでは定期ボットの設定は行わず、[次へ]をクリックする。
⑭ 返信ボット設定画面が表示されるので、[次へ]をクリックする。
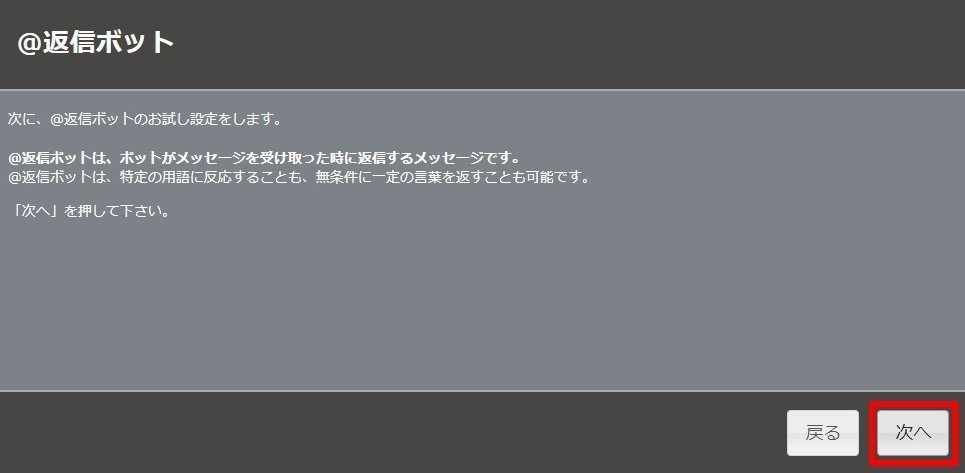
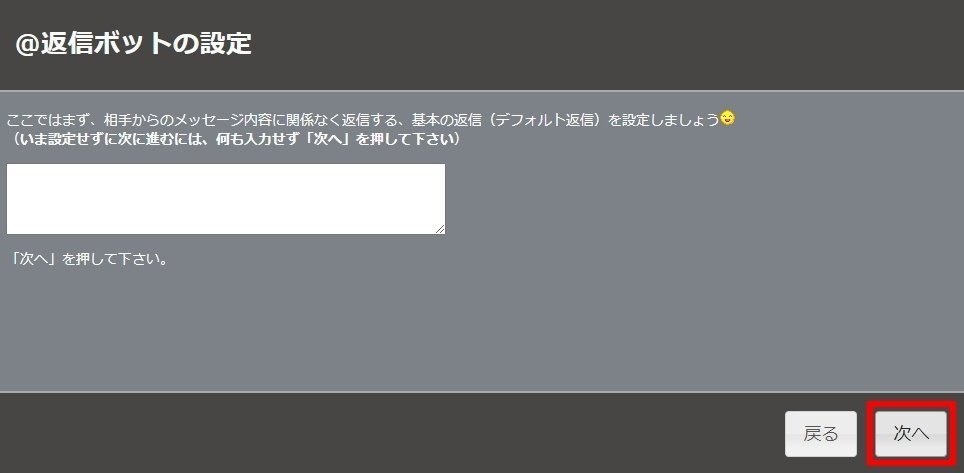
⑮ ここでは返信ボットの設定は行わず、[次へ]をクリックする。
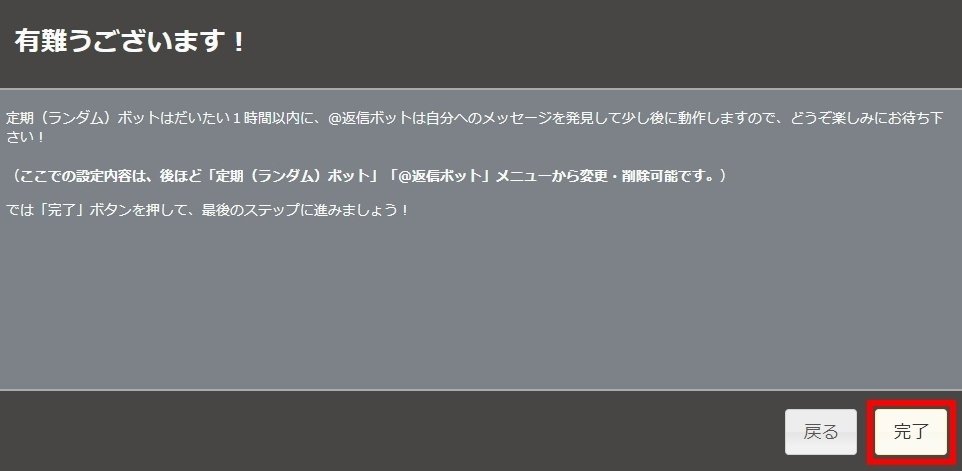
⑯ [完了]をクリックする。
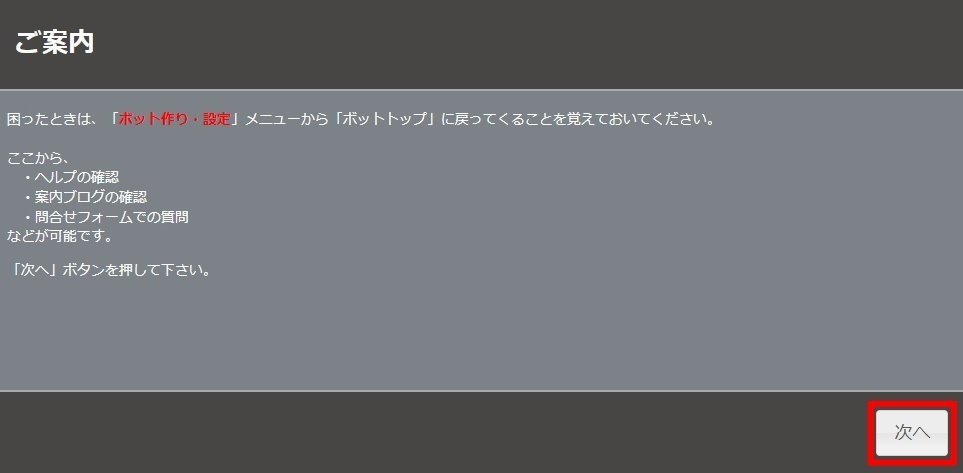
⑰ ご案内画面で、[次へ]をクリックする。
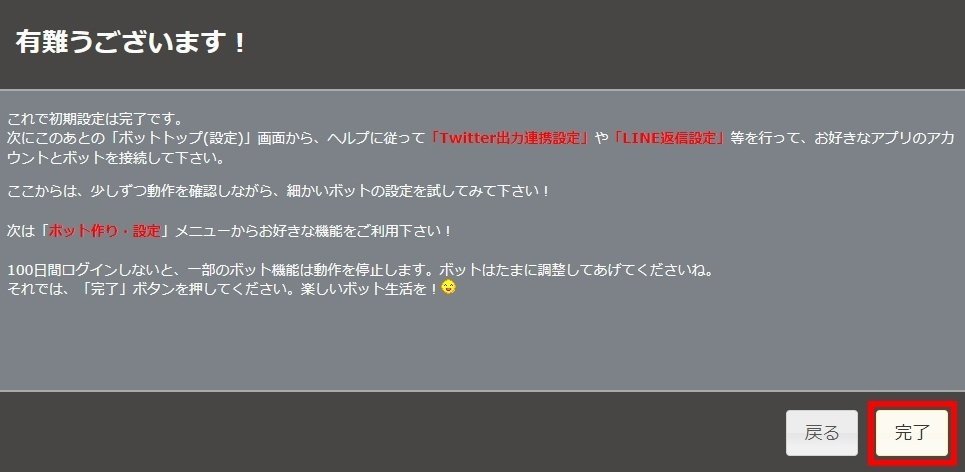
⑱ 初期設定が完了の画面が表示されるので、[完了]をクリックする。
⑲ Botbirdの管理画面が表示されます
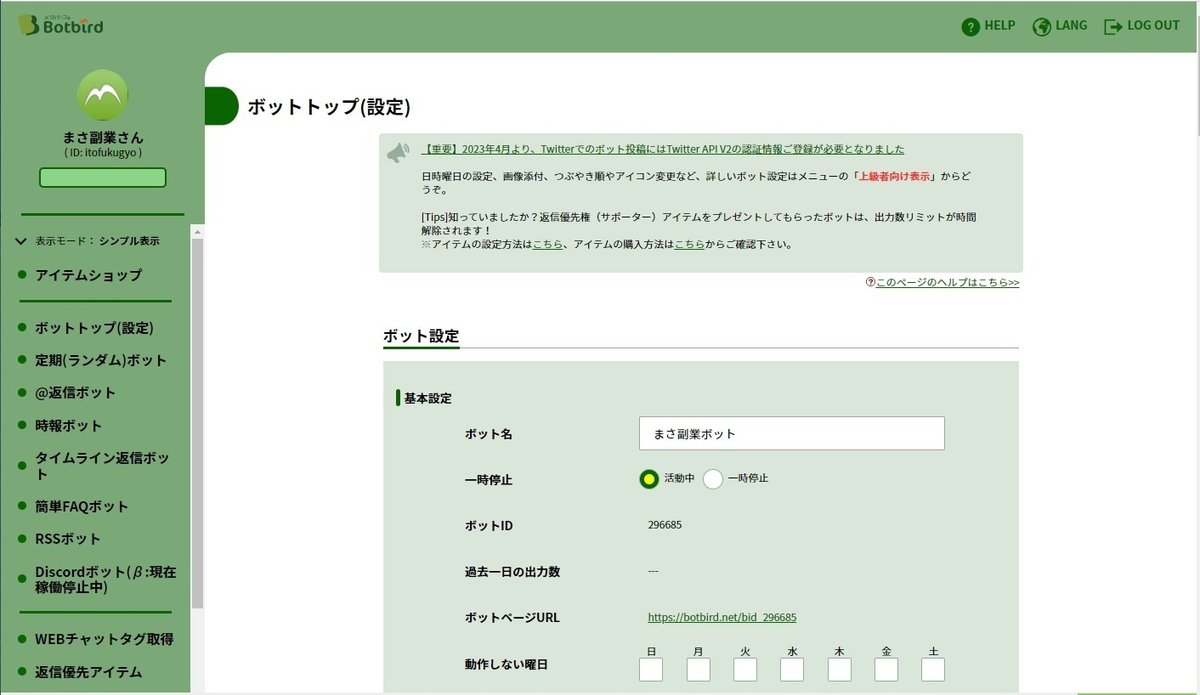
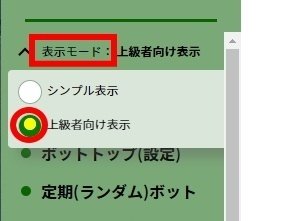
㉑ 左メニューの[表示モード]をクリックし、[上級者向け表示]を選択する。
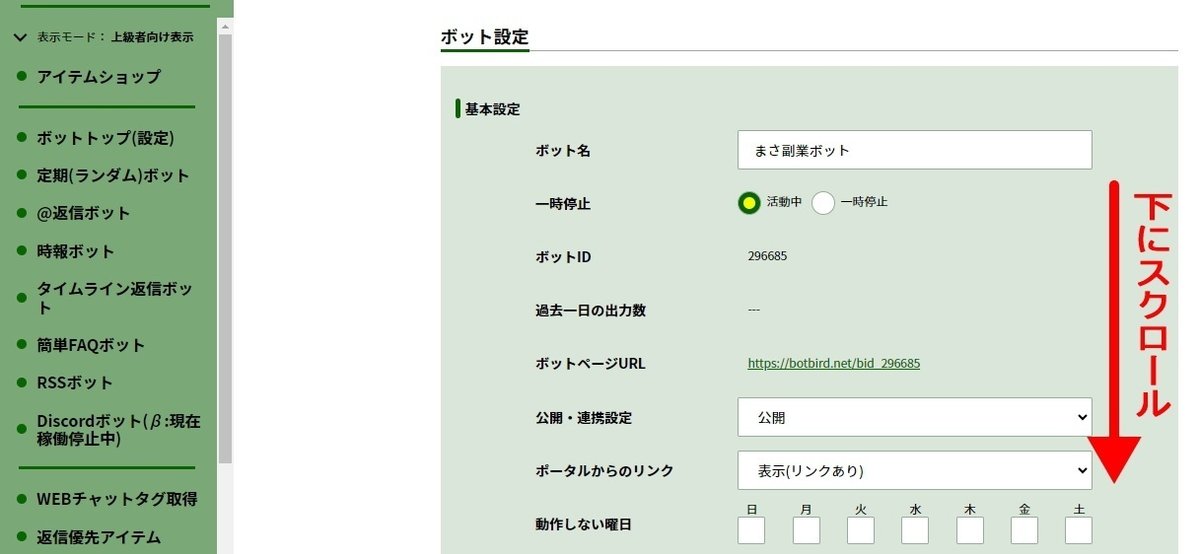
㉒ ボットトップ画面を下にスクロールして、Twitter出力連携設定V2を表示する。
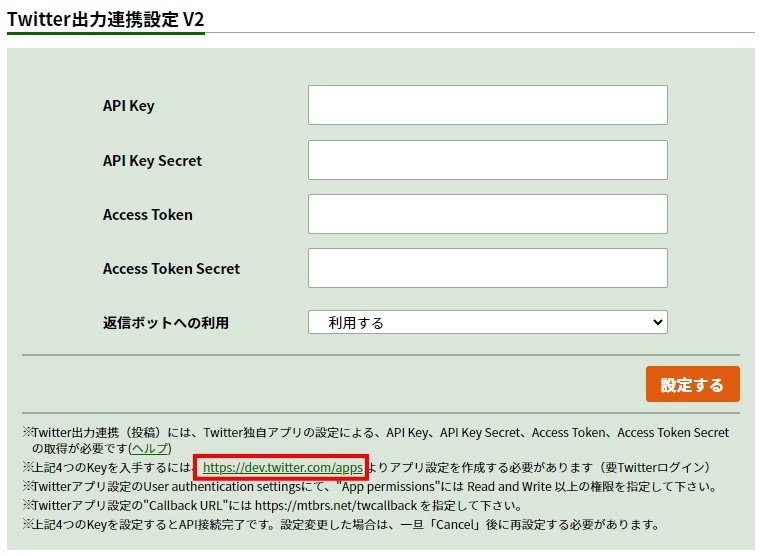
㉓ Twitter出力連携設定V2の画面下、https://dev.twitter.com/apps をクリックする。
※後ほどこの設定画面へ値を入力するので、このページは閉じずに置いておく!
3)X(Twitter)APIキーの取得
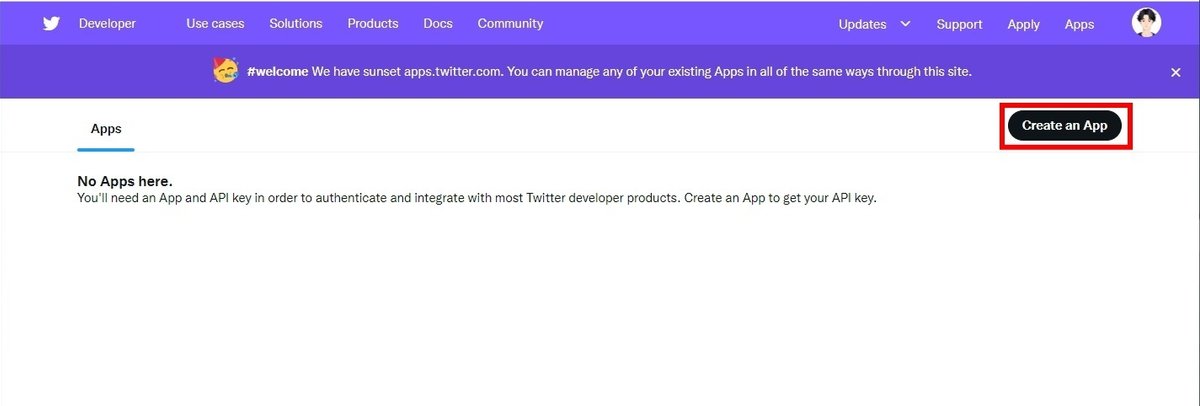
㉔ X(Twitter)開発者プラットフォームのサイトが表示されるので、右上の[Create an App]をクリックする。
㉕ メッセージが表示されるので、[Apply]をクリックする。

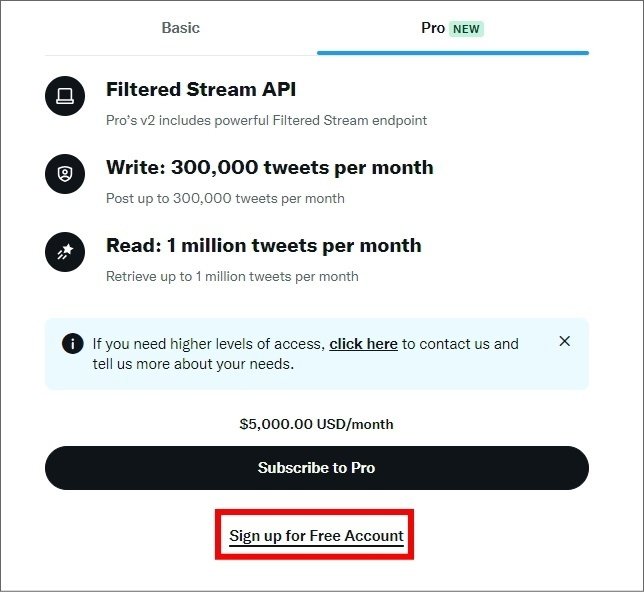
㉖ 料金プランが表示されるので、無料の[Sign up for Free Account]をクリックする。
㉗ APIの使用用途とポリシー確認の画面が表示されるので、使用用途の部分は以下の英文をそのままコピペし、すべてにチェックをして[Submit]をクリックする。
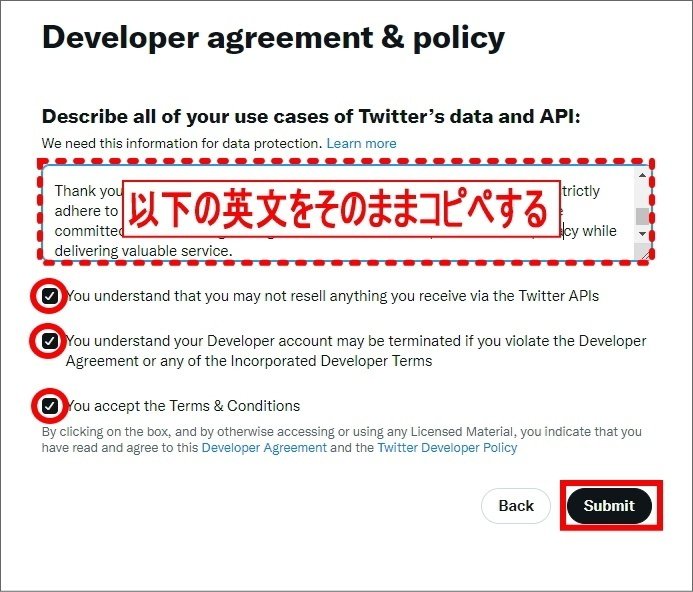
以下の英文をコピペする
I am writing to provide a detailed description of my intention to use Twitter’s data and API in my new service. My primary goal is to ensure compliance with data protection regulations and to respect the privacy of Twitter users, and given that here is the list of my objectives.
1. tweets Aggregation and Curation: Our service aims to aggregate and curate tweets from analogous industries. We will use the API to collect tweets based on specific keywords, hashtags, and user accounts, displaying this content. Through we can engage with relevant content more efficiently.
2. Analytics: By utilizing Twitter’s API, our service will perform qualitative analysis using tweets and statistics to seek public opinion on specific topics, products, or events. The insights gained from this analysis will help our users make informed decisions based on trends in respective domains.
3. Social Listening and Monitoring: Our service will use the API to monitor Twitter for mentions of our users’ brands, products, or services. This real-time information will allow users to identify potential leads and keep track of their brand’s reputation.
4. Reporting: We will leverage the API to gather data on tweet engagements, such as likes, retweets, and replies. This information will be used to generate in-depth reports on user engagement, which helps our service optimize social media strategies and improve the overall performance.
5. Scheduling and Automation: Our service arranges promotional tweets to be automatically posted on a scheduled time through the use of Twitter API. This feature boosts the promotional effect of our users as it maintains their consistent presence on social media and maximizes engagement with their audience at optimal times.
Thank you for considering our application. Please note that our service will strictly adhere to Twitter’s API terms of service and data protection policies. We are committed to maintaining the highest standards of data protection and privacy while delivering valuable service.
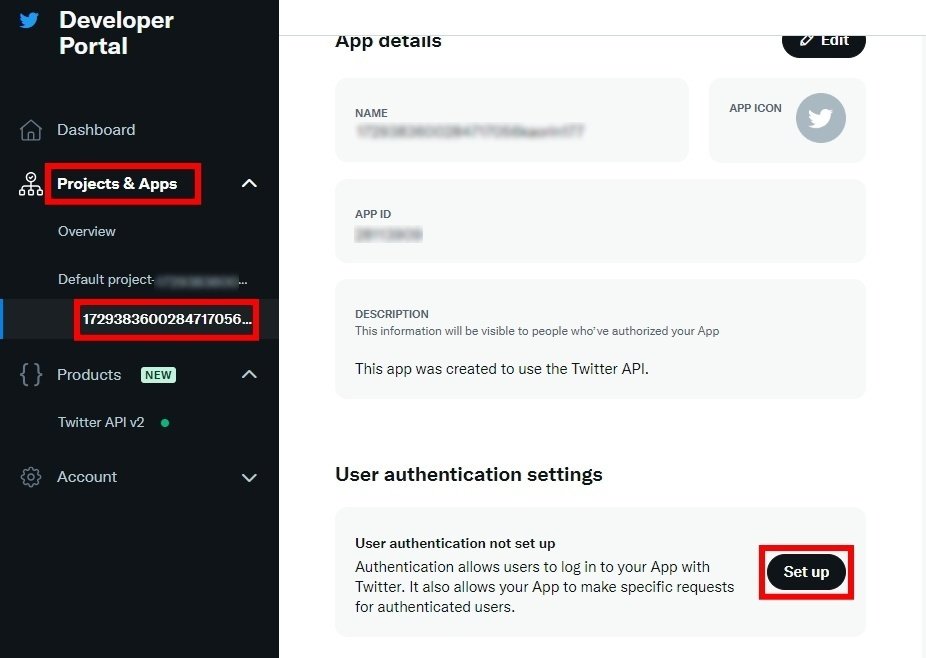
㉘ ポータル管理画面の左メニュー、[Projects&Apps]をクリックし、Default project-XXXの下の数字部分を選択。
User authentication settingsの[Set up]をクリックする。
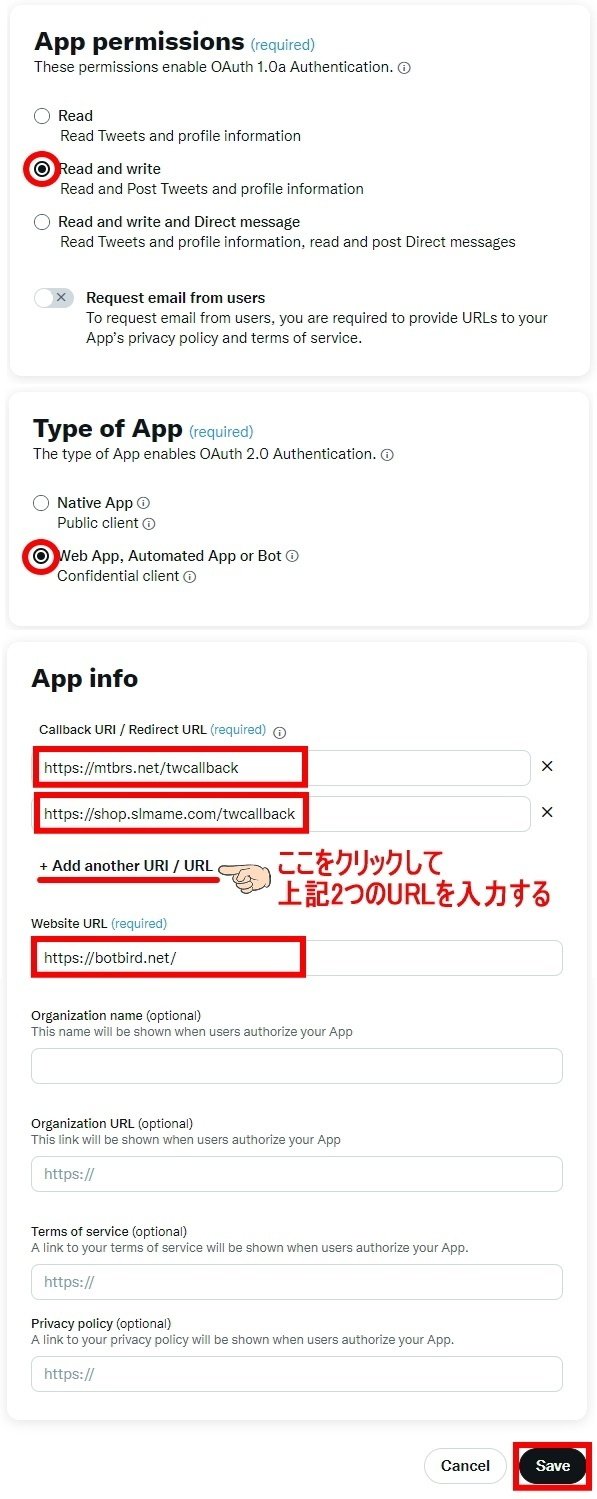
㉙ 各項目に以下を設定し、[Save]をクリックする。
・App permissions → Read and write
・Type of App → Web App,Automated App or Bot
・Callback URI / Redirect URL
https://mtbrs.net/twcallback
httptps://shop.slmame.com/twcallback
・Website URL
https://botbird.net/
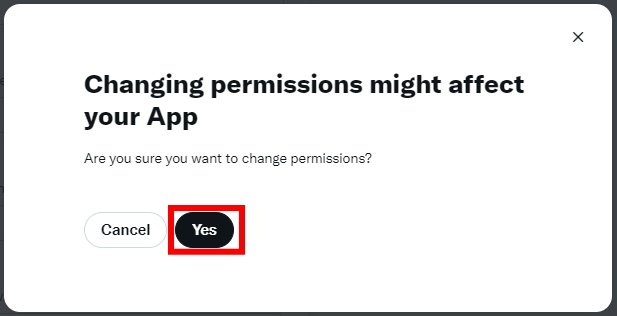
㉚ メッセージが表示されるので、[Yes]をクリックする。
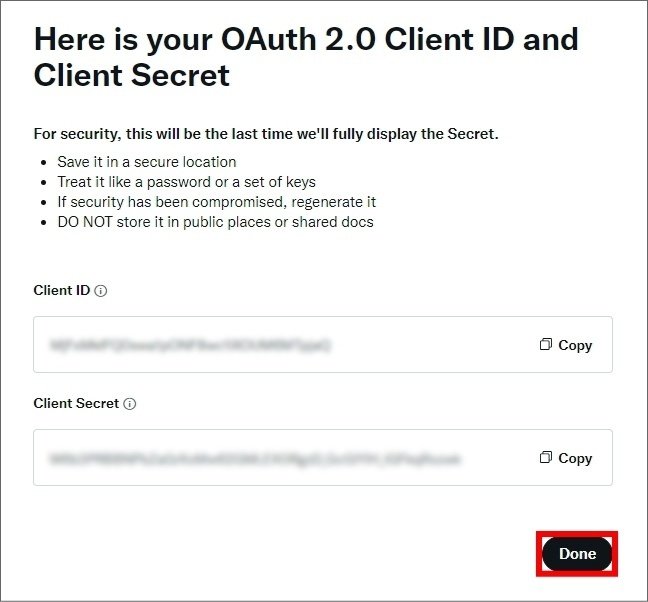
㉛ Client IDとSecretが表示されるので、[Done]をクリックする。
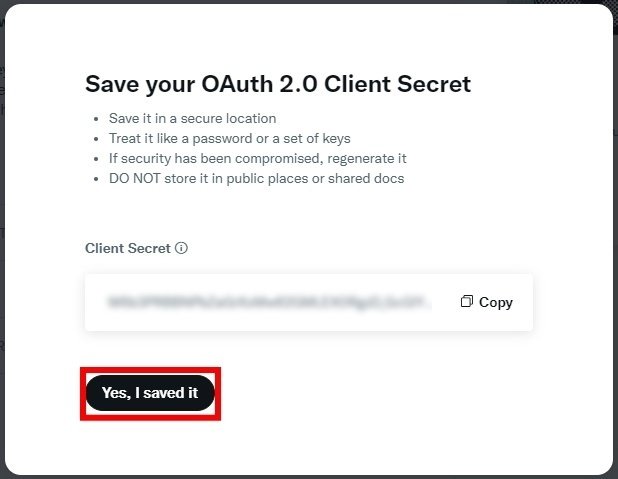
㉜ メッセージが表示されるので、[Yes,I saved it]をクリックする。
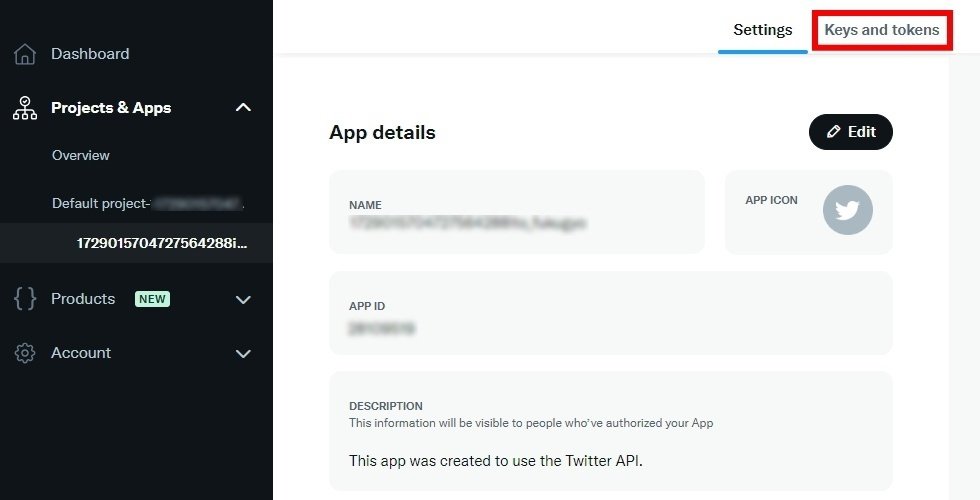
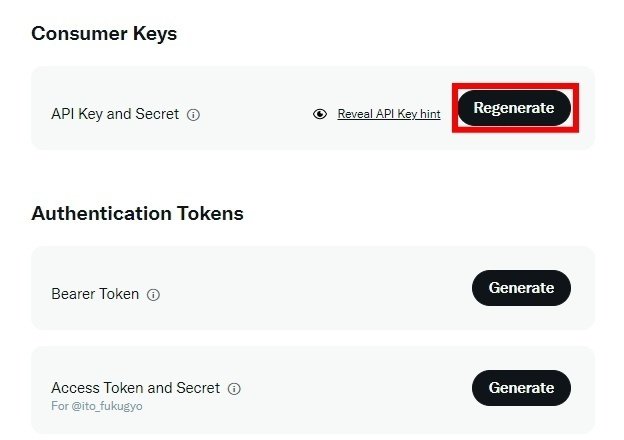
㉝ ポータル管理画面の上部中央の[Keys and tokens]をクリックする。
㉞ Consumer Kyesの[Regenerate]をクリックする。
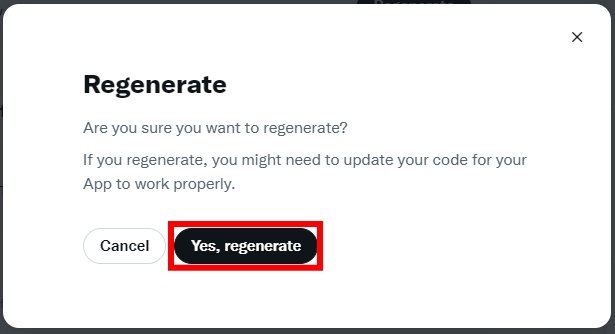
㉟ メッセージが表示されるので、[Yes,regenerate]をクリックする。
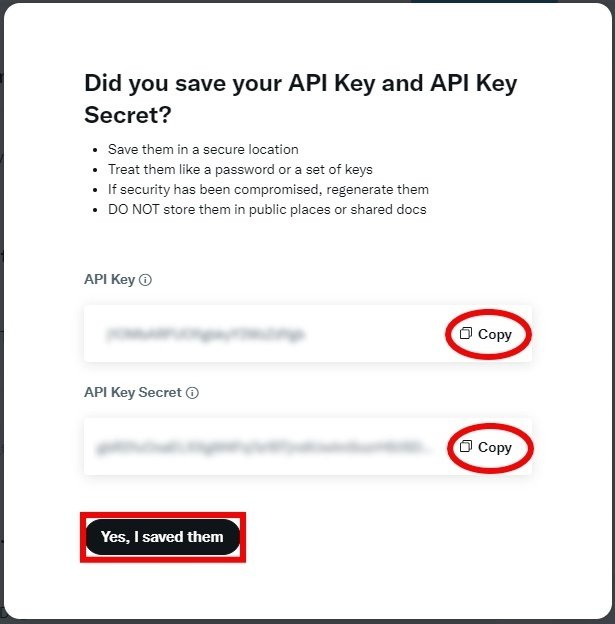
㊱ API KeyとAPI Key SecretをそれぞれCopyしメモ帳に控え、[Yes,I saved them]をクリックする。
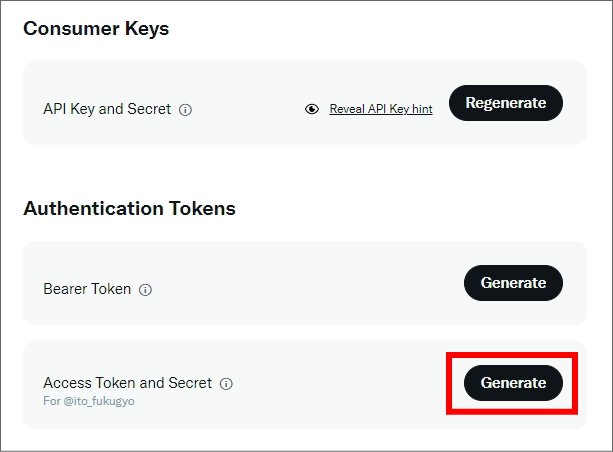
㊲ Access Token and Secretの[Generate]をクリックする。
㊳ Access TokenとAccess Token SecretをそれぞれCopyしメモ帳に控え、[Yes,I saved them]をクリックする。
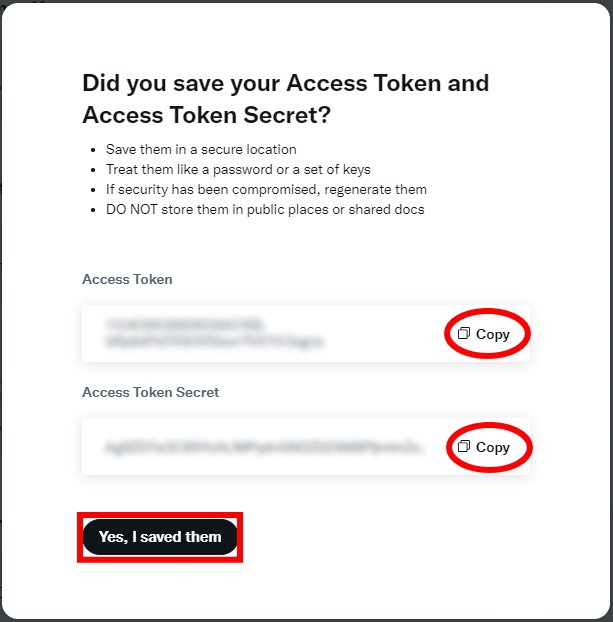
この時点でメモ帳には以下が記載されています
【API Key】
xxxxxxxxxxxxxxxxxxxxxxxxxxxxxxx
【API Key Secret】
xxxxxxxxxxxxxxxxxxxxxxxxxxxxxxxxxxxxxxxxxxxxxxxxxxxxxxxxxx
【Access Token】
xxxxxxxxxxxxxxxxxxxxxxxxxxxxxxxxxxxxxxxxxxxxxxxxxxxxxxx
【Access Token Secret】
xxxxxxxxxxxxxxxxxxxxxxxxxxxxxxxxxxxxxxxxxxxxxxxxxxxxxxxx
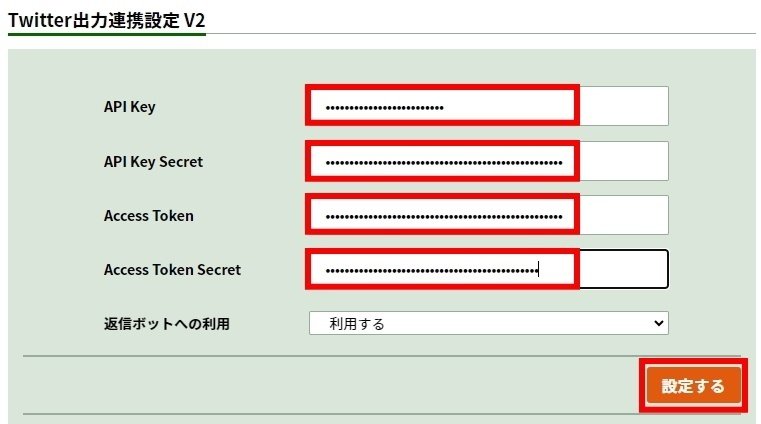
4)Botbird APIキーの設定
㊴ 再びBotbirdの管理画面タブに戻り、メモ帳から各項目をコピペし、[設定する]をクリックする。
5)Botbird連携テスト
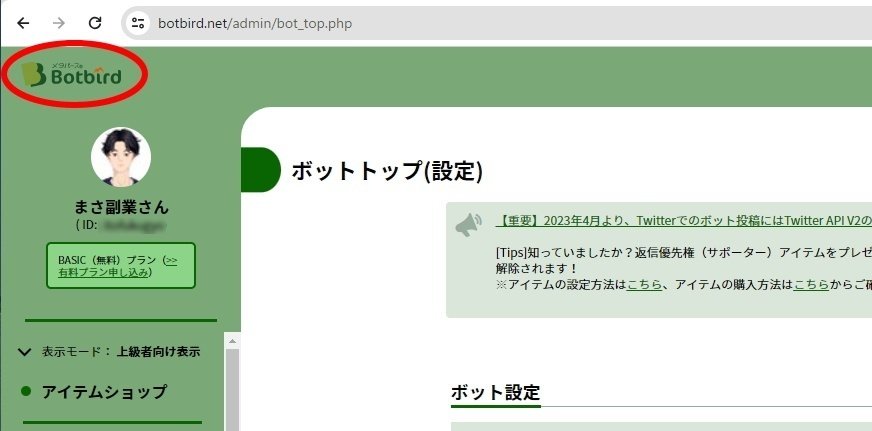
㊵ Botbird管理画面の左上[Botbirdロゴ]をクリックする。
㊶ 今すぐつぶやくから、テスト投稿を入力し[つぶやく]をクリックする。
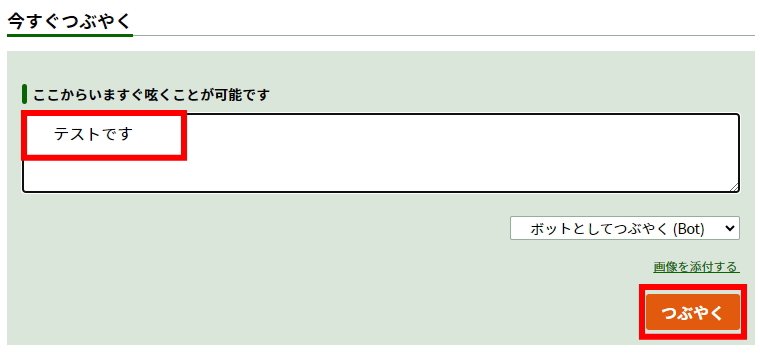
㊷ X(Twitter)のフィードにテスト投稿が表示されれば連携設定はOKです。

6)自動投稿の登録
㊸ Botbird管理画面メニューの[定期(ランダム)ボット]をクリックする。

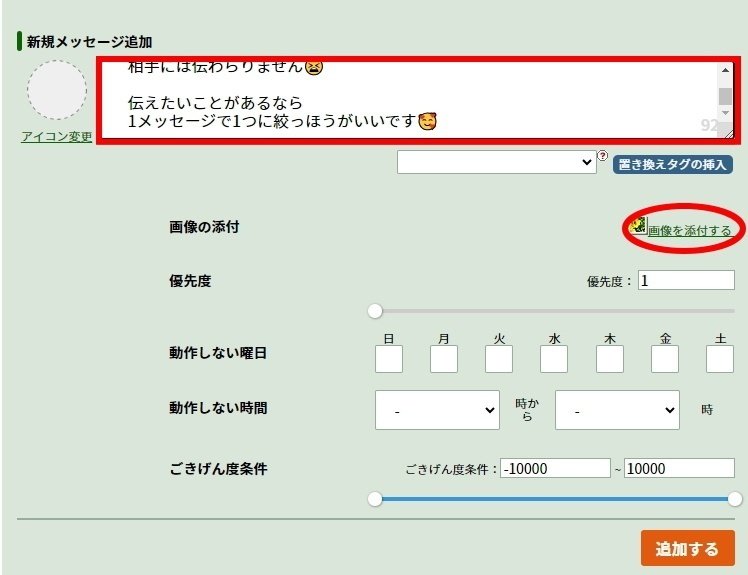
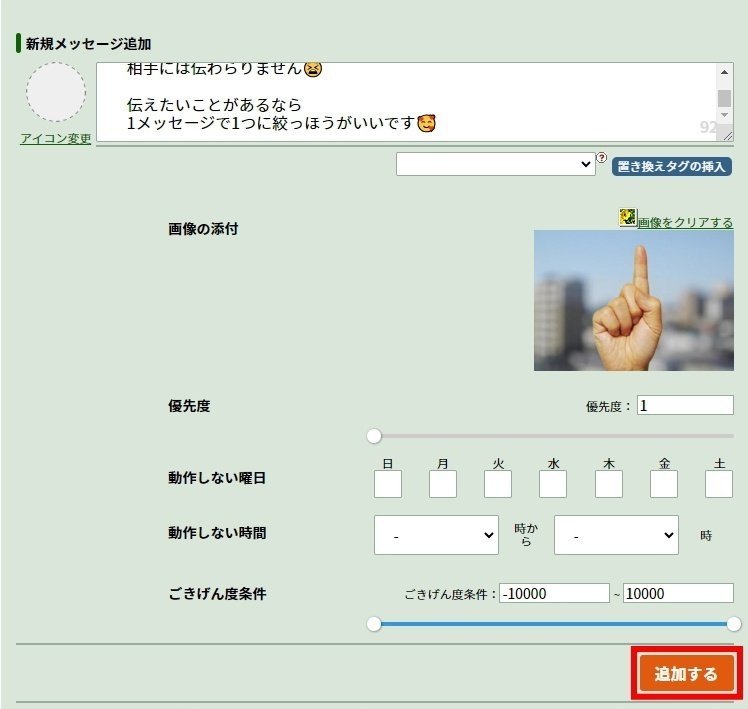
㊹ 新規メッセージのBOXにツイート内容を入力し、画像がある場合は[画像を添付する]をクリックする。
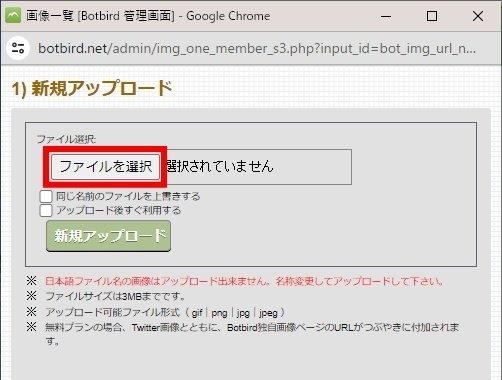
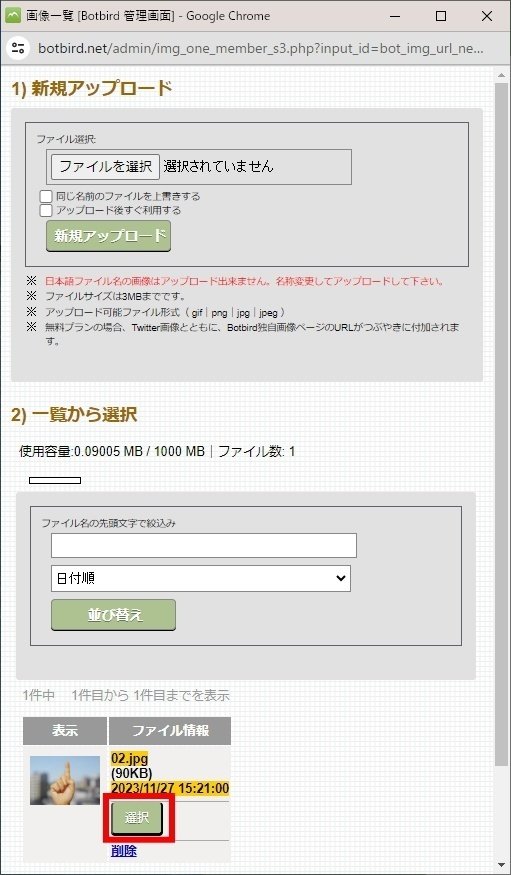
㊺ 画像選択のポップアップが表示されるので、[ファイルを選択]をクリックする。
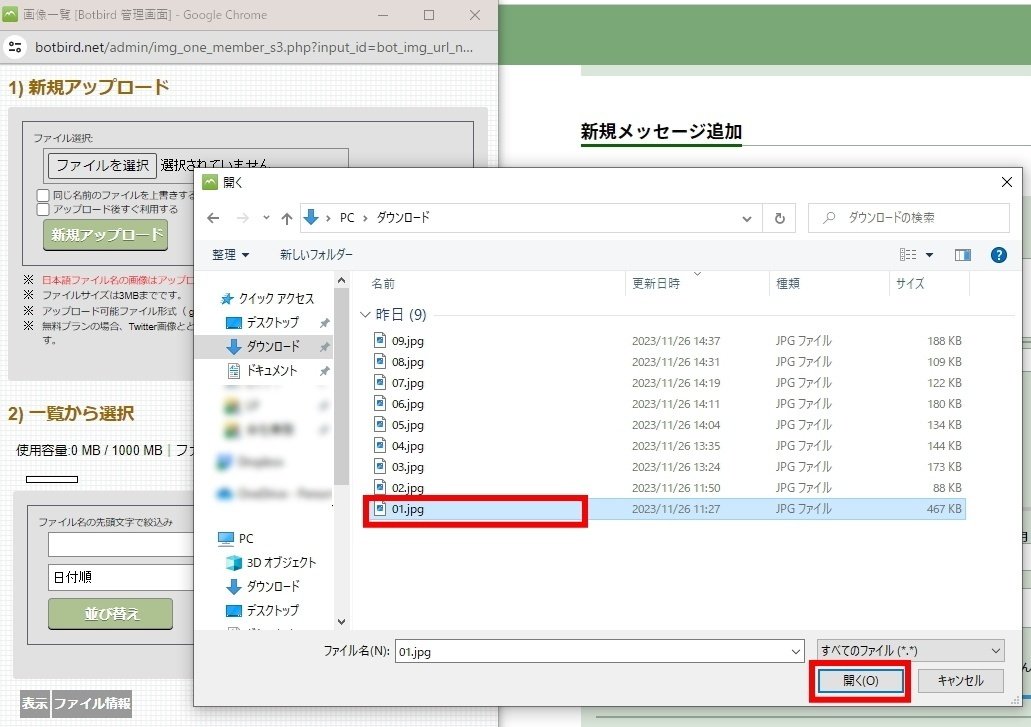
㊻ 投稿する画像を選択し、[開く]をクリックする。
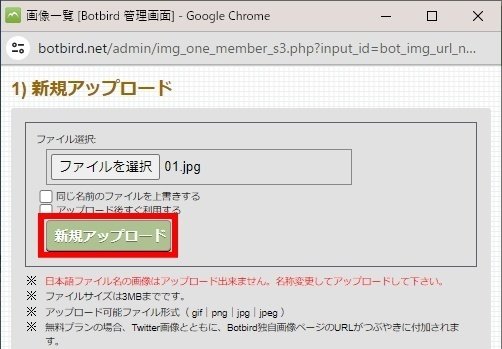
㊼ 画像ファイル選択後、[新規アップロード]をクリックする。
㊽ アップロードされた画像ファイルのリストが、下部に表示されるので[選択]をクリックする。
㊾ メッセージと画像を確認し、[追加する]をクリックする。
㊹~㊾の方法を繰り返して、自動投稿したいツイートを登録していきます。
7)自動投稿の設定と開始
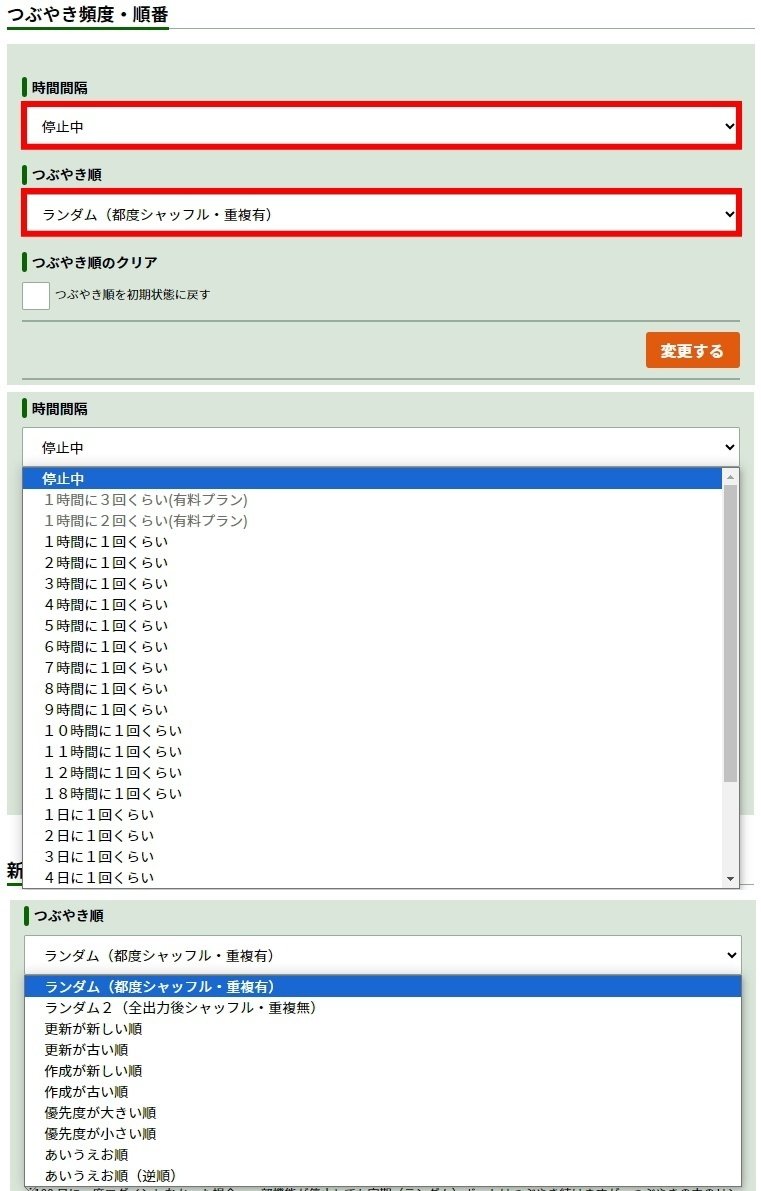
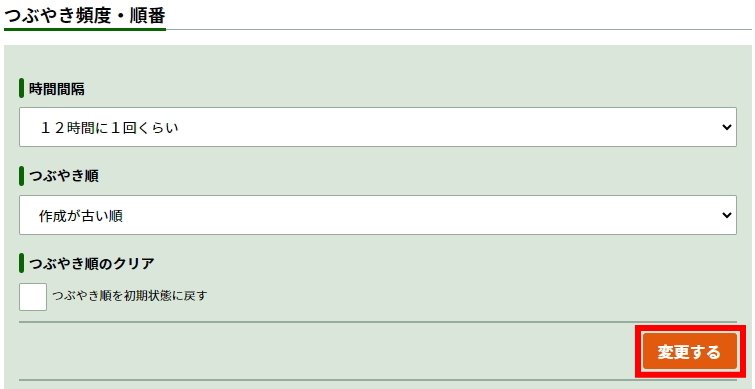
㊿ 登録後、つぶやき頻度・順番の[時間間隔]と[つぶやき順]をそれぞれ選択する。
(51) 各項目を選択後、[変更する]をクリックする。
【注意事項】
Botbirdは、100日間ログインしないと、自動投稿が停止するので、100日の間に1回はログインするようにして下さい。
以上でBotbirdの設定は完了です!
稼働中でも『6)自動投稿の登録』でツイートを追加することもできるので、どんどん追加して日頃のツイートは完全自動化しちゃいましょう!
この記事が気に入ったらサポートをしてみませんか?