Three.jsとGSAPでスクロールアニメーションを作ってみた

自社サイトリニューアルにあたり3Dモデルをスクロールに応じて動かすアニメーションを実装しました。
そこで自分の備忘録を兼ねて、その作り方をまとめてみます。
モデル表示にはThree.js、アニメーションにはGSAPを使用しています。
Three.jsでモデルを表示する
HTMLファイルの作成
公式サイトを参考に、CDNを利用してThree.jsを読み込みます。
canvasというIDを持つ要素を用意しておきます。
<!DOCTYPE html>
<html lang="ja">
<head>
    <meta charset="UTF-8">
    <meta http-equiv="X-UA-Compatible" content="IE=edge">
    <meta name="viewport" content="width=device-width, initial-scale=1.0">
    <title></title>
    <script async src="https://unpkg.com/es-module-shims@1.6.3/dist/es-module-shims.js"></script>
    <script type="importmap">
    {
        "imports": {
            "three": "https://unpkg.com/three@0.150.0/build/three.module.js"
        }
    }
    </script>
    <script src="./index.js" type="module"></script>
</head>
<body>
    <div id="canvas"></div>
</body>
</html>
JavaScriptファイルの作成
index.jsという名前でJavaScriptファイルを作成し、以下のコードを書きます。init()関数の中にThree.jsを使用するためのコードを記述します。
import * as THREE from 'three';

window.addEventListener("DOMContentLoaded", init);

function init() {
  // ここに処理を追加していきます
}
レンダラーを作る
WebGLレンダラーを作成します。レンダラーは、3Dの世界をcanvasに描画する機能を持っています。
const renderer = new THREE.WebGLRenderer({
   antialias:true,// ①
   alpha: true // ②
});
renderer.setSize(window.innerWidth, window.innerHeight);// ③
renderer.setPixelRatio(Math.min(window.devicePixelRatio, 2));// ④
document.getElementById('canvas').appendChild(renderer.domElement); // ⑤
antialias:trueにより、輪郭がなめらかになります。その分計算コストが大きいようです。
alpha:trueにより、背景が透明になります。
デフォルトではレンダラーのサイズが小さいため、setSize()でウインドウの幅と高さに設定します。
スマホでもきれいに見えるように、ピクセル比を設定します。Math.min(window.devicePixelRatio, 2)は、デバイスのピクセル密度が2未満の場合はそのまま使用し、2以上の場合は2を使用することを意味します。
最後に、canvasというIDを持つ要素の中に、レンダラーのDOM要素を追加することでレンダラーがブラウザの画面上に表示されます。
シーンを作る
シーンはオブジェクトや光源などを置く場所です。
const scene = new THREE.Scene();カメラを作る
カメラは透視投影カメラ(PerspectiveCamera)と平行投影カメラ(OrthographicCamera)がありますが、今回は透視投影カメラを使います。
PerspectiveCameraに視野角、アスペクト比、ニアクリップ面、ファークリップ面を指定します。
カメラで見える範囲がレンダラーを通して canvas へ描画されます。
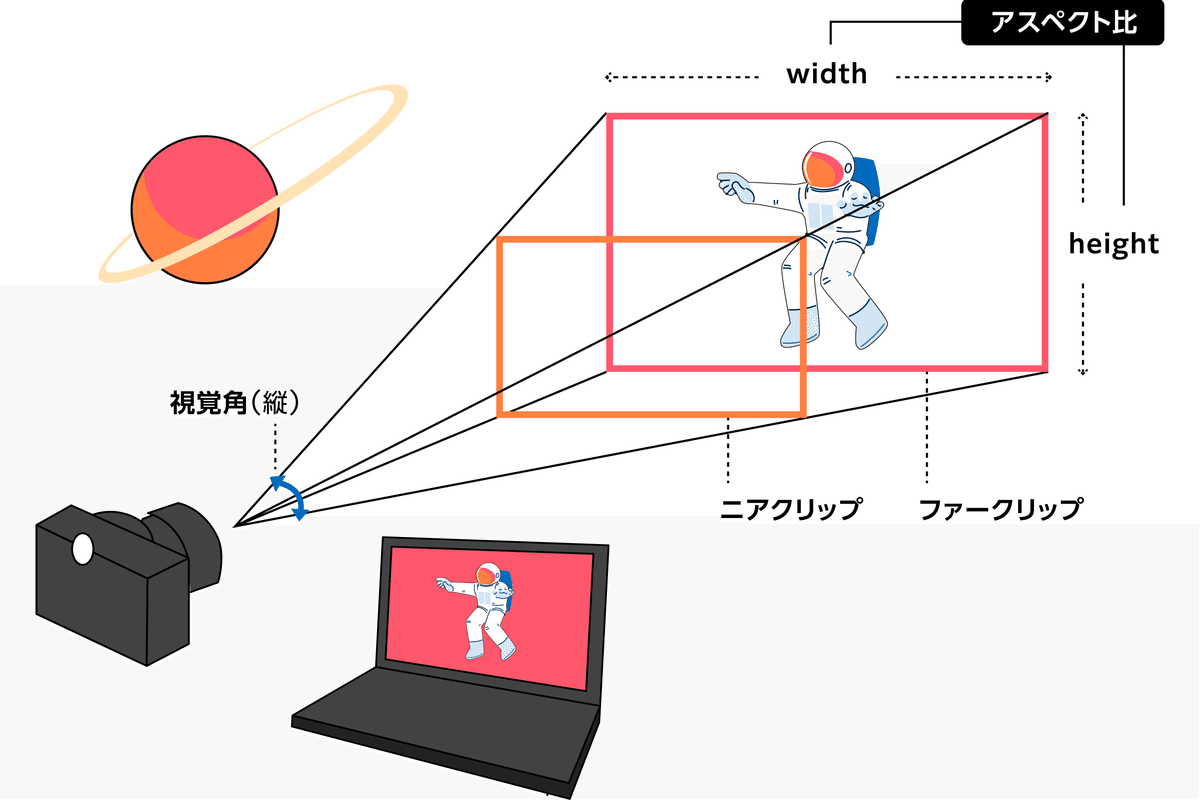
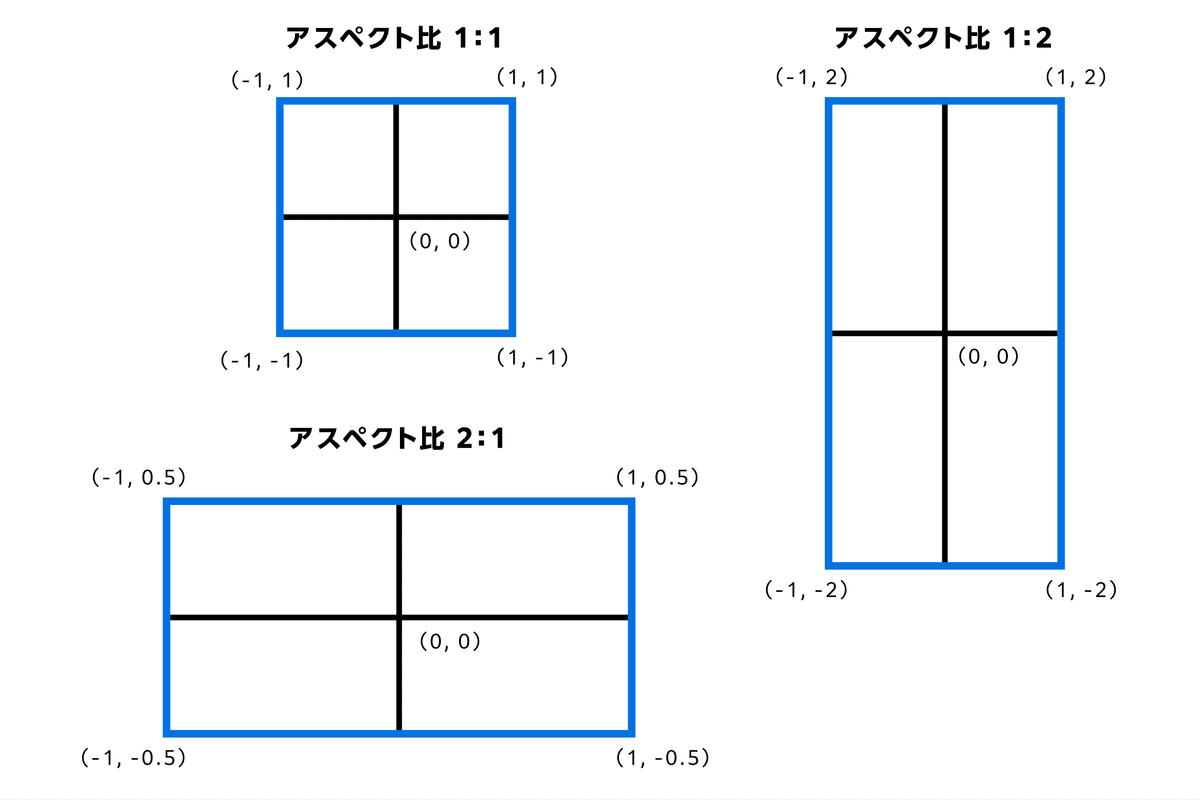
また、座標系について説明します。x軸の範囲は常に-1から1で、y軸の範囲は画面のアスペクト比に基づいて-normalizedHeight / 2からnormalizedHeight / 2までの値を取るようにしています。図を用いて説明すると以下のようになります。
let canvasAspect = window.innerWidth / window.innerHeight;
const normalizedWidth = 2.0;
const fov = 30;
const fovRad = (fov / 2) * (Math.PI / 180);
let normalizedHeight = normalizedWidth / canvasAspect;
let dist = (normalizedHeight / 2) / Math.tan(fovRad);

const camera = new THREE.PerspectiveCamera(fov,canvasAspect,0.1,20);
camera.position.z = dist;
オブジェクトを作る
球は、Mesh()を使用して作成します。メッシュを作るには、ジオメトリ(形状)とマテリアル(素材)を用意する必要があります。
今回は、Three.jsに用意されている球体のためのジオメトリ SphereGeometryを使用します。マテリアルは、光沢感のある質感を表現できるMeshPhongMaterialを使用して作成します。
// new THREE.SphereGeometry(半径、水平分割数、垂直分割数)
const sphereGeo = new THREE.SphereGeometry(0.02,16,16);
const sphereMat = new THREE.MeshPhongMaterial({
    color: 0xf0f0f0,// 色
    shininess: 300,// 光沢度
});
const sphere1 = new THREE.Mesh(sphereGeo, sphereMat);
// 位置を指定
sphere1.position.set(0.5,0,0);
// シーンに追加
scene.add(sphere1);
ライトを作る
Three.jsにはさまざまな光源が用意されていますが、今回は環境光を表現するAmbientLightと拡散光を表現するDirectionalLightを利用します。
■環境光源
空間全体に均等に光の色がうっすら加わります。
// new THREE.AmbientLight(色, 光の強さ)
const ambientLight = new THREE.AmbientLight(0xededed, 0.85);
// シーンに追加
scene.add(ambientLight);
■平行光源
指定した方向から原点に向かって光が降り注ぎます。
// new THREE.DirectionalLight(色, 光の強さ)
const directionalLight = new THREE.DirectionalLight(0xffffff, 0.24);
// 位置を指定 set(X方向,Y方向,Z方向)
directionalLight.position.set(-7.5,7.7,11.6);
// シーンに追加
scene.add(directionalLight);
描画する
renderer.render()に、作成したシーンとカメラを渡すことで、canvas上に描くことができます。
// 描画する
renderer.render(scene, camera);
アニメーション
アニメーションをさせるには、requestAnimationFrameを使用します。これは、連続的にアニメーションフレームを描画するための再帰関数です。これ
により、ブラウザのリフレッシュレートに合わせてシーンが更新されます。
HTMLにGSAPをCDNで読み込む一文を追加します。
<script src="https://unpkg.co/gsap@3/dist/gsap.min.js" defer></script> <!--追記-->
<script src="./index.js" type="module"></script>
そして、描画の2行を下のように置き換えると、球が1秒かけて-0.5の位置へ横移動するはずです。
animate();

unction animate() {
    requestAnimationFrame(animate);
    // 描画する
    renderer.render(scene, camera);
}

gsap.to(sphere1.position, {
    duration: 1,
    x: -0.5,
});
デザインの位置へ球を移動させる
デザインの球の位置に近づけるために次のようなパスを作成しSVGとして書き出し、SVGLoaderを利用してパスから球を配置する座標を求めます。
SVG
<svg version="1.1" id="story" xmlns="http://www.w3.org/2000/svg" xmlns:xlink="http://www.w3.org/1999/xlink" x="0px" y="0px" viewBox="0 0 1441 871" style="enable-background:new 0 0 1441 871;" xml:space="preserve">
    <style type="text/css">.st0{fill:none;stroke:#20FF00;stroke-miterlimit:10;}</style>
    <path class="st0" d="M21.9,618.3C59.1,545.1,43.6,246,104.4,279c60.8,33-2.1,329,74.3,296s20.1-159.5,61.9-164c48.5-5.2,41.2,109.3,112.4,92.8"/>
    <path class="st0" d="M1398.1,640.1c-34.4-81.4-20.1-414-76.5-377.4s1.9,365.9-68.9,329.2s-18.7-177.4-57.4-182.4c-44.9-5.7-38.2,121.6-104.2,103.2"/>
</svg>1.SVGLoaderをインポートします。
<script type="importmap">
 {
     "imports": {
         "three": "https://unpkg.com/three@0.150.0/build/three.module.js",
         "three/addons/": "https://unpkg.com/three@0.150.0/examples/jsm/" //追記
     }
 }
</script>
import * as THREE from 'three';
import { SVGLoader } from 'three/addons/loaders/SVGLoader.js';//追記2.SVGファイルを読み込むためにSVGLoaderを使用します。svgLoader.loadメソッドを呼び出し、SVGファイルのパス('./story.svg')を指定します。
const svgLoader = new SVGLoader();
svgLoader.load('./story.svg', (data) => {
// SVGファイルのデータを取得する処理
});3.SVGファイルからパスの情報を取得します。dataオブジェクトのpathsプロパティに、SVGファイル内のパス要素に関する情報が格納されています。
const paths = data.paths;4.パスの分割数を設定します(例ではdivisionsとして設定しています)
const divisions = 5;5.パスから頂点情報を取得し、新しい配列に連結します。
const points1 = paths[0].getPoints(divisions);
const points2 = paths[1].getPoints(divisions);
const newArray = points1.concat(points2);
positions.push(newArray);6.頂点の座標を-1から1へマッピングします。
const x = positions[0][j].x / 1440 * 2 - 1;
const y = positions[0][j].y / 870 * 2 - 1;7.マッピングされた座標を新しい配列に追加します。
newPositions.push({ x: x, y: -y });8.球を作成し、シーンの原点に追加します。
const sphere = new THREE.Mesh(sphereGeo, sphereMat);
scene.add(sphere);
spheres.push(sphere);9.スクロール位置に応じて球を移動させるために、GSAPのgsap.toメソッドを使用します。scrollTriggerを設定し、トリガー要素('#story')が画面の80%までスクロールされたときに球が移動するようにします。
gsap.to(sphere.position, {
x: newPositions[i].x,
y: newPositions[i].y,
scrollTrigger: {
trigger: '#story',
start: 'top 80%'
}
});これにより、SVGファイルからパスの座標を取得し、マッピングして球を目標の位置に移動させることができます。
最後に全てのコードを記載しておきます。
import * as THREE from 'three';
import { SVGLoader } from 'three/addons/loaders/SVGLoader.js';//追記
// ...中略...
// シーンに追加
scene.add(directionalLight);
const positions = [];
const newPositions = [];
const spheres = [];
const svgLoader = new SVGLoader();
svgLoader.load('./story.svg', (data) => {
let paths = data.paths;
const divisions = 5;// 分割する数
// サブパスから頂点情報を取得
const arr1 = paths[0].subPaths[0].getPoints(divisions);
const arr2 = paths[1].subPaths[0].getPoints(divisions);
// 2つを連結して1つの配列にする
const newArray = arr1.concat(arr2);
positions.push(newArray);
for(let j = 0; j < newArray.length; j++){
// -1から1にマッピングする
const x = positions[0][j].x / 1440 * 2 - 1;//1440はSVGの幅
const y = positions[0][j].y / 870 * 2 - 1;//870はSVGの高さ
newPositions.push({x:x, y:- y});
// 球を作る
const sphere = new THREE.Mesh(sphereGeo, sphereMat);
scene.add(sphere);
spheres.push(sphere);
}
// 球を移動させる
for(let i = 0; i < spheres.length; i++){
gsap.to(spheres[i].position, {
x: newPositions[i].x,
y: newPositions[i].y,
// storyが画面の80%の位置に来たら球が動き出す
scrollTrigger: {
trigger: '#story',
start: 'top 80%',
}
})
}
})HTML
<!DOCTYPE html>
<html lang="ja">
<head>
    <meta charset="UTF-8">
    <meta http-equiv="X-UA-Compatible" content="IE=edge">
    <meta name="viewport" content="width=device-width, initial-scale=1.0">
    <title></title>
    <script async src="https://unpkg.com/es-module-shims@1.6.3/dist/es-module-shims.js"></script>
    <script type="importmap">
    {
        "imports": {
            "three": "https://unpkg.com/three@0.150.0/build/three.module.js",
            "three/addons/": "https://unpkg.com/three@0.150.0/examples/jsm/" //追記
        }
    }
    </script>
    <script src="https://unpkg.co/gsap@3/dist/gsap.min.js" defer></script>
    <script src="https://unpkg.com/gsap@3/dist/ScrollTrigger.min.js" defer></script><!--追記-->
    <script src="./index.js" type="module"></script>
    <style>.story {height: 50vh;}</style><!--追記-->
</head>
<body>
    <div id="canvas"></div>
    <section id="story" class="story"><h1>story</h1></section><!--追記-->
</body>
</html>
おわりに
実際には、3Dモデルの読み込みやリサイズの処理、球の位置を分散させる計算など、さまざまな処理を行っていますが、今回はそれらの詳細は省略しました。
紹介した方法が最適ではないと思うので、今後も引き続き学習し、より優れた実装方法を見つけられるように努力します。
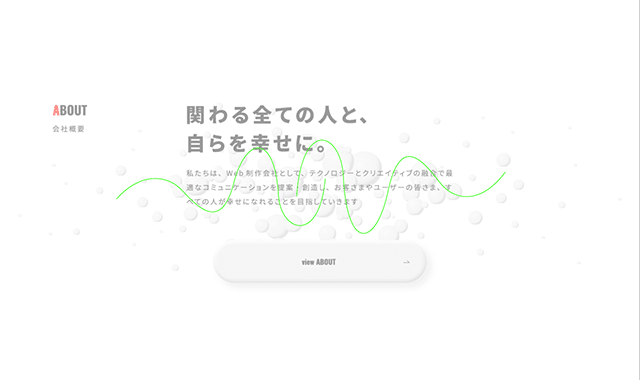
■お仕事のご依頼やご相談はお気軽に
エイトビーは、Web制作会社としてテクノロジーとクリエイティブの融合で最適なコミュニケーションを提案・創造し、お客さまやユーザーの皆さま、すべての人が幸せになれることを目指しています。
■採用募集はこちら
エイトビーでは、新しい仲間を募集しています。
この記事が気に入ったらサポートをしてみませんか?