脂の旨味が違います!「豚の角煮(五枚肉/オギョップサル使用)」
脂の旨味が違います!豚の角煮(五枚肉/オギョップサル使用)
今回は五枚肉/オギョップサルを使って角煮を作ってみました!
肉好きな方なら、五枚肉はご存知だと思うんでうが!この五枚肉 結構焼いて食べる方が多いんですが、焼くよりも煮付けた方が、皮から出る脂の旨味がしっかりと味わえるんですよ(^o^)
何を隠そう自分も初めて食べて時は(@_@)驚きものでした。
皮なしの豚バラ肉だって美味いのは分かりますが、皮付きの方が美味いだなんて嘘だ〜!と思わず作ってみて下さい( ゚д゚)。
と言う事で・・・
1,まずは材料〜/ First of all, the material ~

・長葱 1本 / 1 long green onion
・水 3L / 3L of water
・砂糖 100g / 100g of sugar
・醤油 200cc / 200cc of soy sauce
・味醂 300 / 300 of sweet sake
・酒600cc / 600cc of sake
・生姜 100g / 100g of ginger
・卵 適量 / Appropriate amount of egg
・青菜 1把(好みで) / 1 small green onion (if you like)
いや〰五枚肉が圧巻の存在感ですね〜(^o^)
断面はこんな感じです!

この皮が最高の味わいを出してくれます。
t is a cross section of five pieces of meat! The layers are in the order of
skin → fat → meat → fat → meat.
This skin gives the best taste.
2,下準備です/ Preparation

・生姜はスライスにします。 / ・ Slice the ginger.
・卵は硬めのゆで卵にしておきます。 / ・ Eggs should be hard boiled eggs.
・青菜を使う場合は下茹でして下さい。/ ・ When using green vegetables, please boil them.
3,肉を圧力鍋にかけます。/ Put the meat in a pressure cooker.

Put ginger slices, green onions and five pieces of meat in a pressure cooker, cover and heat.
2,圧力がかかったら、中火にして25分〜30分圧力をかけます。
When pressure is applied, reduce to medium heat and apply pressure for 25 to 30 minutes.
*この時五枚肉は圧力鍋に入る大きさにカットして下さい。
* At this time, cut the five pieces of meat into a size that fits in the pressure cooker.
4,圧力をかけた肉をカットします / Cut the pressured meat

いや〰いい感じで脂が出てますね〜(*´∀`*) この時点で味噌をちょっと塗ってパクリ!としても、最高ですよ( ゚∀゚)・∵. グハッ!!
No, it feels good and fat is coming out ~ (* ´∀ ` *)At this point, apply a little miso and Knob eating! Even so, it's the best (゜ ∀ ゜) ・ ∵.
5,煮込んでいきます。 / I will simmer.

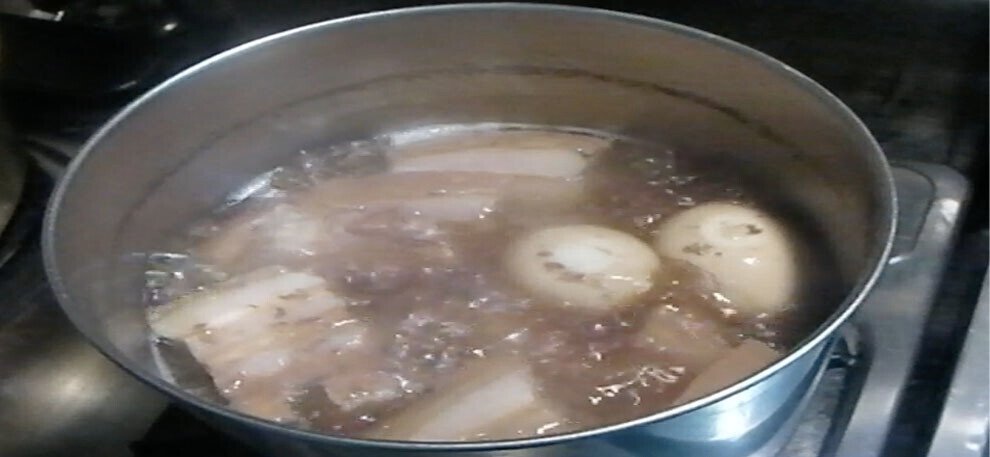
沸騰したら中火にして1時間煮込んでいきます。
Put sugar and cut meat in a large pot・ Add water, sake, soy sauce, mirin, and boiled eggs and heat over high heat.When it boils, reduce to medium heat and simmer for 1 hour.
6,煮込んでる間に仕上げの調味料を合わせます。 / Add the finishing seasoning while boiling.

・砂糖40g / 40g of sugar,
・味醂 200cc / 200cc of sweet sake,
・辣油 大1 / 1 large chili oil,
・一味 大さじ / 1 tablespoon of The crew, 1
・鷹の爪輪切り1本分 / 1 slice of hawk's claw
7,1時間後の状態です。/ It is in the state after 1 hour.

The simmered soup is decreasing with a nice feeling (* ˘︶˘ *) ...: * ♡I will put the finishing seasoning here.
8,仕上げ調味料を加えていきます。/ I will add the finishing seasoning.

・ Add sugar, sweet sake, soy sauce, hawk claw slices, chili peppers, and chili oil and simmer for 30 to 45 minutes.
9,仕上げ調味料を入れて30分後の状態です。/ It is in the state 30 minutes after adding the finishing seasoning.

脂の輝きが良いですね〜(^o^) この時点で味見をして、味が薄いようでしたらそのまま15分〜30分更に煮込んで下さい。
The shine of fat is good ~ (^ o ^)Taste at this point,If the taste is light, simmer for 15 to 30 minutes.
10,完成\(^o^)/ /

I wanted to make the taste stronger, so The finishing time was extended by 30 minutes and simmered for 1 hour.
(*´∀`*)色・艶いい感じで仕上がりました。
やっぱり皮付き肉は脂の出方が違いますね〜!脂好きには堪らない仕上がりです。
写真では青菜を添えてないですが、茹でた青菜を添えて脂たっぷりの煮汁を染込ませ食べるのもお薦めです(*˘︶˘*).。.:*♡➕白髪ねぎ等と一緒に食べても最高です。
小分けして保存袋に入れ、しっかりと空気を抜いておけば、冷凍保存もききますので、ちょっと多めに作ってお弁当の一品・もう一品欲しい時な等に活用しても美味しくいただけます。
最後までありがとうございましたm(_ _)m。
Cyovin's kitchenのYou Tubeです。
良かったら参考にして下さい。
この記事が気に入ったらサポートをしてみませんか?
