
【ティラノビルダー】着せ替え機能の実装

【注意】
キャラクターと着せ替え用の画像は全て同じサイズで用意してください。
①キャラクターの登録
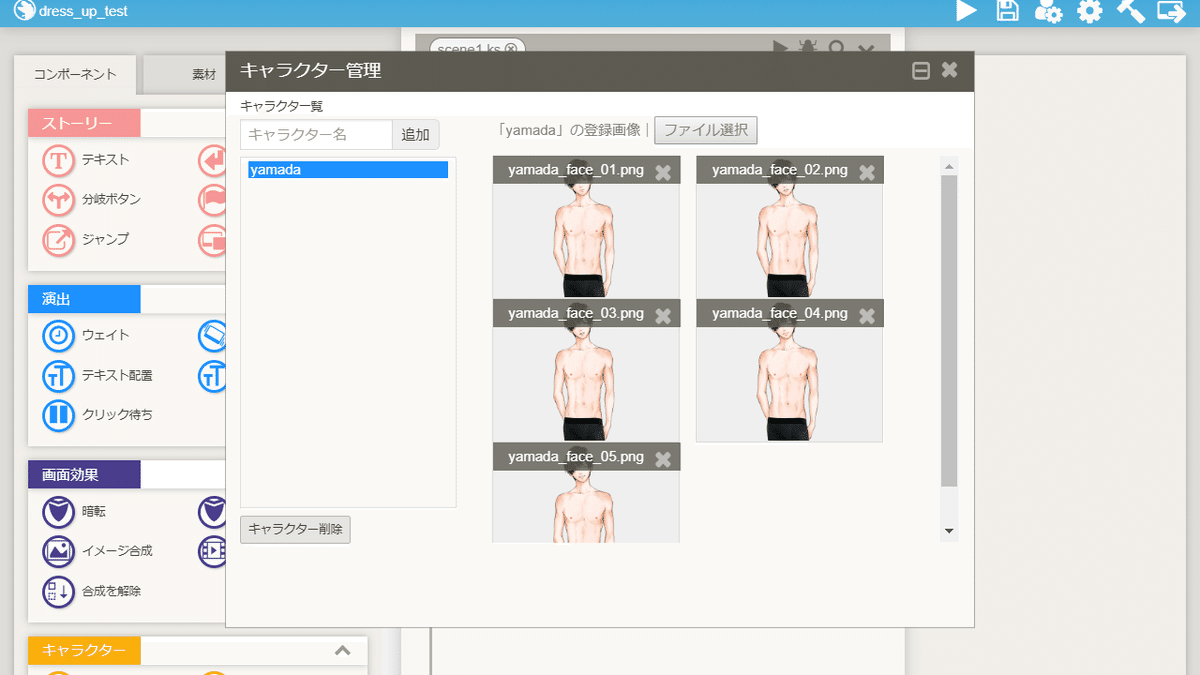
キャラクターを登録します。
今回はキャラクター名をyamadaとしました。
②衣装の画像の配置

プロジェクト一覧画面からフォルダのアイコンをクリックし、作業中のプロジェクトのフォルダを開きます。

fgimageフォルダをクリックします。

衣装の画像を配置するフォルダを新規作成します。

衣装の画像を配置します。
これで、衣装の画像の配置は完了です。
③衣装の画像の登録

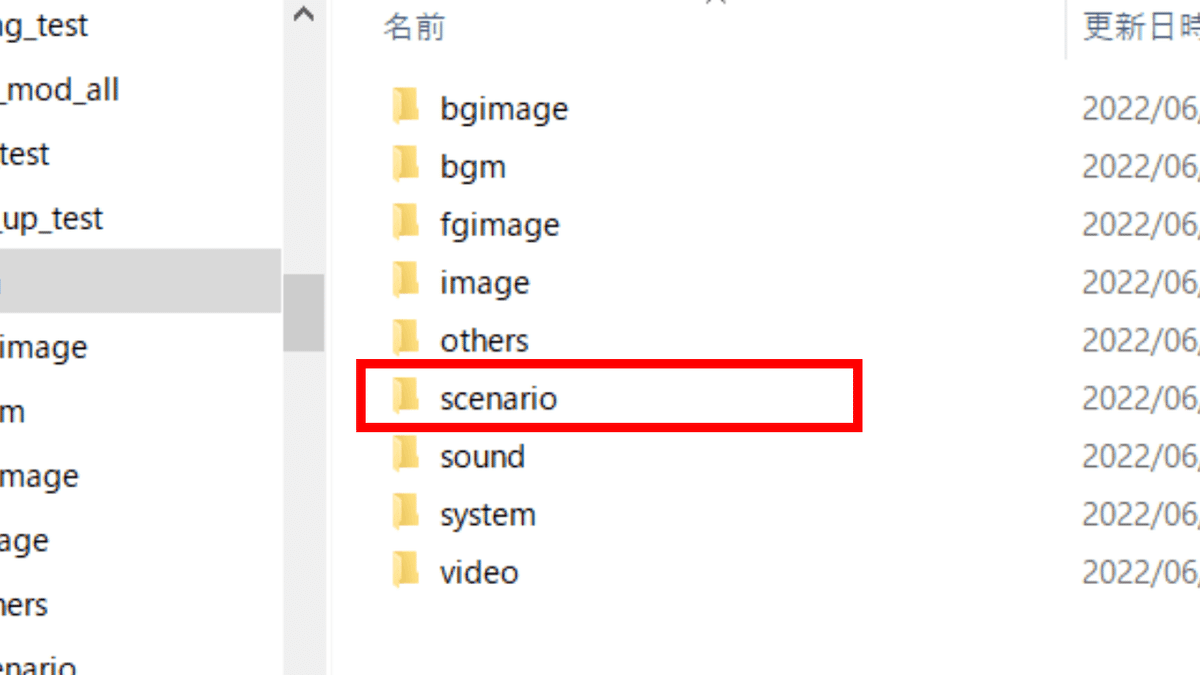
scenarioフォルダをクリックします。
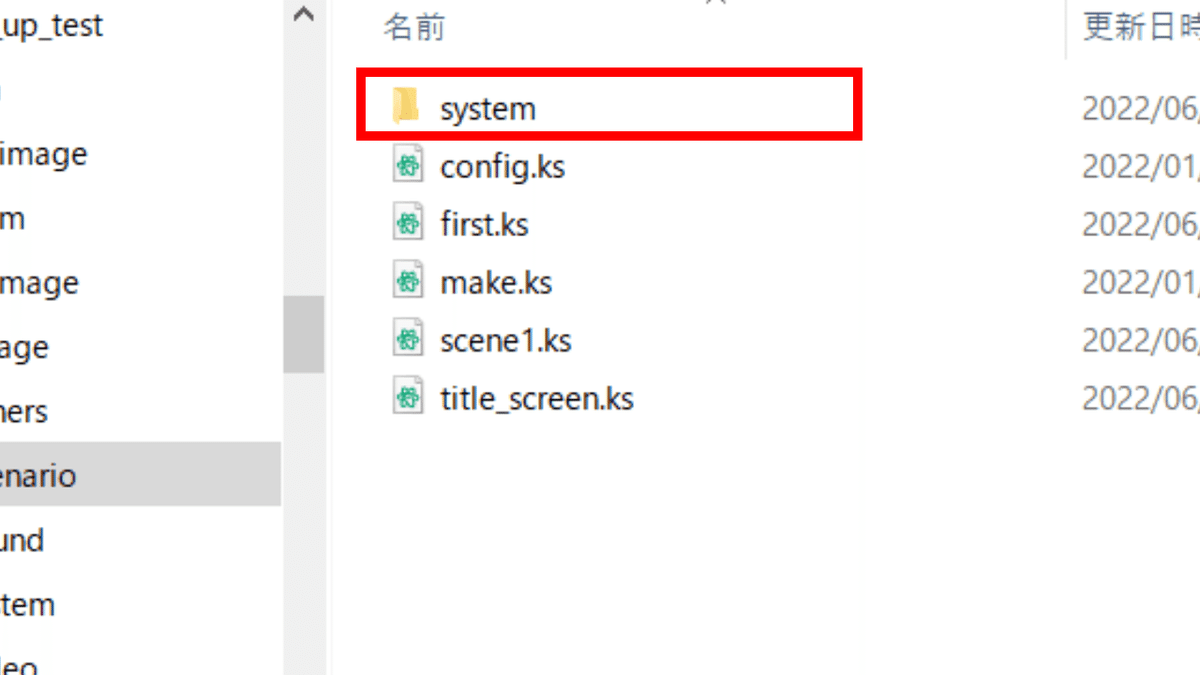
systemフォルダをクリックします。
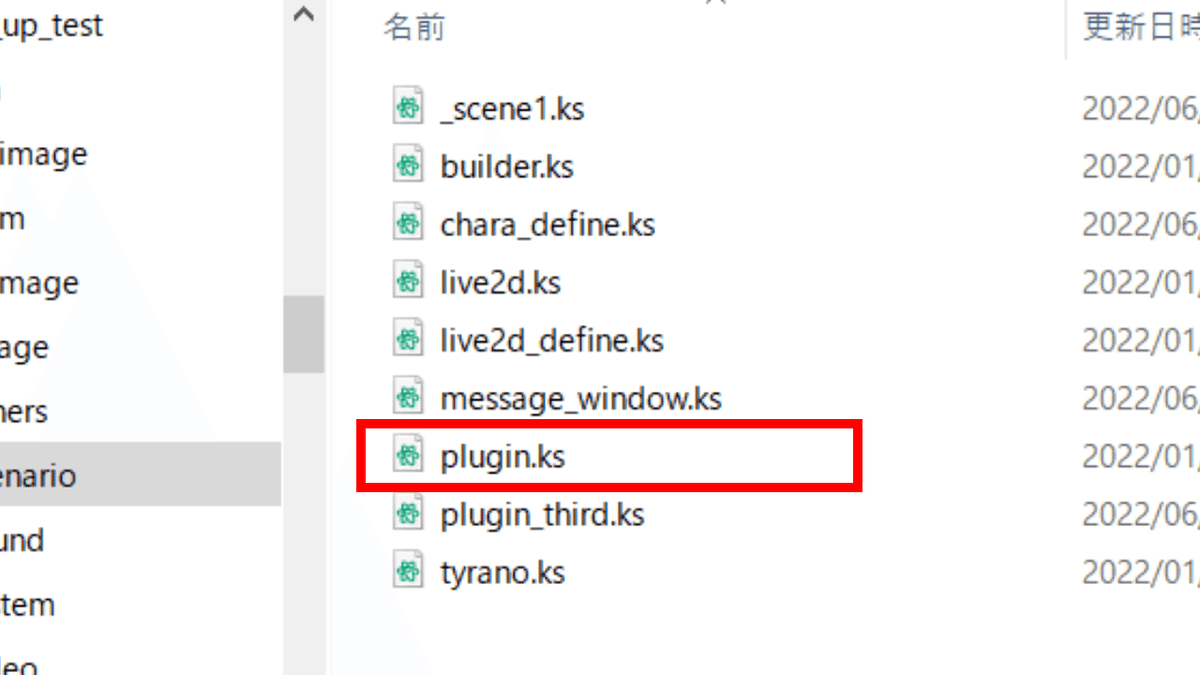
plugin.ksをメモ帳で開きます。

[return]と書かれています。
このコードは絶対に消さないでください。

下記のコードを記述します。
[chara_layer name="yamada" part="clothes" id="1" storage="clothes/yamada_clothes_01.png"]
[chara_layer name="yamada" part="clothes" id="2" storage="clothes/yamada_clothes_02.png"]
[chara_layer name="yamada" part="clothes" id="3" storage="clothes/yamada_clothes_03.png"]
[chara_layer name="yamada" part="clothes" id="4" storage="clothes/yamada_clothes_04.png"]
[chara_layer name="yamada" part="clothes" id="5" storage="clothes/yamada_clothes_05.png"]
【キャラクターの名前】
name
キャラクター管理画面で登録したキャラクターの名前を指定します。
【着せ替え用の画像の登録番号】
part
id
衣装の画像を、partとidで登録します。
【着せ替え用の画像がある場所】
storage
先程、配置した衣装の画像がある場所を指定します。
コードを記述した後、最後に上書き保存をします。
これで、衣装の画像の登録は完了です。
④動作の確認
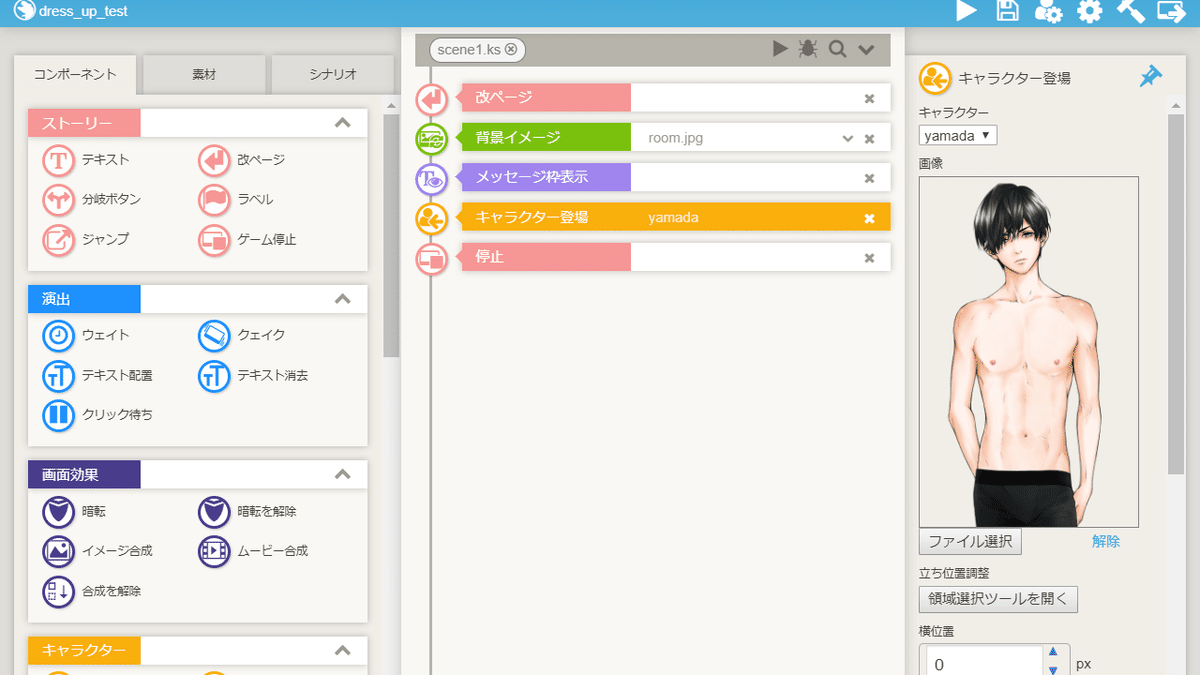
キャラクター登場コンポーネントを配置します。

キャラクターの画像と衣装の画像が合わせて表示されます。
⑤着せ替え画面のシナリオファイルの作成

着せ替え画面のシナリオファイルを作成します。
今回は、dress_upとしました。

ティラノスクリプトコンポーネントを配置します。
下記のコードを貼り付けます。
[layopt layer="message0" visible="false"]

[clearfix]

[stop_keyconfig]

[free_layermode time="100" wait="true"]

[reset_camera time="100" wait="true"]

[iscript]
$(".layer_camera").empty();
$("#bgmovie").remove();

if (TYRANO.kag.stat.f.select == undefined ) {
TYRANO.kag.stat.f.select = 1;
}

[endscript]

[hidemenubutton]

[bg storage="bg_base.png" time="100"]

[button fix="true" graphic="config/c_btn_back.png" enterimg="config/c_btn_back2.png" target="*back" x="1160" y="20"]

[chara_part name="yamada" clothes="&f.select"]

[chara_show name="yamada" time="1" layer="0" width="500" height="800" left="10" top="20"]

[button graphic="clothes/yamada_clothes_01.png" target="*select" x="500" y="130" width="100" height="160" fix="true" folder="fgimage" exp="f.select = 1"]
[button graphic="clothes/yamada_clothes_02.png" target="*select" x="610" y="130" width="100" height="160" fix="true" folder="fgimage" exp="f.select = 2"]
[button graphic="clothes/yamada_clothes_03.png" target="*select" x="720" y="130" width="100" height="160" fix="true" folder="fgimage" exp="f.select = 3"]
[button graphic="clothes/yamada_clothes_04.png" target="*select" x="830" y="130" width="100" height="160" fix="true" folder="fgimage" exp="f.select = 4"]
[button graphic="clothes/yamada_clothes_05.png" target="*select" x="940" y="130" width="100" height="160" fix="true" folder="fgimage" exp="f.select = 5"]

[s]

*select

[chara_part name="yamada" clothes="&f.select"]

[return]

*back

[cm]

[clearfix]

[start_keyconfig]

[clearstack]

[awakegame]

[s]
(1)背景
[bg storage="bg_base.png" time="100"]
(2)戻るボタンの位置
[button fix="true" graphic="config/c_btn_back.png" enterimg="config/c_btn_back2.png" target="*back" x="1160" y="20"]
(3)キャラクターの大きさ・位置
[chara_show name="yamada" time="1" layer="0" width="500" height="800" left="10" top="20"]
(4)衣装の選択ボタンの大きさ・位置
[button graphic="clothes/yamada_clothes_01.png" target="*select" x="500" y="130" width="100" height="160" fix="true" folder="fgimage" exp="f.select = 1"]
これで着せ替え用のシナリオファイルの作成は完了です。
⑥着せ替え画面に移動するボタンの配置

ティラノスクリプトコンポーネントを配置します。
ティラノスクリプトコンポーネントに以下のコードを貼り付けます。
[button graphic="button/dress_up.png" storage="dress_up.ks" x="1000" y="400" role="sleepgame"]【画像の場所】
graphic
【移動先のシナリオ】
storage
【横の位置】
x
【縦の位置】
y
⑦make.ksの編集
scenarioフォルダをクリックします。
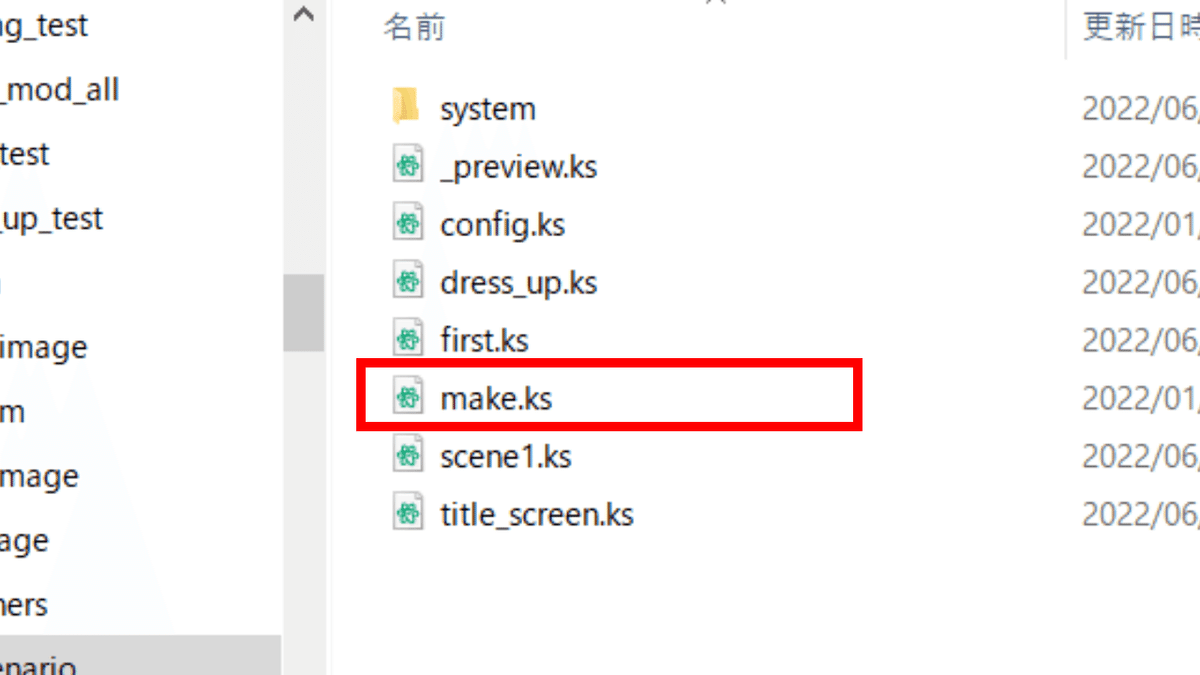
make.ksファイルをメモ帳で開きます。

注意書きが書かれています。
[return]と書かれています。
このコードは絶対に消さないでください。

下記のコードを記述します。
[chara_part name="yamada" clothes="&f.select"]コードを記述した後、最後に上書き保存をします。
これで、make.ksの編集は完了です。
⑧動作の確認

衣装を変更することができました。
これで解説を終わります。おつかれさまでした。
この記事が気に入ったらサポートをしてみませんか?