
【ティラノビルダー】画像ボタンのホバー時に、画像を表示する方法

ティラノビルダーで、画像ボタンのホバー時に、画像を表示しました pic.twitter.com/QyaNE90dxp
— サイバーノーツ (@Cyber_Noughts) October 13, 2023
ティラノビルダーで、画像ボタンのホバー時に、画像を表示する方法について解説します。
①画像の準備
button1.png(ボタンの画像)
button1_hover.png(ホバー時のボタンの画像)
button1_image.png(ホバー時に表示する画像)
button2.png(ボタンの画像)
button2_hover.png(ホバー時のボタンの画像)
button2_image.png(ホバー時に表示する画像)
button3.png(ボタンの画像)
button3_hover.png(ホバー時のボタンの画像)
button3_image.png(ホバー時に表示する画像)
今回は、上記の6つの画像を準備します。
【注意①】
ボタンの画像、ホバー時のボタンの画像。ホバー時に表示する画像の名前は全て共通の名前を付けてください。
今回は、共通の名前をbutton1、button2、button3としました。
【注意②】
ホバー時のボタンの画像の名前の最後に_hoverと付けてください。
【注意③】
ホバー時に表示する画像の名前の最後に_imageと付けてください。


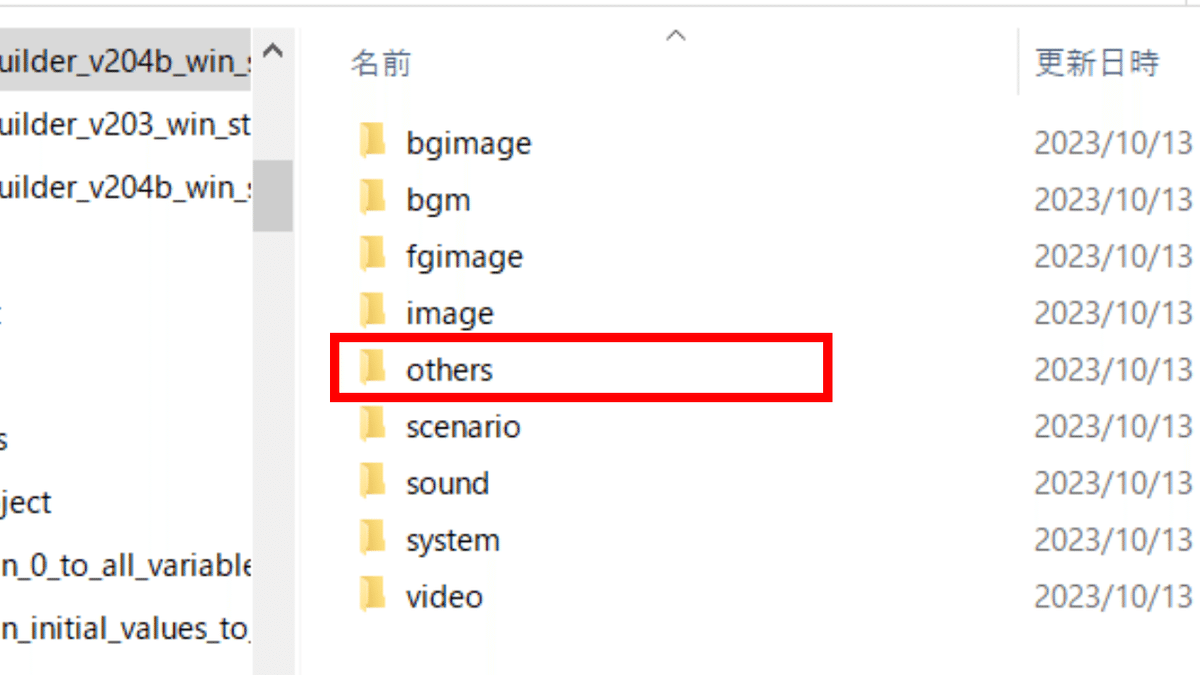
②画像の追加

ホバー時に表示する画像を追加します。
button1_image.png
button2_image.png
button3_image.png
今回は、上記の画像を追加しました。
これで、画像の追加は完了です。
③画像の配置

画面左上のプロジェクト名をクリックします。

imageフォルダをクリックします。

imageフォルダが開かれました。
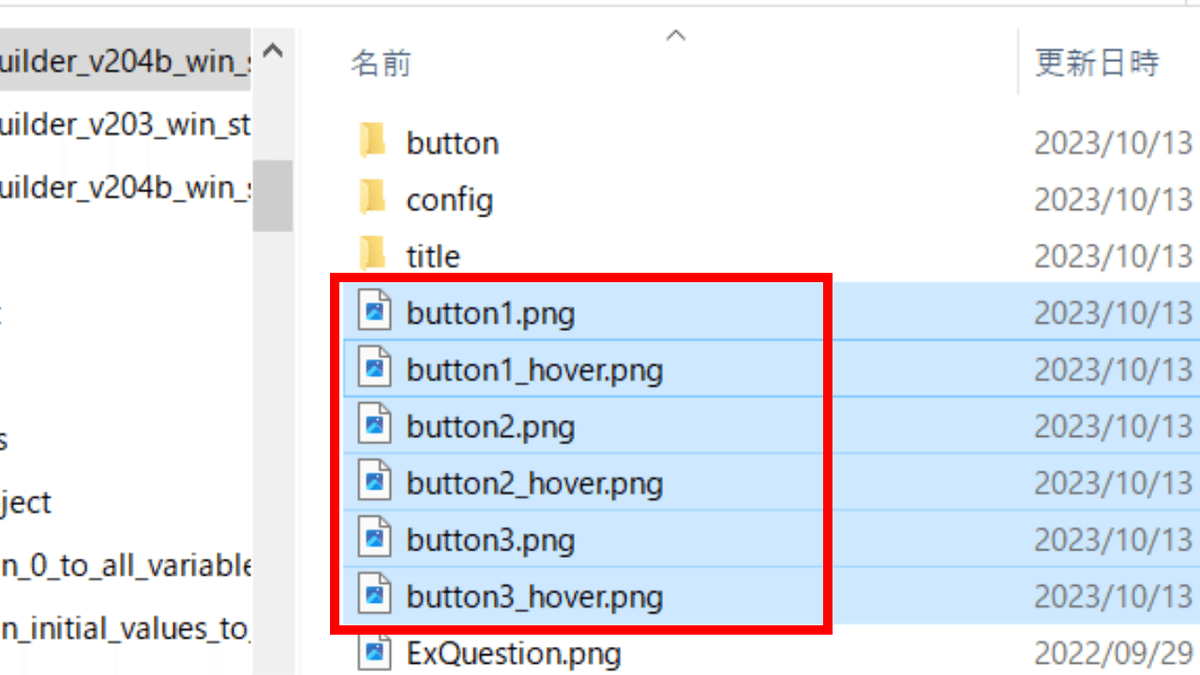
ボタンの画像、ホバー時のボタンの画像を配置します。
button1.png
button1_hover.png
button2.png
button2_hover.png
button3.png
button3_hover.png
今回は、上記の画像を配置しました。
これで、画像の配置は完了です。
④テキストファイルの新規作成・編集
othersフォルダをクリックします。

othersフォルダが開かれました。
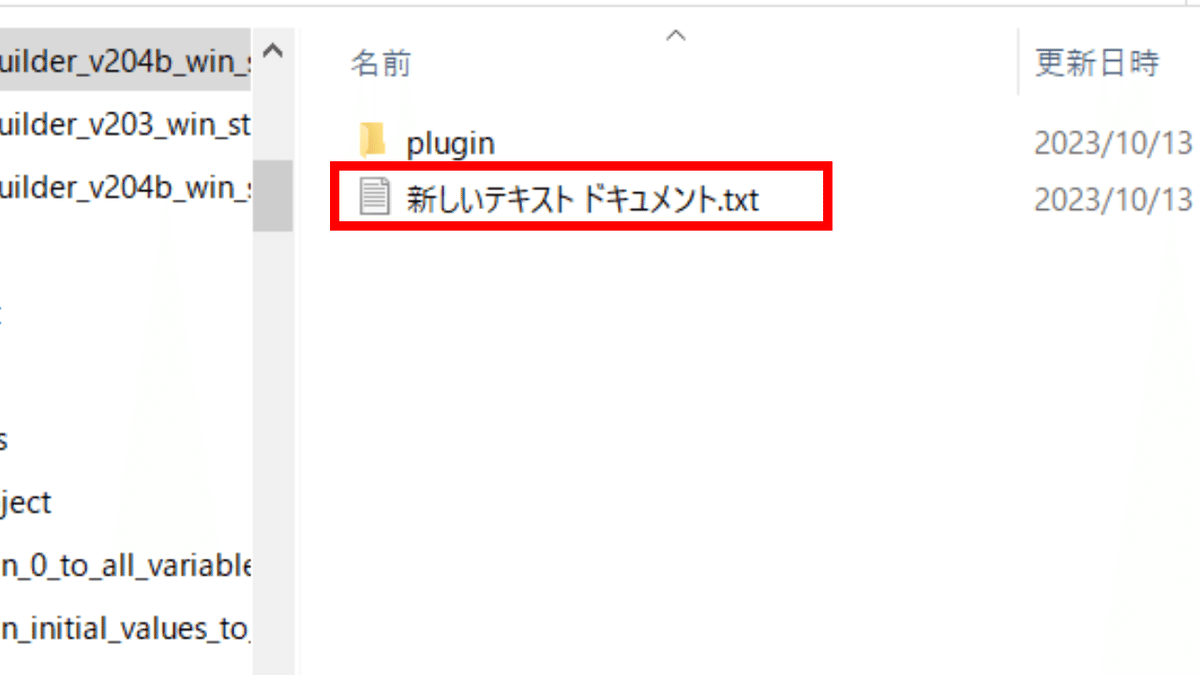
テキストファイルを新規作成します。
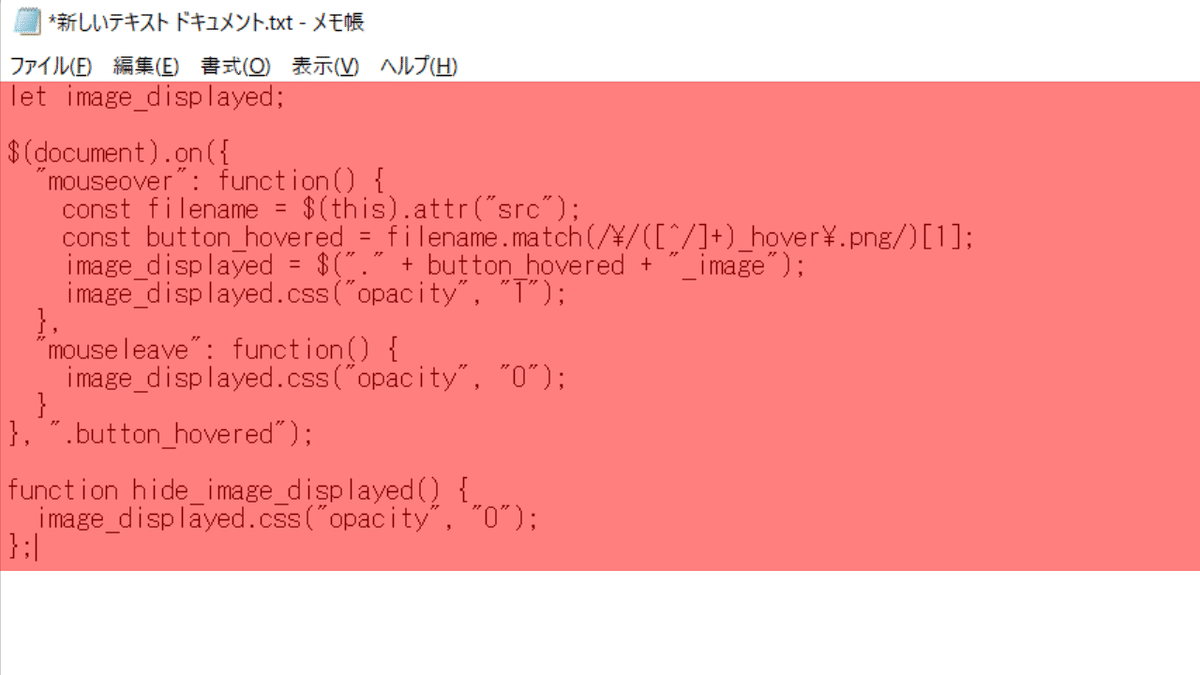
テキストファイルを開き、下記のコードを貼り付けます。
let image_displayed;

$(document).on({
  "mouseover": function() {
    const filename = $(this).attr("src");
    const button_hovered = filename.match(/\/([^/]+)_hover\.png/)[1];
    image_displayed = $("." + button_hovered + "_image");
    image_displayed.css("opacity", "1");
  },
  "mouseleave": function() {
    image_displayed.css("opacity", "0");
  }
}, ".button_hovered");

function hide_image_displayed() {
  image_displayed.css("opacity", "0");
};
最後に必ず上書き保存をしてください。
テキストファイルのファイル名をhover.jsに変更します。
「拡張子を変更すると、ファイルが使えなくなる可能性があります。変更しますか?」
上記の様に表示されますが、「はい」をクリックします。

テキストファイルのファイル名をhover.jsに変更しました。
これで、テキストファイルの新規作成・編集は完了です。
⑤plugin.ksの編集
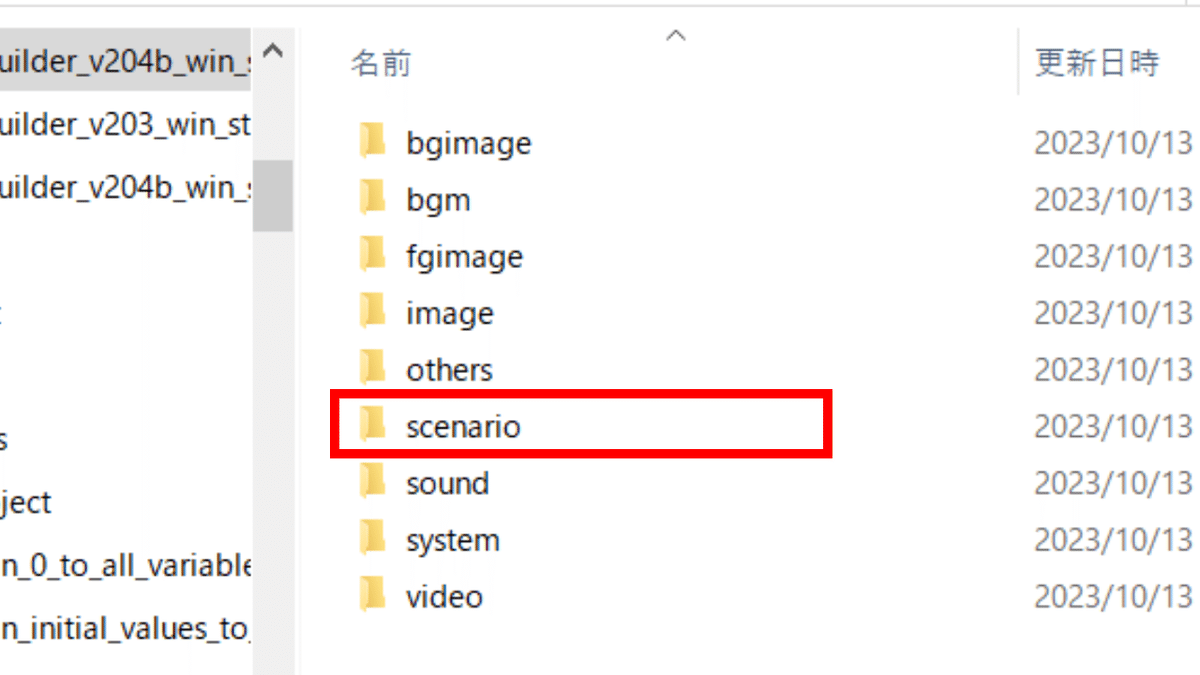
scenarioフォルダをクリックします。
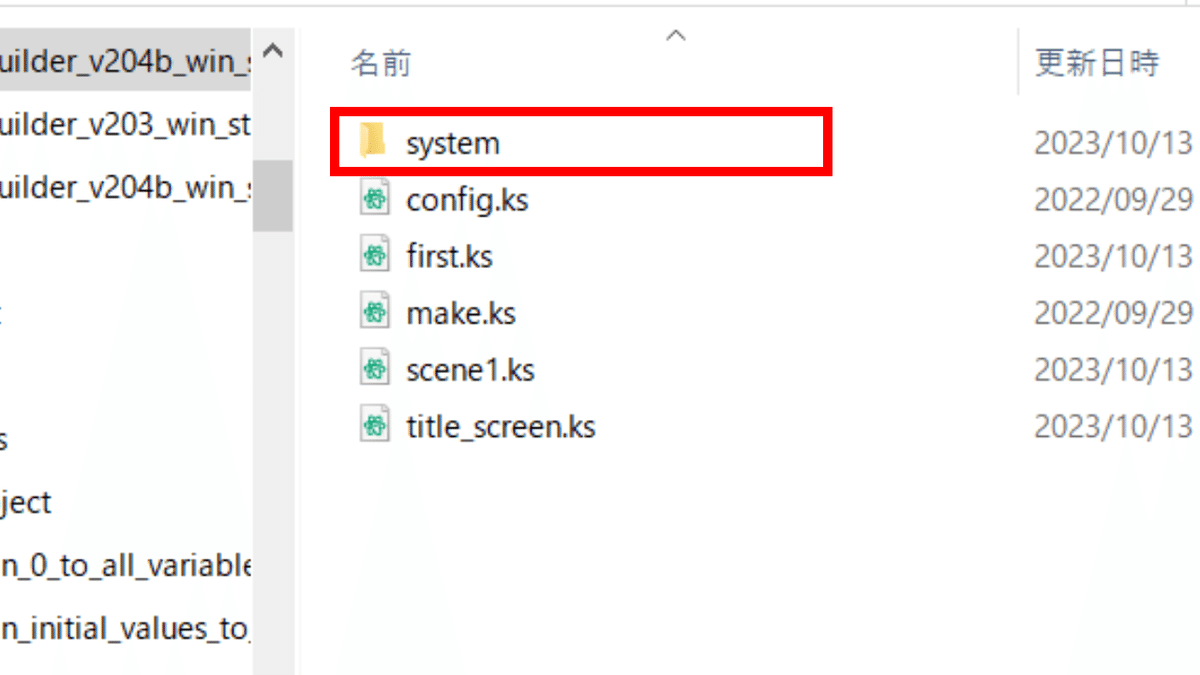
systemフォルダをクリックします。
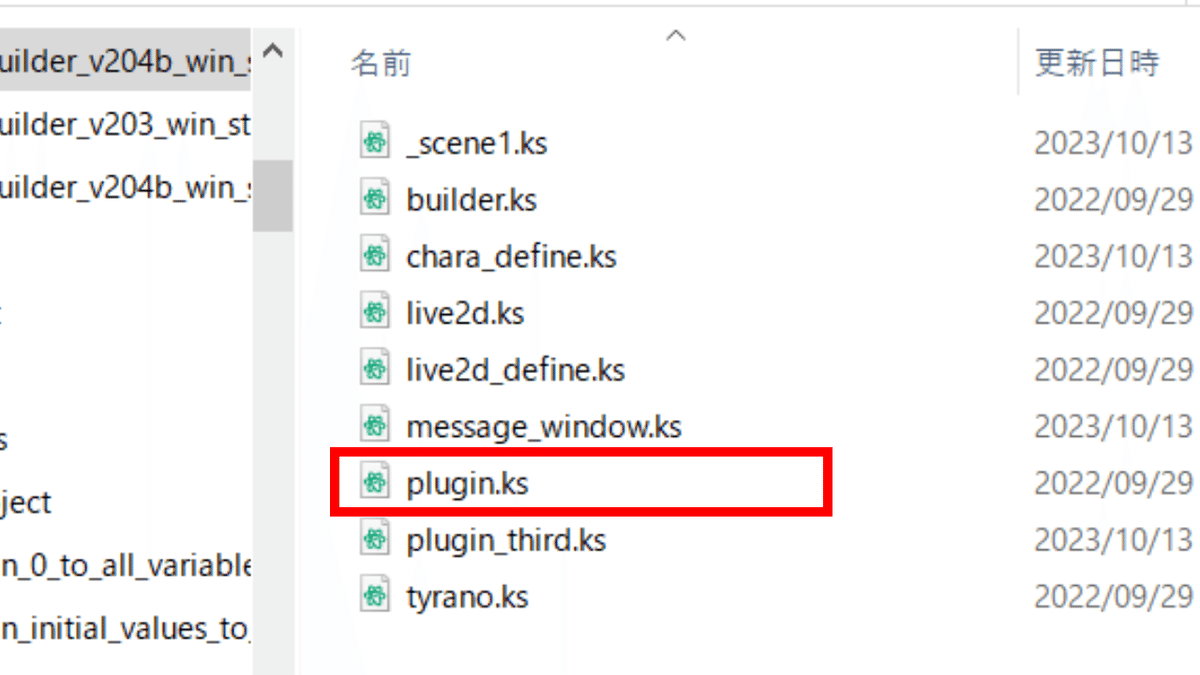
plugin.ksをメモ帳で開きます。
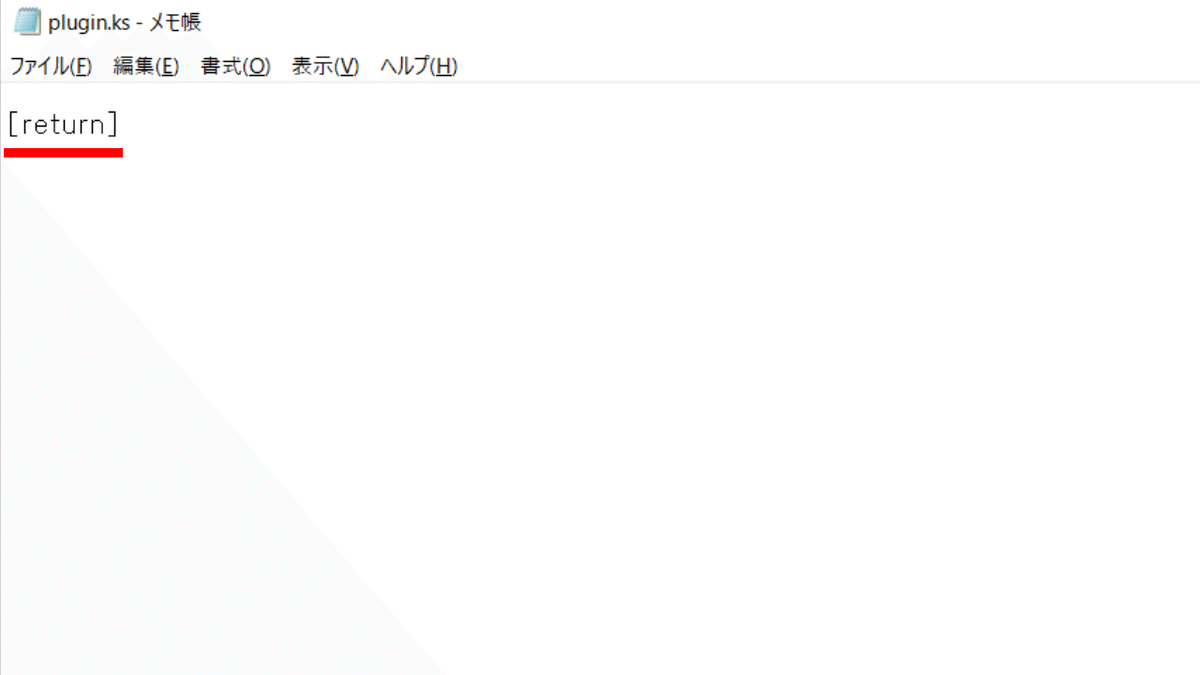
[return]と書かれています。このコードは絶対に消さないでください。

[loadjs storage="hover.js"]最後に必ず上書き保存をしてください。
これで、plugin.ksの編集は完了です。
⑥scene1の編集
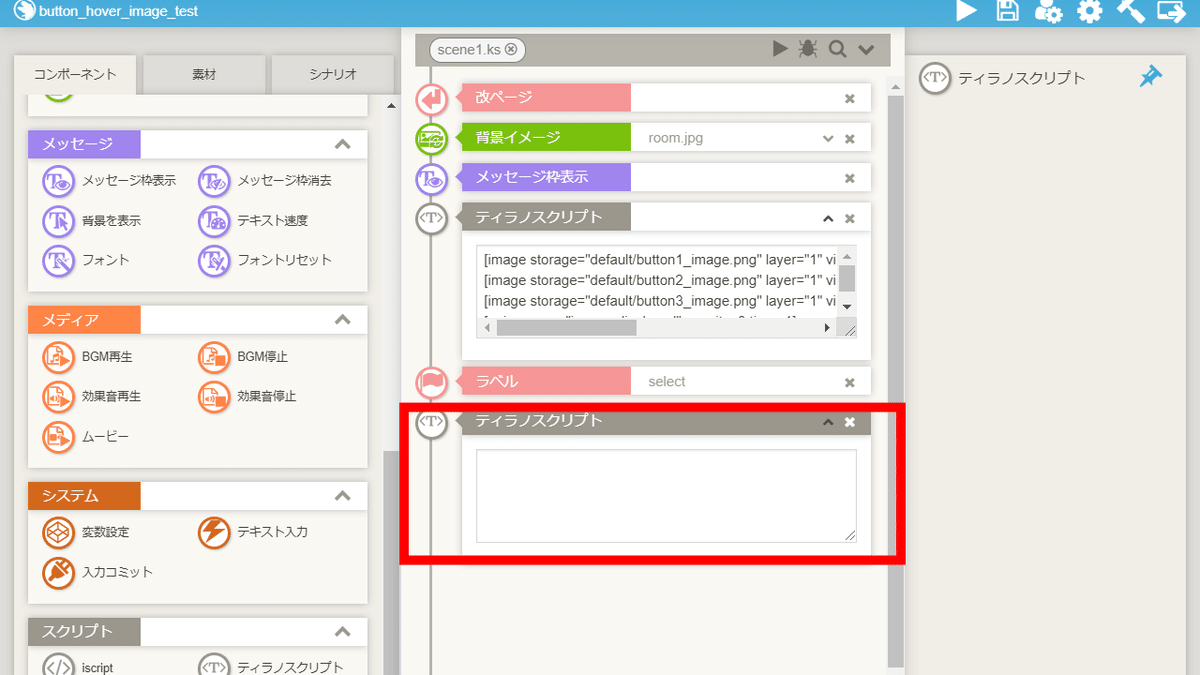
⑥-(1) ティラノスクリプトコンポーネントの配置

ティラノスクリプトコンポーネントを配置します。

下記のコードを貼り付けます。
[image storage="default/button1_image.png" layer="1" visible="true" left="400" top="100" name="button1_image,image_displayed"]
[image storage="default/button2_image.png" layer="1" visible="true" left="400" top="100" name="button2_image,image_displayed"]
[image storage="default/button3_image.png" layer="1" visible="true" left="400" top="100" name="button3_image,image_displayed"]
[anim name="image_displayed" opacity=0 time=1]
※4行目のコードは変更する箇所はありません。
【コードの解説】
■ storage
画像を指定します。
今回は、ホバー時に表示する画像を指定します。
■ left
画像の縦位置を指定できます。
■ top
画像の横位置を指定できます。
■ name
画像をプログラム上で管理するための名前を指定します。
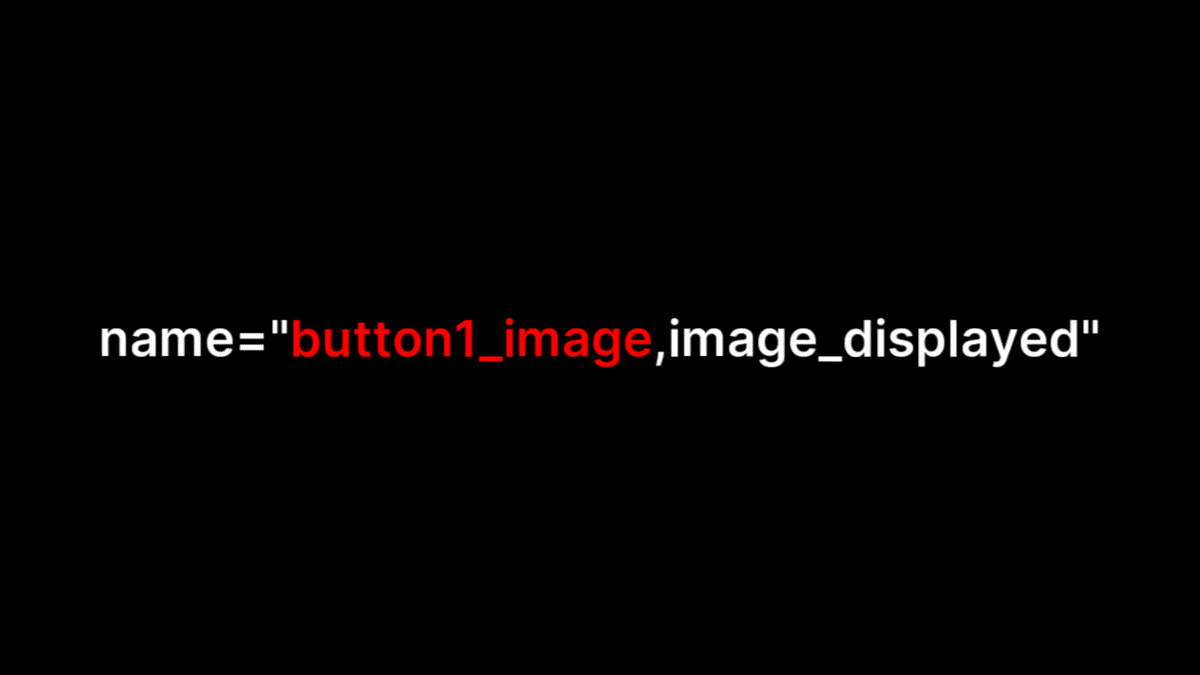
画像の名前に合わせて赤文字の部分を変更してください。
画像の名前がbutton1_imageの場合、
button1_imageと指定します。
⑥-(2) ラベルコンポーネントの配置

ラベルコンポーネントを配置します。
ラベル名は、selectとします。
⑥-(3) ティラノスクリプトコンポーネントの配置
ティラノスクリプトコンポーネントを配置します。

下記のコードを貼り付けます。
[button graphic="button1.png" storage="" target="*button1" name="button_hovered" x="100" y="100" exp="hide_image_displayed()" enterimg="button1_hover.png"]
[button graphic="button2.png" storage="" target="*button2" name="button_hovered" x="100" y="200" exp="hide_image_displayed()" enterimg="button2_hover.png"]
[button graphic="button3.png" storage="" target="*button3" name="button_hovered" x="100" y="300" exp="hide_image_displayed()" enterimg="button3_hover.png"]
【コードの解説】
■ graphic
ボタンの画像を指定します。
■ storage
移動先のシナリオを指定します。
指定しない場合は、作業中のシナリオになります。
シナリオ名の後ろに.ksと付けます。
(例)シナリオscene1に移動したい場合
storage="scene1.ks"
■ target
移動先のラベルを指定します。
ラベル名の先頭に*を付けます。
(例)ラベルbutton1に移動したい場合
target="*button1"
■ x
ボタンの横位置を指定できます。
■ y
ボタンの縦位置を指定できます。
■ enterimg
ホバー時のボタンの画像を指定します。
⑥-(4) 停止コンポーネントの配置
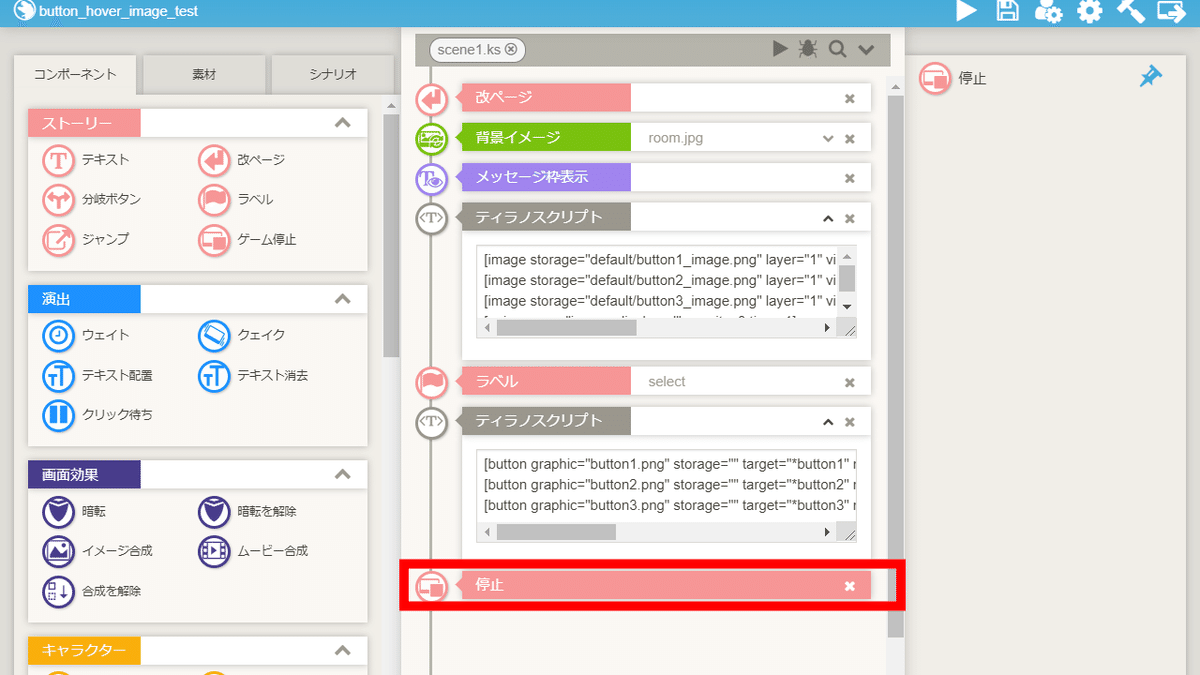
停止コンポーネントを配置します。
⑥-(5) ラベルコンポーネントの配置

ラベルコンポーネントを3つ配置します。
button1
button2
button3
上から順に、上記のラベル名を指定します。
⑥-(6) 改ページコンポーネントの配置
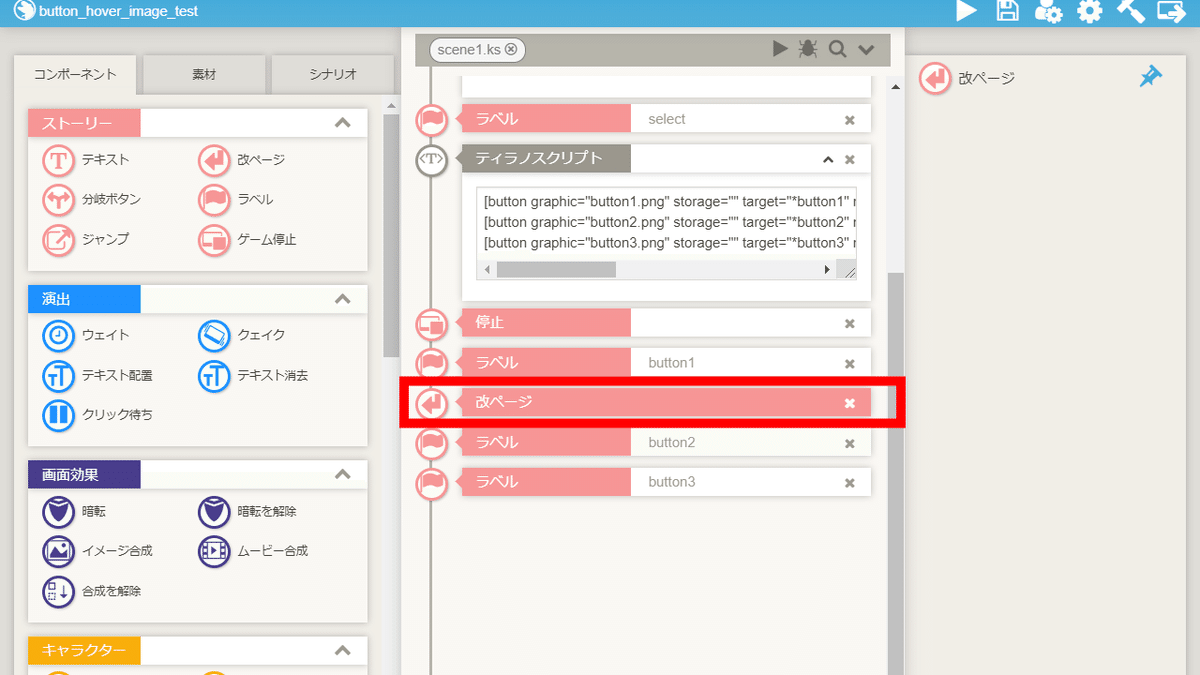
改ページコンポーネントを配置します。
⑥-(7) テキストコンポーネント・ジャンプコンポーネントの配置

テキストコンポーネント・ジャンプコンポーネントを配置します。
ジャンプコンポーネントのターゲットにラベルselectを指定します。
⑥-(8) 改ページコンポーネントの配置
改ページコンポーネントを配置します。
⑥-(9) テキストコンポーネント・ジャンプコンポーネントの配置

テキストコンポーネント・ジャンプコンポーネントを配置します。
ジャンプコンポーネントのターゲットにラベルselectを指定します。
⑥-(10) 改ページコンポーネントの配置
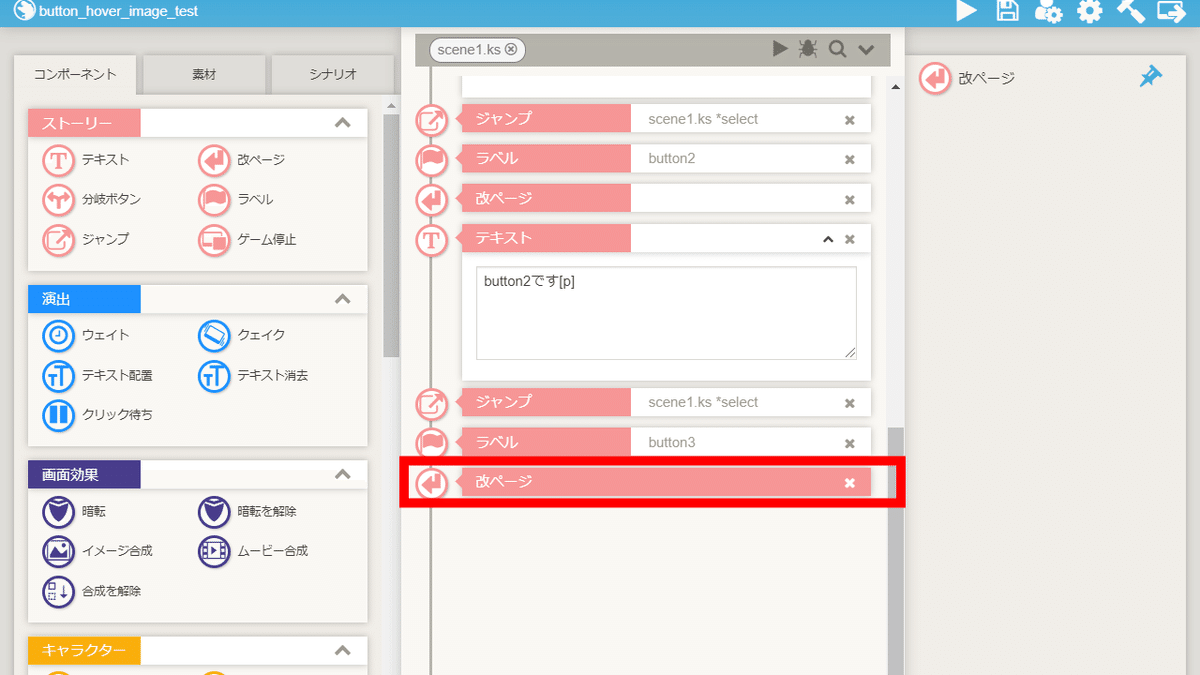
改ページコンポーネントを配置します。
⑥-(11) テキストコンポーネント・ジャンプコンポーネントの配置

テキストコンポーネント・ジャンプコンポーネントを配置します。
ジャンプコンポーネントのターゲットにラベルselectを指定します。
これで、画像ボタンのホバー時に、画像を表示する手順は完了です。
以上で解説を終わります。おつかれさまでした。
【参考】
ホバー時に表示する画像は、イメージ消去コンポーネントで消去できます。
この記事が気に入ったらサポートをしてみませんか?