
【ティラノビルダー】ソーシャルゲーム風のホーム画面の作成方法

【ティラノビルダー】ソーシャルゲーム風のホーム画面の作成方法 サンプル動画 pic.twitter.com/uxnaWrqjca
— サイバーノーツ (@Cyber_Noughts) July 17, 2022
今回は、ソーシャルゲーム風のホーム画面を作成します。
キャラクターの立ち絵・スチルが表示される
プレイヤー側で好きな立ち絵・スチルに変更できる
セリフが流れる
ストーリーに移動するための分岐ボタンが表示される
以上の機能を実装します。
【使用素材】
わたおきば様の立ち絵を使用させていただきました。
【準備】
シナリオを新規作成し、シナリオ名をep1とします。
①画像の配置

プロジェクト一覧画面からフォルダのアイコンをクリックし、作業中のプロジェクトのフォルダを開きます。

imageフォルダをクリックします。

画像を配置するフォルダを新規作成します。

画像を配置します。
これで、画像の配置は完了です。
②キャラクターの追加

「プロジェクト」→「キャラクター管理」をクリックし、キャラクター管理画面を開きます。

今回はキャラクター名をakaneとしました。
キャラクターの画像を登録します。
これで、キャラクターの追加は完了です。
③scene1の編集
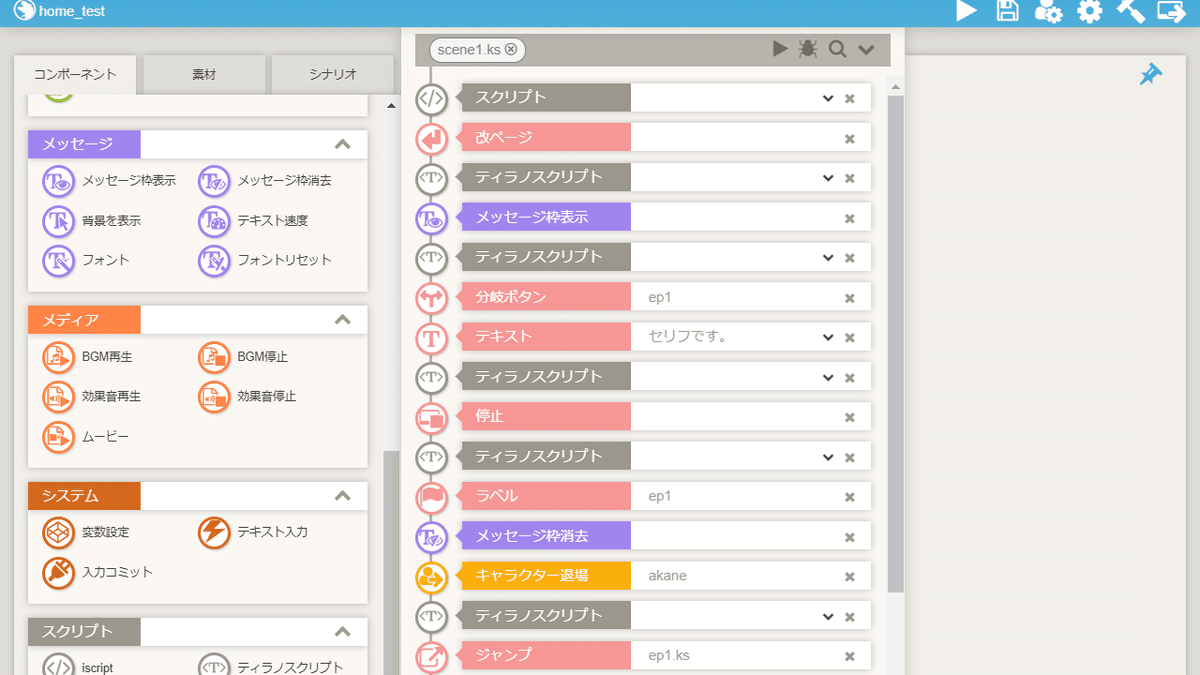
全体の画像です。
(1) 背景・立ち絵の初期設定

iscriptコンポーネントを配置します。
if ( sf.bg == undefined ) {
sf.bg = 'bg_base.png';
}
if ( sf.face == undefined ) {
sf.face = 'chara/1/a.png';
}
コードを貼り付けます。
【デフォルトの背景】
bg_base.png
【デフォルトの立ち絵】
chara/1/a.png
デフォルトの背景・立ち絵を変更したい場合は、
bg_base.png・chara/1/a.pngを変更します。
(2) 背景の表示

ティラノスクリプトコンポーネントを配置します。
[bg storage="&sf.bg" time="1000" method="crossfade"]コードを貼り付けます。
(3) キャラクターの表示
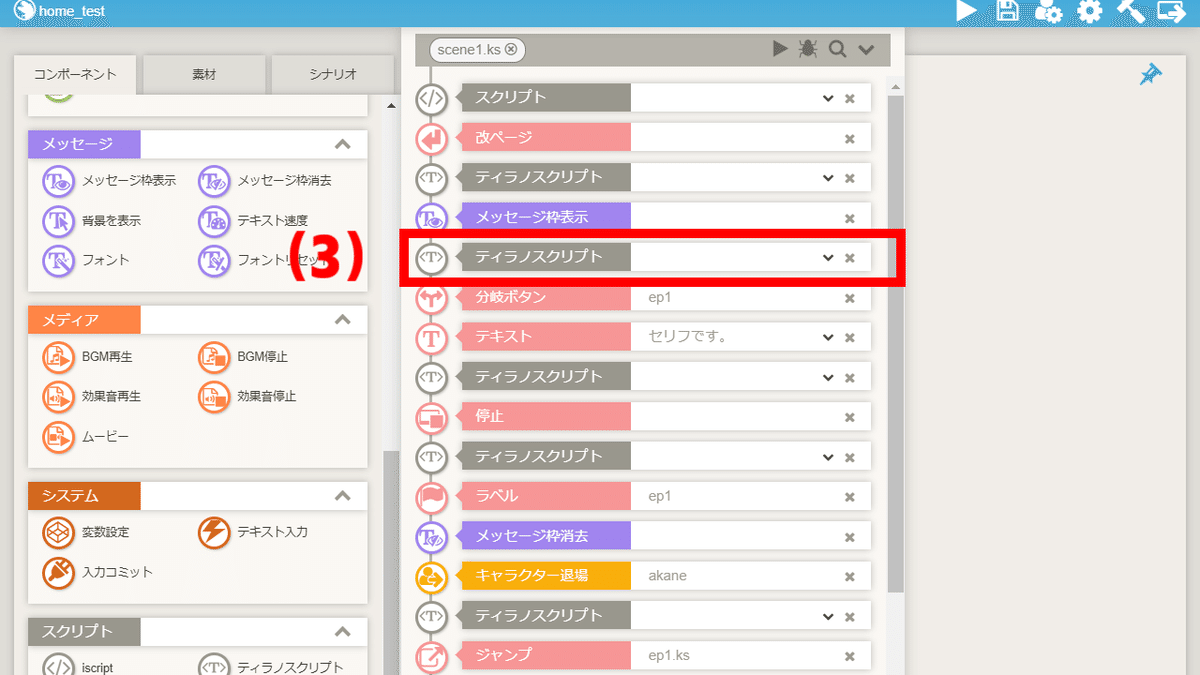
ティラノスクリプトコンポーネントを配置します。
[chara_show name="akane" time="1000" wait="true" storage="&sf.face" width="400" height="1100" top="100"]コードを貼り付けます。
(4) ボタンの表示

ティラノスクリプトコンポーネントを配置します。
[button graphic="home/bg_base.png" target="*bg" x="860"  y="30" width="80" height="60" fix="true" exp="sf.bg = 'bg_base.png'" name="home"]
[button graphic="home/room.png"    target="*bg" x="960"  y="30" width="80" height="60" fix="true" exp="sf.bg = 'room.jpg'"    name="home"]
[button graphic="home/rouka.png"   target="*bg" x="1060" y="30" width="80" height="60" fix="true" exp="sf.bg = 'rouka.jpg'"   name="home"]
[button graphic="home/title.png"   target="*bg" x="1160" y="30" width="80" height="60" fix="true" exp="sf.bg = 'title.jpg'"   name="home"]

[button graphic="home/a.png" target="*face" x="850"  y="130" width="100" height="100" fix="true" exp="sf.face = 'chara/1/a.png'" name="home"]
[button graphic="home/b.png" target="*face" x="950"  y="130" width="100" height="100" fix="true" exp="sf.face = 'chara/1/b.png'" name="home"]
[button graphic="home/c.png" target="*face" x="1050" y="130" width="100" height="100" fix="true" exp="sf.face = 'chara/1/c.png'" name="home"]
[button graphic="home/d.png" target="*face" x="1150" y="130" width="100" height="100" fix="true" exp="sf.face = 'chara/1/d.png'" name="home"]
[button graphic="home/e.png" target="*face" x="850"  y="250" width="100" height="100" fix="true" exp="sf.face = 'chara/1/e.png'" name="home"]
[button graphic="home/f.png" target="*face" x="950"  y="250" width="100" height="100" fix="true" exp="sf.face = 'chara/1/f.png'" name="home"]
[button graphic="home/g.png" target="*face" x="1050" y="250" width="100" height="100" fix="true" exp="sf.face = 'chara/1/g.png'" name="home"]
[button graphic="home/h.png" target="*face" x="1150" y="250" width="100" height="100" fix="true" exp="sf.face = 'chara/1/h.png'" name="home"]
コードを貼り付けます。
【画像の位置】
x:横位置
y:縦位置
【画像の大きさ】
width:横幅
height:縦幅
(5) 背景・立ち絵の変更

ティラノスクリプトコンポーネントを配置します。
*bg

[bg storage="&sf.bg" time="500"]

[return]

[s]

*face

[chara_mod name="akane" storage="&sf.face" time="300" cross="false"]

[return]
コードを貼り付けます。
(6) ボタンの消去

ティラノスクリプトコンポーネントを配置します。
[clearfix name="home"]コードを貼り付けます。
以上で解説を終わります。おつかれさまでした。
この記事が気に入ったらサポートをしてみませんか?