[開発者日記] メモアプリ開発 7日目

6日目はMaterialAppとScaffoldを調査しました。
MaterialAppはマテリアルUIを構築するために必要なWidgetで、Scaffoldはケーキ作りで言う基本的な材料という位置づけでした。
7日目はStatefulWidgetでボタンを押下したらカウントされるUIと画面遷移を構築できたらなと思います。
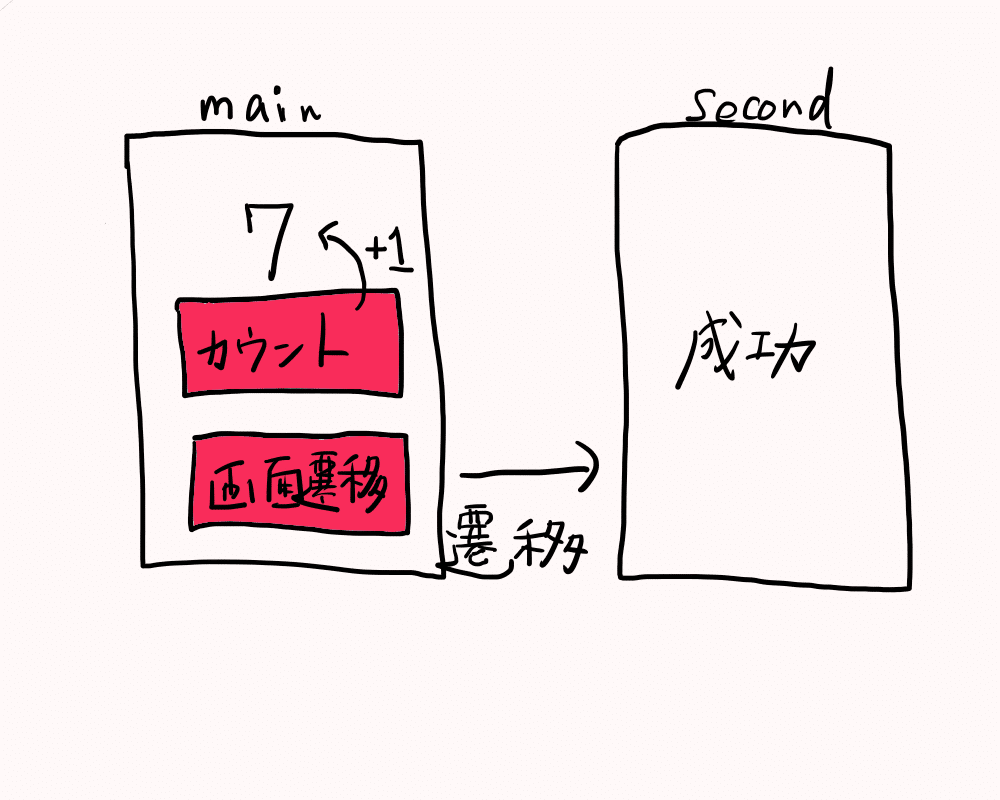
画面構築イメージ図
カウントボタンでボタンの上の数字が1つずつ足されていき、カウントボタンの下にある画面遷移ボタンでSecond画面に遷移してく想定となります。
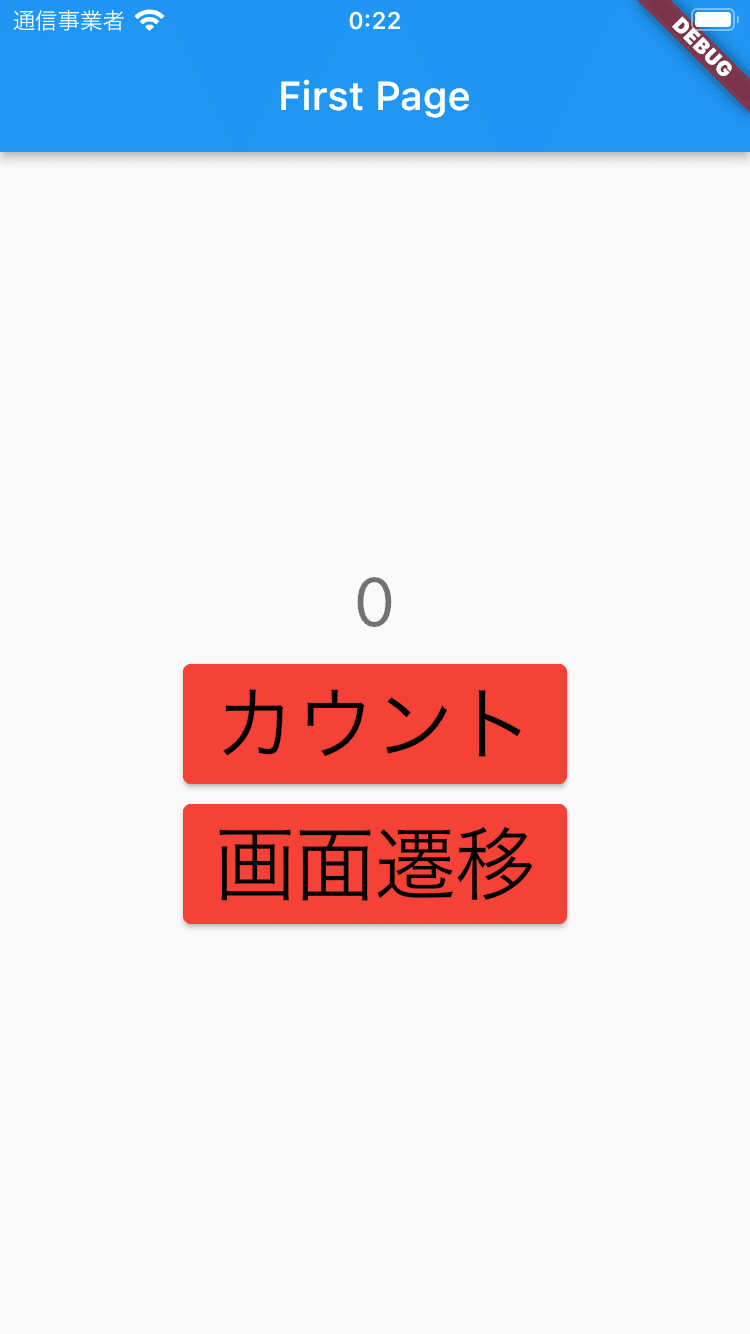
実装・実行画面
カウント数・カウントボタン・画面遷移ボタンを配置する
カウント数とカウントボタンと画面遷移ボタンを配置してみます。
今回実装するボタンは縦並びで配置するのでColumn Widget を使用していきます。
カウント数のStateを管理したいためStatefulWidgetで作成します。
import 'package:flutter/material.dart';
import 'package:flutter_application/Second.dart';

class FirstPage extends StatefulWidget {
  const FirstPage({super.key, required this.title});

  final String title;

  @override
  State<FirstPage> createState() => _FirstPageState();
}

class _FirstPageState extends State<FirstPage> {
  @override
  Widget build(BuildContext context) {
    return Scaffold(
      appBar: AppBar(
        title: Text(widget.title),
      ),
      body: Center(
        child: Column(
          mainAxisAlignment: MainAxisAlignment.center,
          children: [
       // カウント数を表示
            Text(
              '0',
              style: Theme.of(context).textTheme.headline4,
            ),
            const SizedBox(
              height: 10,
            ),
       // カウントボタン
            ElevatedButton(
                style: ElevatedButton.styleFrom(backgroundColor: Colors.red),
                onPressed: () {},
                child: const Text(
                  "カウント",
                  style: TextStyle(fontSize: 40, color: Colors.black),
                )),
            const SizedBox(
              height: 10,
            ),
       // 画面遷移ボタン
            ElevatedButton(
                onPressed: () {},
                style: ElevatedButton.styleFrom(backgroundColor: Colors.red),
                child: const Text(
                  "画面遷移",
                  style: TextStyle(fontSize: 40, color: Colors.black),
                ))
          ],
        ),
      ),
    );
  }
}
カウントボタンを押下したら数字が1つずつ足されるようにする
まず、カウントのStateをsetStateで変更できるようにします。
class _FirstPageState extends State<FirstPage> {
  // カウント数
 int _counter = 0;

 // 1ずつ足す処理
  void _incrementCounter() {
    setState(() {
      _counter++;
    });
  }
// 省略
その後、ボタンを押下するたびにStateが変わるようにonPresses内にカウント処理を記述します。
// 省略
// カウントボタン
ElevatedButton(
style: ElevatedButton.styleFrom(backgroundColor: Colors.red),
onPressed: () {
_incrementCounter();
},
child: const Text(
"カウント",
style: TextStyle(fontSize: 40, color: Colors.black),
)
),
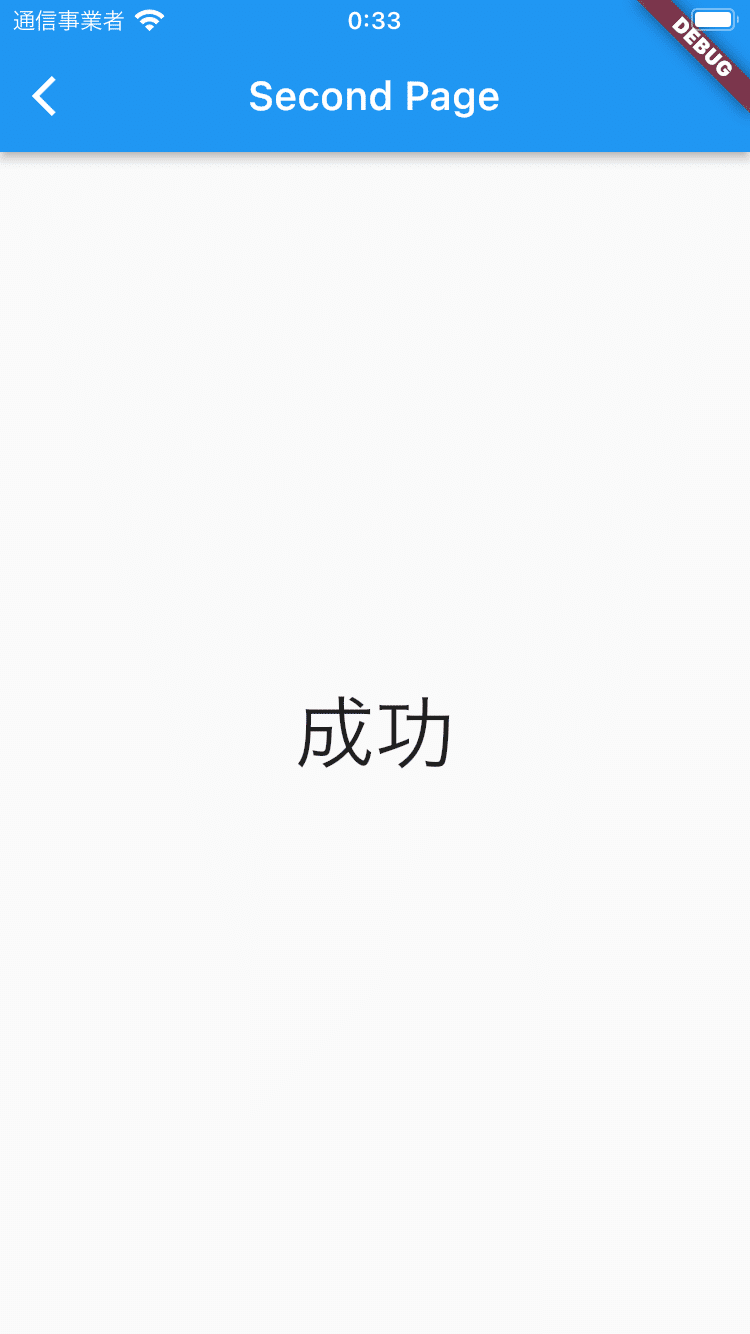
// 省略遷移後のページを作成する
遷移図の通りに画面中央に「成功」の文字が表示されるようなページを作成します。
import 'package:flutter/widgets.dart';
import 'package:flutter/material.dart';

class SecondPage extends StatelessWidget {
  const SecondPage({super.key, required this.title});
  // タイトルを表示できるように引数を持っておく
  final String title;

  @override
  Widget build(BuildContext context) {
    return Scaffold(
      appBar: AppBar(title: Text(title)),
      body: const Center(
          child: Text(
        "成功",
        style: TextStyle(height: 1.0, fontSize: 40),
      )),
    );
  }
}
画面遷移をおこなう
画面遷移を行うには、Navigator.pushとNavigator.pushNamedの2種類があるみたいですが、今回はNavigator.pushを使用して実装してみます。
使用方法はNavigator.pushにRouteWidgetを記述します。
// 省略
// 画面遷移ボタン
ElevatedButton(
  onPressed: () {
    // ここで画面遷移処理を記述する
    Navigator.of(context).push(
      MaterialPageRoute(
        builder: (context) =>
            const SecondPage(title: "Second Page"),
      ),
    );
  },
  style: ElevatedButton.styleFrom(backgroundColor: Colors.red),
  child: const Text(
    "画面遷移",
    style: TextStyle(fontSize: 40, color: Colors.black),
  )
)
// 省略
次回やること
今回はカウント処理を作成し、カウントされた値を画面に反映させる処理を構築しました。また、画面処理ができるようにしました。
次回は1日目に構築した「なんちゃってUI設計図」からアプリを作ってみようかなと思います。
最近、本業の方が忙しくて思うように着手できていませんが、毎日少しずつ勉強していこうかなと思います。
ここまで読んでいただきありがとうございます。
それではおやすみなさい(-_-)zzz