Unity で iOS連携

はじめに
Unity でスマートフォンアプリを作成している場合、時に iOS 独自の機能を使用したい/しなければならない時があると思います。そんな時にどうすれば連携できるかを紹介します。
Unity と iOS 連携
Unity と iOS を連携させるには Unity側(C#)で Objective-C をラップした C++(Objective-C++) のコードを呼び出すことで Unity から iOS の関数を呼び出すことができます。(Swift でも実現できますが、Swift から Objective-C への変換が必要なため、Objective-C をオススメします。)また、その逆の iOS のネイティブ側で処理した結果を Unity に返す際には UnitySendMessage を使用することで実現できます。
開発環境
- Mac OS (Mojave)
- Unity 2018.4.9f1
- Xcode 11
手順
* Unity でプロジェクト作成済みを前提とします
1. Unity プロジェクトの Assets 配下に Plugins -> iOS フォルダを作成
2. Unity で作成したプロジェクトをビルド(書き出し場所は任意)
3. ビルドした XcodeProject を開き、Libraries -> Plugins -> iOS 配下に New File... -> Objective-c File を選択し、任意の名前でファイル作成
4. 同じように header ファイルを作成
5. Objective-C ファイルの拡張子を .m から .mm に変更する
6. .mm ファイルと .h ファイル内にネイティブの処理を実装する
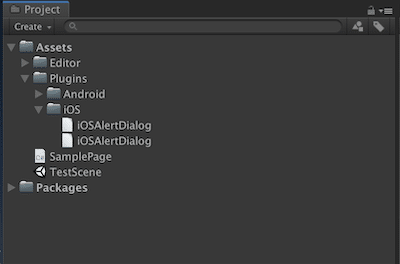
7. 実装を終えた .mm ファイルと hファイルを Unity プロジェクトの Assets -> Plugins -> iOS 配下に配置(下図参照)
8. Unity側 でネイティブを呼ぶスクリプト作成/修正
9. Unity でビルド
サンプルコード
Unity から iOS のアラートダイアログの表示し、アラートダイアログのボタンイベントを Unity 側に返し、ログ表示するサンプルです。UnitySendMessage は Unity からビルドした XcodeProject の Classes -> Unity の UnityInterface に定義されており、通常の iOS アプリ開発手順で作成してしまうと存在しない関数のため、コンパイルエラーが発生します。UnitySendMessage の第一引数にはスクリプトをアタッチしているゲームオブジェクト名を指定、第二引数には Unity に処理が返ってきた際に実行する関数名、第三引数には前述した関数に渡す文字列を指定します。
iOS(Objective-C)
UnityAlert.mm
#import "iOSAlertDialog.h"

extern "C" {
// ①
void _iOSAlertDialogShow(char *cTitle,
                        char *cMessage,
                        char *cGameObject,
                        char *cPositiveMethod,
                        char *cNegativeMethod) {
       NSString *title = [NSString stringWithCString:cTitle encoding:NSUTF8StringEncoding];
       NSString *message = [NSString stringWithCString:cMessage encoding:NSUTF8StringEncoding];
       NSString *gameObject = [NSString stringWithCString:cGameObject encoding:NSUTF8StringEncoding];
       NSString *positiveMethod = [NSString stringWithCString:cPositiveMethod encoding:NSUTF8StringEncoding];
       NSString *negativeMethod = [NSString stringWithCString:cNegativeMethod encoding:NSUTF8StringEncoding];
       iOSAlertDialog *alertDialog = [[iOSAlertDialog alloc] init];
       [alertDialog show:title
                 message:message
              gameObject:gameObject
          positiveMethod:positiveMethod
          negativeMethod:negativeMethod];
   }
}

@implementation iOSAlertDialog

- (void) show:(NSString* )title message:(NSString *)message gameObject:(NSString* )gameObject positiveMethod:(NSString *)positiveMethod negativeMethod:(NSString* )negativeMethod {
   _alertController = [UIAlertController alertControllerWithTitle:title
                                                          message:message
                                                   preferredStyle:UIAlertControllerStyleAlert];
   [_alertController addAction:[UIAlertAction actionWithTitle:@"OK"
                                                        style:UIAlertActionStyleDefault
                                                      handler:^(UIAlertAction * _Nonnull action) {
       UnitySendMessage([gameObject UTF8String], [positiveMethod UTF8String], [@"OK" UTF8String]);
   }]];
   [_alertController addAction:[UIAlertAction actionWithTitle:@"キャンセル"
                                                        style:UIAlertActionStyleDefault
                                                      handler:^(UIAlertAction * _Nonnull action) {
       UnitySendMessage([gameObject UTF8String], [negativeMethod UTF8String], [@"キャンセル" UTF8String]);
   }]];
   UIViewController *viewController = UnityGetGLViewController();
   [viewController presentViewController:_alertController animated:true completion:nil];
}

@end
UnityAlert.h
#import <Foundation/Foundation.h>
#import <UIKit/UIKit.h>

@interface iOSAlertDialog : NSObject

@property (strong, nonatomic) UIAlertController *alertController;

- (void) show:(NSString* )title message:(NSString *)message gameObject:(NSString* )gameObject positiveMethod:(NSString *)positiveMethod negativeMethod:(NSString* )negativeMethod;

@end
Unity(C#)
*任意のスクリプト(クラス)を作成し、適当な GameObject にアタッチして使用することを前提
// ②
[DllImport("__Internal")]
static extern void _iOSAlertDialogShow(string title, string message, string gameObject, string positiveMethod, string negativeMethod);

// ③
void PositiveButtonEventListener(string message)
{
   Debug.Log($"<color=aqua>{message}</color>");
}
// ③
void NegativeButtonListener(string message)
{
   Debug.Log($"<color=aqua>{message}</color>");
}

#if UNITY_IOS
   // ④
   _iOSAlertDialogShow("タイトル",
       "メッセージ",
       gameObject.name,
       nameof(PositiveButtonEventListener),
       nameof(NegativeButtonListener));
#endif
サンプルコード解説
① extern "C" で囲われた部分にネイティブ関数を呼ぶためのラップ関数を作成
② DllImport で①で定義した関数を定義する
③ ボタンイベントを受け取るためのコールバックメソッド準備
④ ②で定義した関数を任意の場所で呼ぶ
ネイティブのアラートダイアログのボタンイベントは UnitySendMessage でネイティブから Unity へ返しています。UnitySendMessage の第2引数には Unity 側で用意した PositiveButtonEventListener と NegativeButtonListener を定義していて、ボタンイベントで第3引数の文字列を Unity 側のこれらのメソッドで受け取ることを実現しています。もし、UnitySendMessage で Unity 側に処理されたことを伝えたいが、値(文字列)が不要という場合は UnitySendMessage の第3引数に空文字を設定してください。ただし、Unity 側のコールバックメソッドを引数なしで定義してしまうと処理されたことが通知されないので引数は文字列型を定義することが必須となりますので注意してください。
まとめ
Unity と iOS の連携方法を紹介しました。ビルドするまでの手順が長かったり、Unity と Xcode を行き来したり、エラーがわかりにくかったりと大変ですが、こちらの方法が使えると Unity でできることが増えます。ただし、UnitySendMessage は実行時に 1フレームかかるので、乱用するとフレーム落ちが発生する可能性がありますので注意してください。
この記事が気に入ったらサポートをしてみませんか?