
機械学習を利用して髪が青い順を作る

環境
・Python3.6.8
・windows10
・tensorflow 1.12.0
目次
0.前置き
1.TensorFlowのインストールとチュートリアル
2.学習データ収集
3.識別コード
4.クローンから再学習
5.再学習データを利用したコード
6.髪が青い順のための実装
7.まとめ
0.前置き
髪が青い順って何?
1.TensorFlowのインストールとチュートリアル
TensorFlowというのはGoogleが開発しオープンソースで公開している、機械学習に用いるためのソフトウェアライブラリ。詳しく知りたい場合は公式ページなりググるなりどうぞ。僕も分からん。
インストールには下記のコマンド
$ pip install tensorflowTensorFlowのチュートリアル
新しい言語を学ぶ時に"Hello World!!"とやるように、機械学習界の"Hellw World!!"に該当するものがあるらしく、それをこなしておく。
参考記事:TensorFlowチュートリアル - ML初心者のためのMNIST(翻訳)
2.学習データの収集
まずは青髪の女の子のイラストを集める。google_images_downloadを利用します。
インストールには下記のコマンド
$ pip install google_images_download画像を集めます。下記コマンドを実施した階層/検索ワードのフォルダ(自動生成)内に格納されます。
$ googleimagesdownload -k "青髪 女の子"問題なければこのように次々とダウンロードしていってくれます。最後にかかった時間が表示されたら終了。
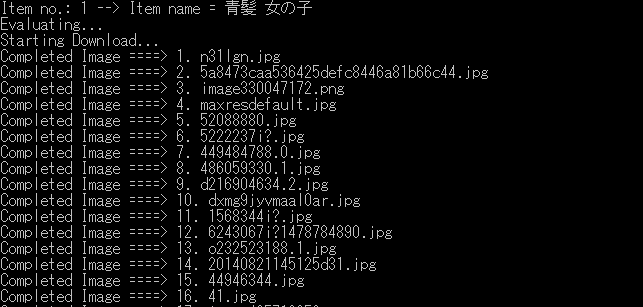
ダウンロードが完了したら、フォルダ内を見て画像データの選別をします。手作業。選別が終わったらリネームソフトなりを使ってファイル名をわかりやすくしておきます。(aogami001.jpg ~ aogami100.jpgみたいな)
せっかくなので簡易なリネームコードを実装。
rename.py
# coding: utf-8
import glob
import os

lead = "aogami"

def rename(files,j,filetype):
    for i, old_name in enumerate(files):
        # ファイル名を生成
        if filetype == "jpg":
            new_name = "./rename_work/" + lead + "{0:03d}.jpg".format(i + j + 1)
        elif filetype == "png":
            new_name = "./rename_work/" + lead + "{0:03d}.png".format(i + j + 1)
        # リネーム
        os.rename(old_name, new_name)
    return i

def main():
    files = glob.glob("./rename_work/*.jpg")
    index = rename(files,0,"jpg")
    files = glob.glob("./rename_work/*.png")
    rename(files,index,"png")

if __name__ == "__main__":
    main()
rename.pyと同じ階層に"rename_work"というフォルダを作成し、その中にリネームしたい画像ファイルを入れてこのコードを実行すると"aogami001.jpg"から連番でリネームし、jpgが無くなると次の番号からpngファイルに連番を振ってくれます。こんなもの使わなくてもググればいくらでも出てくるけどね。
青髪じゃないデータも必要なので同様の手順で非青髪の女の子のイラストも集めておきます。(赤髪や黒髪など)
追記:
この方法では学習データの母数が少なかったので後々方法を変更。
pixivダウンローダ を使用。
3.識別コード
正直全く分かってない。のでこちらの記事のコードをそのまま利用してみる。
参考記事:TensorFlowでアニメゆるゆりの制作会社を識別する
train.txtを作成する必要があるらしく、学習データが少なければ手打ちで良いが、多くなると困るためまた簡易なコードを用意。
getfilelist.py
# coding: utf-8
import glob
import os

textfile = './gakusyudata/train.txt'

def replace_list(filelist,model):
    result = []
    for x in filelist:
        result.append(str(x).replace('\\','/') + ' ' + str(model) + "\n")
    return result

def getfilelist(filetype,model):
    if model == 0:
        if filetype == "jpg":
            filelist = glob.glob("./gakusyudata/aogami/**.jpg")
        elif filetype == "png":
            filelist = glob.glob("./gakusyudata/aogami/**.png")
    elif model == 1:
        if filetype == "jpg":
            filelist = glob.glob("./gakusyudata/not_aogami/**.jpg")
        elif filetype == "png":
            filelist = glob.glob("./gakusyudata/not_aogami/**.png")
    return replace_list(filelist,model)

def main():
    f = open(textfile, mode = "w")
    filelist = getfilelist("jpg",0)
    filelist.extend(getfilelist("png",0))
    filelist.extend(getfilelist("jpg",1))
    filelist.extend(getfilelist("png",1))
    for x in filelist:
        f.write(str(x))
    f.close()

if __name__ == "__main__":
    main()
そして実際に参考記事のコードを実行してみる…が、構文エラーやらが大量。
どうやら当時と現在ではいくつか相違があるらしい。
参考記事:TensorFlow の "AttributeError: 'module' object has no attribute 'xxxx'" エラーでつまづいてしまう人のための移行ガイド
修正したコードが下記の通り。
#!/usr/bin/env python
# -*- coding: utf-8 -*-
import sys
import cv2
import numpy as np
import tensorflow as tf
import tensorflow.python.platform

NUM_CLASSES = 2
IMAGE_SIZE = 28
IMAGE_PIXELS = IMAGE_SIZE*IMAGE_SIZE*3

flags = tf.app.flags
FLAGS = flags.FLAGS
flags.DEFINE_string('train', 'train.txt', 'File name of train data')
flags.DEFINE_string('test', 'test.txt', 'File name of train data')
flags.DEFINE_string('train_dir', '/tmp/data', 'Directory to put the training data.')
flags.DEFINE_integer('max_steps', 200, 'Number of steps to run trainer.')
flags.DEFINE_integer('batch_size', 10, 'Batch size'
                     'Must divide evenly into the dataset sizes.')
flags.DEFINE_float('learning_rate', 1e-4, 'Initial learning rate.')

def inference(images_placeholder, keep_prob):
    """ 予測モデルを作成する関数

    引数:
      images_placeholder: 画像のplaceholder
      keep_prob: dropout率のplace_holder

    返り値:
      y_conv: 各クラスの確率(のようなもの)
    """
    # 重みを標準偏差0.1の正規分布で初期化
    def weight_variable(shape):
      initial = tf.truncated_normal(shape, stddev=0.1)
      return tf.Variable(initial)

    # バイアスを標準偏差0.1の正規分布で初期化
    def bias_variable(shape):
      initial = tf.constant(0.1, shape=shape)
      return tf.Variable(initial)

    # 畳み込み層の作成
    def conv2d(x, W):
      return tf.nn.conv2d(x, W, strides=[1, 1, 1, 1], padding='SAME')

    # プーリング層の作成
    def max_pool_2x2(x):
      return tf.nn.max_pool(x, ksize=[1, 2, 2, 1],
                            strides=[1, 2, 2, 1], padding='SAME')

    # 入力を28x28x3に変形
    x_image = tf.reshape(images_placeholder, [-1, 28, 28, 3])

    # 畳み込み層1の作成
    with tf.name_scope('conv1') as scope:
        W_conv1 = weight_variable([5, 5, 3, 32])
        b_conv1 = bias_variable([32])
        h_conv1 = tf.nn.relu(conv2d(x_image, W_conv1) + b_conv1)

    # プーリング層1の作成
    with tf.name_scope('pool1') as scope:
        h_pool1 = max_pool_2x2(h_conv1)

    # 畳み込み層2の作成
    with tf.name_scope('conv2') as scope:
        W_conv2 = weight_variable([5, 5, 32, 64])
        b_conv2 = bias_variable([64])
        h_conv2 = tf.nn.relu(conv2d(h_pool1, W_conv2) + b_conv2)

    # プーリング層2の作成
    with tf.name_scope('pool2') as scope:
        h_pool2 = max_pool_2x2(h_conv2)

    # 全結合層1の作成
    with tf.name_scope('fc1') as scope:
        W_fc1 = weight_variable([7*7*64, 1024])
        b_fc1 = bias_variable([1024])
        h_pool2_flat = tf.reshape(h_pool2, [-1, 7*7*64])
        h_fc1 = tf.nn.relu(tf.matmul(h_pool2_flat, W_fc1) + b_fc1)
        # dropoutの設定
        h_fc1_drop = tf.nn.dropout(h_fc1, keep_prob)

    # 全結合層2の作成
    with tf.name_scope('fc2') as scope:
        W_fc2 = weight_variable([1024, NUM_CLASSES])
        b_fc2 = bias_variable([NUM_CLASSES])

    # ソフトマックス関数による正規化
    with tf.name_scope('softmax') as scope:
        y_conv=tf.nn.softmax(tf.matmul(h_fc1_drop, W_fc2) + b_fc2)

    # 各ラベルの確率のようなものを返す
    return y_conv

def loss(logits, labels):
    """ lossを計算する関数

    引数:
      logits: ロジットのtensor, float - [batch_size, NUM_CLASSES]
      labels: ラベルのtensor, int32 - [batch_size, NUM_CLASSES]

    返り値:
      cross_entropy: 交差エントロピーのtensor, float

    """

    # 交差エントロピーの計算
    cross_entropy = -tf.reduce_sum(labels*tf.log(logits))
    # TensorBoardで表示するよう指定
    tf.summary.scalar("cross_entropy", cross_entropy)
    return cross_entropy

def training(loss, learning_rate):
    """ 訓練のOpを定義する関数

    引数:
      loss: 損失のtensor, loss()の結果
      learning_rate: 学習係数

    返り値:
      train_step: 訓練のOp

    """

    train_step = tf.train.AdamOptimizer(learning_rate).minimize(loss)
    return train_step

def accuracy(logits, labels):
    """ 正解率(accuracy)を計算する関数

    引数:
      logits: inference()の結果
      labels: ラベルのtensor, int32 - [batch_size, NUM_CLASSES]

    返り値:
      accuracy: 正解率(float)

    """
    correct_prediction = tf.equal(tf.argmax(logits, 1), tf.argmax(labels, 1))
    accuracy = tf.reduce_mean(tf.cast(correct_prediction, "float"))
    tf.summary.scalar("accuracy", accuracy)
    return accuracy

if __name__ == '__main__':
    # ファイルを開く
    f = open(FLAGS.train, 'r')
    # データを入れる配列
    train_image = []
    train_label = []
    for line in f:
        # 改行を除いてスペース区切りにする
        line = line.rstrip()
        l = line.split()
        # データを読み込んで28x28に縮小
        img = cv2.imread(l[0])
        img = cv2.resize(img, (28, 28))
        # 一列にした後、0-1のfloat値にする
        train_image.append(img.flatten().astype(np.float32)/255.0)
        # ラベルを1-of-k方式で用意する
        tmp = np.zeros(NUM_CLASSES)
        #print(str(l))
        tmp[int(l[1])] = 1
        train_label.append(tmp)
    # numpy形式に変換
    train_image = np.asarray(train_image)
    train_label = np.asarray(train_label)
    f.close()

    f = open(FLAGS.test, 'r')
    test_image = []
    test_label = []
    for line in f:
        line = line.rstrip()
        l = line.split()
        img = cv2.imread(l[0])
        img = cv2.resize(img, (28, 28))
        test_image.append(img.flatten().astype(np.float32)/255.0)
        tmp = np.zeros(NUM_CLASSES)
        tmp[int(l[1])] = 1
        test_label.append(tmp)
    test_image = np.asarray(test_image)
    test_label = np.asarray(test_label)
    f.close()

    with tf.Graph().as_default():
        # 画像を入れる仮のTensor
        images_placeholder = tf.placeholder("float", shape=(None, IMAGE_PIXELS))
        # ラベルを入れる仮のTensor
        labels_placeholder = tf.placeholder("float", shape=(None, NUM_CLASSES))
        # dropout率を入れる仮のTensor
        keep_prob = tf.placeholder("float")

        # inference()を呼び出してモデルを作る
        logits = inference(images_placeholder, keep_prob)
        # loss()を呼び出して損失を計算
        loss_value = loss(logits, labels_placeholder)
        # training()を呼び出して訓練
        train_op = training(loss_value, FLAGS.learning_rate)
        # 精度の計算
        acc = accuracy(logits, labels_placeholder)

        # 保存の準備
        saver = tf.train.Saver()
        # Sessionの作成
        sess = tf.Session()
        # 変数の初期化
        sess.run(tf.initialize_all_variables())
        # TensorBoardで表示する値の設定
        summary_op = tf.summary.merge_all()
        summary_writer = tf.summary.FileWriter(FLAGS.train_dir, sess.graph_def)

        # 訓練の実行
        for step in range(FLAGS.max_steps):
            for i in range(int(len(train_image)/FLAGS.batch_size)):
                # batch_size分の画像に対して訓練の実行
                batch = FLAGS.batch_size*i
                # feed_dictでplaceholderに入れるデータを指定する
                sess.run(train_op, feed_dict={
                  images_placeholder: train_image[batch:batch+FLAGS.batch_size],
                  labels_placeholder: train_label[batch:batch+FLAGS.batch_size],
                  keep_prob: 0.5})

            # 1 step終わるたびに精度を計算する
            train_accuracy = sess.run(acc, feed_dict={
                images_placeholder: train_image,
                labels_placeholder: train_label,
                keep_prob: 1.0})
            #print "step %d, training accuracy %g"%(step, train_accuracy)
            print("step " + str(step) + " training accuracy " + str(train_accuracy))
            # 1 step終わるたびにTensorBoardに表示する値を追加する
            summary_str = sess.run(summary_op, feed_dict={
                images_placeholder: train_image,
                labels_placeholder: train_label,
                keep_prob: 1.0})
            summary_writer.add_summary(summary_str, step)

    # 訓練が終了したらテストデータに対する精度を表示
    test_accuracy = sess.run(acc, feed_dict={
        images_placeholder: test_image,
        labels_placeholder: test_label,
        keep_prob: 1.0})
    print("test accuracy " + str(test_accuracy))

    # 最終的なモデルを保存
    save_path = saver.save(sess, "./model/model")
ついでに出力したモデルを読み込むためのコード(学習にある程度の時間がかかるため用意)
#!/usr/bin/env python
# -*- coding: utf-8 -*-
import sys
import cv2
import numpy as np
import tensorflow as tf
import tensorflow.python.platform

NUM_CLASSES = 2
IMAGE_SIZE = 28
IMAGE_PIXELS = IMAGE_SIZE*IMAGE_SIZE*3

flags = tf.app.flags
FLAGS = flags.FLAGS
flags.DEFINE_string('train', 'train.txt', 'File name of train data')
flags.DEFINE_string('test', 'test.txt', 'File name of train data')
flags.DEFINE_string('train_dir', '/tmp/data', 'Directory to put the training data.')
flags.DEFINE_integer('max_steps', 200, 'Number of steps to run trainer.')
flags.DEFINE_integer('batch_size', 10, 'Batch size'
                     'Must divide evenly into the dataset sizes.')
flags.DEFINE_float('learning_rate', 1e-4, 'Initial learning rate.')

def inference(images_placeholder, keep_prob):
    """ 予測モデルを作成する関数

    引数:
      images_placeholder: 画像のplaceholder
      keep_prob: dropout率のplace_holder

    返り値:
      y_conv: 各クラスの確率(のようなもの)
    """
    # 重みを標準偏差0.1の正規分布で初期化
    def weight_variable(shape):
      initial = tf.truncated_normal(shape, stddev=0.1)
      return tf.Variable(initial)

    # バイアスを標準偏差0.1の正規分布で初期化
    def bias_variable(shape):
      initial = tf.constant(0.1, shape=shape)
      return tf.Variable(initial)

    # 畳み込み層の作成
    def conv2d(x, W):
      return tf.nn.conv2d(x, W, strides=[1, 1, 1, 1], padding='SAME')

    # プーリング層の作成
    def max_pool_2x2(x):
      return tf.nn.max_pool(x, ksize=[1, 2, 2, 1],
                            strides=[1, 2, 2, 1], padding='SAME')

    # 入力を28x28x3に変形
    x_image = tf.reshape(images_placeholder, [-1, 28, 28, 3])

    # 畳み込み層1の作成
    with tf.name_scope('conv1') as scope:
        W_conv1 = weight_variable([5, 5, 3, 32])
        b_conv1 = bias_variable([32])
        h_conv1 = tf.nn.relu(conv2d(x_image, W_conv1) + b_conv1)

    # プーリング層1の作成
    with tf.name_scope('pool1') as scope:
        h_pool1 = max_pool_2x2(h_conv1)

    # 畳み込み層2の作成
    with tf.name_scope('conv2') as scope:
        W_conv2 = weight_variable([5, 5, 32, 64])
        b_conv2 = bias_variable([64])
        h_conv2 = tf.nn.relu(conv2d(h_pool1, W_conv2) + b_conv2)

    # プーリング層2の作成
    with tf.name_scope('pool2') as scope:
        h_pool2 = max_pool_2x2(h_conv2)

    # 全結合層1の作成
    with tf.name_scope('fc1') as scope:
        W_fc1 = weight_variable([7*7*64, 1024])
        b_fc1 = bias_variable([1024])
        h_pool2_flat = tf.reshape(h_pool2, [-1, 7*7*64])
        h_fc1 = tf.nn.relu(tf.matmul(h_pool2_flat, W_fc1) + b_fc1)
        # dropoutの設定
        h_fc1_drop = tf.nn.dropout(h_fc1, keep_prob)

    # 全結合層2の作成
    with tf.name_scope('fc2') as scope:
        W_fc2 = weight_variable([1024, NUM_CLASSES])
        b_fc2 = bias_variable([NUM_CLASSES])

    # ソフトマックス関数による正規化
    with tf.name_scope('softmax') as scope:
        y_conv=tf.nn.softmax(tf.matmul(h_fc1_drop, W_fc2) + b_fc2)

    # 各ラベルの確率のようなものを返す
    return y_conv

def loss(logits, labels):
    """ lossを計算する関数

    引数:
      logits: ロジットのtensor, float - [batch_size, NUM_CLASSES]
      labels: ラベルのtensor, int32 - [batch_size, NUM_CLASSES]

    返り値:
      cross_entropy: 交差エントロピーのtensor, float

    """

    # 交差エントロピーの計算
    cross_entropy = -tf.reduce_sum(labels*tf.log(logits))
    # TensorBoardで表示するよう指定
    tf.summary.scalar("cross_entropy", cross_entropy)
    return cross_entropy

def training(loss, learning_rate):
    """ 訓練のOpを定義する関数

    引数:
      loss: 損失のtensor, loss()の結果
      learning_rate: 学習係数

    返り値:
      train_step: 訓練のOp

    """

    train_step = tf.train.AdamOptimizer(learning_rate).minimize(loss)
    return train_step

def accuracy(logits, labels):
    """ 正解率(accuracy)を計算する関数

    引数:
      logits: inference()の結果
      labels: ラベルのtensor, int32 - [batch_size, NUM_CLASSES]

    返り値:
      accuracy: 正解率(float)

    """
    correct_prediction = tf.equal(tf.argmax(logits, 1), tf.argmax(labels, 1))
    accuracy = tf.reduce_mean(tf.cast(correct_prediction, "float"))
    tf.summary.scalar("accuracy", accuracy)
    return accuracy

if __name__ == '__main__':
    # ファイルを開く

    f = open(FLAGS.test, 'r')
    test_image = []
    test_label = []
    for line in f:
        line = line.rstrip()
        l = line.split()
        img = cv2.imread(l[0])
        img = cv2.resize(img, (28, 28))
        test_image.append(img.flatten().astype(np.float32)/255.0)
        tmp = np.zeros(NUM_CLASSES)
        tmp[int(l[1])] = 1
        test_label.append(tmp)
    test_image = np.asarray(test_image)
    test_label = np.asarray(test_label)
    f.close()

    with tf.Graph().as_default():
        # 画像を入れる仮のTensor
        images_placeholder = tf.placeholder("float", shape=(None, IMAGE_PIXELS))
        # ラベルを入れる仮のTensor
        labels_placeholder = tf.placeholder("float", shape=(None, NUM_CLASSES))
        # dropout率を入れる仮のTensor
        keep_prob = tf.placeholder("float")

        # inference()を呼び出してモデルを作る
        logits = inference(images_placeholder, keep_prob)
        # loss()を呼び出して損失を計算
        loss_value = loss(logits, labels_placeholder)
        # training()を呼び出して訓練
        train_op = training(loss_value, FLAGS.learning_rate)
        # 精度の計算
        acc = accuracy(logits, labels_placeholder)

        # 保存の準備
        saver = tf.train.Saver()
        # Sessionの作成
        sess = tf.Session()
        #saver = tf.train.import_meta_graph('../model/aogami_model.meta')
        saver.restore(sess, "./model/model")

    print("Restored a model")

    # テストデータに対する精度を表示
    test_accuracy = sess.run(acc, feed_dict={
        images_placeholder: test_image,
        labels_placeholder: test_label,
        keep_prob: 1.0})
    print("test accuracy " + str(test_accuracy))
試しに青髪のイラスト、そうでないイラストでそれぞれテストしてみたところ、青髪の場合は1.0。そうでない場合は0.0の値が返ってきた。識別は出来ているみたいだが、こんな数字が出るわけない…ため一旦保留(もしかしたらそう作られているのかも?ちゃんと読め)
4.クローンから再学習
次の手段として、Tensorflowのクローンを作成し、必要なモデルを再学習させようと言うもの。
参考記事:
Tensorflowを再学習させて「〇〇判別機」を作る
TensorFlowを使って猫の種類の判別機を作る
まずクローンを作成する。
$ cd <作業フォルダ>
$ git clone https://github.com/tensorflow/tensorflow.git
ダウンロードが開始され、しばらくすると完了する。
また、tensorflow-hubというライブラリが必要になるため、インストールしておく。
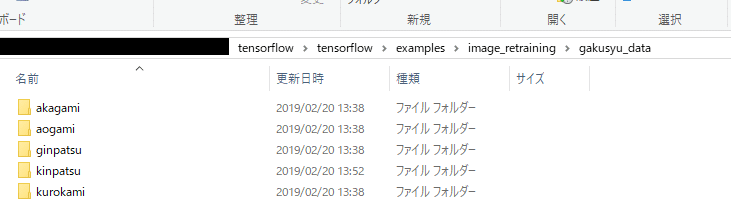
# pip install tensorflow-hubダウンロードが完了したら、".\tensorflow\tensorflow\examples\image_retraining"の階層に学習するための画像データを格納する。格納するフォルダ名は参考記事に習って"gakusyu_data"とした。
さらに、その"gakusyu_data"フォルダ内にそれぞれの学習データのフォルダを格納する。
エクスプローラー上で見るとこんな感じ。
そうしたら、"image_retraining"の階層まで戻り、retrain.py を用意する。
そして下記のコマンドを実行
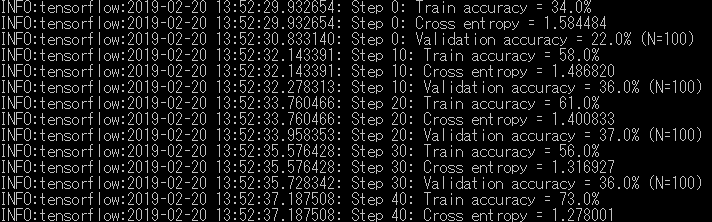
$ python retrain.py --bottleneck_dir=bottlenecks --how_many_training_steps=500 --model_dir=inception --summaries_dir=training_summaries/basic --output_graph=retrained_graph.pb --output_labels=retrained_labels.txt --image_dir=gakusyu_data
問題がなければこのように学習が始まるので終わるまで待つ。
試しに青髪のイラストを test001.jpg というファイル名とし、判別してもらう。
".\tensorflow\tensorflow\examples\label_image" にある label_image.py をコピーし、image_retraining フォルダに貼り付ける。
が、僕の環境ではこのまま動かすことができなかったため、コードを一部変更
# 85行目
output_layer = "final_result"
そして下記のコマンドを実行
$ python label_image.py --image test001.jpg --graph retrained_graph.pb --labels retrained_labels.txt --input_layer=Placeholder実行結果
aogami 0.5790044
ginpatsu 0.24891208
kinpatsu 0.11860475
akagami 0.03299505
kurokami 0.020483635
5.再学習データを利用したコード
現状はコマンドを打って1枚の画像の判別を行えるようになった。
これを複数枚読み込むように変更する必要がある。
手始めにlabel_image.pyをモジュール化
# Copyright 2017 The TensorFlow Authors. All Rights Reserved.
#
# Licensed under the Apache License, Version 2.0 (the "License");
# you may not use this file except in compliance with the License.
# You may obtain a copy of the License at
#
#     http://www.apache.org/licenses/LICENSE-2.0
#
# Unless required by applicable law or agreed to in writing, software
# distributed under the License is distributed on an "AS IS" BASIS,
# WITHOUT WARRANTIES OR CONDITIONS OF ANY KIND, either express or implied.
# See the License for the specific language governing permissions and
# limitations under the License.
# ==============================================================================

from __future__ import absolute_import
from __future__ import division
from __future__ import print_function

import argparse

import numpy as np
import tensorflow as tf

def load_graph(model_file):
  graph = tf.Graph()
  graph_def = tf.GraphDef()

  with open(model_file, "rb") as f:
    graph_def.ParseFromString(f.read())
  with graph.as_default():
    tf.import_graph_def(graph_def)

  return graph

def read_tensor_from_image_file(file_name,
                                input_height=299,
                                input_width=299,
                                input_mean=0,
                                input_std=255):
  input_name = "file_reader"
  output_name = "normalized"
  file_reader = tf.read_file(file_name, input_name)
  if file_name.endswith(".png"):
    image_reader = tf.image.decode_png(
        file_reader, channels=3, name="png_reader")
  elif file_name.endswith(".gif"):
    image_reader = tf.squeeze(
        tf.image.decode_gif(file_reader, name="gif_reader"))
  elif file_name.endswith(".bmp"):
    image_reader = tf.image.decode_bmp(file_reader, name="bmp_reader")
  else:
    image_reader = tf.image.decode_jpeg(
        file_reader, channels=3, name="jpeg_reader")
  float_caster = tf.cast(image_reader, tf.float32)
  dims_expander = tf.expand_dims(float_caster, 0)
  resized = tf.image.resize_bilinear(dims_expander, [input_height, input_width])
  normalized = tf.divide(tf.subtract(resized, [input_mean]), [input_std])
  sess = tf.Session()
  result = sess.run(normalized)

  return result

def load_labels(label_file):
  label = []
  proto_as_ascii_lines = tf.gfile.GFile(label_file).readlines()
  for l in proto_as_ascii_lines:
    label.append(l.rstrip())
  return label

def get_acc(file_name,model_file,label_file,input_layer,output_layer):
  input_height = 299
  input_width = 299
  input_mean = 0
  input_std = 255

  graph = load_graph(model_file)
  t = read_tensor_from_image_file(
      file_name,
      input_height=input_height,
      input_width=input_width,
      input_mean=input_mean,
      input_std=input_std)

  input_name = "import/" + input_layer
  output_name = "import/" + output_layer
  input_operation = graph.get_operation_by_name(input_name)
  output_operation = graph.get_operation_by_name(output_name)

  with tf.Session(graph=graph) as sess:
    results = sess.run(output_operation.outputs[0], {
        input_operation.outputs[0]: t
    })
  results = np.squeeze(results)

  top_k = results.argsort()[-5:][::-1]
  labels = load_labels(label_file)

  return labels, results, top_k
以下をmain.pyとし、実行してみる。ついでに後々必要になりそうなのでDataFrameに変換する。
# coding: utf-8
import label_image
import pandas as pd

model_file = "retrained_graph.pb"
label_file = "retrained_labels.txt"
input_layer = "Placeholder"
output_layer = "final_result"

# listからDataFrameに変換する
def transDF(filename,labels,results,df):
    for i in range(len(labels)):
        tmp = pd.DataFrame([[filename,labels[i],results[i]]], columns=['filename','label','accuracy'])
        df = df.append(tmp , ignore_index=True)

    return df

def main():
    df = pd.DataFrame(columns=['filename','label','accuracy'])

    file_name = "test001.jpg"

    labels, results, top_k = label_image.get_acc(file_name,model_file,label_file,input_layer,output_layer)
    df = transDF(file_name,labels,results,df)

    print(df)

if __name__ == "__main__":
    main()
結果
      filename     label  accuracy
0  test001.jpg   akagami  0.032995
1  test001.jpg    aogami  0.579004
2  test001.jpg  ginpatsu  0.248912
3  test001.jpg  kinpatsu  0.118605
4  test001.jpg  kurokami  0.020484
これで画像ファイル名を渡せばラベルと精度が返ってくるようになった。
6.髪が青い順のための実装
上記までの手順で1枚の画像に対して、そのキャラが青髪であるかどうかはある程度判別できるようになった。この段階で残されている課題が3つある。
1つ目は順番があるということは1枚だけではダメということ。複数枚読み込めるようにする必要がある。
2つ目は何を以て"髪が青い"の順番を決めるのかということ。これに関しては精度の値を使う必要があるだろう。
3つ目はやはりソートされた画像を順々に見たい。なのでテストのために読み込んだ画像をプレビューする機能が必要。
まず初めに画像ファイル名の入ったリストを渡すと画像を表示してくれるモジュールを実装。OpenCVを使用。
showImage.py
# coding: utf-8
import cv2
import glob

ESC_key = 27 # ESC
next_key_list = [100,115] # D,S
prev_key_list = [119,97] # A,W

gui = "Order By BlueHair"

def showImage(files):
    i = 0
    max = len(files) - 1
    img = cv2.imread(files[i])
    cv2.namedWindow(gui, cv2.WINDOW_AUTOSIZE)
    cv2.imshow(gui, img)
    k = cv2.waitKey(0)

    # ESCキーが押されるまでループ
    while k != ESC_key:
        # SかDで次の画像を表示。ただし最後の場合は最後のまま
        if k in next_key_list:
            i = i + 1
            if i > max:
                i = max
        # AかWで前の画像を表示。ただし最初の場合は最初のまま
        elif k in prev_key_list:
            i = i - 1
            if i < 0:
                i = 0

        img = cv2.imread(files[i])
        cv2.imshow(gui, img)
        k = cv2.waitKey(0)

    cv2.destroyAllWindows()
キーボードの"S"か"D"を入力すると次の画像、"A"か"W"を入力すると前の画像を表示してくれる。ESCキーを入力すると終了。矢印キーを使いたかったけど分からなかった。
次に複数枚読み込むための処理だが、これはmain内でループを回せばok。
最後に"髪が青い"順番を決めるための処理。
勝手な裁定だが以下のように決めた。
1.学習モデルを元に判別させたaogamiの精度が何位か調べる。
2.その順位によってaogamiの精度に補正値を加算する。
3.最終的なaogamiの精度を全ての画像でソートする。
上記に考慮したコードがこちら
main.py
# coding: utf-8
import label_image
import showImages
import pandas as pd
import glob
import os
from tkinter import filedialog

Cor_val = [1,0.5,0.3,0.1]

model_file = "retrained_graph.pb"
label_file = "retrained_labels.txt"
input_layer = "Placeholder"
output_layer = "final_result"

# ファイル名以外の列情報を削除する
def drop_df(df):
    tmp = df.drop("label", axis = 1)
    tmp = tmp.drop("accuracy" , axis = 1)
    return tmp

# 精度を置き換える
def replace_acc(df,rank):
    if rank < 4:
        df.accuracy[df.label =="aogami"] = df.accuracy[df.label =="aogami"] + Cor_val[rank]
    return df

# 青髪が何番目か
def check_aogami_rank(df):
    tmp = df.sort_values('accuracy',ascending=False)
    return tmp.reset_index().query('label == "aogami"').index[0]

# DataFrameからlistに変換する
def TransList(df):
    l = df.values.tolist()
    x = []
    for s in l:
        x.extend(s)
    return x

# listからDataFrameに変換する
def transDF(filename,labels,results):
    df = pd.DataFrame(columns=['filename','label','accuracy'])

    for i in range(len(labels)):
        tmp = pd.DataFrame([[filename,labels[i],results[i]]], columns=['filename','label','accuracy'])
        df = df.append(tmp , ignore_index=True)

    return df

def main():

    bluehair_df = pd.DataFrame(columns=['filename','label','accuracy'])
    # フォルダ選択ダイアログを出す
    fld = filedialog.askdirectory(initialdir = os.path.dirname(os.path.abspath(__file__)))

    # 何かしらのフォルダが選ばれていれば進む
    if fld is not None:
        files = glob.glob(fld + "/*.jpg")
        files.extend(glob.glob(fld + "/*.jpeg"))
        files.extend(glob.glob(fld + "/*.png"))
        if len(files) > 0:
            for i ,filename in enumerate(files):
                labels, results, top_k = label_image.get_acc(filename,model_file,label_file,input_layer,output_layer)
                df = transDF(filename,labels,results)
                rank = check_aogami_rank(df)

                df = replace_acc(df,rank)
                bluehair_df = bluehair_df.append(df.query('label == "aogami"'))

            bluehair_df = bluehair_df.sort_values('accuracy',ascending=False)
            bluehair_df = drop_df(bluehair_df)
            aogami_list = TransList(bluehair_df)

            showImages.showImage(aogami_list)

if __name__ == "__main__":
    main()
テストデータとして、個人利用○となっているPicrewを使わせていただきました。ありがとうございます。
お芋的女の子メーカーβ
ガン見してぅるメーカー
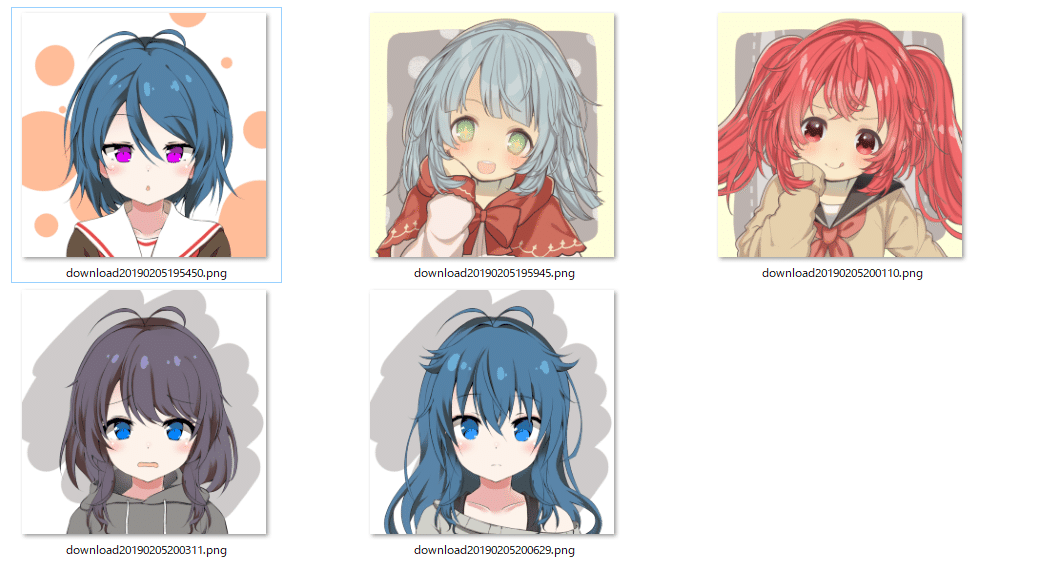
これらを格納したフォルダを上記コードを実行して読み込んでみます。
実行結果(初期表示)
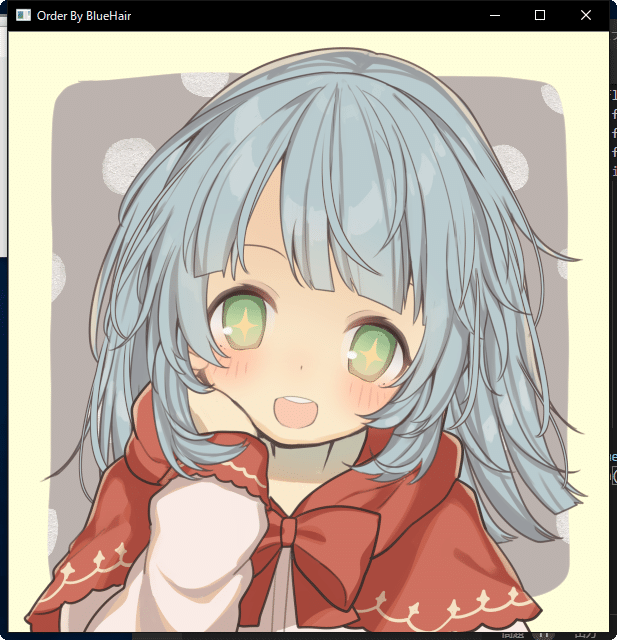
次の画像
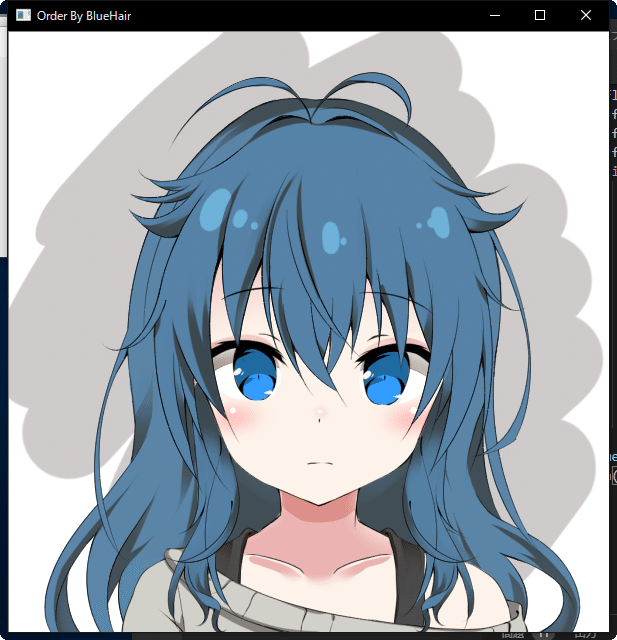
次の画像
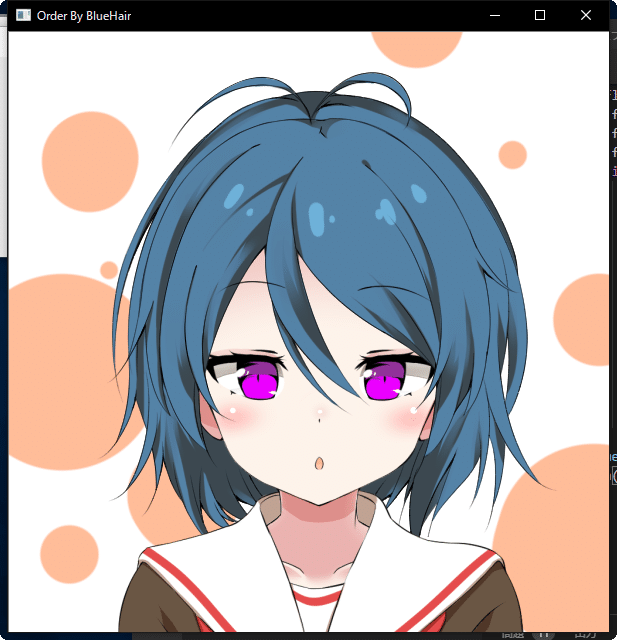
次の画像
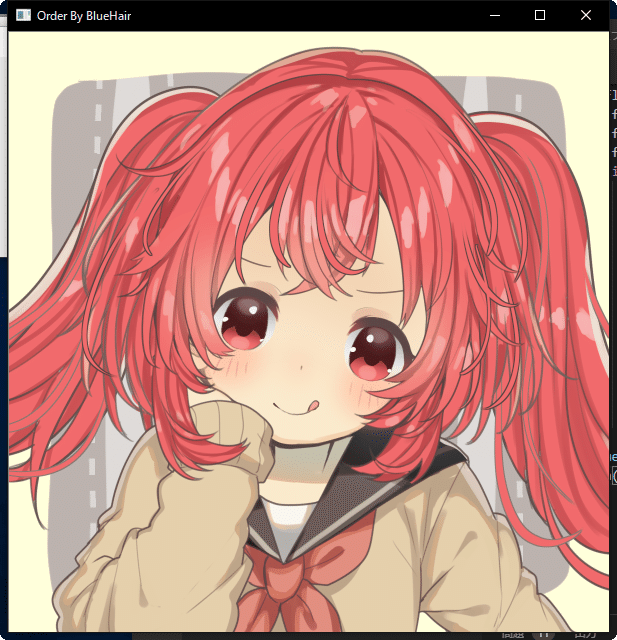
次の画像

明らかな青髪のイラスト3つが先に表示されるという結果!
まとめ
まだまだ課題はいっぱいあるけど、ひとまずプロトタイプとして髪が青い順で表示できるビューアーが完成。
今回のコードと学習データ
OrderByBlueHair - akaness1git GitHub
参考記事
TensorFlowチュートリアル - ML初心者のためのMNIST(翻訳)
TensorFlowでアニメゆるゆりの制作会社を識別する
TensorFlow の "AttributeError: 'module' object has no attribute 'xxxx'" エラーでつまづいてしまう人のための移行ガイド
ディープラーニングでザッカーバーグの顔を識別するAIを作る①(学習データ準備編)
TensorFlowによるももクロメンバー顔認識(前編)
TensorFlow APIリファレンス
TensorFlow学習パラメータのsave, restoreでつまった
Tensorflowを再学習させて「〇〇判別機」を作る
TensorFlowを使って猫の種類の判別機を作る
pandas.DataFrame, SeriesとPython標準のリストを相互に変換
この記事が気に入ったらサポートをしてみませんか?