
Aspect Ratio selector で 画像サイズ調整がお手軽に!

こんにちは。あるいは、こんばんは!
Stable Diffusion WebUI の画像生成をする際に、便利な拡張機能がたくさんあると思います。
とりわけ、ライターさんにとって、ブログやSNSサイトに画像を挿入する際に「サイズ」や「アスペクト比」が決まっていることも多いのではないでしょうか。
Stable Diffusion WebUIで画像生成されている場合には(まだSD人口多くない?)、スライダーや数値入力でちまちま設定することが(下図)、ワンクリックボタンポチッで設定できるようになるので、さぞかし便利になるのではないでしょうか!わたしは、そうしたいです。
では、やってみます!
Stable Diffusion WebUI起動
わたしの環境では、以前の記事で作成したバッチファイル(py310.bat)で、Anaconda仮想環境py310から起動するようにしています。
py310.batをダブルクリック
chcp 65001
call C:/Users/user/Anaconda3/Scripts/activate.bat
call activate py310
cd C:/Users/user/Dropbox/GitHub/clone/stable-diffusion-webui
C:/Users/user/.conda/envs/py310/python.exe launch.py --skip-python-version-check
pause
コマンドプロンプトやターミナルから
以下を1行ずつ入力して、実行していきます!
conda activate py310
cd /Users/user/Dropbox/GitHub/clone/stable-diffusion-webui
python launch.py --skip-python-version-checkちなみに、わたしはVisual Studio Codeというソフトを使用しています。
Aspect Ratio selectorをインストールするよ!
Stable Diffusion WebUIが立ち上がったら、拡張機能を確認してみましょう。
Aspect Ratio selectorは、Stable Diffusion WebUIの拡張ツールの一つです。
Stable Diffusionを立ち上がってから、
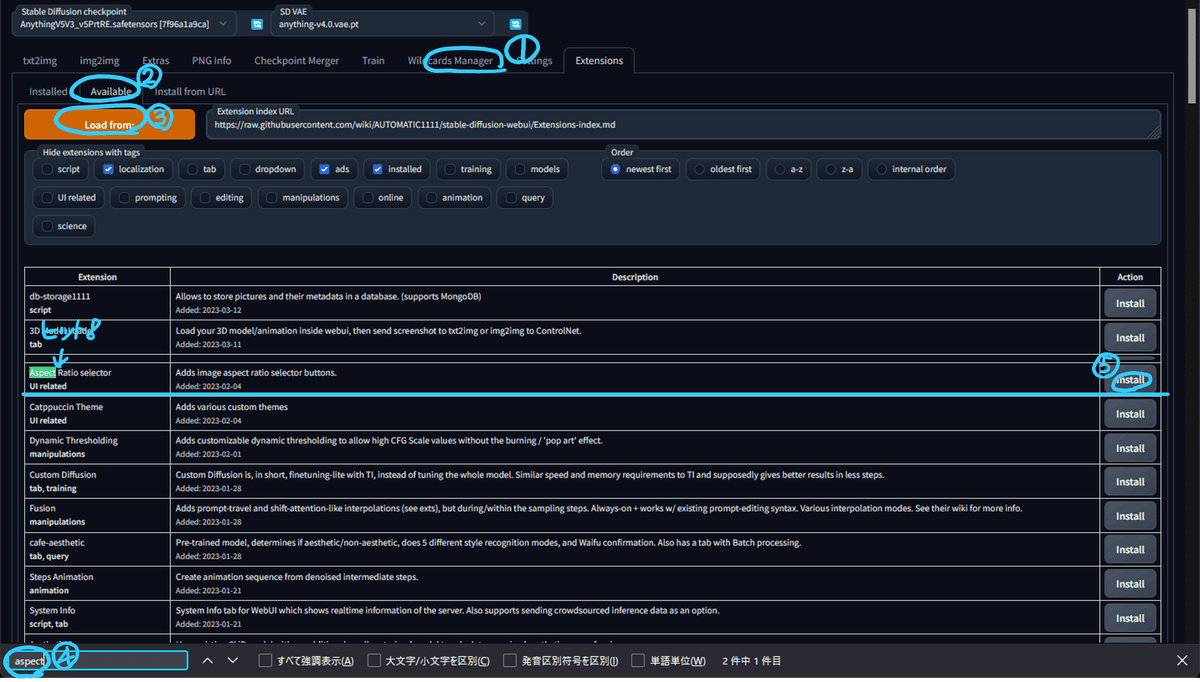
①タブが並んでいるところの「Extensions(拡張機能)」を選択
②さらにタブが並んでいますので「Avairable(拡張機能リスト)」を選択
③「Load from:(読込)」をポチッ
④「aspect」を検索
⑤「Install(インストール)」してみましょう!
エラーを吐きやがり お戻しになりました!
いつものことです。。。
この場合は落ち着いて、コマンドプロンプトから以下のように入力するか、GitHubからフォルダをダウンロードしましょう!
cd /Users/user/Dropbox/GitHub/clone/stable-diffusion-webui/extensions
git clone https://github.com/alemelis/sd-webui-ar.git
Aspect Ratio selectorを使ってみよう!
①「txt2txt」「txt2img」タブにボタンが出るようになります。
②「Calc」ボタンを押すと、
③計算器(Aspect Ratio Calculator)が展開します。
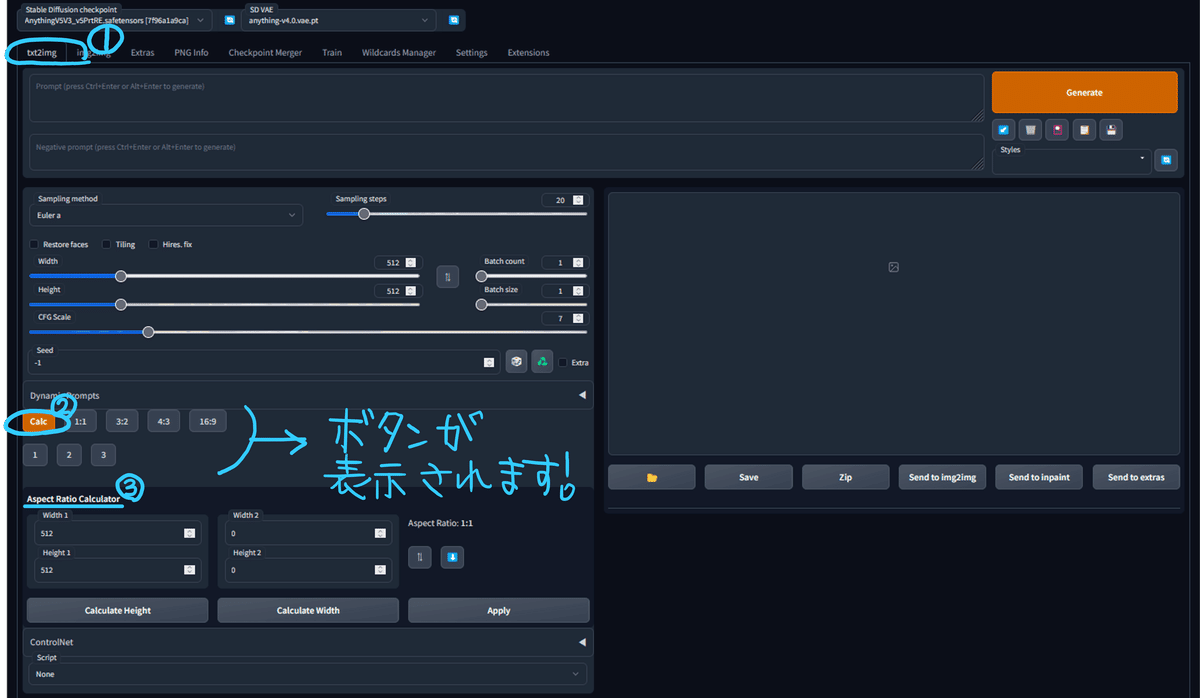

上段はアスペクト比で、設定されたHeightの値に対して、Widthの値を変更してくれます。
(「1:1」のときにHeightの値が変更されるという現象を確認しています)

③「16:9」を押す ④widthが自動計算により変更される
下段は固定値で、デフォルトでは以下のように設定されています。
1:512 x 512
2:768 x 512
3:403 x 716
設定ファイル(aspect_ratios.txt、resolutions.txt)には以下の情報が入っているようです。
1:1, 1.0
3:2, 3/2
4:3, 4/3
16:9, 16/9
# 6:13, 6/13
# 9:16, 9/16
# 3:5, 3/5
# 2:3, 2/3
# 19:16, 19/16
# fox movietone
# 5:4, 5/4 # medium format photo
# 11:8, 11/8 # academy standard
# IMAX, 1.43
# 14:9, 14/9
# 16:10, 16/10
# 𝜑, 1.6180 # golden ratio
# 5:3, 5/3 # super 16mm
# 1.85, 1.85 # US widescreen cinema
# DCI, 1.9 # digital imax
# 2:1, 2.0 # univisium
# 70mm, 2.2
# 21:9, 21/9 # cinematic wide screen
# δ, 2.414 # silver ratio
# UPV70, 2.76 # ultra panavision 70
# 32:9, 32/9 # ultra wide screen
# PV, 4.0 # polyvision
button-label, aspect-ratio-value # comment
1, 512, 512 # 1:1 square
2, 768, 512 # 3:2 landscape
3, 403, 716 # 9:16 portrait
button-label, width, height, # optional comment
noteで使用する画像のサイズ
noteで使用する画像をSDで生成させる場合に、あらかじめサイズを登録しておくとよいですね♪
以下にresolutions.txtフォーマットでメモしておきます。
※日本語は使用しないほうが良いようです!
n1, 1280, 670 # note header
n2, 1280, 720 # note membership
n2: noteメンバーシップ画像,会員証画像
PIXIV FANBOXで使用する画像のサイズ
p1, 1620, 580 # header
p2, 500, 320 # plan cover
p3, 1280, 800 # fancard
p4, 1200, 630# cover
p2: プランカバー画像
p3: ファンカード画像
p4: 画像投稿カバー画像
まとめ
サイズを1ボタンで簡単にセッティングできるのはありがたいことですね!
スライドや数値入力の手間が省けます。
些細なことではありますが、同じフォーマットで複数のSNSサイトなどを抱えてらっしゃる方には重宝されるのではないでしょうか。
他にもたくさんの拡張機能がありますが、note書きながらお試しするのはとても時間がかかりますね(-o-;)
なかなかやりたいことにたどり着けませんが、ヘッダーを1ポチするだけで作成できるようになったのは収穫です♪
他にも拡張機能を試しながら、プロンプトの開発を手掛けたいものです。

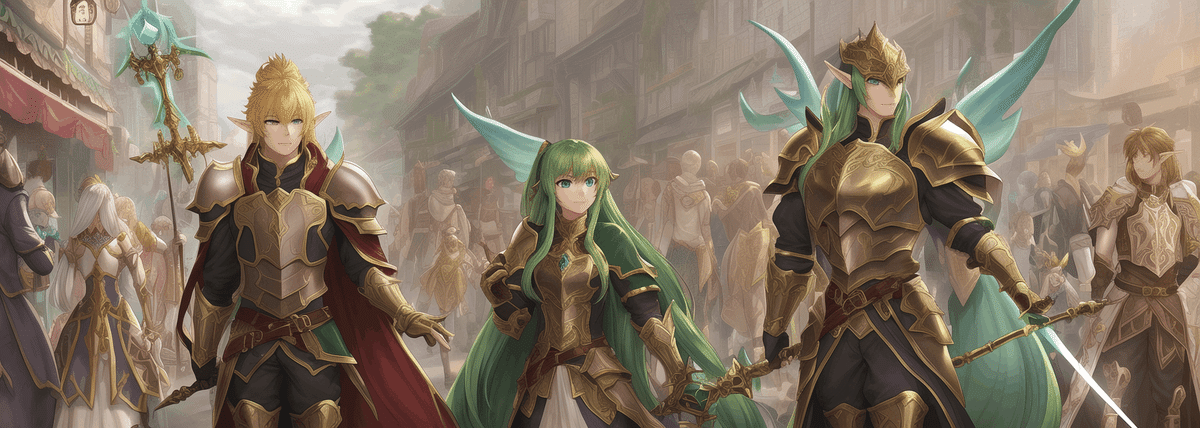
shimmering golden legendary armor and wielding a legendary sword
(blue shining hair:1.5), gentle smile, female healer, priestly staff, chanting a healing spell and surrounded by a radiant aura of light,
Negative prompt: (EasyNegative:1.5), (ng_deepnegative_v1_75t:0.75), (worst quality, low quality, normal quality:1.4),
Steps: 20, Sampler: Euler a, CFG scale: 7, Seed: 2195433780, Size: 1280x670, Model hash: 7f96a1a9ca, Model: AnythingV5V3_v5PrtRE Used embeddings: EasyNegative [119b], ng_deepnegative_v1_75t [1a3e]
Time taken: 32.33s Torch active/reserved: 3855/4874 MiB, Sys VRAM: 6144/6144 MiB (100.0%)
この記事が参加している募集
この記事が気に入ったらサポートをしてみませんか?