KubeflowでCustom Jupyter Imageの作成

Custom Jupyter Imageを作成
作成したImageを元にKubeflowでNotebook Serverを立てる
こいつも公式ドキュメントなぞってるだけ
検証内容

Kubeflowでデフォルト選択できる「tensorflow-1.14.0-notebook-cpu:v0.7.0」imageから作成したJupyter Notebookでは
simplejson packageが入ってないので、辞書をjson文字列に変換しようとするとModuleNotFoundErrorになる
simplejson package入りのJupyter imageを作成して
こいつのエラーがなくなることを確かめてみる
Custom Jupyter Imageの作成
ローカル環境で以下のようなDockerfileを作成
FROM gcr.io/kubeflow-images-public/tensorflow-1.14.0-notebook-cpu:v0.7.0

USER root

RUN pip install --upgrade pip

# Install base python3 packages
RUN pip3 --no-cache-dir install \
   simplejson

ENV NB_PREFIX /
USER jovyan
CMD ["sh","-c", "jupyter notebook --notebook-dir=/home/jovyan --ip=0.0.0.0 --no-browser --allow-root --port=8888 --NotebookApp.token='' --NotebookApp.password='' --NotebookApp.allow_origin='*' --NotebookApp.base_url=${NB_PREFIX}"]
検証のために選択していた「gcr.io/kubeflow-images-public/tensorflow-1.14.0-notebook-cpu:v0.7.0」imageにroot userでsimplejson package追加してるだけ
最後にjovyan userに切替とかないと
「custom jupyter image no healthy upstream」
こんなエラー出てきてNotebookが表示されないので注意しよう!
ImageをDockerhubにpush
GCPのContainer Registryではなく、Dockerhubに上げてみた
以下Dockerhubのページで「Create Repository」をクリックして新しいRepositoryを作成する
https://hub.docker.com/repositories

作成したRepository名を指定してbuild&push
docker build --tag=shintaro0123/kubeflow .
docker push shintaro0123/kubeflow
Imageを元にNotebook Server作成

Kubeflowのサイドメニュー「Notebook Servers」をクリックして「New Server」を選択

Custom Image選択して作成したDockerhubのimageを指定&Launch
Notebookで動作検証
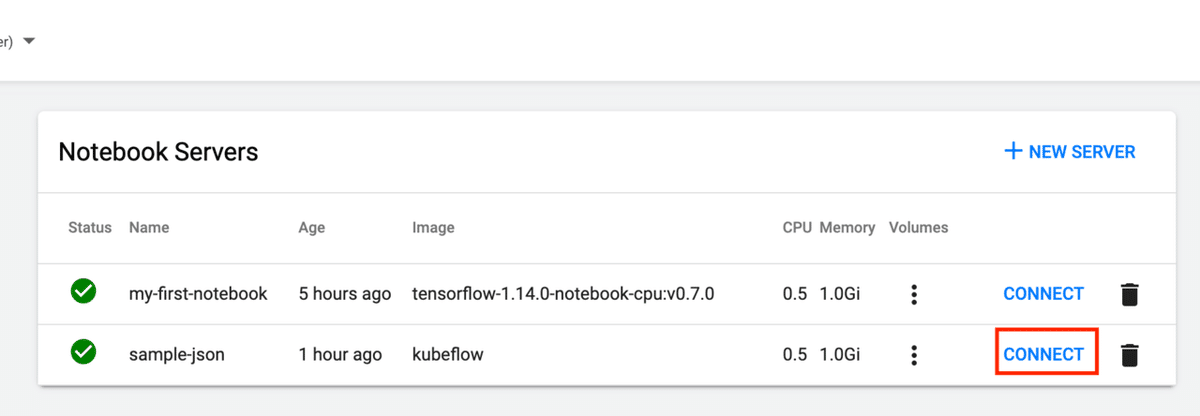
作成したNotebook ServerにCONNECT

検証してみるとsimplejson packageが読み込まれて
辞書がjson文字列に変換された!!!
まとめ
割とスッとできた
もっとKubeflow使いこなしていくとこの辺も活きてくるのかな・・
とりあえず一通りドキュメント触ってみることにしよう
この記事が気に入ったらサポートをしてみませんか?