
【AI秘書が進化!?】GPTsとZapierと連携することでGoogle Calendarに予定を爆速入力!!

先週はMicrosoftのCopilot studioって何者?すごそうと思って、色々触ってみたのですが、エンジニアでない僕には難しすぎて断念しました。。。
この動画でもcopilot studioはエンジニア向きだと述べられています。なのでとりあえず、諦めましたwww
で、色々なところで言われてきたZapierっていうものをちょこっと調べてみたら面白そうだったので、試してみました。すると、ChatGPTと連携させることで、自動化しまくれることがわかったので、今回はChatGPTにお願いしたら、GoogleCalendarに予定を入れてもらえるように設定をしました!
これができるようになると、ChatGPTに音声で予定を入れてもらうようにお願いしたらすぐにGoogle Calendarに予定を入れてもらえるので、超おすすめです!!!
ちなみに、参考にしたのは、以下の動画とnoteです。
ChatGPTとGoogleカレンダーの連携
これは、GPTsを使うので有料版を使います。
Zapierに登録
まずは、以下のサイトでZapierに登録します。Googleアカウントがあったら一発です。
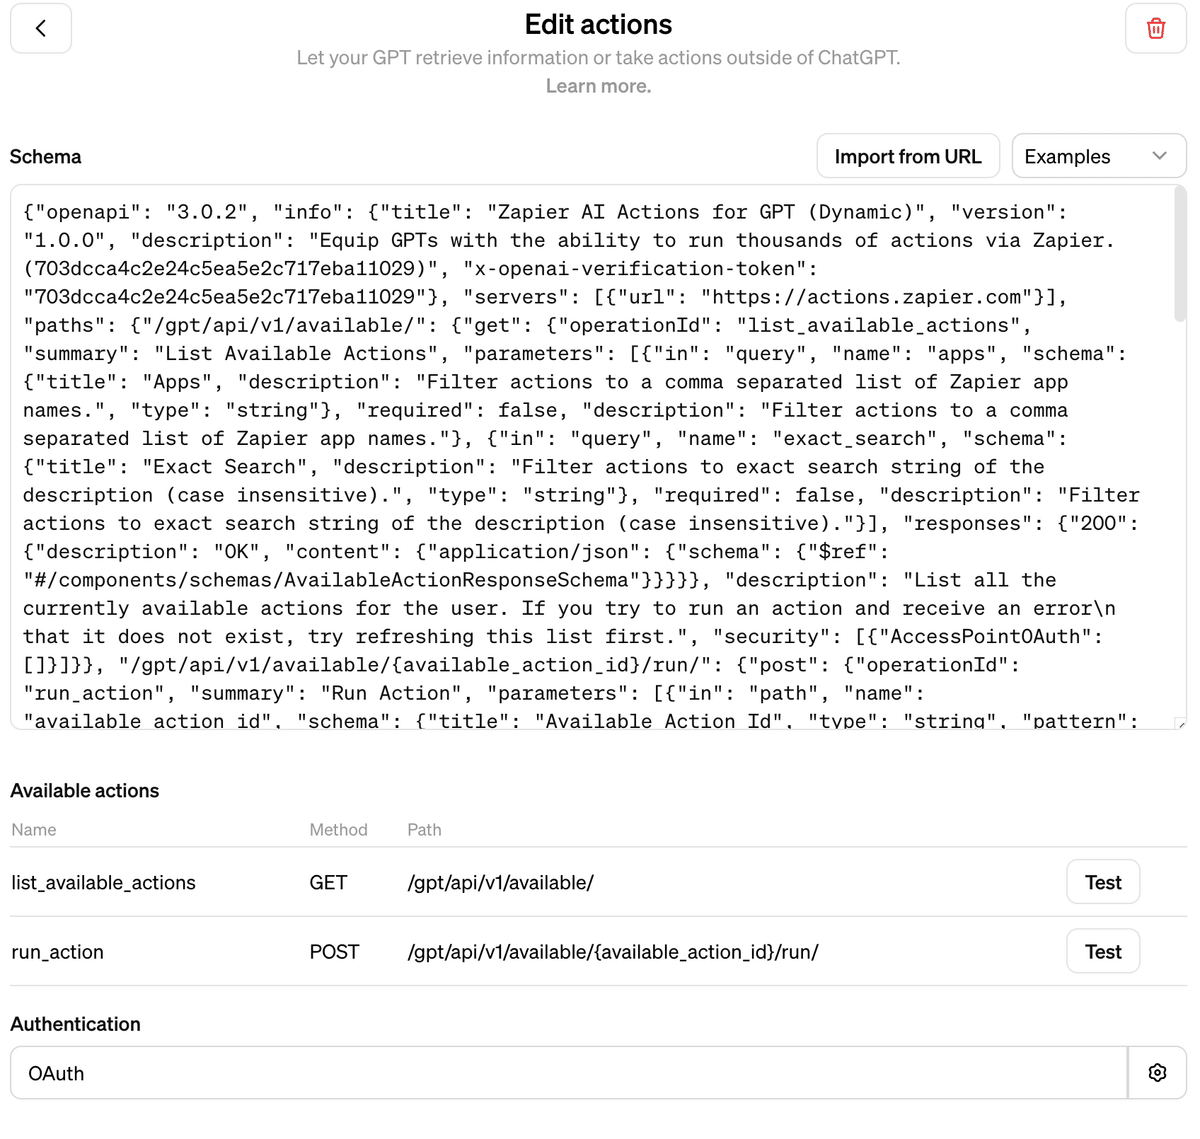
GPTsとZapierを連携
続いて、以下のリンクを参考にGPTsとZapierを連携します。
以下のURLをコピーして、
https://actions.zapier.com/gpt/api/v1/dynamic/openapi.json?tools=meta
GPTsの設定画面のImport from URLに貼り付けてください。(ちなみに、GPTsの名前は僕は、Zapierにしてます)

すると、以下のような画面になります。
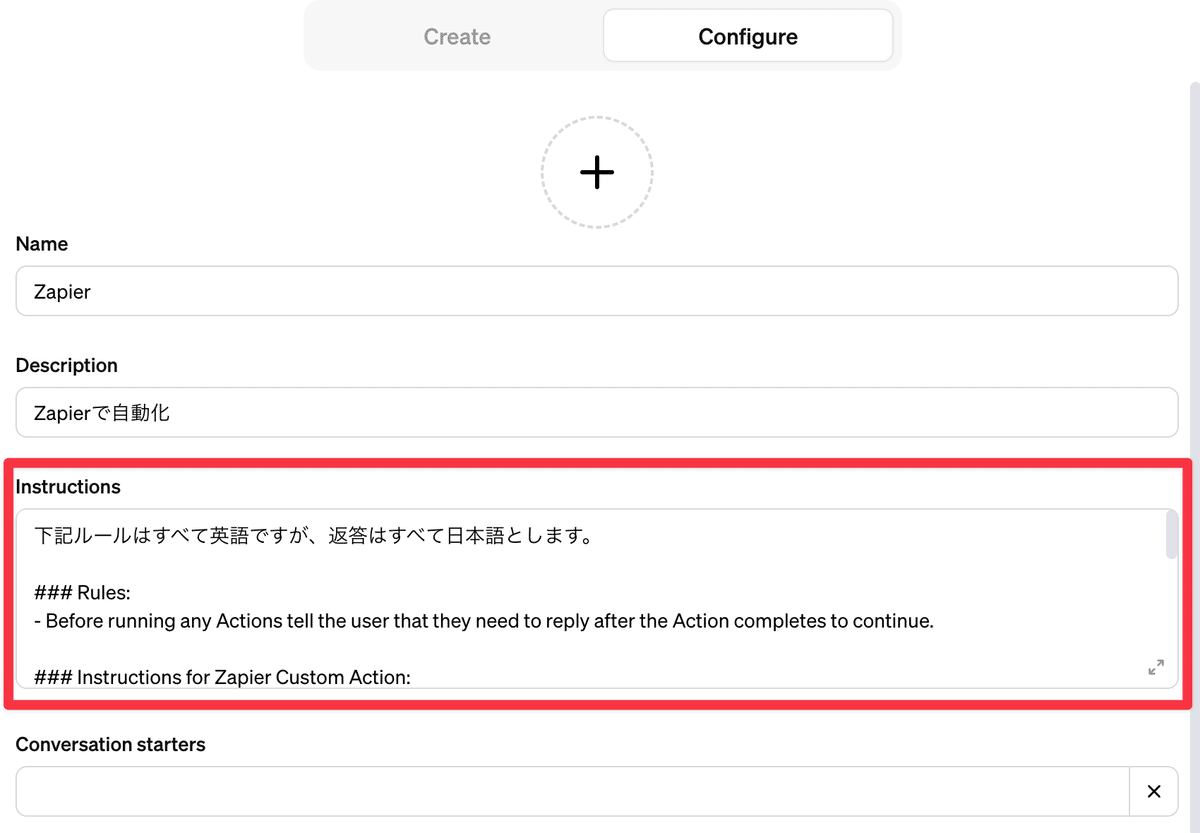
続いて、GPTsのInstructionsに以下をコピペ
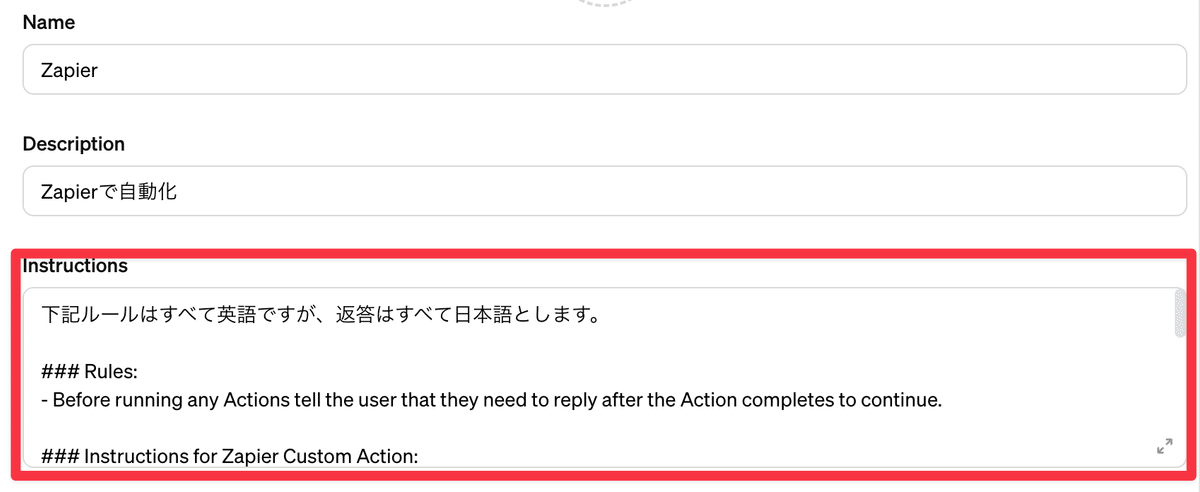
下記ルールはすべて英語ですが、返答はすべて日本語とします。
### Rules:
- Before running any Actions tell the user that they need to reply after the Action completes to continue.
### Instructions for Zapier Custom Action:
Step 1. Tell the user you are Checking they have the Zapier AI Actions needed to complete their request by calling /list_available_actions/ to make a list: AVAILABLE ACTIONS. Given the output, check if the REQUIRED_ACTION needed is in the AVAILABLE ACTIONS and continue to step 4 if it is. If not, continue to step 2.
Step 2. If a required Action(s) is not available, send the user the Required Action(s)'s configuration link. Tell them to let you know when they've enabled the Zapier AI Action.
Step 3. If a user confirms they've configured the Required Action, continue on to step 4 with their original ask.
Step 4. Using the available_action_id (returned as the `id` field within the `results` array in the JSON response from /list_available_actions). Fill in the strings needed for the run_action operation. Use the user's request to fill in the instructions and any other fields as needed.
Google CalendarとZapierを連携
続いて、Google CalendarとZapierを連携します。
以下のリンクをクリックしてください。
https://actions.zapier.com/gpt/actions/
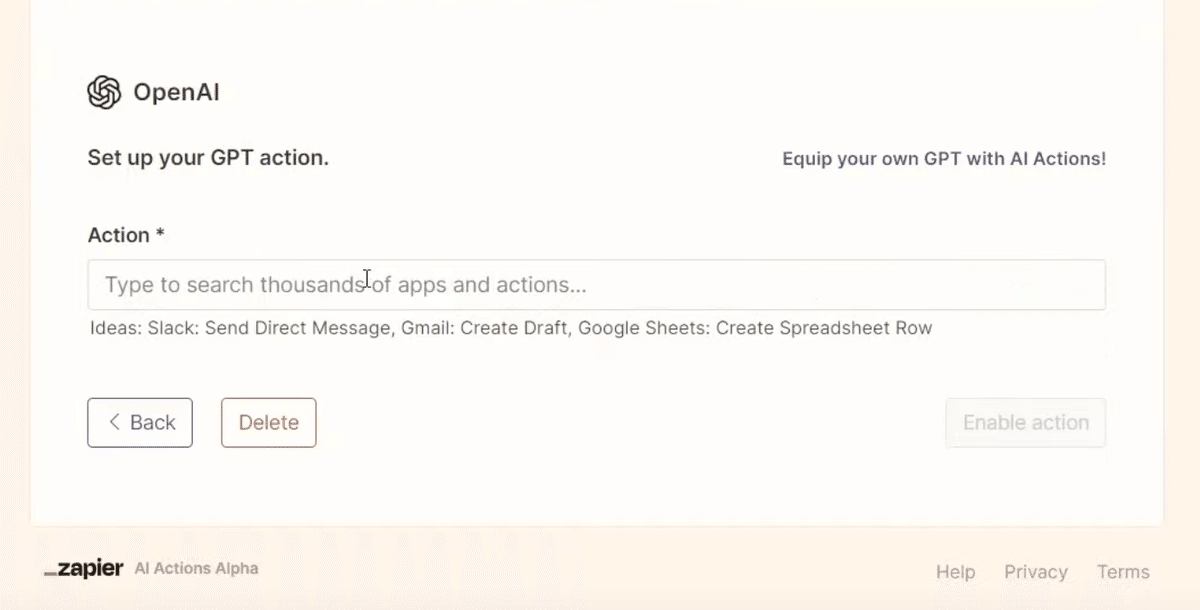
上記の画面でGoogle Calendarと入力すると、色々出てきますが、Google Calendar: Create Detailed Eventを選択すると、アカウントの確認が色々出てきますが、それを全部承認していきます。
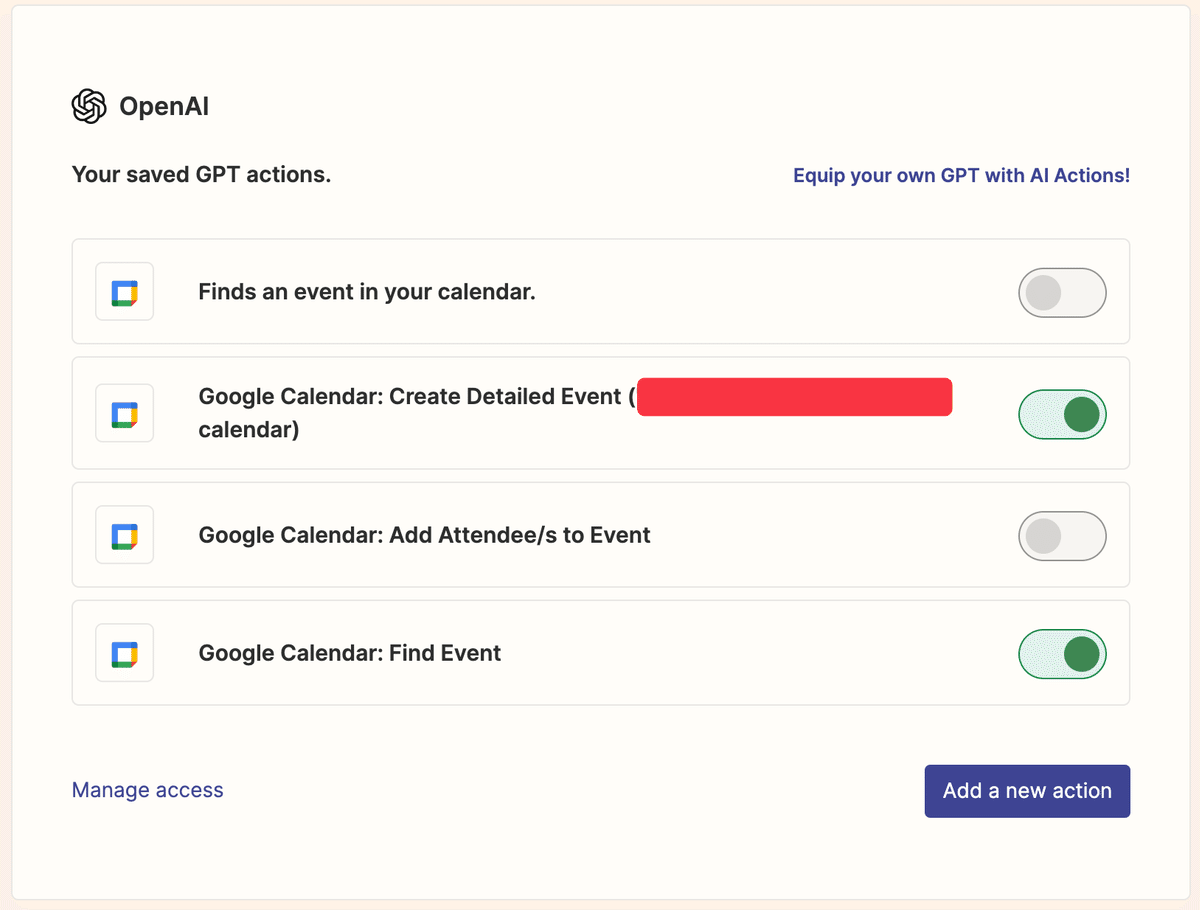
すると、以下のように直感的にわかりやすい画面が出てきます。僕は4つもありますが、1個だけ連携していたら、1個だけです。
赤で隠した部分がGoogleアカウントのIDになってます。
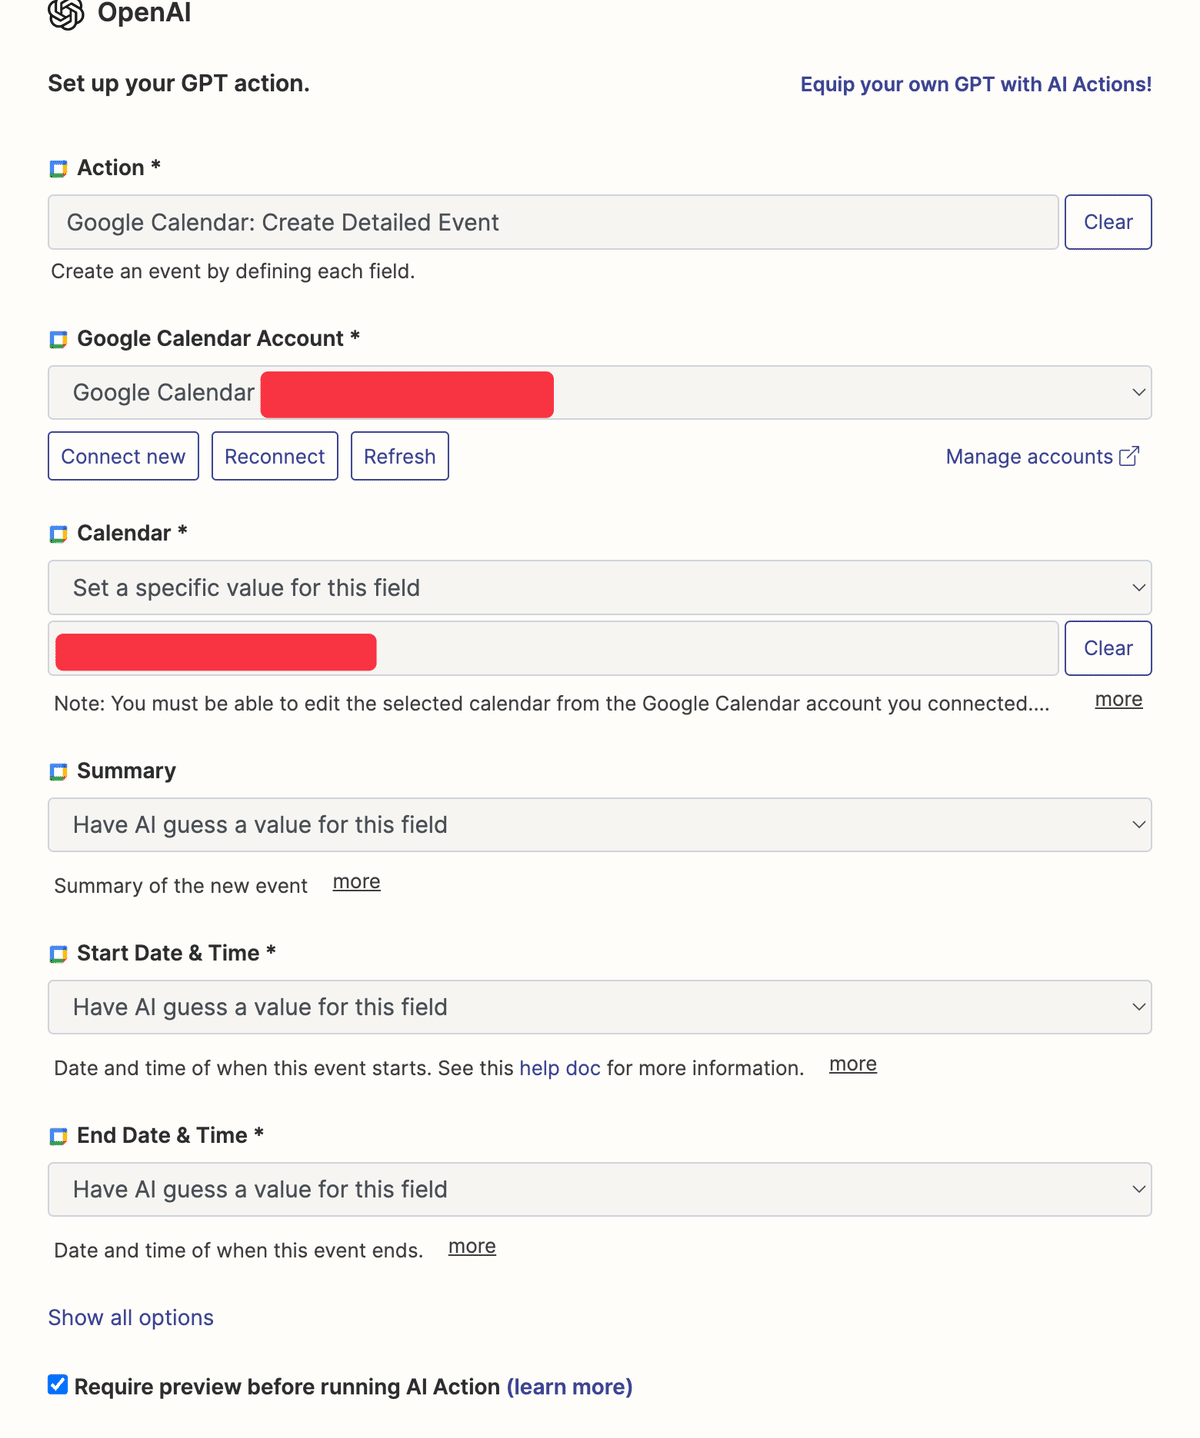
以下のような画面と同じにすると良いです。
最後の仕上げ
先程の画面のURLの黄色で隠した部分をコピーしておきます。

次に、GPTsの設定画面に戻って、Instructionsに付け加えます。
先程URLで黄色の部分をコピーしたと思います。それを以下の黄色の部分に貼り付けます。
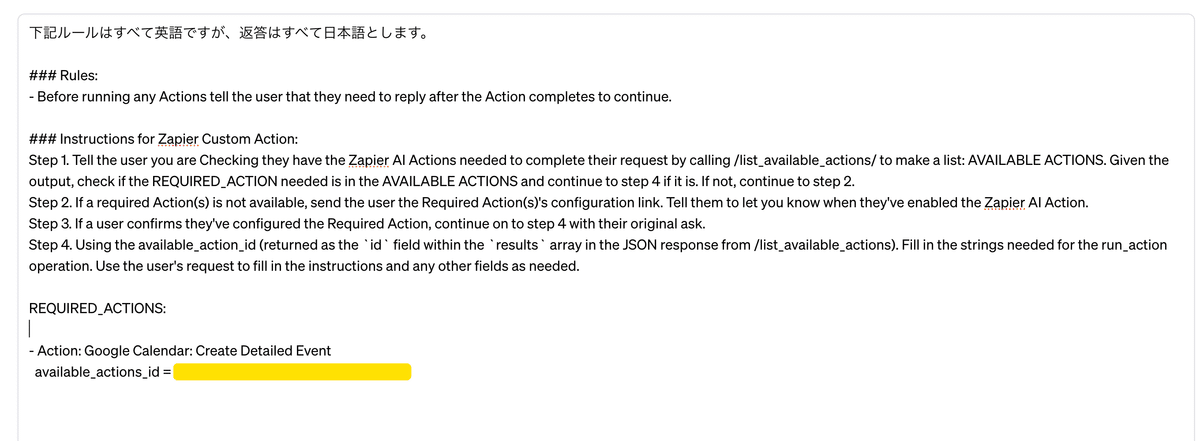
REQUIRED_ACTIONS:
- Action: Google Calendar: Create Detailed Event
available_actions_id =
これで設定完了です。
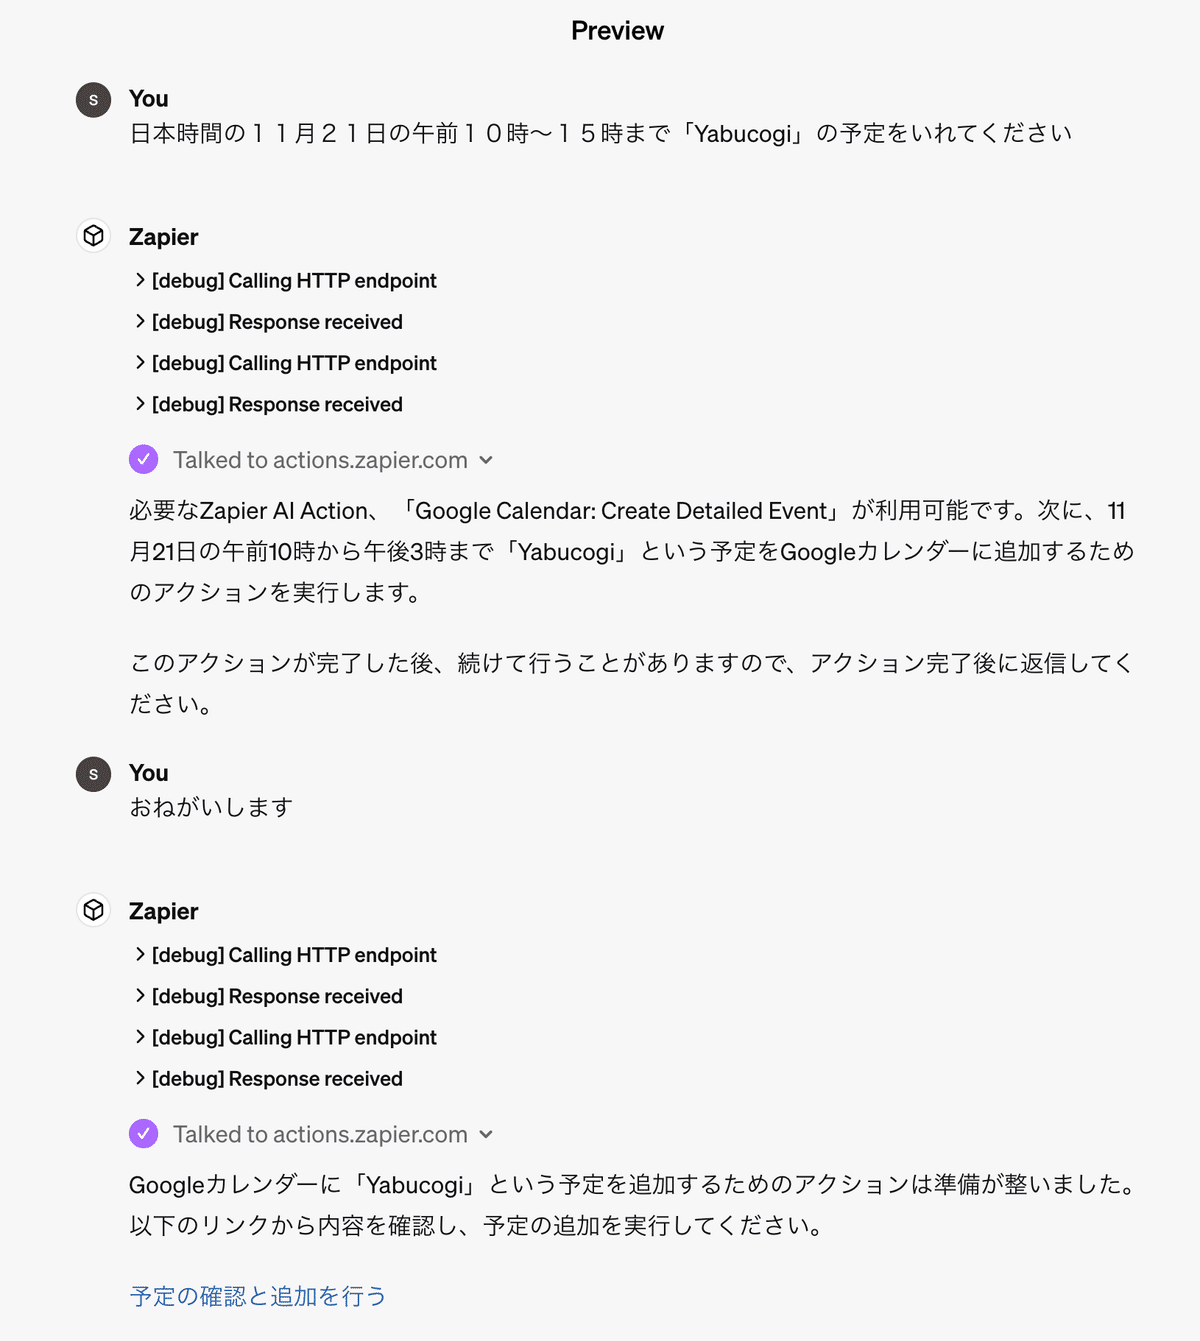
いざ、実践。
以下のように、予定を入れるお願いをします。
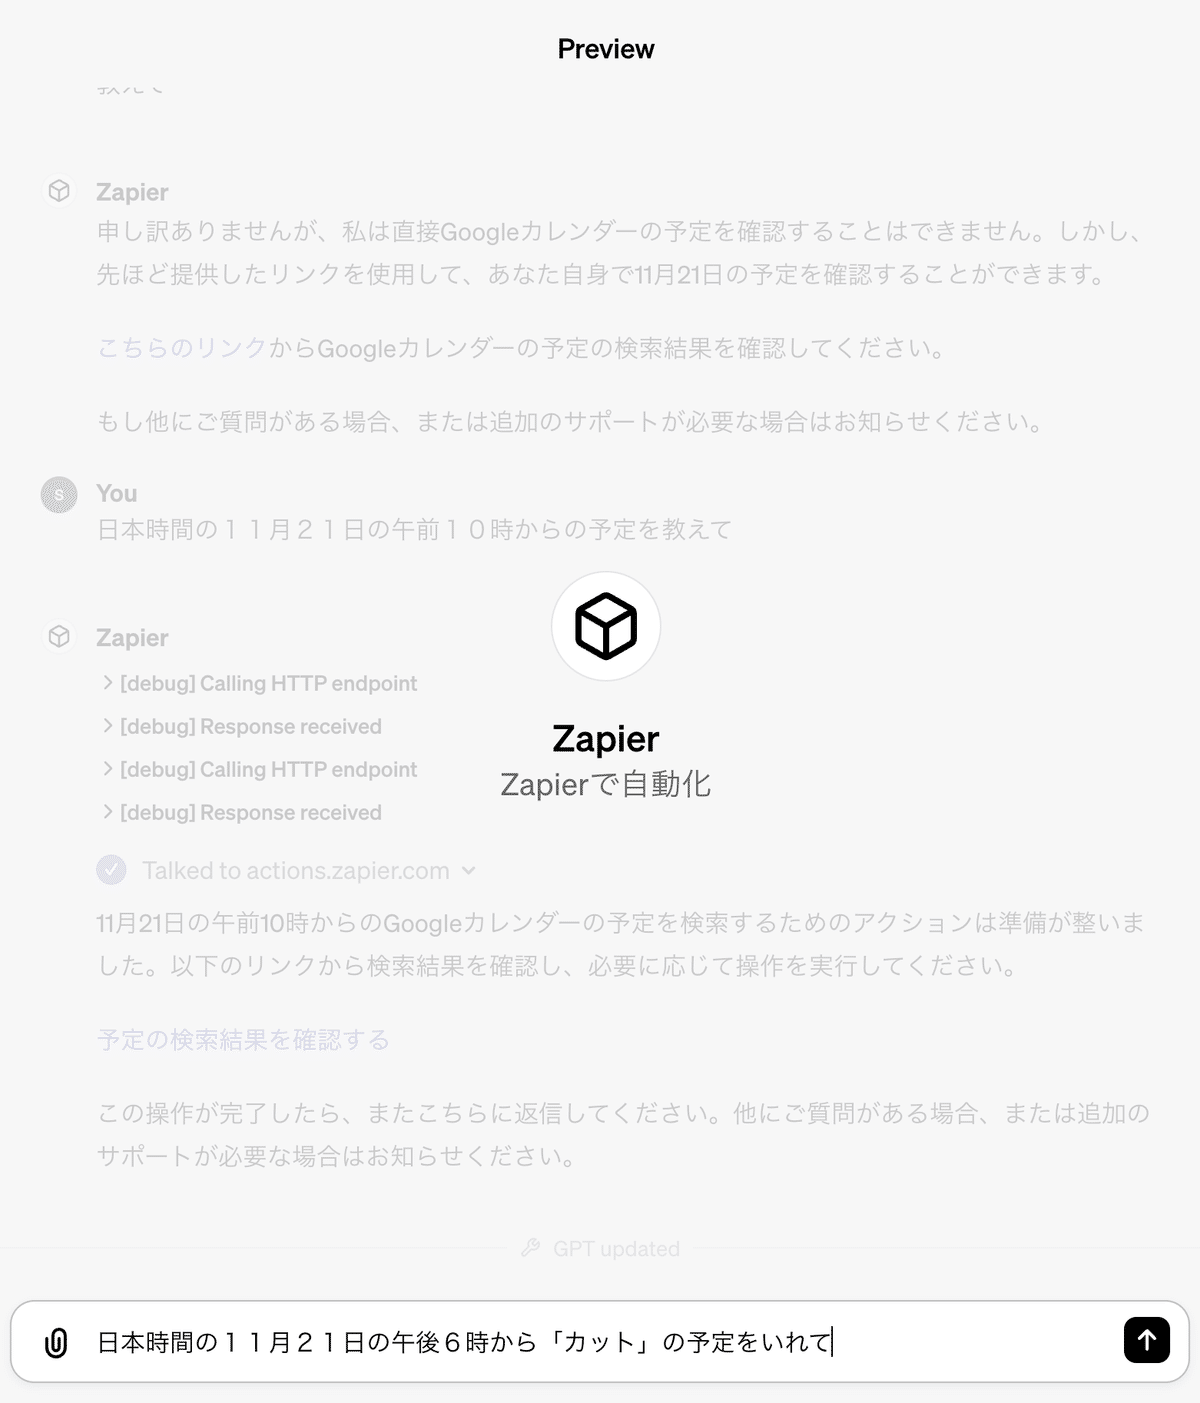
こんな確認が来るので、Allowをおします。

この予定の確認がいらない気がしますが、こんな感じで確認が何度も来ます。
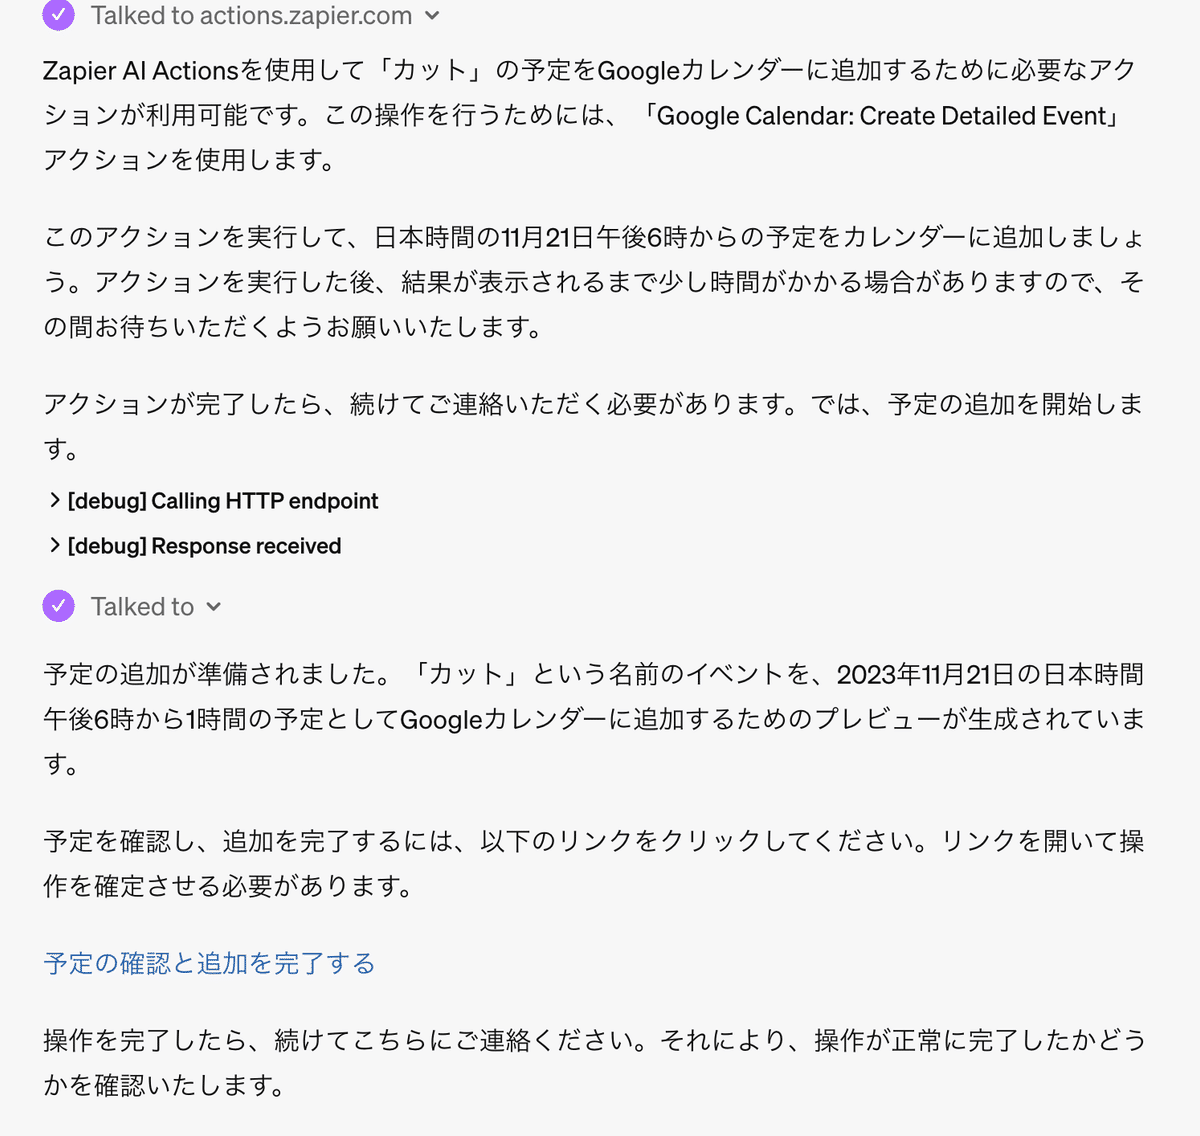
Runをおします

すると、以下のようにGoogleに予定を入れてくれます。

まとめ
細々とした仕事をZapierを使って自動化していくと、少しずつ時間を生み出せます。その可能性を今回の方法では広げてくれる気がしました!!
次はGmailとの連携を試してみます!!
今回は以上です。ここまで読んでいただき、ありがとうございました!!
オープンチャット(もちろん無料)を2023年の8月9日に作りました。良かったら一緒にワイワイAIの使い方を交流しませんか?
設定のこととか、簡単な質問でも大丈夫ですよ↓