ごみ識別アプリの製作

AIを用いたゴミ識別アプリを製作しました。
今回は製作したWebアプリについて書いていきます。
製作したWebアプリはこちらです。
アプリ概要
完成したサイトはこちらです。
今回、kaggleからGarbageclassificationのデータセットをお借りし
”段ボール”、”ガラス”、”鉄”、”紙”、”プラスティック”、”生ごみ”の計6種類を
画像識別します。

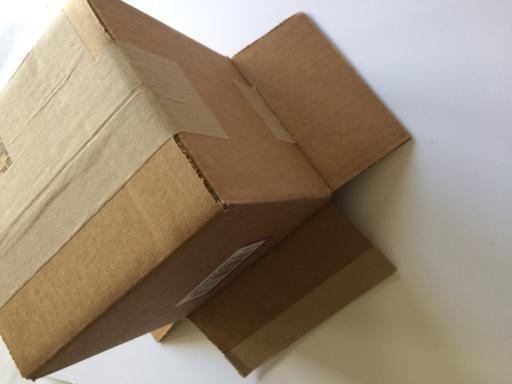
まず、この中に”段ボール”の画像をアップしてみます。
その結果、
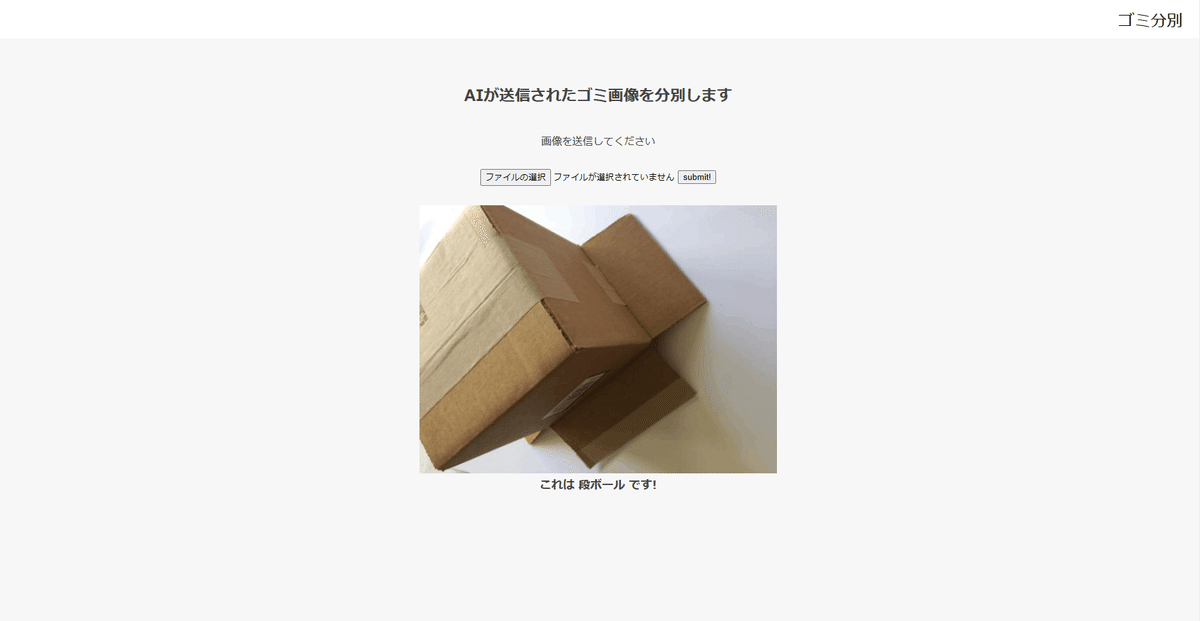
このように画像とAIが判別し、"これは段ボールです!" と返してくれました。
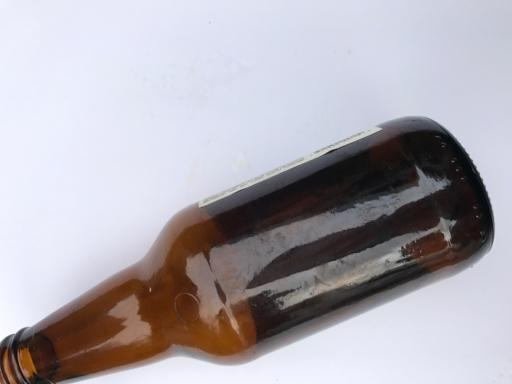
続いて、”段ボール”以外も試してみたいと思います。
”ガラス”をアップしてみます。
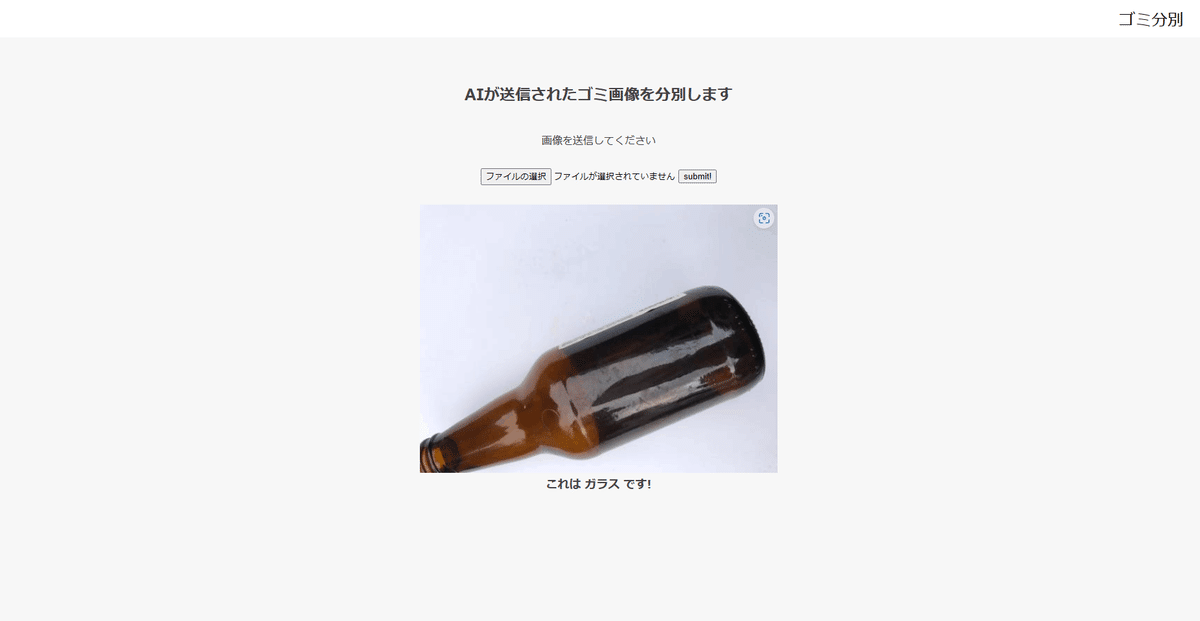
きちんと”ガラス”と識別されました。
コード説明
今回は以下のような流れで作りました。
1:KaggleのGarbageclassificationデータセットを読み込む。
2:モデル作成と学習、学習結果の保存
3:Webアプリ作成用のコード作成
・KaggleのGarbageclassificationデータセットについて
使用したKaggleデータセットは以下
データ内訳 (cardboard (393), glass (491), metal (400), paper(584),
plastic (472) and trash(127).)
今回、私はGoogle Colaboratoryを使って機械学習モデルを作りました。
流れとしては、Google Drive上にデータセットを保存し、
Google Colaboratoryとマウントを行いデータセットのデータを
読み込みました。
マウントの取り方は以下に参考サイトを載せておきます。
【Google Colaboratory】Google ドライブにマウントし、ファイルへアクセスする方法 | キカガクの技術ブログ (kikagaku.co.jp)
・モデル作成と学習、学習結果の保存について
from google.colab import drive #Googleドライブにマウントし、ファイルへアクセス
drive.mount('/content/drive')
import os
import cv2
import numpy as np
import matplotlib.pyplot as plt
from tensorflow.keras.utils import to_categorical
from tensorflow.keras.layers import Dense, Dropout, Flatten, Input
from tensorflow.keras.applications.vgg16 import VGG16
from tensorflow.keras.models import Model, Sequential
from tensorflow.keras import optimizers
# お使いの仮想環境のディレクトリ構造等によってファイルパスは異なります。
path_cardboard = os.listdir("/content/drive/MyDrive/Garbageclassification/Garbageclassification/cardboard")
path_glass = os.listdir("/content/drive/MyDrive/Garbageclassification/Garbageclassification/glass")
path_metal = os.listdir("/content/drive/MyDrive/Garbageclassification/Garbageclassification/metal")
path_paper = os.listdir("/content/drive/MyDrive/Garbageclassification/Garbageclassification/paper")
path_plastic = os.listdir("/content/drive/MyDrive/Garbageclassification/Garbageclassification/plastic")
path_trash = os.listdir("/content/drive/MyDrive/Garbageclassification/Garbageclassification/trash")
img_cardboard = []
img_glass = []
img_metal = []
img_paper = []
img_plastic = []
img_trash = []
for i in range(len(path_cardboard)):
img = cv2.imread("/content/drive/MyDrive/Garbageclassification/Garbageclassification/cardboard/" + path_cardboard[i]) #ディレクトリ名語尾に/
if (img is None):
continue
b,g,r = cv2.split(img)
img = cv2.merge([r,g,b])
img = cv2.resize(img, (50,50))
img_cardboard.append(img)
for i in range(len(path_glass)):
img = cv2.imread("/content/drive/MyDrive/Garbageclassification/Garbageclassification/glass/" + path_glass[i] )#ディレクトリ名語尾に/
if (img is None):
continue
b,g,r = cv2.split(img)
img = cv2.merge([r,g,b])
img = cv2.resize(img, (50,50))
img_glass.append(img)
for i in range(len(path_metal)):
img = cv2.imread("/content/drive/MyDrive/Garbageclassification/Garbageclassification/metal/" + path_metal[i]) #ディレクトリ名語尾に/
if (img is None):
continue
b,g,r = cv2.split(img)
img = cv2.merge([r,g,b])
img = cv2.resize(img, (50,50))
img_metal.append(img)
for i in range(len(path_paper)):
img = cv2.imread("/content/drive/MyDrive/Garbageclassification/Garbageclassification/paper/" + path_paper[i]) #ディレクトリ名語尾に/
if (img is None):
continue
b,g,r = cv2.split(img)
img = cv2.merge([r,g,b])
img = cv2.resize(img, (50,50))
img_paper.append(img)
for i in range(len(path_plastic)):
img = cv2.imread("/content/drive/MyDrive/Garbageclassification/Garbageclassification/plastic/" + path_plastic[i]) #ディレクトリ名語尾に/
if (img is None):
continue
b,g,r = cv2.split(img)
img = cv2.merge([r,g,b])
img = cv2.resize(img, (50,50))
img_plastic.append(img)
for i in range(len(path_trash)):
img = cv2.imread("/content/drive/MyDrive/Garbageclassification/Garbageclassification/trash/" + path_trash[i]) #ディレクトリ名語尾に/
if (img is None):
continue
b,g,r = cv2.split(img)
img = cv2.merge([r,g,b])
img = cv2.resize(img, (50,50))
img_trash.append(img)
X = np.array(img_cardboard + img_glass + img_metal + img_paper + img_plastic + img_trash)
y = np.array([0]*len(img_cardboard) + [1]*len(img_glass) + [2]*len(img_metal) + [3]*len(img_paper) + [4]*len(img_plastic) + [5]*len(img_trash))#ディレクトリ名語尾に/
rand_index = np.random.permutation(np.arange(len(X)))
X = X[rand_index]
y = y[rand_index]
# データの分割
X_train = X[:int(len(X)*0.8)]
y_train = y[:int(len(y)*0.8)]
X_test = X[int(len(X)*0.8):]
y_test = y[int(len(y)*0.8):]
# 正解ラベルをone-hotの形にします
y_train = to_categorical(y_train)
y_test = to_categorical(y_test)
# モデルにvggを使います
input_tensor = Input(shape=(50, 50, 3))
vgg16 = VGG16(include_top=False, weights='imagenet', input_tensor=input_tensor)
# vggのoutputを受け取り、2クラス分類する層を定義します
# その際中間層を下のようにいくつか入れると精度が上がります
top_model = Sequential()
top_model.add(Flatten(input_shape=vgg16.output_shape[1:]))
top_model.add(Dense(256, activation='relu'))
top_model.add(Dropout(0.5))
top_model.add(Dense(6, activation='softmax')) #Dense
# vggと、top_modelを連結します
model = Model(vgg16.inputs, top_model(vgg16.output))
# vggの層の重みを変更不能にします
for layer in model.layers[:19]:
layer.trainable = False
# コンパイルします
model.compile(loss='categorical_crossentropy',
optimizer=optimizers.SGD(lr=1e-4, momentum=0.9),
metrics=['accuracy'])
# 学習を行います
model.fit(X_train, y_train, batch_size=128, epochs=150, validation_data=(X_test, y_test))
# 画像を一枚受け取り、段ボール、ガラス、鉄、紙、プラスチック、生ゴミを判別する。
def separately(img):
img = cv2.resize(img, (50, 50))
pred = np.argmax(model.predict(np.array([img])))
if pred == 0:
return 'cardboard'
elif pred == 1:
return 'glass'
elif pred == 2:
return 'metal'
elif pred == 3:
return "paper"
elif pred == 4:
return "plastic"
else:
return "trash"
# 精度の評価(適切なモデル名に変えて、コメントアウトを外してください)
scores = model.evaluate(X_test, y_test, verbose=1)
print('Test loss:', scores[0])
print('Test accuracy:', scores[1])
# pred_gender関数に写真を渡して分類を予測します
img = cv2.imread("/content/drive/MyDrive/Garbageclassification/Garbageclassification/cardboard/" + path_cardboard[10]) #ディレクトリ名+語尾に/
b,g,r = cv2.split(img)
img1 = cv2.merge([r,g,b])
plt.imshow(img1)
plt.show()
print(separately(img))
今回、使用したデータセットは、段ボール (393枚)、 ガラス (491枚)、
鉄 (400枚)、 紙(584枚)、 プラスチック (472枚)、生ゴミ(127枚)と非常に
画像数が少なかったため、VGG16モデルを使用し転移学習を行いました。
転移学習では、すでに学習済みのモデルを使って、より少ない画像、より短時間で学習モデルを構築することを目指します。
そして学習したデータを保存しています。
・Webアプリ作成用のコード作成について
データセットを作成し、それを学習させた結果の保存まで終わりました。
ここからWebアプリ作成用のコードになります。
まずディレクトリの構成はこのようになっています。
.
├── uploads
├── model.h5
├── separately.py
├── requirements.txt
├── static
│   └── stylesheet.css
└── templates
   └── index.html
separately.pyは以下の通りです。
import os
from flask import Flask, request, redirect, render_template, flash
from werkzeug.utils import secure_filename
from tensorflow.keras.models import Sequential, load_model
from tensorflow.keras.preprocessing import image

import numpy as np


classes = ["段ボール","ガラス","鉄","紙","プラスティック","生ゴミ"] #段ボール、ガラス、鉄、紙、プラスティック、生ゴミ
image_size = 50 #resize 50
UPLOAD_FOLDER = "static"
ALLOWED_EXTENSIONS = set(['png', 'jpg', 'jpeg', 'gif'])

app = Flask(__name__)

def allowed_file(filename):
    return '.' in filename and filename.rsplit('.', 1)[1].lower() in ALLOWED_EXTENSIONS

model = load_model('./model.h5')#学習済みモデルをロード


@app.route('/', methods=['GET', 'POST'])
def upload_file():
    if request.method == 'POST':
        if 'file' not in request.files:
            flash('ファイルがありません')
            return redirect(request.url)
        file = request.files['file']
        if file.filename == '':
            flash('ファイルがありません')
            return redirect(request.url)
        if file and allowed_file(file.filename):
            filename = secure_filename(file.filename)
            file.save(os.path.join(UPLOAD_FOLDER, filename))
            filepath = os.path.join(UPLOAD_FOLDER, filename)

            #受け取った画像を読み込み、np形式に変換
            img = image.load_img(filepath, target_size=(image_size,image_size))
            img = image.img_to_array(img)
            data = np.array([img])
            #変換したデータをモデルに渡して予測する
            result = model.predict(data)[0]
            predicted = result.argmax()
            pred_answer = "これは " + classes[predicted] + " です!"

            return render_template("index.html",answer=pred_answer, images=filepath)

    return render_template("index.html",answer="")

if __name__ == "__main__":
    port = int(os.environ.get('PORT', 8080))
    app.run(host ='0.0.0.0',port = port)
続いて、index.html
<!DOCTYPE html>
<html lang="ja">
<head>
<meta charset="UTF-8">
<meta name="viewport" content="width=device-width, initial-scale=1.0">
<meta http-equiv="X-UA-Compatible" content="ie=edge">
<title>Garbage Classifier</title>
<link rel="stylesheet" href="./static/stylesheet.css">
</head>
<div id="home">
<body>
<header>
<a class="header-logo" href="#">ゴミ分別</a>
</header>
<div class="main">
<h2> AIが送信されたゴミ画像を分別します</h2>
<p>画像を送信してください</p>
<form method="POST" enctype="multipart/form-data">
<input class="file_choose" type="file" name="file">
<input class="btn" value="submit!" type="submit">
</form>
<img class="image" src="{{images}}">
<div class="answer">{{answer}}</div>
</div>
<footer>
<small>© シンタ </small>
</footer>
</div>
</body>
</html>
続いて、stylesheet.css
body{
    background:#f7f7f7;
    -webkit-animation:colour 15s linear infinite;
    -moz-animation:colour 15s linear infinite;

}

@-webkit-keyframes colour{
    0%{
      background:#f8f8f8
    }

    40%{
      background:#c3f3b0
    }

    80%{
      background:#fafafa
    }

    100%{
      background:#e7f8aa
    }

}


header {
    background-color: #fff;
    height: 60px;
    margin: -8px;
    display: flex;
    flex-direction: row-reverse;
    justify-content: space-between;
}

.header-logo {
    color: #000;
    font-size: 25px;
    margin: 15px 25px;
    text-decoration: none;
}

.main {
    min-height: 100vh;
    position: relative;
    padding-bottom: 50px;
    box-sizing: border-box;
}

h2 {
    color: #444444;
    margin: 80px 0px 30px;
    text-align: center;
}

p {
    color: #444444;
    margin: 40px 0px 30px 0px;
    text-align: center;
}

.answer {
    color: #444444;
    margin: 5px 0px 30px 0px;
    text-align: center;
    font-weight: bold;
    font-size: 18px;

}

.image {
    width: 30%;
    display: block;
    margin: 30px auto 0px;
}

form {
    text-align: center;
}

footer {
    background-color: #c0cac4;
    margin: -8px;
    width: 100%;
    position: absolute;
   }

   small {
    margin: 15px 25px;
    left: 0;
    bottom: 0;
   }
最後にrequirements.txtがこちらです。
absl-py==0.9.0
astor==0.8.1
bleach==3.1.5
bottle==0.12.18
click==7.1.2
certifi==2020.6.20
chardet==3.0.4
flask==2.0.1
future==0.18.2
gast==0.3.3
grpcio==1.31.0
gunicorn==20.0.4
h5py==2.10.0
html5lib==1.1
itsdangerous==2.0
idna==2.10
Jinja2==3.0.1
line-bot-sdk==1.16.0
Markdown==3.2.2
MarkupSafe==2.0
numpy==1.18.0
oauthlib==3.1.0
pillow==7.2.0
protobuf==3.12.4
PyYAML==5.4.1
python-dotenv==0.14.0
requests==2.25.1
scipy==1.4.1
six==1.15.0
tensorboard==2.3.0
tensorflow-cpu==2.3.0
termcolor==1.1.0
urllib3==1.26.5
Werkzeug==2.0.0
以上となります。
結果と改善点
結果は以下に、
エポック数を30、 50、 100、 150、 200と変えて学習した出力値をご確認下さい。
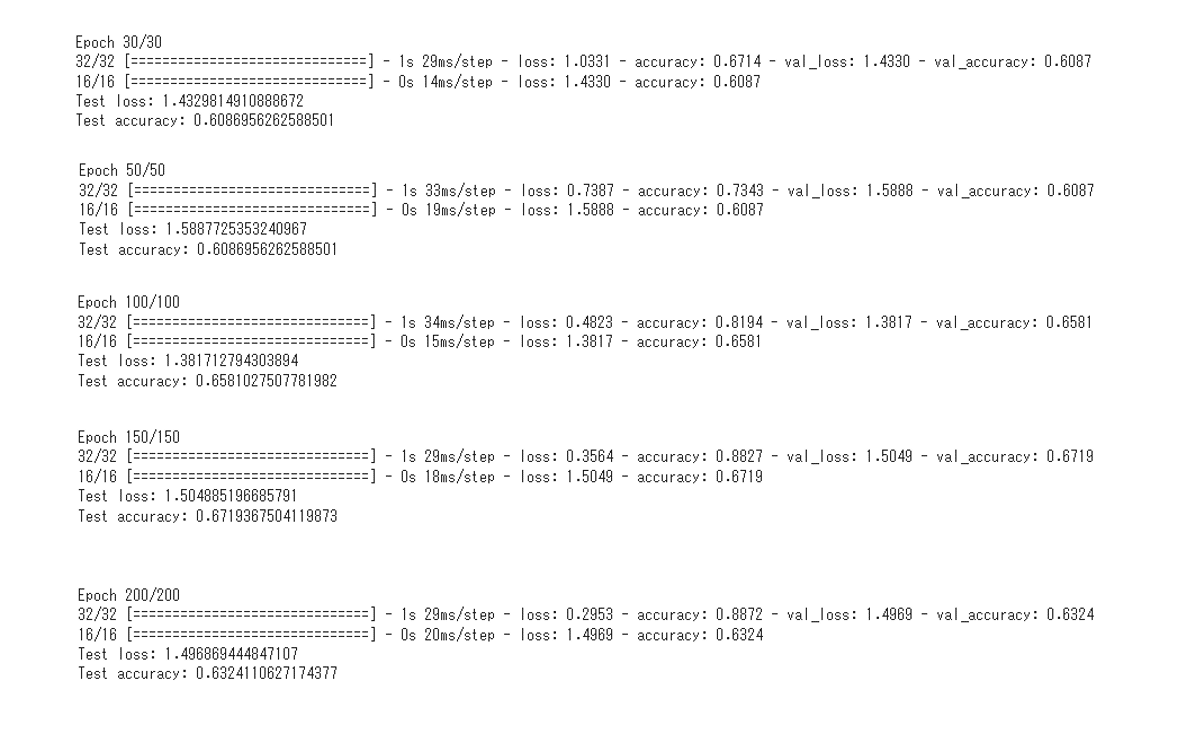
エポック数30 : Test lossは1.4329814910888672
Test accuracyは0.6086956262588501
エポック数50 : Test lossは1.5887725353240967
Test accuracyは0.6086956262588501
エポック数100 : Test lossは1.381712794303894
Test accuracyは0.6581027507781982
エポック数150 : Test lossは1.504885196685791
Test accuracyは0.6719367504119873
エポック数200 : Test lossは1.496869444847107
Test accuracyは0.6324110627174377
上記の結果をみて、エポック数が30、50、100は学習不足。エポック数が200に関しては過学習であることが分かりました。そのため、エポック数は150で設定しました。
また、混合行列で相関関係を以下に示します。
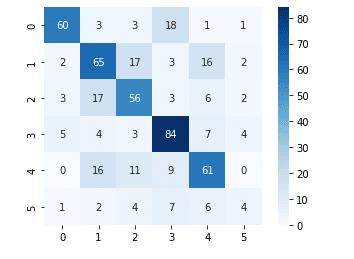
ラベル2:鉄 ラベル3:紙
ラベル4:プラスチック ラベル5:生ゴミ
1行目、ラベル0の段ボールとラベル3の紙が相関が高いことが分かります。
データセット内の段ボール画像と紙画像を見ても個人的な意見ではありますが類似点が多くありましたので、うまく識別するためにも工夫が必要だと感じました。
今後の展望としまして、
初めは、精度80%以上を目標にしていましたが、期待した精度に届くことができませんでした。
理由としましては、
1. 学習用の画像が少なかったこと。
2. 最適なモデルを選べたのかというところです。
学習用の画像が少なかったことに関しては、今回使用したデータセット内の画像を水増しして精度を向上できるか試して行きたいと思います。
最適なモデルを選べたのかという点に関しては、VGG16ではなく、
Inception-v3モデルにも興味があるのでこれも検証してみたいと思います。
この記事が気に入ったらサポートをしてみませんか?