
UE5から始める C++ & BP 06 【C++版】 四則演算(+ - x ÷)
昨日はこの記事を書いていたら80 LEVELから流れてきた動画にびっくりしました。
AIが動画を解析して人のモーションを抽出してくれる。
しかもフリーで!
スゴイです。
動画をAIが解析してモーション付けられるのかな?
— ポジTA (@posita33) January 19, 2022
しかも、Freeって書いてある!
すごい! https://t.co/cFaUBtMYQM
実際に触って見たら思いもよらぬ制度だったのでビックリしました。
Webカメラでモーションデータが作れるのは本当にすごいです。
スゴイ連呼しても足りないぐらいスゴイです。
Zennの方でチュートリアル書きました。
是非触ってみてください。
C++&BPPの基本文法が書き終わったら、Zennの方でチュートリアル記事は書いていくことにします。
noteの方が読んだ本とかの書評とかマインドSet的な記事を書きます。
【C++版】c++ 四則演算(+ - x ÷)
VisualStudioを開いて、編集するファイルを表示する
プロジェクトを閉じていたら、プロジェクトを開き、
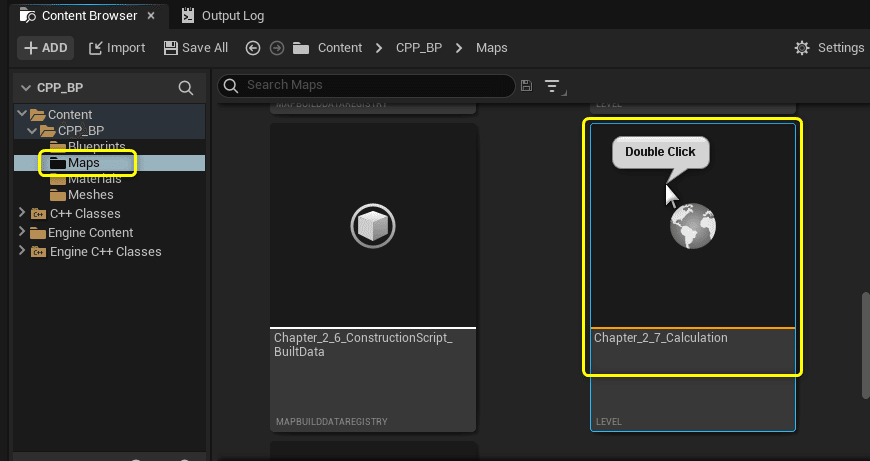
「Chapter_2_7_Calculation」を開きます。
ToolsからVisual Studioを開きます。

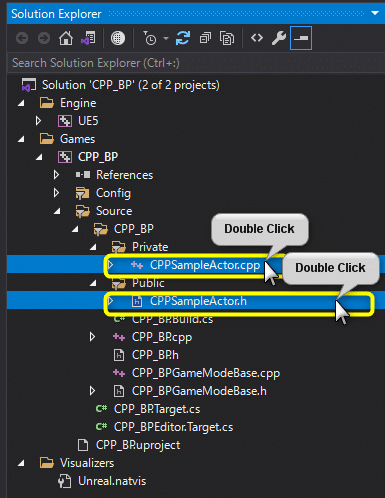
Solution Explorerから今回編集する2つのファイルを開きます。
CPPSampleActor.cpp
CPPSampleActor.h
C++でBlueprintの四則演算を再現する
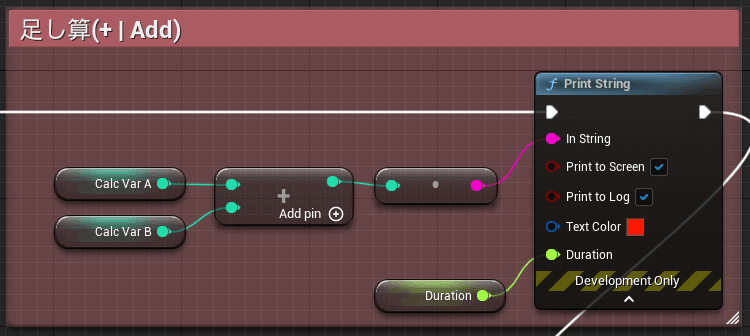
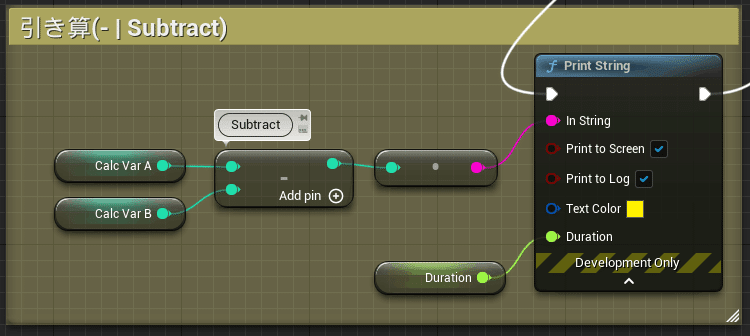
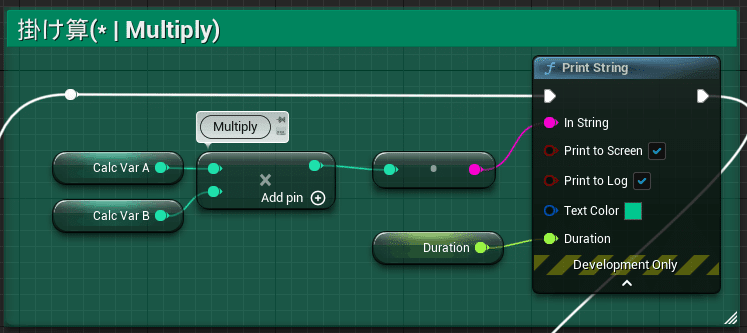
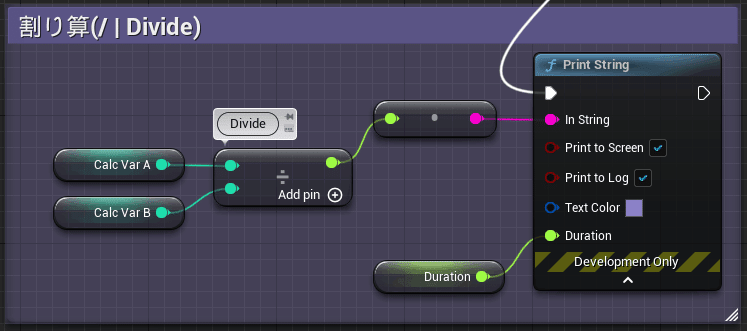
Blueprint版で実装した四則演算の結果をPrintStringで出力する処理をC++で再現します。
赤:Add(足し算)ノード
黄:Subtract(引き算)ノード
緑:Multiply(掛け算)ノード
青:Divide(割り算)ノード
変数を宣言する
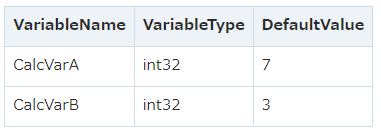
Blueprint同様にVariableType:Integerの変数を二つ宣言します。
CPPSampleActor.h
private:
	// 計算用の変数
	int32 CalcVarA = 7;
	int32 CalcVarB = 3;
VariableType:int(整数型)の種類
BlueprintではVariableTypeに「Integer」を設定しました。
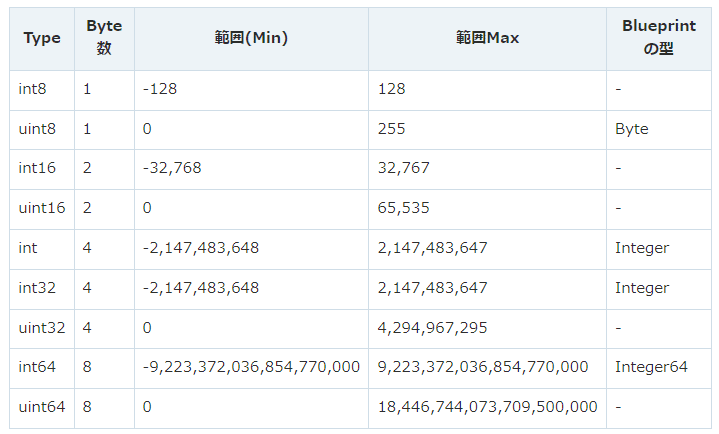
C++ではVariableTypeに「int32」を設定しましたが、同じ範囲をもつVariableTypeです。
C++で使用できるintの種類を表にしました。
1Byte = 8bit
intの右側の数値から8で割るとByte数が出ます。

例) int32は 32/8 = 4(Byte)

±(プラスマイナス)かどうかを決めるためには、1bitが必要です。
先頭のuはunsigned(符号無し)の意味で
-(マイナス)かどうかの1bitを数値のために使うため、最大値が大きくなり、最小値は0になります。
足し算の処理を再現する
まずはAdd(足し算)ノードを再現してみましょう。
CPPSampleActor.cpp BeginePlay関数に処理を追記します。
	// Add(足し算)の処理
	int32 ResultAdd = UKismetMathLibrary::Add_IntInt(CalcVarA,CalcVarB);
	FString StrResultAdd = Conv_IntToString(ResultAdd);
	UKismetSystemLibrary::PrintString(
		this
		, StrResultAdd
		, true
		, true
		, FColor::Red
		, Duration);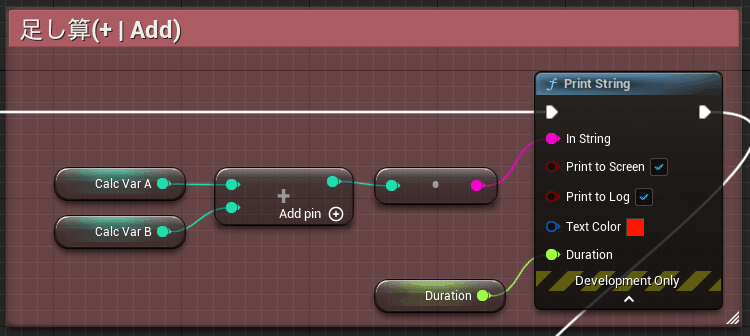
[Add]ノードは「KismetMathLibrary.h」で[Add_IntInt]関数として宣言されています。
Blueprintを再現するので、使用するには「KismetMathLibrary.h」をincludeします。
#include "Kismet/KismetMathLibrary.h" // 追加

int32 ResultAdd = UKismetMathLibrary::Add_IntInt(CalcVarA,CalcVarB);「KismetMathLibrary.h」の[Add_IntInt]関数を見てみましょう。KismetMathLibrary.h
/** Addition (A + B) */
UFUNCTION(BlueprintPure, meta=(DisplayName = "int + int", CompactNodeTitle = "+", Keywords = "+ add plus", CommutativeAssociativeBinaryOperator = "true"), Category="Math|Integer")
static int32 Add_IntInt(int32 A, int32 B = 1);
「KismetMathLibrary.ini」で処理が実装されています。
実際に行っていることは「A + B」です。
KISMET_MATH_FORCEINLINE
int32 UKismetMathLibrary::Add_IntInt(int32 A, int32 B)
{
	return A + B;
}
[Add_IntInt]関数を使用しないで書いてみましょう。
int32 ResultAdd = UKismetMathLibrary::Add_IntInt(CalcVarA,CalcVarB);
   ↓
int32 ResultAdd = CalcVarA + CalcVarB;
[Conv_IntToString]関数でint32からFStringに変換しています。
こちらも[Conv_IntToString]関数を使わずに書いてみましょう。
//Conv_IntToString()を使用するにはincludeの追加が必要です
#include "Kismet/KismetStringLibrary.h"

	FString StrResultAdd = Conv_IntToString(ResultAdd);

//Conv_IntToString()のint32 > FString変換処理
	FString::Printf(TEXT("%d"), InInt);
PrintString関数以外は、Blueprintで使用したノードを使用しない書き方です。
CPPSampleActor.cpp BeginePlay()
	// Add(足し算)の処理
	int32 ResultAdd = CalcVarA + CalcVarB;
	FString StrResultAdd = FString::Printf(TEXT("%d"), ResultAdd);
	UKismetSystemLibrary::PrintString(
		this
		, StrResultAdd
		, true
		, true
		, FColor::Red
		, Duration);
Ctrl + Sでファイルを保存し、Compileを行います。

LevelEditorに戻り「CPPSampleActor」をViewportに配置します。
Blueprit側のPrintStringが出力されると確認しづらいので、Viewportに配置した「BP_SampleActor」を削除します。
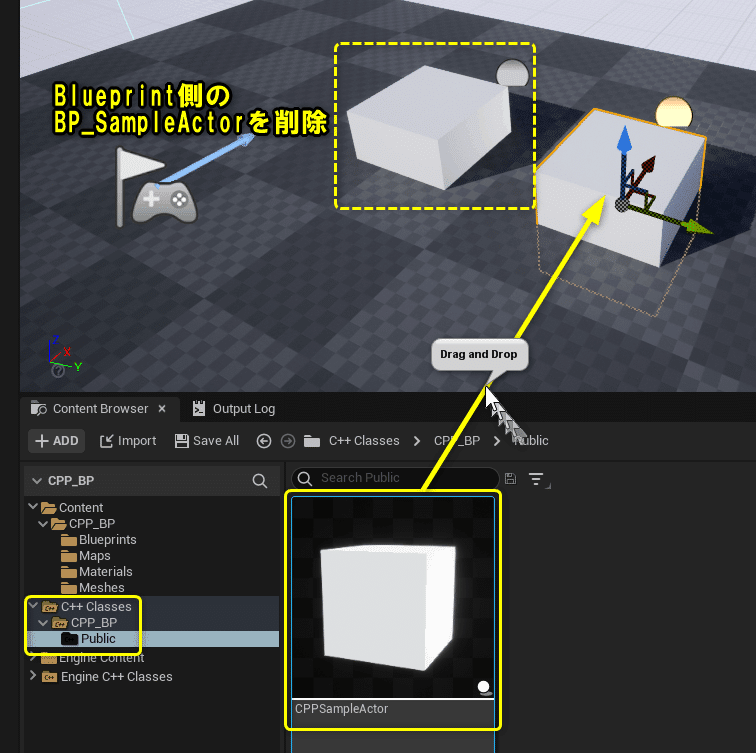
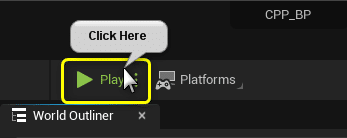
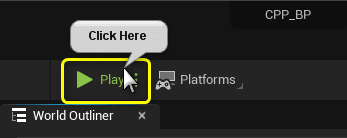
Level Editorの[Play]ボタンをクリックします。
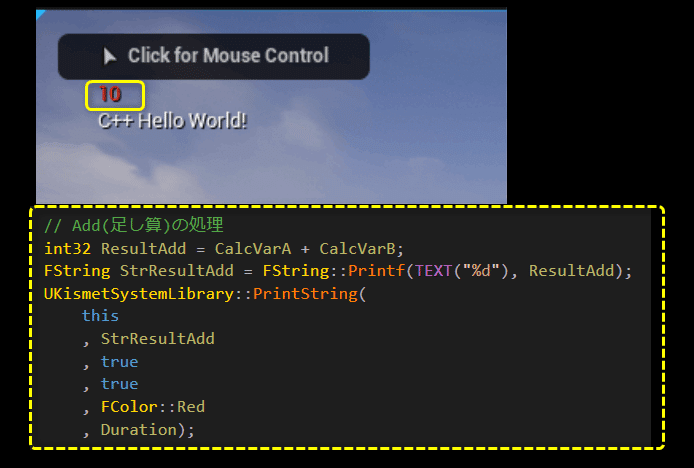
CalcVarA + CalcVarB(7+3)の結果が正しく出力されました。
引き算、掛け算、割り算の処理を再現する
それでは足し算以外の四則演算の処理を書いていきましょう。
// C++の四則演算の書き方
CalcVarA + CalcVarB // 足し算
CalcVarA - CalcVarB // 引き算
CalcVarA * CalcVarB // 掛け算
CalcVarA / CalcVarB // 割り算数式に使用する「+」などの文字は「演算子」と言います。
「数式の演算子」と「プログラミングの演算子」では、掛け算と割り算の記号が違います。
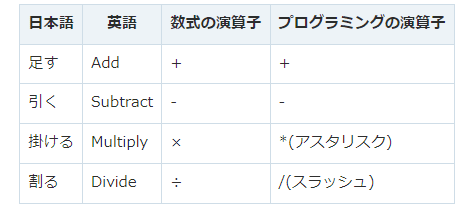
Blueprint以外にもMaterialなど他のEditorでも四則演算ノードが用意されています。
ノードのヘッダ部分に英語が表示されますので、四則演算の英単語を覚えていくと対応することが意味が分かります。
	// Subtract(引き算)の処理
	int32 ResultSubtract = CalcVarA - CalcVarB;
	FString StrResultSubtract = FString::Printf(TEXT("%d"), ResultSubtract);
	UKismetSystemLibrary::PrintString(
		this
		, StrResultSubtract
		, true
		, true
		, FColor::Yellow
		, Duration);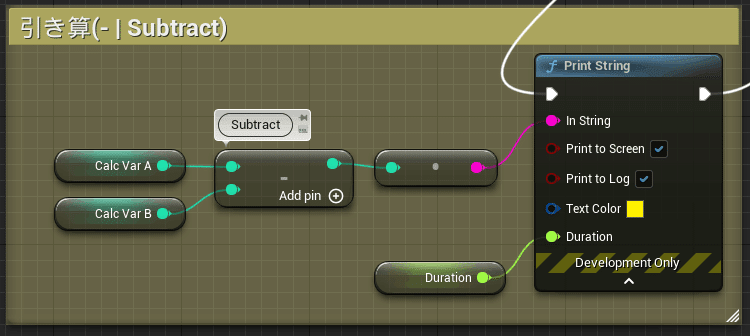
	// Multiply(掛け算)の処理
	int32 ResultMultiply = CalcVarA * CalcVarB;
	FString StrResultMultiply = FString::Printf(TEXT("%d"), ResultMultiply);
	UKismetSystemLibrary::PrintString(
		this
		, StrResultMultiply
		, true
		, true
		, FColor::Green
		, Duration);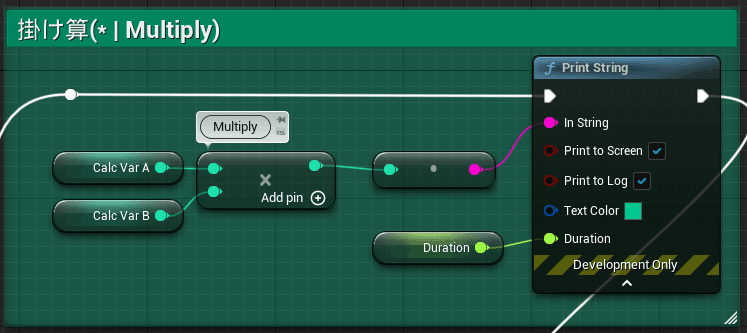
	// Divide(割り算)の処理
	int32 ResultDivide = CalcVarA / CalcVarB;
	FString StrResultDivide = FString::Printf(TEXT("%d"), ResultDivide);
	UKismetSystemLibrary::PrintString(
		this
		, StrResultDivide
		, true
		, true
		, FColor::Blue
		, Duration);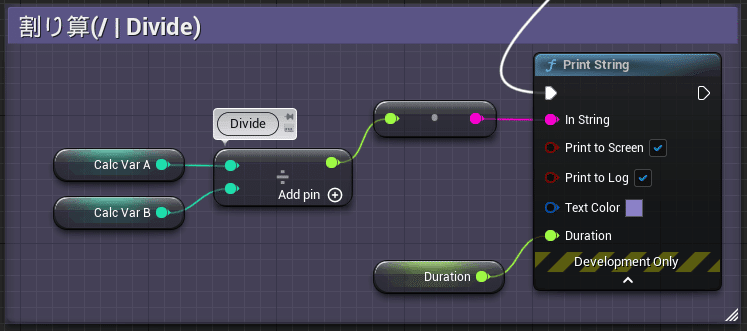
Ctrl + Sでファイルを保存し、Compileを行います。

Level Editorの[Play]ボタンをクリックします。
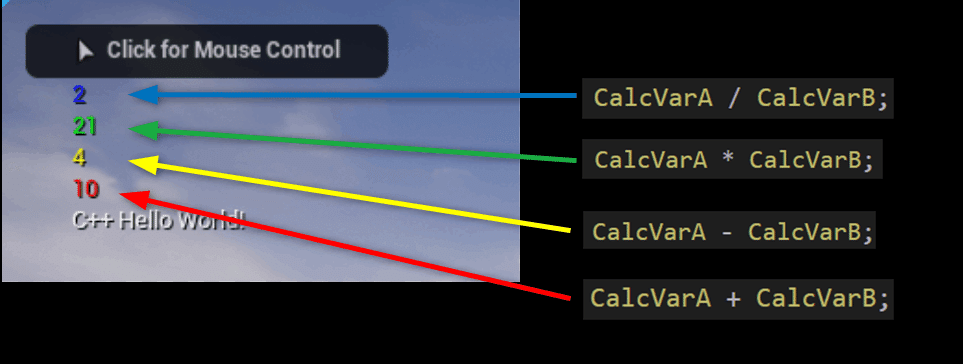
四則演算の結果が正しく表示されました。
Blueprintの時と同様に、割り算の結果が小数点切り捨てになります。
割り算の結果を小数点まで表示させる
割り算の結果が小数点切り捨てになります。
Blueprintでは小数点まで表示させるには変数の型を[Integer]を[Float]に変換することで解決できました。
C++で[int32]から[float]に変換(Cast)させて小数点を扱うことが出来る処理です。
	// Divide(割り算)の処理(int > float)
	float ResultDivide = (float)CalcVarA / (float)CalcVarB;
	FString StrResultDivide = FString::Printf(TEXT("%f"), ResultDivide);
	UKismetSystemLibrary::PrintString(
		this
		, StrResultDivide
		, true
		, true
		, FColor::Blue
		, Duration);
VariableTypeがint32の変数[CalcVarA],[CalcVarB]の変数型をヘッダーファイルでFloatに変更することもできます。
一時的に[int32]から[float]に変換(Cast)させる方法は、変数の前に(VariableType)とすることで変換できます。
出来るVariableTypeと出来ないVariableTypeがありますので、気を付けて使用してください。
int32 ResultDivide = CalcVarA / CalcVarB;
↓
float ResultDivide = (float)CalcVarA / (float)CalcVarB;
少数点を含む文字列をFStringに変換するには、「%d」から「%f」に変更します。
FString::Printf(TEXT("%d"), ResultDivide);
↓
FString::Printf(TEXT("%f"), ResultDivide);
フォーマット指定子といって、「%英字1文字」の部分を、引数に渡した変数で置き換えてくれます。
変数の型によって、「半角英字1文字」の部分を変更します。
Ctrl + Sでファイルを保存し、Compileを行います。

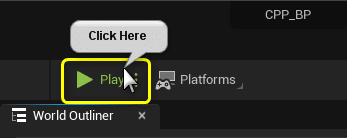
Level Editorの[Play]ボタンをクリックします。
割り算の結果が小数点まで表示されます。

全てを保存して、C++側の説明は終了です
C++側の説明は以上になります。
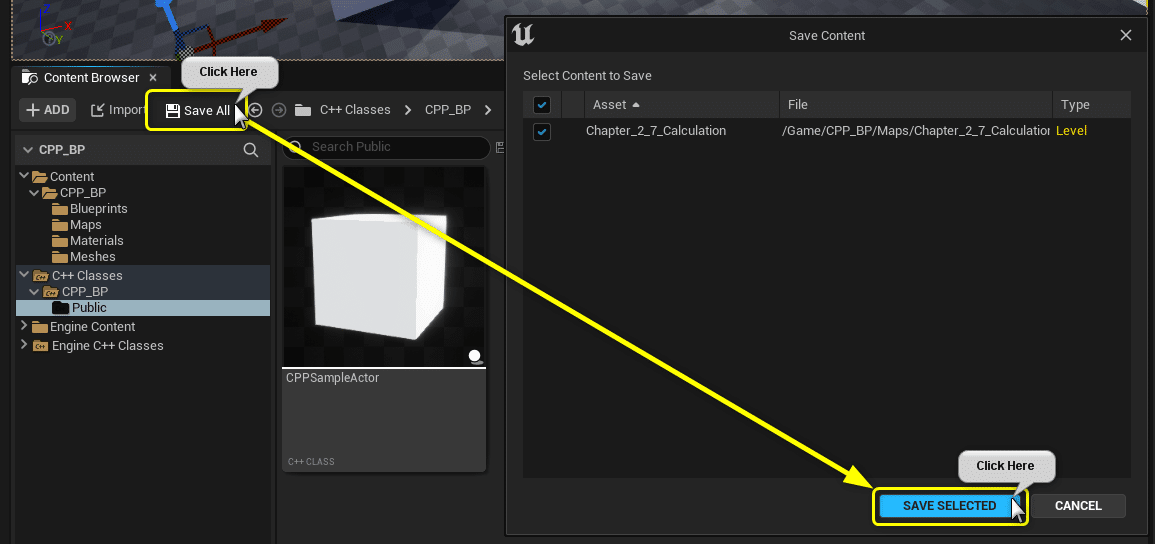
プロジェクトを全て保存しましょう。
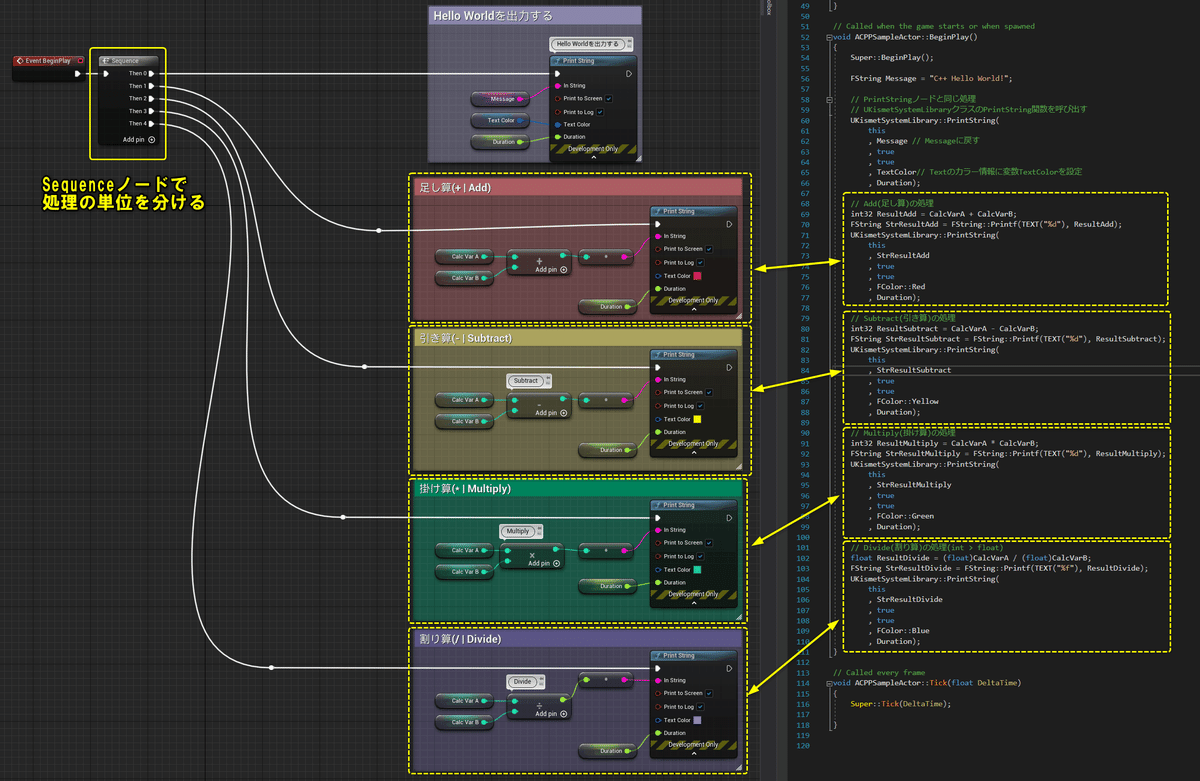
BlueprintとC++の処理を並べてみる
BlueprintとC++の処理を並べてみます。
Blueprintで[Sequence]ノードを使うと、処理を上から下に並べることが出来ます。
まとめ
Blueprintで何気なく使っていた「Add」ノードも
C++で作られているんだなぁ
当然なことですがC++の勉強しないと何処に書かれているのかも分からなかったです。
調べていくことで自然とUnrealEngineのソースコードに触れる機会が増えるのでスゴイ勉強になります。
UE4から始めるC++&Blueprint 進捗とロードマップ
Zennで進捗報告を行い、GitHubでロードマップを公開中です。
よかったら覗いてみてください。
