UE5から始める C++ & BP 08 【C++版】Flow Control(Switch)

ようやく半分のタスクがDoneの状態になりました。
いよいよ折り返し地点!
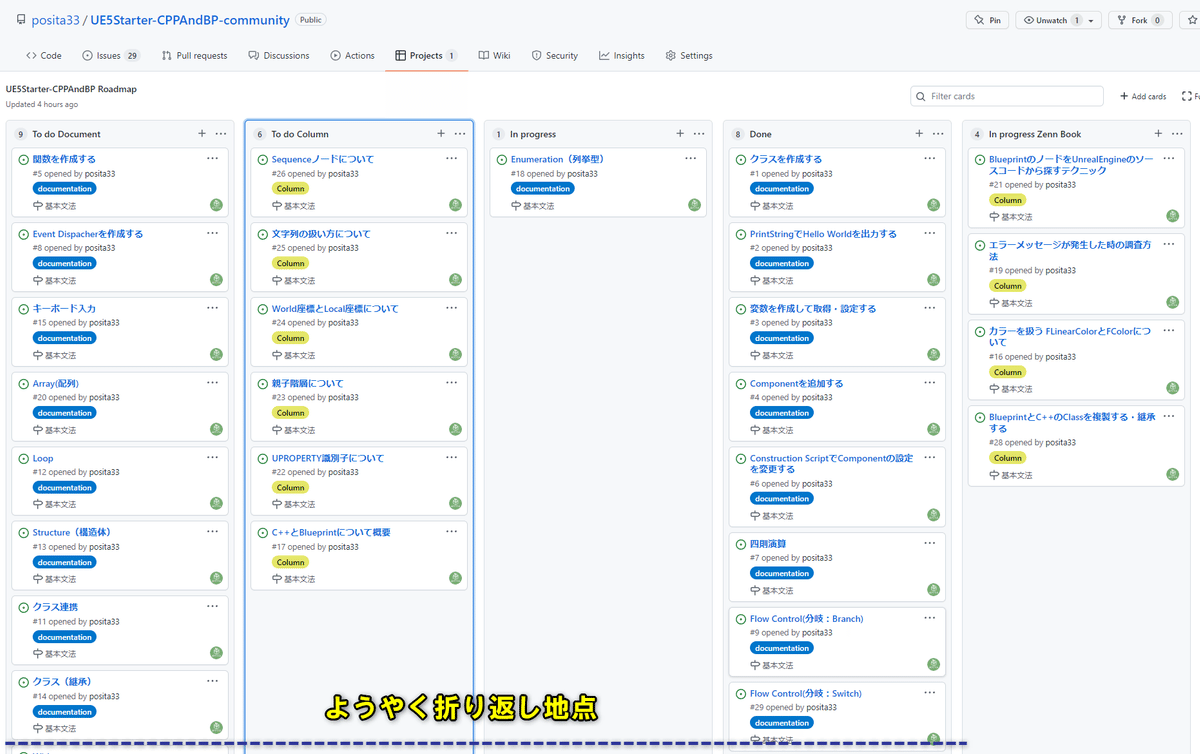
毎日1万文字くらいのペースで書いてやっと半分。
基本文法を2言語分書いているので致し方が無いですね。
意外と軽い気持ちで書き始めたけど、よくよく考えたら結構なボリュームですね。
まだ、そんなに難しくないので、執筆スタイルを確立するのにちょうどいい課題です。
残り半分頑張ろう!
それでは、Blueprintの処理をC++で再現します。
【C++版】Flow Control(Switch)
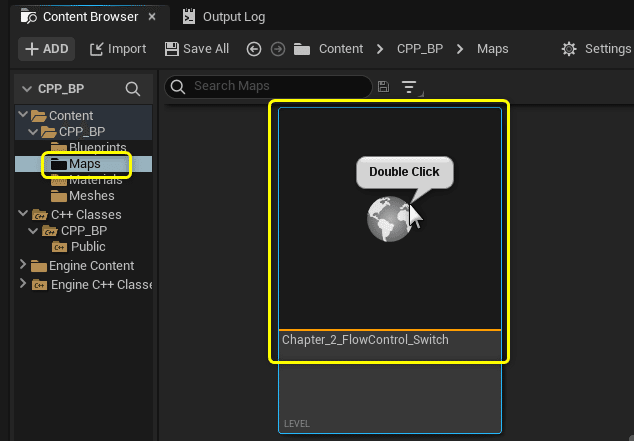
VisualStudioを開いて、編集するファイルを作成する
プロジェクトを閉じていたら、プロジェクトを開き、
「Chapter_2_FlowControl_Switch」を開きます。
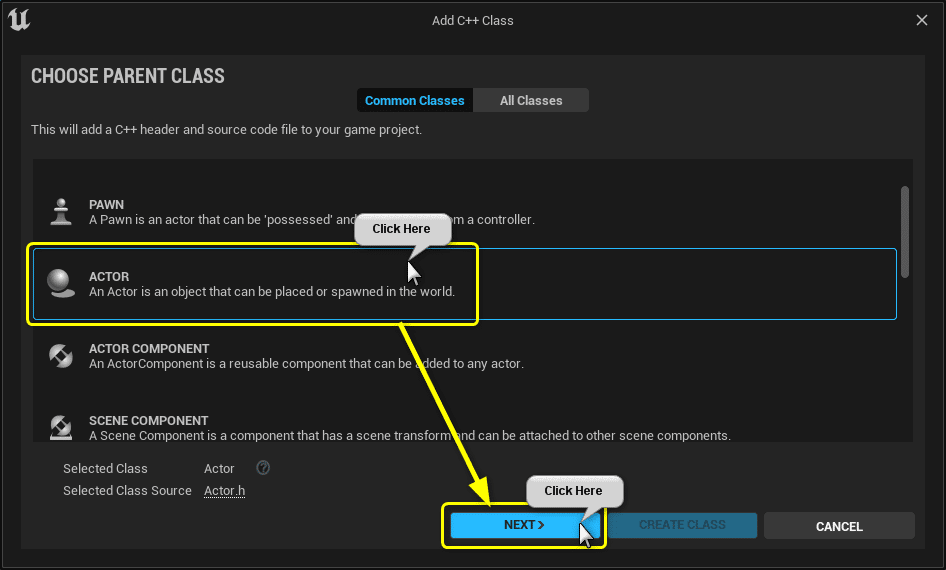
[Tools]メニューから[New C++ Class]を開きます。
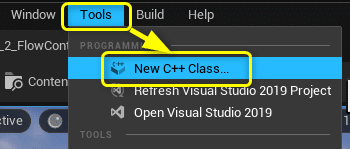
親クラスに[Actor]を選択します。
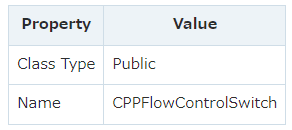
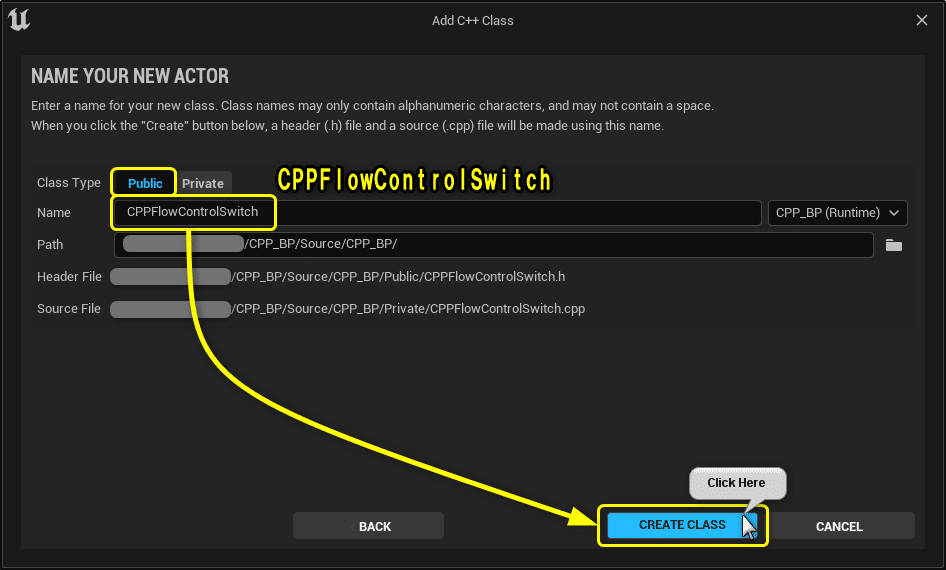
ClassTypeとClass名を設定します。
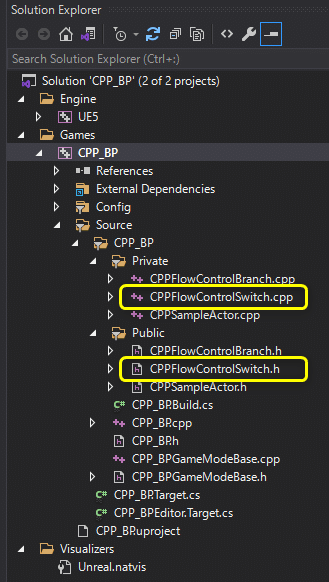
Solution Explorerから今回編集する2つのファイルを開きます。
CPPFlowControlSwitch.h
CPPFlowControlSwitch.cpp
開いたファイルを学習する初期状態に修正します。
CPPFlowControlSwitch.h
// Fill out your copyright notice in the Description page of Project Settings.

#pragma once

#include "CoreMinimal.h"
#include "GameFramework/Actor.h"
#include "CPPFlowControlSwitch.generated.h"

UCLASS()
class CPP_BP_API ACPPFlowControlSwitch : public AActor
{
	GENERATED_BODY()

protected:
	// Called when the game starts or when spawned
	virtual void BeginPlay() override;

private:
	// PrintString関数のDurationに設定する変数
	const float Duration = 10.0f;

	// PrintString関数のTextColorに設定する変数
	const FLinearColor TextColor = FColor(255, 255, 255);

	// 計算用の変数
	int32 CalcVarA = 7;
	int32 CalcVarB = 3;

	// Flow Control用の変数
	bool IsPrintHello = false;
	int32 CalcType = 1;
};
CPPFlowControlSwitch.cpp
// Fill out your copyright notice in the Description page of Project Settings.
#include "CPPFlowControlSwitch.h"
#include "Kismet/KismetSystemLibrary.h"
// Called when the game starts or when spawned
void ACPPFlowControlSwitch::BeginPlay()
{
Super::BeginPlay();
FString Message = "C++ Hello World!";
if (IsPrintHello)
{
// PrintStringノードと同じ処理
// UKismetSystemLibraryクラスのPrintString関数を呼び出す
UKismetSystemLibrary::PrintString(this, Message, true, true, TextColor, Duration);
}
else
{
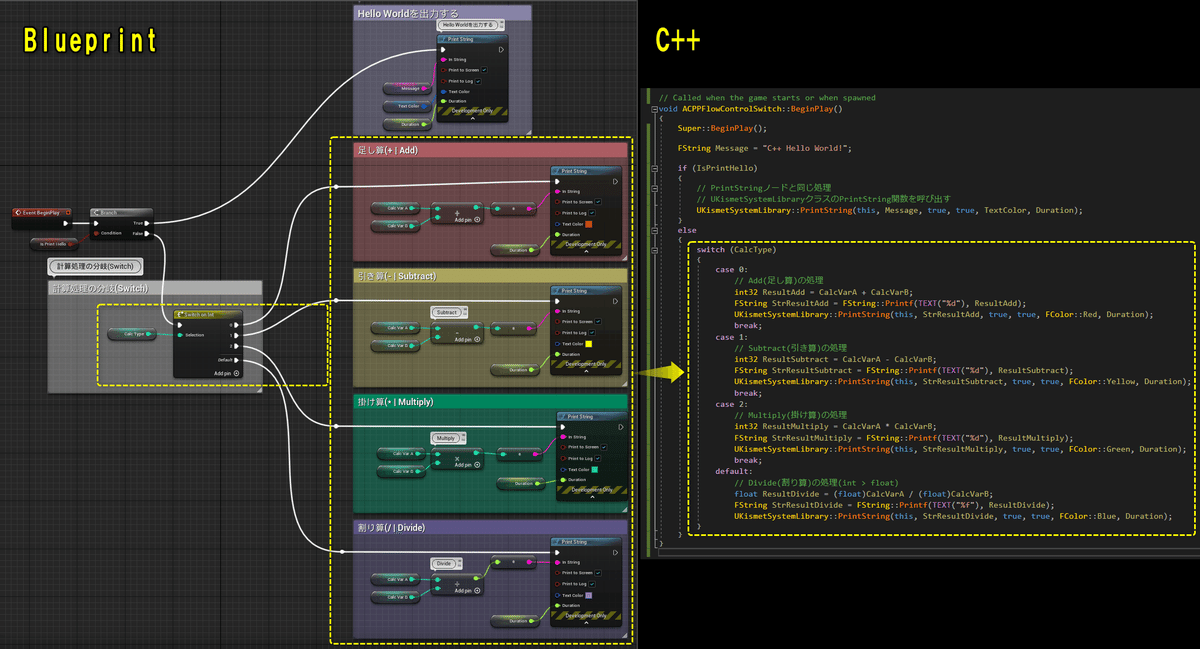
if (CalcType == 0)
{
// Add(足し算)の処理
int32 ResultAdd = CalcVarA + CalcVarB;
FString StrResultAdd = FString::Printf(TEXT("%d"), ResultAdd);
UKismetSystemLibrary::PrintString(this, StrResultAdd, true, true, FColor::Red, Duration);
}
else if (CalcType == 1)
{
// Subtract(引き算)の処理
int32 ResultSubtract = CalcVarA - CalcVarB;
FString StrResultSubtract = FString::Printf(TEXT("%d"), ResultSubtract);
UKismetSystemLibrary::PrintString(this, StrResultSubtract, true, true, FColor::Yellow, Duration);
}
else if (CalcType == 2)
{
// Multiply(掛け算)の処理
int32 ResultMultiply = CalcVarA * CalcVarB;
FString StrResultMultiply = FString::Printf(TEXT("%d"), ResultMultiply);
UKismetSystemLibrary::PrintString(this, StrResultMultiply, true, true, FColor::Green, Duration);
}
else
{
// Divide(割り算)の処理(int > float)
float ResultDivide = (float)CalcVarA / (float)CalcVarB;
FString StrResultDivide = FString::Printf(TEXT("%f"), ResultDivide);
UKismetSystemLibrary::PrintString(this, StrResultDivide, true, true, FColor::Blue, Duration);
}
}
}
Switch文で数値を分岐する(Switchノード)
Blueprintでは[Branch]ノードを使用して、計算結果の出力結果を切り替えていました。
C++で処理を再現します。
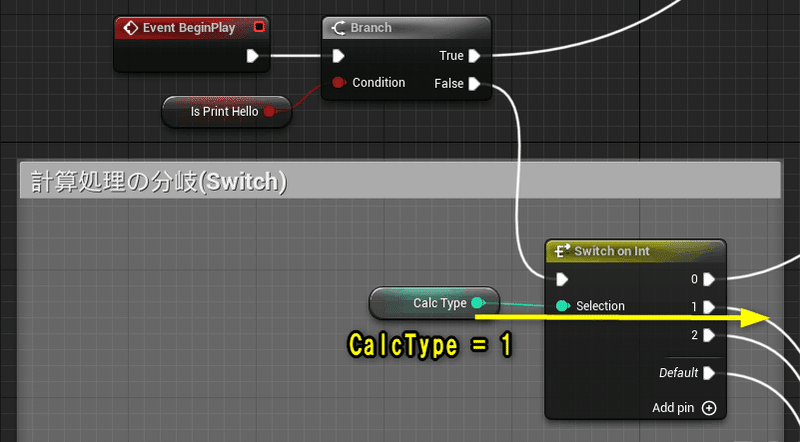
C++ではswitch文を使用します。
switch文の書き方は以下になります。
switch(条件)
{
    case 0:
        処理1;
        break;
    case 1:
        処理2;
        break;
    case 2:
        処理3;
        break;
    default:
        条件が1,2,3のいずれにも当てはまらない時の処理;
}

// case内が複数行の場合は、{}で囲む

switch(条件)
{
    case 0:
    {
        処理1-1;
        処理1-2;
        break;
    }
    case 1:
    {
        処理2-1;
        処理2-2;
        break;
    }
    case 2:
    {
        処理3-1;
        処理3-2;
        break;
    }
    default:
    {
        条件が1,2,3のいずれにも当てはまらない時の処理1;
        条件が1,2,3のいずれにも当てはまらない時の処理2;
    }
}
変数[CalcType]の値をswitch文で切り替える処理に変更します。
CPPFlowControlSwitch.cpp BeginPlay()
void ACPPFlowControlSwitch::BeginPlay()
{
	Super::BeginPlay();

	FString Message = "C++ Hello World!";

	if (IsPrintHello)
	{
		// PrintStringノードと同じ処理
		// UKismetSystemLibraryクラスのPrintString関数を呼び出す
		UKismetSystemLibrary::PrintString(this, Message, true, true, TextColor, Duration);
	}
	else
	{
		switch (CalcType)
		{
			case 0:
			{
				// Add(足し算)の処理
				int32 ResultAdd = CalcVarA + CalcVarB;
				FString StrResultAdd = FString::Printf(TEXT("%d"), ResultAdd);
				UKismetSystemLibrary::PrintString(this, StrResultAdd, true, true, FColor::Red, Duration);
				break;
			}
			case 1:
			{
				// Subtract(引き算)の処理
				int32 ResultSubtract = CalcVarA - CalcVarB;
				FString StrResultSubtract = FString::Printf(TEXT("%d"), ResultSubtract);
				UKismetSystemLibrary::PrintString(this, StrResultSubtract, true, true, FColor::Yellow, Duration);
				break;
			}
			case 2:
			{
				// Multiply(掛け算)の処理
				int32 ResultMultiply = CalcVarA * CalcVarB;
				FString StrResultMultiply = FString::Printf(TEXT("%d"), ResultMultiply);
				UKismetSystemLibrary::PrintString(this, StrResultMultiply, true, true, FColor::Green, Duration);
				break;
			}
			default:
			{
				// Divide(割り算)の処理(int > float)
				float ResultDivide = (float)CalcVarA / (float)CalcVarB;
				FString StrResultDivide = FString::Printf(TEXT("%f"), ResultDivide);
				UKismetSystemLibrary::PrintString(this, StrResultDivide, true, true, FColor::Blue, Duration);
			}
		}
	}
}
Ctrl + Sでファイルを保存し、Compileを行います。

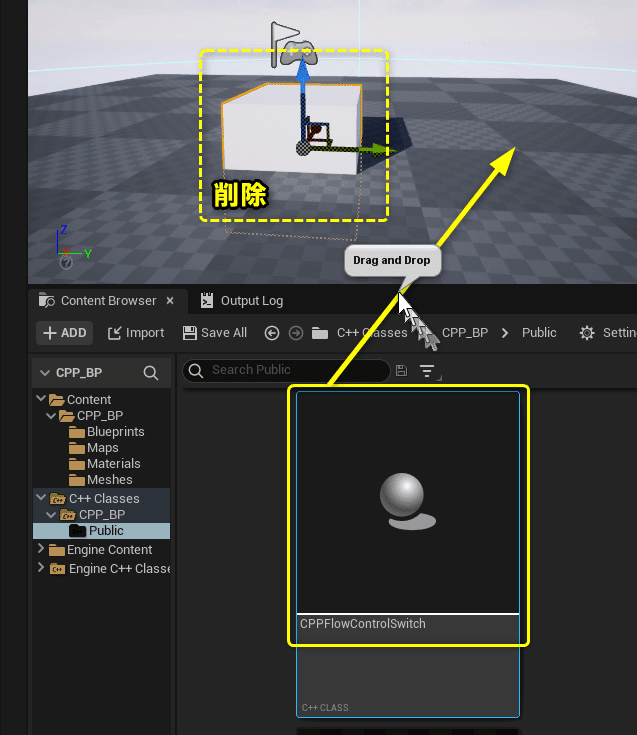
PrintStringの出力結果が分かりづらくなるので、「BP_FlowControl_Switch」を削除します。
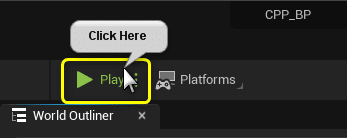
Level Editorの[Play]ボタンをクリックします。
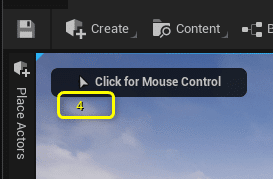
変数[CalcType]の値が[1]なので、引き算の出力結果が表示されます。
C++とBlueprintの比較画像
C++とBlueprintの比較画像です。
全て保存してC++側は終了です。
C++側の説明は以上になります。
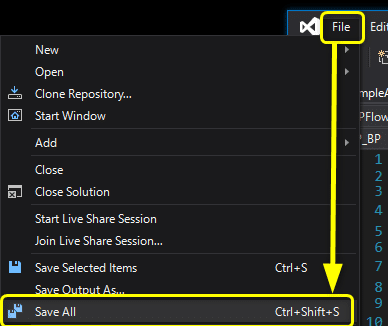
プロジェクトを全て保存しましょう。
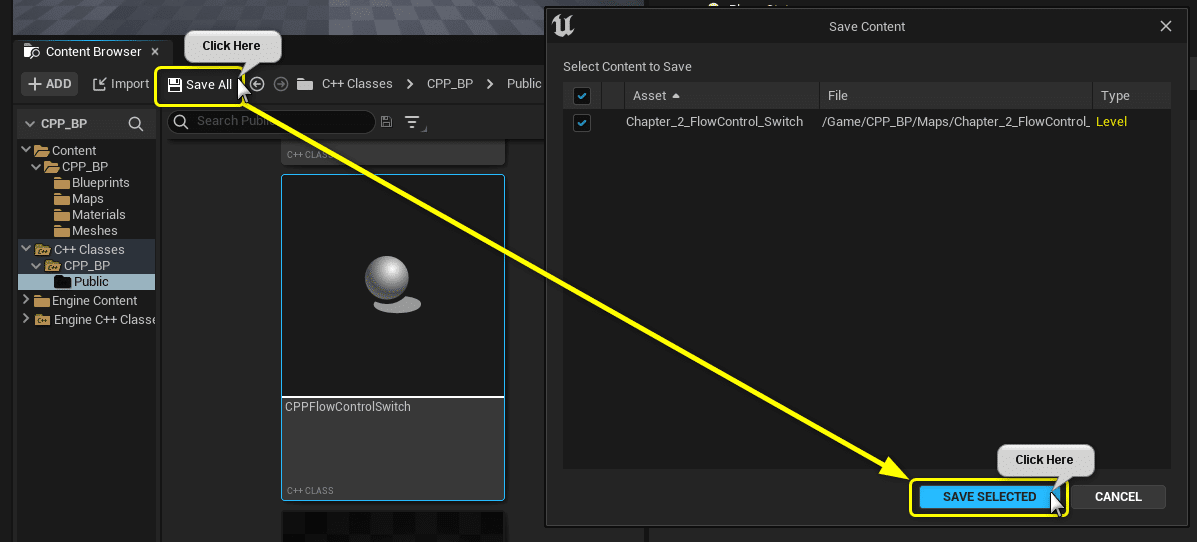
VisualStudioのSolutionも全て保存しましょう。
まとめ
Branch(if文)が抜けるとあっという間に書くことができました。
長いトンネルをやっと抜けた。
そんな気分です。
次なる強敵は関数、クラスについてでしょうか。
プログラミング言語の核となる機能は分かっている側としては文を見れば説明なくても分かるのですが、説明するとなると一気に難しくなります。
相手に伝えて理解してもらう言語化は大切ですね。
UE4から始めるC++&Blueprint 進捗とロードマップ
Zennで進捗報告を行い、GitHubでロードマップを公開中です。
よかったら覗いてみてください。
https://github.com/posita33/UE5Starter-CPPAndBP-community/projects/2
この記事が気に入ったらサポートをしてみませんか?