AutoGenをガッツリ試してみる:RAGを利用したソースコードの作成・実行

概要
少し時間が空いてしまいましたが、AutoGenを続けて試してみます。前回はRAGを使ってAgentベースでの検索を試してみました。今回は、ライブラリのドキュメントから使い方を検索しつつ、プログラムを作成して自動で実行をしていきます。Agentの利用により、検索とプログラム作成・実行を一気に繋げられるのは非常に面白いですね。
データの準備
今回の実験では、PFNの開発しているoptunaというライブラリを対象にしてみようと思います。optunaとは、機械学習のハイパーパラメータを最適化するためのライブラリです。機械学習をする上で、様々なパラメータを手作業で試行錯誤せずに自動で探索してくれるのは非常に便利で、僕自身もよく使っております。
RAGを利用するに当たり、optunaのマニュアルのデータを取得する必要があり、markdown形式のデータを作成します。まずは適当な場所にoptunaのリポジトリをクローンしましょう。
git clone https://github.com/optuna/optuna.gitoptunaのマニュアル類は、optuna/docsに格納されています。sphinxを使ってマークダウンのドキュメントを作成していきます。まずはマークダウンを出力できるようにライブラリをインストール。
pip install sphinx_markdown_builder次に、以下をoptuna/docs/source/conf.pyとして保存
extensions = [
    'sphinx_markdown_builder'
]
あとは、マークダウン形式でビルドしておきます。ビルドにおいて足りないライブラリが出ると思うけど、各々の環境次第だと思うので、頑張ってインストールします。
sphinx-build -M markdown ./source ./build最後に、ビルドしたディレクトリをRAG用のディレクトリとして、作業用のディレクトリにコピーしておきます。名称を[workspace]/referenceとしておきます。これで準備は出来たので
cp -r ./build [workspace]/referenceOptunaのドキュメントからプログラムを実行
インストール
まずはAutoGenのインストールをします。今回は、RAG用のパッケージをインストールする必要があるようで、以下のようにします。また、optunaが入っていなければ、それもインストールします。
pip install -U "pyautogen[retrievechat]"
pip install optuna
実行
前回までと同様に、インポートをしていきます。
import chromadb
from autogen.agentchat.contrib.retrieve_assistant_agent import RetrieveAssistantAgent
from autogen.agentchat.contrib.retrieve_user_proxy_agent import RetrieveUserProxyAgent
次にAPIキー周りを設定します。
config_list = [
    {
        "model": "gpt-4",
        "api_key": "<OpenAI APIのキーを入力>"
    }
]
Agentの設定周りも前回とほぼ同様ですが、先ほど作成したマニュアルを格納したディレクトリを指定します。
assistant = RetrieveAssistantAgent(
    name="assistant",
    system_message="You are a helpful assistant.",
    llm_config={
        "request_timeout": 600,
        "seed": 42,
        "config_list": config_list,
    },
)

ragproxyagent = RetrieveUserProxyAgent(
    name="ragproxyagent",
    human_input_mode="NEVER",
    max_consecutive_auto_reply=10,
    retrieve_config={
        "task": "code",
        "docs_path": "./optuna",
        "chunk_token_size": 2000,
        "model": config_list[0]["model"],
        "client": chromadb.PersistentClient(path="./code_ref4"),
        "embedding_model": "all-mpnet-base-v2",
    },
)
まずはoptunaについて質問してみます。
assistant.reset()

qa_problem = "optunaとは何のライブラリですか?"
ragproxyagent.initiate_chat(assistant, problem=qa_problem)
RAGで利用するドキュメント群などがズラズラ表示されますが、以下のような結果が返ってきました。ちゃんと正しい結果が返ってきていそうですね。
Optunaはハイパーパラメータ自動最適化ライブラリです。機械学習モデルのハイパーパラメータを自動的に最適化するためのソフトウェアで、Pythonで書かれています。

キーフィーチャーとしては、以下のようなものがあります:
1. 自動的にパラメータの最適な組み合わせを探索します。
2. パラメータ空間を効率的に探索するための高度な最適化アルゴリズムを提供します。
3. 分散化された環境で並行する複数の試行を効率的に扱うことができます。
4. 試行の進行状況や結果を視覚的に確認するための可視化ツールが提供されています。

また、Optunaは、Pythonの主要な機械学習ライブラリやフレームワークとの統合が容易であるという特徴も持っています。
次にプログラムを書いて実行してもらいましょう。せっかくAgentを使っているので全部丸投げをしてみます。
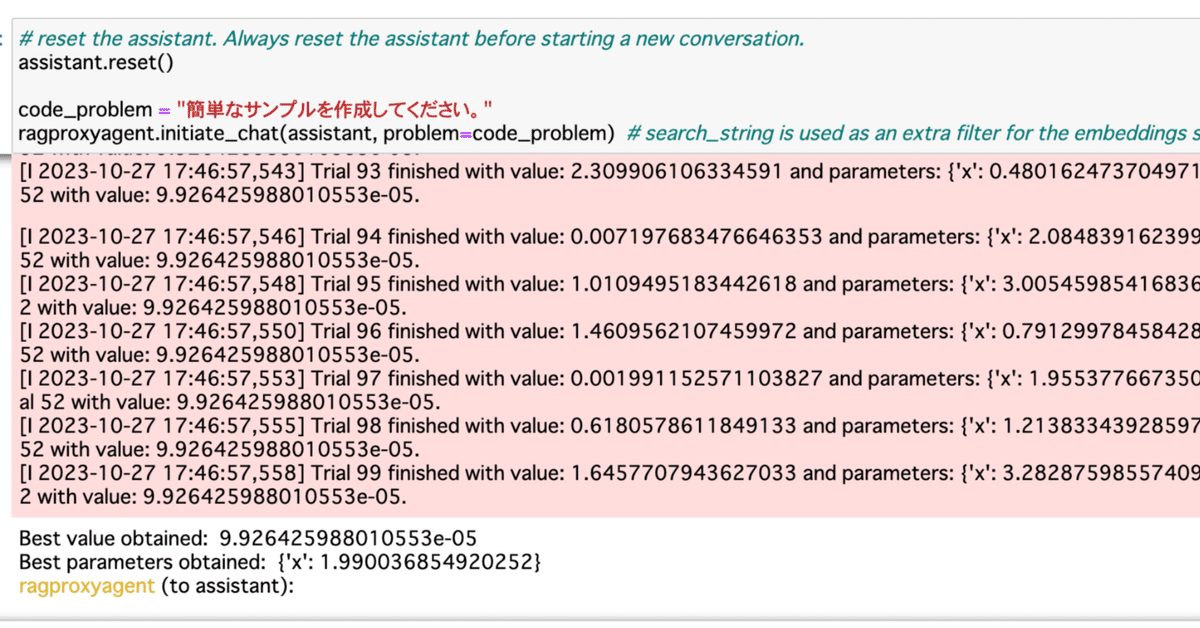
assistant.reset()

code_problem = "簡単なサンプルを作成してください。"
ragproxyagent.initiate_chat(assistant, problem=code_problem)
以下のような返答が返ってきました。さらに、続けて実行もしてくれていそうです。作るものも丸投げしましたが、適当な目的関数を考えてくれて、その最適化をやってくれていそうです。
「簡単なサンプルを作成してください」というリクエストに対して、具体的な内容や言語などが明記されていないため、Python言語による基本的なOptunaの最適化プロセスのサンプルコードを提供します。

```python
# Simple sample code in Python using Optuna for optimization

import optuna

# Objective function to be optimized
def objective(trial):
    x = trial.suggest_uniform('x', -10, 10)
    return (x - 2) ** 2

# Create a study
study = optuna.create_study()

# Optimize the study
study.optimize(objective, n_trials=100)

# Print the result
best_trial = study.best_trial
print("Best value obtained: ", best_trial.value)
print("Best parameters obtained: ", best_trial.params)
```

このコードは、Optunaを使用して、与えられた目的関数 `(x - 2) ^ 2` を最適化します。関数は、xが2のときに最小値0を取ります。そのため、この最適化プロセスの目標は、xを2に最も近づけることで、関数の出力を0に最も近づけることです。
実行結果は長いので最後の何行かだけを以下に挙げます。おおよそx=2になって、目的関数の値がほぼ0になっているのが確認できました。良いですね。
[I 2023-10-27 17:46:57,546] Trial 94 finished with value: 0.007197683476646353 and parameters: {'x': 2.084839162399486}. Best is trial 52 with value: 9.926425988010553e-05.
[I 2023-10-27 17:46:57,548] Trial 95 finished with value: 1.0109495183442618 and parameters: {'x': 3.005459854168361}. Best is trial 52 with value: 9.926425988010553e-05.
[I 2023-10-27 17:46:57,550] Trial 96 finished with value: 1.4609562107459972 and parameters: {'x': 0.7912997845842844}. Best is trial 52 with value: 9.926425988010553e-05.
[I 2023-10-27 17:46:57,553] Trial 97 finished with value: 0.001991152571103827 and parameters: {'x': 1.9553776673502625}. Best is trial 52 with value: 9.926425988010553e-05.
[I 2023-10-27 17:46:57,555] Trial 98 finished with value: 0.6180578611849133 and parameters: {'x': 1.2138334392859784}. Best is trial 52 with value: 9.926425988010553e-05.
[I 2023-10-27 17:46:57,558] Trial 99 finished with value: 1.6457707943627033 and parameters: {'x': 3.282875985574094}. Best is trial 52 with value: 9.926425988010553e-05.

Best value obtained:  9.926425988010553e-05
Best parameters obtained:  {'x': 1.990036854920252}
この問題がドキュメントに書いてあるものをそのままやってるんじゃないの?みたいな気持ちにもなるので、もう少し難しい問題を解いてみましょう。おなじみのタイタニック号の生存者予測問題を最適化させてみましょう。
assistant.reset()

code_problem = "Titanic生存者予測を機械学習で解いて、その最適化をしてください。"
ragproxyagent.initiate_chat(assistant, problem=code_problem)
結果は以下のようになりました。ちょっと長々と文章が出てきちゃったのでコードだけ貼ります。あら、titanicじゃなくてirisになってる笑
import optuna
from sklearn.datasets import load_iris
from sklearn.ensemble import RandomForestClassifier
from sklearn.model_selection import cross_val_score

# loads iris dataset
iris = load_iris()
X = iris.data
y = iris.target

def objective(trial):
    # hyperparameters to optimize
    n_estimators = trial.suggest_int("n_estimators", 2, 150)
    max_depth = trial.suggest_int("max_depth", 2, 32)

    # model
    clf = RandomForestClassifier(n_estimators=n_estimators, max_depth=max_depth, random_state=42)

    # cross validation and metric calculation
    score = cross_val_score(clf, X, y, n_jobs=-1, cv=3)
    accuracy = score.mean()

    return accuracy

# create study and optimization
study = optuna.create_study(direction="maximize")
study.optimize(objective, n_trials=100)

print("Best trial:")
trial = study.best_trial
print(f"  Value: {trial.value}")
print("  Params: ")
for key, value in trial.params.items():
   print(f"    {key}: {value}")
とりあえず実行もしてくれているので、結果も見てみよう。よくわからないけど、多分n_estimatorsとmax_depthについて最適化したということでしょう。精度も97%という数値になっていますね。
[I 2023-10-27 18:25:05,274] Trial 96 finished with value: 0.9666666666666667 and parameters: {'n_estimators': 101, 'max_depth': 30}. Best is trial 0 with value: 0.9666666666666667.
[I 2023-10-27 18:25:05,332] Trial 97 finished with value: 0.9666666666666667 and parameters: {'n_estimators': 95, 'max_depth': 4}. Best is trial 0 with value: 0.9666666666666667.
[I 2023-10-27 18:25:05,397] Trial 98 finished with value: 0.9666666666666667 and parameters: {'n_estimators': 113, 'max_depth': 18}. Best is trial 0 with value: 0.9666666666666667.
[I 2023-10-27 18:25:05,432] Trial 99 finished with value: 0.9666666666666667 and parameters: {'n_estimators': 45, 'max_depth': 27}. Best is trial 0 with value: 0.9666666666666667.

Best trial:
  Value: 0.9666666666666667
  Params:
    n_estimators: 94
    max_depth: 14
再チャレンジ
さて、irisで動いても仕方ないので、titanicでやってみましょう。確実にやってもらえるようにデータをローカルにダウンロードして実行してみましょう。
wget https://raw.githubusercontent.com/datasciencedojo/datasets/master/titanic.csv続いて、データの位置も指定した上で、最適化をしてもらいましょう。ダウンロードしたtitanic.csvを指定します。
assistant.reset()

code_problem = "Titanic生存者予測を機械学習で解いて、その最適化をしてください。titanicデータはtitanic.csvから取得できます。"
ragproxyagent.initiate_chat(assistant, problem=code_problem)
作られたコードは以下のようになりました。データをtrain/validで7:3に分けてvalidデータに対して最適化をしているようです。パラメータとしては、先程と同様に深さと推論器の数について最適化しているようです。
import optuna
import pandas as pd
from sklearn.ensemble import RandomForestClassifier
from sklearn.metrics import accuracy_score
from sklearn.model_selection import train_test_split

# データの読み込み
titanic = pd.read_csv('titanic.csv')

# データの前処理
titanic = titanic.drop(['Name', 'Cabin', 'Ticket', 'PassengerId'], axis=1)
titanic = titanic.dropna()

# カテゴリー変数の変換
titanic['Sex'] = titanic['Sex'].replace(['male', 'female'], [0, 1])
titanic['Embarked'] = titanic['Embarked'].replace(['S', 'C', 'Q'], [0, 1, 2])

# データ分割
train_x = titanic.drop('Survived', axis=1)
train_y = titanic.Survived
train_x, valid_x, train_y, valid_y = train_test_split(train_x, train_y, test_size=0.3, random_state=42)

# 目的関数の定義
def objective(trial):
    rf_max_depth = trial.suggest_int('rf_max_depth', 2, 32)
    rf_n_estimators = trial.suggest_int('rf_n_estimators', 10, 100)
    classifier_obj = RandomForestClassifier(max_depth=rf_max_depth, n_estimators=rf_n_estimators, random_state=42)
    classifier_obj.fit(train_x, train_y)
    preds = classifier_obj.predict(valid_x)
    accuracy = accuracy_score(valid_y, preds)
    return accuracy

# 最適化の実行
study = optuna.create_study(direction='maximize')
study.optimize(objective, n_trials=100)

# 結果の出力
print('Best trial:')
trial = study.best_trial
print('  Value: ', trial.value)
print('  Params: ')
for key, value in trial.params.items():
    print('    {}: {}'.format(key, value))
実行結果は以下のようになりました、精度80%弱くらいですが、とりあえずはパラメータを最適化できているようですね。
[I 2023-10-27 18:43:04,820] Trial 95 finished with value: 0.7757009345794392 and parameters: {'rf_max_depth': 16, 'rf_n_estimators': 20}. Best is trial 7 with value: 0.780373831775701.
[I 2023-10-27 18:43:04,867] Trial 96 finished with value: 0.7616822429906542 and parameters: {'rf_max_depth': 9, 'rf_n_estimators': 70}. Best is trial 7 with value: 0.780373831775701.
[I 2023-10-27 18:43:04,884] Trial 97 finished with value: 0.7523364485981309 and parameters: {'rf_max_depth': 14, 'rf_n_estimators': 13}. Best is trial 7 with value: 0.780373831775701.
[I 2023-10-27 18:43:04,913] Trial 98 finished with value: 0.7476635514018691 and parameters: {'rf_max_depth': 11, 'rf_n_estimators': 35}. Best is trial 7 with value: 0.780373831775701.
[I 2023-10-27 18:43:04,949] Trial 99 finished with value: 0.7757009345794392 and parameters: {'rf_max_depth': 19, 'rf_n_estimators': 45}. Best is trial 7 with value: 0.780373831775701.

Best trial:
  Value:  0.780373831775701
  Params:
    rf_max_depth: 4
    rf_n_estimators: 76
終わりに
通常のRAGでは検索しかできていなかったのに対して、Agentらしく、RAGとプログラムコード作成・実行という複雑なタスクを解けることが確認できました。RAGを使うことで、ChatGPTが知らないようなライブラリに対しても、コードを生成することが出来ます。次回はまた別の機能も探っていきたいのでよろしくお願いします。
この記事が気に入ったらサポートをしてみませんか?