DNxHRのDataLevel問題のメモ_PremierePro_DavinciResolve

2023/05/08追記
DaVinci18.5betaでの検証の追記
PremireProとDavinciResolveを使った書き出し時のDataLevelについてのメモを残す。
別な情報、間違ってる情報などがあったら是非教えてください。
ワークフロー
Premiere Proでオフラインを行い、Davinci Resolveでカラー後、Premiere Proに戻す(Round trip)させる状況を前提として話を進めます。
起きた問題
Premiere ProからDavinci Resolveへ送り、カラーを済ませ、
書き出しを、
mov
DNxHR 444 12bit
で行い、Premiere Proに戻したところ
色が軽くなっているように感じた。(薄くなっている、彩度が少し減少している、コントラストが弱くなっている)
プレビューだけがおかしいのかなと感じたのだが、プロジェクトモニター(プロジェクトモニターウィンドウ)からScreenshotを書き出してみて、Photoshopに入れてみたところ画像の状態でもその色が表示されている。
Premiere ProのLumetriスコープで確認してみたところ10より下あたりから0までの情報、100から90上の情報がないことに気づいた。
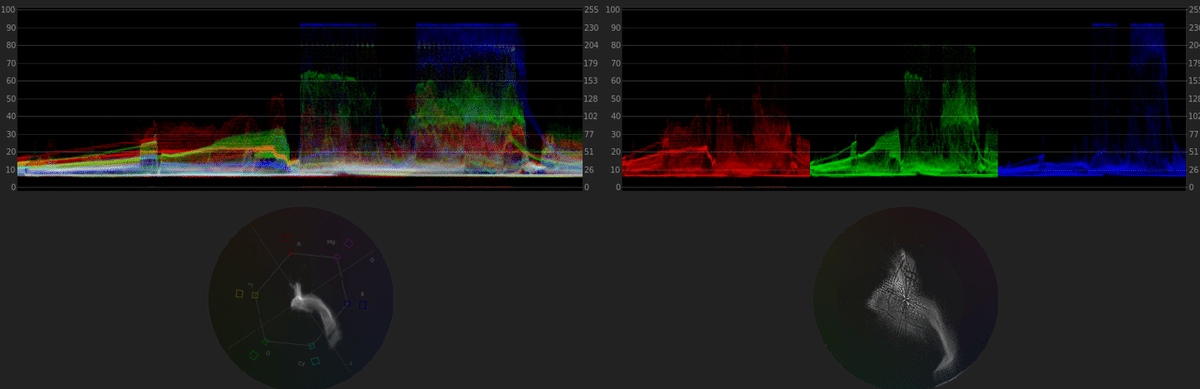
これはDataLevelで起こる状態に当てはまるような現象だと感づいた。
Data Level
データレベルを知らない人のために一応説明しておく。
映像にはデータレベルと呼ばれるものがある。
二つあって、ビデオレンジ(リーガルレンジ、TV legal range)とフルレンジと呼ばれるものがある。
それぞれ保有できる情報が違い、
Video range (16 - 235 : 8bit, 64 - 940 : 10bit)
Full range (0 - 255 : 8 bit, 0 - 1023 : 10bit)
と異なってくる。それぞれによってどこを黒とし、白をするかがkとなってくる。
なぜこんなことになっているかという部分の歴史については、技術的な面から色々あったのだろう。
ここでは本筋から外れるのでこれ以上はやめて、分かりやすい参考リンクを貼っておくので参照してください。
DataLevel - References
Data vs. Legal TV Levels
Data range levels (0-255 or 0-1023), or TV legal levels (16-235 or 64-940)
[DaVinci] DaVinci内でのデータレベルの処理について
YUVとRGBの違い - 改訂版
yamaQ colorz
8bit は 0 から 255、10bit は 0 から 1023 の階調を表現 できる。映像の一番暗いところから最も明るいところま でを、このデジタルデータの段階の中に割り振っている。 映像データは、過去にアナログのテレビ信号をデジタル 化した時点で生まれた。映像信号の黒レベルから 100% に相当する点を白ピークとしたが、実は 100% よりも若 干明るい映像も送受信することができた。この 100% か ら 108% くらいの白以上に明るい部分をスーパーホワイ トと呼んだ。
アナログからデジタルに D/A 変換する際に、100% で信号をカットしてスーパーホワイトを捨てる方法と、 スーパーホワイトも含めてデータ化する 2 つの方法が ある。メディアファイルから DaVinci Resolve に、イン ポートする場合を考えてみよう。ファイルの階調が 8bit であれば、0 から 255 の階調を保存している。インポー ト時にレベル 255 を 100% と解釈したとして、実はメ ディアファイルを作成した際にはスーパーホワイトを含 んでいたとする。この結果、Resolve 内では元の信号源 よりも暗く映ることになってしまう。逆のケースでレベ ル 255 が 100% だったにも関わらず、Resolve でスーパー
ホワイトと誤った解釈をすると明るくなってしまう。 レベル 255 を 100% とするのをデータレベルが Full と言い、スーパーホワイトとするのを Video と呼ぶ。こ れらの解釈をミスマッチすると前述したような明るさが 意図せずに変わってしまうため、DaVinci Resolve から の入出力ではデータレベルの変換は間違わずにパスしな ければならない。入力部では Media Pool で素材の Clip Attributes を開いて Video タブから設定できる。ここで は Auto、Full、Video の 3 つから選択する。Auto にし た場合には、メディアファイルのコーデックが RGB 系 なら Full に、YCbCr 系では Video に設定される。ビデオ モニターの設定は Project Settings の Master Settings に あるが、ここでは Full と Video が選択できる。Auto は ここにはない。VTR への出力時にもこれと同じ項目が設
定できる。ファイル出力部は Deliver ページにあるが、 これは入力部と同じである。
Video レベルの素材を Resolve に取り込んだ際、ウエー ブフォームで見ると 100% 以上のスーパーホワイトは表 示されない。もし 100% 以上の階調を使いたい場合には、 Gain のマスターホイールを絞ってみれば隠れていた部 分が戻ってくる。Video レベルの素材を取り込む際には この仕組みを理解して、隠れている階調を生かすのか捨 てるのかを判断することが必要である。
About YUV Video
原因
調べてみたところどうやらDavinci resolveでの、ある仕様があることが分かった。
Davinci Resolveで書き出し時にData Levelは Auto or Full or Videoが選べて、Autoにすると勝手に空気を読んでData Levelを選んでくれるということになっている。
てっきりRGB 444系のコーデックはFullを選んでくれると勘違いをしていたのだが、そうとも限らないらしい。
Hi guys,
there is a solution to avoid the gamma shift from Resolve to premiere using DNXHR 4444 codec?
In my project i set levels black and white,16-235, but i have to share my export with an editor and i would
avoid problems.
Using DNx RGB codecs (444) set Data Levels to Full, never Auto.
Never say "never" in post-production. :wink:
For workflows in which you're outputting one of the RGB flavors of DNxHR from Resolve to be used in Premiere, you should specify "Full." The reason for this is because Premiere expects "Full" levels from those RGB codecs, but Resolve's "Auto" setting chooses "Video" for all the DNxHR codecs, even the RGB ones.
This seems to violate the convention of using Video for YUV and Full for RGB, like how ProRes does it, but maybe it's because this is for Media Composer or Symphony and they expect Video levels...
と書かれてる記事を見つけた。
I use this workflow every day. For me is like this:
DNxHD or DNxHR in .mov file will be wrong (video) level in Premier if set in Resolve to auto
DNxHD or DNxHR in .mov file will be correct level in Premier if set in Resolve to full
DNxHD or DNxHR in .mxf file will be correct level in Premier if set in Resolve to auto
DNxHD or DNxHR in .mov file will be correct level in Avid if set in Resolve to auto
DNxHD or DNxHR in .mov file will be wrong (video) level in Premier if set in Resolve to full
DNxHD or DNxHR in .mxf file will be correct level in Avid if set in Resolve to auto
From this I use in 99% .mxf instead of .mov it even renders a bit faster.
Both Premier an Avid uses video levels as their base. Not sure but editorial software will always use video levels if not changed in custom workflow.
また、別の人で
The workflow for my tests was as follows:
In Resolve, drop a "SMPTE Color Bar" generator into a timeline
Create a compound clip of the SMTPE Color Bar generator so that it will show up in the Color and Deliver pages
Render out different kinds of DNxHR 444 10-bit and ProRes 4444, each with "Auto," "Full," and "Video"
Bring the different renders into Premiere Pro to see which options precipitate the dreaded gamma shift
By examining the 3.5, 7.5 and 11.5 rectangles, I determined where the gamma shifts were occurring. Here are my results from Resolve Studio 14.2.1 to Premiere Pro CC 12.0.0 and Premiere Pro 12.0.1.

要約すると、最新versionでいつ変わるかは分からないが、現状
DNxHR or DNxHDを mov/mxf の444コーデックを、autoで書き出すとPremiere Proでは色が変わってしまうようだ。
この場合は、Fullを選ばないといけないみたい。
(DaVinci Resolve 18.5 beta winでも同様の結論だった。Video & Retain sub-black super-white dataでもダメ。)
ただし、Prores4444 コーデックでは問題ないみたいだ。
追記2023/05/08
DaVinciで書き出した
1 : mxf / OP1A / DNxHR 4444 12bit / RenderページにてVideo
2 : mxf / OP1A / DNxHR 4444 12bit / RenderページにてVideo & Retain sub-black super-white data
3 : mxf / OP1A / DNxHR 4444 12bit / RenderページにてFull
を書き出してそれをDaVInciにインポートした時
それぞれDaVinci ResolveのClip attributeでは、書き出し時のメタデータを認識していて、Autoを選んだ時に書き出しと設定が一致する。
Autoにしていると同じ階調の絵として正しく表示されている。
Videoで書き出したもの(1 & 2)をClip attributeでFullにしたときに、Premiere Proと同じような症状で黒が浮いたように見えるため、PremiereProでは勝手にVideoでもFullでもメタから読まずに、Fullとして読み込まれているということ。
ややこしい。
References
Avoid gamma shift in Premiere
DNxHR Resolve to Premiere page1
DNxHR Resolve to Premiere page2
この記事が気に入ったらサポートをしてみませんか?