NixOS 日本語環境を構築する

はじめに
Linuxディストリビューションの中でも個性あるNixOSに興味が湧いたので、PCへのインストールをしました。何よりも日本語の情報が少なく、試行錯誤でここまで構築しました。知識ある方からするとおかしな点があるかもしれません。まずはGUI環境と日本語入力ができないと不便なので、そこにたどり着くまでの紹介です。
インストールメディアの作成
NixOSのサイトよりダウンロードページに入ります。
NixとNixOSと二種類あります。Nixはパッケージマネージャーで、他のOSでもNixのパッケージの仕組みが使用できるものです。今回はOSを入れたいので、NixOS Mnimal ISO Imageをダウンロードします。
ダウンロードしたISOイメージをUSBかDVDにディスクイメージとして保存します。DVDに保存する場合は、ダウンロードした.isoイメージを右クリックして、”ディスクイメージの書き込み”を選択します。USBに保存してブータブルメディアにする場合、Windowsでは専用ソフトをダウンロードして起動します。私が使用したのは、balenaEtcherというソフトです。
ブートメディアからの起動
作成したブートメディアから起動するため、PCを起動させる際にBIOS設定に入ります。BIOSへの入り方はマザーボードによって違うので、起動時に出る表示を見逃さないか、事前に調べておきましょう。一般的にDelキー連打でBIOS設定画面に入れます。ちなみにASUSのマザーボードはF8キーを連打していると、起動するブートマネージャーを選択する画面になりますので、NixOSを書き込んだメディアを選択します。
BIOS設定画面に入った場合、Boot設定タグを選んで該当メディアを選択します。この際に同じ名前で頭にUEFIと付いたものがあるときは、よほどPCが古くない場合を除いて、UEFIを選択したほうが良いと思います。
NixOSインストール開始
NixOSが起動してくると自動ログインします。まずはルートユーザー権限を取得します。
sudo i次にネットワークカードを認識しているか、確認します。
ip addr[nokiyameego@nixos:~]$ ip addr
1: lo: <LOOPBACK,UP,LOWER_UP> mtu 65536 qdisc noqueue state UNKNOWN group default qlen 1000
link/loopback 00:00:00:00:00:00 brd 00:00:00:00:00:00
inet 127.0.0.1/8 scope host lo
valid_lft forever preferred_lft forever
inet6 ::1/128 scope host
valid_lft forever preferred_lft forever
2: enp6s0: <BROADCAST,MULTICAST,UP,LOWER_UP> mtu 1500 qdisc mq state UP group default qlen 1000
link/ether 04:42:1a:ec:82:b2 brd ff:ff:ff:ff:ff:ff
inet 192.168.0.16/24 brd 192.168.0.255 scope global dynamic noprefixroute enp6s0
valid_lft 86366sec preferred_lft 75566sec
inet6 2402:6b00:4609:d800:6076:e5c6:b0a0:7324/64 scope global temporary dynamic
valid_lft 268sec preferred_lft 268sec
inet6 2402:6b00:4609:d800:2253:15a9:d756:8a2c/64 scope global dynamic mngtmpaddr noprefixroute
valid_lft 268sec preferred_lft 268sec
inet6 fe80::642:1aff:feec:82b2/64 scope link noprefixroute
valid_lft forever preferred_lft forever
inet6 fe80::7252:f4d8:1cac:384d/64 scope link noprefixroute
valid_lft forever preferred_lft forever
[nokiyameego@nixos:~]$
上記のように表示が出ていればネットワークカードを認識しています。この場合有線ネットワークをenp6s0として認識しています。他、eth00などの名前になるものもあります。DHCPでIPアドレスも取得できています。
私の場合、無線LANカードを認識できず、有線のみで構築しました。
次にインストール先のメディアを調べます。私はfdiskを使います。
fdisk -lDisk /dev/sda: 29.3 GiB, 31457280000 bytes, 61440000 sectors
Disk model: STORAGE DEVICE
Units: sectors of 1 * 512 = 512 bytes
Sector size (logical/physical): 512 bytes / 512 bytes
I/O size (minimum/optimal): 512 bytes / 512 bytes
fdisk -lDisk /dev/sdb: 476.94 GiB, 512110190592 bytes, 1000215216 sectors
Disk model: INTEL SSDSC2KW51
Units: sectors of 1 * 512 = 512 bytes
Sector size (logical/physical): 512 bytes / 512 bytes
I/O size (minimum/optimal): 512 bytes / 512 bytes
Disklabel type: gpt
Disk identifier: B07066FD-E671-E04D-B646-9554C4EABEF6
Device Start End Sectors Size Type
/dev/sdb1 2048 1050623 1048576 512M EFI System
/dev/sdb2 1050624 1000215182 999164559 476.4G Linux filesystem
Disk /dev/sdc: 1.82 TiB, 2000398934016 bytes, 3907029168 sectors
Disk model: Seagate BarraCud
Units: sectors of 1 * 512 = 512 bytes
Sector size (logical/physical): 512 bytes / 512 bytes
I/O size (minimum/optimal): 512 bytes / 512 bytes
Disklabel type: gpt
Disk identifier: 36174537-4F96-4D0C-9A04-3A400586E774
Device Start End Sectors Size Type
/dev/sdc1 34 32767 32734 16M Microsoft reserved
/dev/sdc2 32768 3907026943 3906994176 1.8T Microsoft basic data
こんな感じでPCに搭載している記憶媒体が見えるはずです。他にWindowsを入れてある方は、Windowsが入っているディスクに間違ってNixOSをインストールしないように注意しましょう。今回は/dev/sdaにNixOSをインストールします。
パーテショニングとフォーマット
次にfdiskコマンドでディスクを選択してフォーマットとパーティションを切っていきます。
fdisk /dev/sda
Welcome to fdisk (util-linux 2.37.4).
Changes will remain in memory only, until you decide to write them.
Be careful before using the write command.

Device does not contain a recognized partition table.
Created a new DOS disklabel with disk identifier 0x2c728a2f.

Command (m for help):
まず、mコマンドでhelp画面を見てみます。
Command (m for help): m

Help:

  DOS (MBR)
   a   toggle a bootable flag
   b   edit nested BSD disklabel
   c   toggle the dos compatibility flag

  Generic
   d   delete a partition
   F   list free unpartitioned space
   l   list known partition types
   n   add a new partition
   p   print the partition table
   t   change a partition type
   v   verify the partition table
   i   print information about a partition

  Misc
   m   print this menu
   u   change display/entry units
   x   extra functionality (experts only)

  Script
   I   load disk layout from sfdisk script file
   O   dump disk layout to sfdisk script file

  Save & Exit
   w   write table to disk and exit
   q   quit without saving changes

  Create a new label
   g   create a new empty GPT partition table
   G   create a new empty SGI (IRIX) partition table
   o   create a new empty DOS partition table
   s   create a new empty Sun partition table


Command (m for help):
今回使用するコマンドは、g、n、p、t、wです。
まず、gコマンドでGPTパーティションテーブルを作成します。
次に、nコマンドで新しいパーティションを作成します。First sectorはデフォルト、Last sectorは+512Mと入力してください。問合せにはYesで答えます。できたらpコマンドで確認しましょう。
次にtコマンドでパーティションタイプを変更します。パーティションタイプは1を入力します。これで、パーティションタイプがLinux filesystemからEFI Systemにかわりました。
Command (m for help): n
Partition number (1-128, default 1):
First sector (2048-61439966, default 2048):
Last sector, +/-sectors or +/-size{K,M,G,T,P} (2048-61439966, default 61439966): +512M

Created a new partition 1 of type 'Linux filesystem' and of size 512 MiB.
Partition #1 contains a vfat signature.

Do you want to remove the signature? [Y]es/[N]o: Y

The signature will be removed by a write command.

Command (m for help): p
Disk /dev/sdc: 29.3 GiB, 31457280000 bytes, 61440000 sectors
Disk model: STORAGE DEVICE
Units: sectors of 1 * 512 = 512 bytes
Sector size (logical/physical): 512 bytes / 512 bytes
I/O size (minimum/optimal): 512 bytes / 512 bytes
Disklabel type: gpt
Disk identifier: 8EBF981D-E9F5-6147-9E65-1BACB49AAF32

Device     Start     End Sectors  Size Type
/dev/sda1   2048 1050623 1048576  512M Linux filesystem

Filesystem/RAID signature on partition 1 will be wiped.

Command (m for help): t
Selected partition 1
Partition type or alias (type L to list all): 1
Changed type of partition 'Linux filesystem' to 'EFI System'.

Command (m for help): p
Disk /dev/sdc: 29.3 GiB, 31457280000 bytes, 61440000 sectors
Disk model: STORAGE DEVICE
Units: sectors of 1 * 512 = 512 bytes
Sector size (logical/physical): 512 bytes / 512 bytes
I/O size (minimum/optimal): 512 bytes / 512 bytes
Disklabel type: gpt
Disk identifier: 8EBF981D-E9F5-6147-9E65-1BACB49AAF32

Device     Start     End Sectors  Size Type
/dev/sda1   2048 1050623 1048576  512M EFI System

Filesystem/RAID signature on partition 1 will be wiped.

Command (m for help):
続いてnコマンドで次のパーティションを作ります。今回は残りの容量をすべて使うので、デフォルト設定のまま決定します。
pコマンドで確認すると、/dev/sda1と/dev/sda2ができています。
Command (m for help): n
Partition number (2-128, default 2):
First sector (1050624-61439966, default 1050624):
Last sector, +/-sectors or +/-size{K,M,G,T,P} (1050624-61439966, default 61439966):

Created a new partition 2 of type 'Linux filesystem' and of size 28.8 GiB.

Command (m for help): p
Disk /dev/sdc: 29.3 GiB, 31457280000 bytes, 61440000 sectors
Disk model: STORAGE DEVICE
Units: sectors of 1 * 512 = 512 bytes
Sector size (logical/physical): 512 bytes / 512 bytes
I/O size (minimum/optimal): 512 bytes / 512 bytes
Disklabel type: gpt
Disk identifier: 8EBF981D-E9F5-6147-9E65-1BACB49AAF32

Device       Start      End  Sectors  Size Type
/dev/sda1     2048  1050623  1048576  512M EFI System
/dev/sda2  1050624 61439966 60389343 28.8G Linux filesystem

Filesystem/RAID signature on partition 1 will be wiped.

Command (m for help):
ここまででやり直しをしたい場合、qコマンドで退出すれば変更は中止になります。これで確定ならwコマンドで決定します。
次にパーティションをフォーマットします。mkfsコマンドを使用します。
 mkfs.ext4 -L nixos /dev/sda2
 mkfs.fat -F 32 -n boot /dev/sda1
さあ、それぞれのパーティションにマウントしてきます。sda2にルート、sda1はブートにしています。
 mount /dev/sda2 /mnt
 mkdir -p /mnt/boot
 mount /dev/sda1 /mnt/boot
次にNixOSで大事なconfiguration.nixファイルを生成します。このファイルに各種設定情報を書き込み自分好みのNixOSを作り上げます。まずは自動生成をします。
nixos-generate-config --root /mntこれでconfiguration.nixファイルができました。次に,nanoを使用してファイルを編集します。
nano /mnt/etc/nixos/configuration.nix

 # Edit this configuration file to define what should be installed on
  # your system.  Help is available in the configuration.nix(5) man page
  # and in the NixOS manual (accessible by running ‘nixos-help’).

  { config, pkgs, ... }:

  {
  imports =
    [ # Include the results of the hardware scan.
      ./hardware-configuration.nix
    ];
  # Use the systemd-boot EFI boot loader.
  boot.loader.systemd-boot.enable = true;   #これは必須
  boot.loader.efi.canTouchEfiVariables = true;
  boot.loader.grub.useOSProber = true;
まず行の頭に#があるものはコメントアウトされています。まず起動を目指すなら、最低限の設定を有効にしてみることをおすすめします。そうは言っても必要最低限の項目はデフォルトで有効になっています。#を消すことでその項目が有効になります。設定項目とただのコメントを間違えないようにしましょう。
nanoのコマンドは下に出ているので初心者でもわかりやすいです。編集を終えたらCtrl+xで保存します。ここでNoを選択すればやり直しができます。
インストールと再起動
nixos-install上記コマンドを入れるとインストールが始まります。
インストールが終わりになるとrootユーザーのパスワードを聞いてきます。忘れないように入力しましょう。
reboot再起動して自動的にNixOSが立ち上がってきたら成功です。rootユーザーで先ほど作成したパスワードでログインします。
デスクトップ環境と日本語入力
さて、ここまでできたらあとは好みに作り上げましょう。
今回私は、デスクトップ環境にPantheonを、日本語入力はfcitx+mozcで作りました。
まず、fcitx-mozcをインストールします。nix-envコマンドでインストールします。ついでにfcitx-anthyも入れます。フォントはnoto-fontsをインストールしました。他におすすめフォントをいくつか。
nix-env -i fcitx-mozc
nix-env -i fcitx-anthy
nix-env -i noto-fonts
nix-env -i noto-fonts-extra
nix-env -i noto-fonts-cjk
nix-env -i noto-fonts-emoji
nix-env -i fira-code
nix-env -i fira-code-symbols
nix-env -i mplus-outline-fonts
nix-env -i dina-font
nix-env -i proggyfonts
nix-env -i dejavu-fonts
次に設定ファイルを編集します。
設定ファイルはインストール時に編集したconfiguration.nixファイルです。場所は、/etc/nixos/configuration.nix になります。nanoで編集しましょう。
nano /etc/nixos/configuration.nixまずはデスクトップ環境から。設定を書き込みます。私はnvidiaのグラフィックカードを使用しているのでvideoDriver設定をこのようにしています。
nixpkgs.config.allowUnfree = true; を追加してください。これはnvidiaのグラフィックドライバーがフリーライセンスではないため、この表記をしないとビルド時にエラーになります。
  # Enable the X11 windowing system.
   services.xserver.enable = true;
   services.xserver.videoDrivers = [ "nvidia" ];
   nixpkgs.config.allowUnfree = true;


  #Pantheon  Desktop
  services.xserver.desktopManager.pantheon.enable = true;
ちなみにAMDのグラフィックカード、Intelグラフィックドライバーの場合。試していないので、動作しなかったらごめんなさい。
services.xserver.videoDrivers = [ "amdgpu-pro" ];   #AMDの場合

services.xserver.videoDrivers = [ "modesetting" ];   #Intelの場合
services.xserver.useGlamor = true;
インプットメソッドの設定。
  i18n.inputMethod = {
   enabled = "fcitx";
   fcitx.engines = with pkgs.fcitx-engines; [ mozc anthy ];
  };

 fonts = {
   fonts = with pkgs; [
    noto-fonts
    noto-fonts-cjk
    noto-fonts-extra
    noto-fonts-emoji
  #  liberation_ttf
    fira-code
    fira-code-symbols
    mplus-outline-fonts
    dina-font
    proggyfonts

    dejavu_fonts

   ];

   fontconfig = {
     enable = true;

     defaultFonts = {
       sansSerif = [ "Noto Sans CJK JP" "DejaVu Sans" ];
       serif = [ "Noto Serif JP" "DejaVu Serif" ];
     };

     subpixel = { lcdfilter = "light"; };
    };
   };
次にユーザーを作りましょう。パスワードは忘れないようにしましょう。私はnokiyameegoというユーザー名を使用しています。
  # Define a user account. Don't forget to set a password with ‘passwd’.
   users.users.nokiyameego = {
     isNormalUser = true;
     extraGroups = [ "wheel" ]; # Enable ‘sudo’ for the user.
     password = "*****";  #実際はパスワード見えています。
  };
編集がおわったらCtrl+xでYesを選択して保存します。
さあ、設定ができたらビルドをしましょう。
nixos-rebuild swtich --upgrade私はここでエラーを何度も出しました。シンタックスエラー連発。落ち着いてスペルを確認しましょう。
rebootビルドが終了したらリブートします。
無事にGUIのログイン画面は出ましたでしょうか。ここで作成したユーザー名とパスワードでログインしてください。
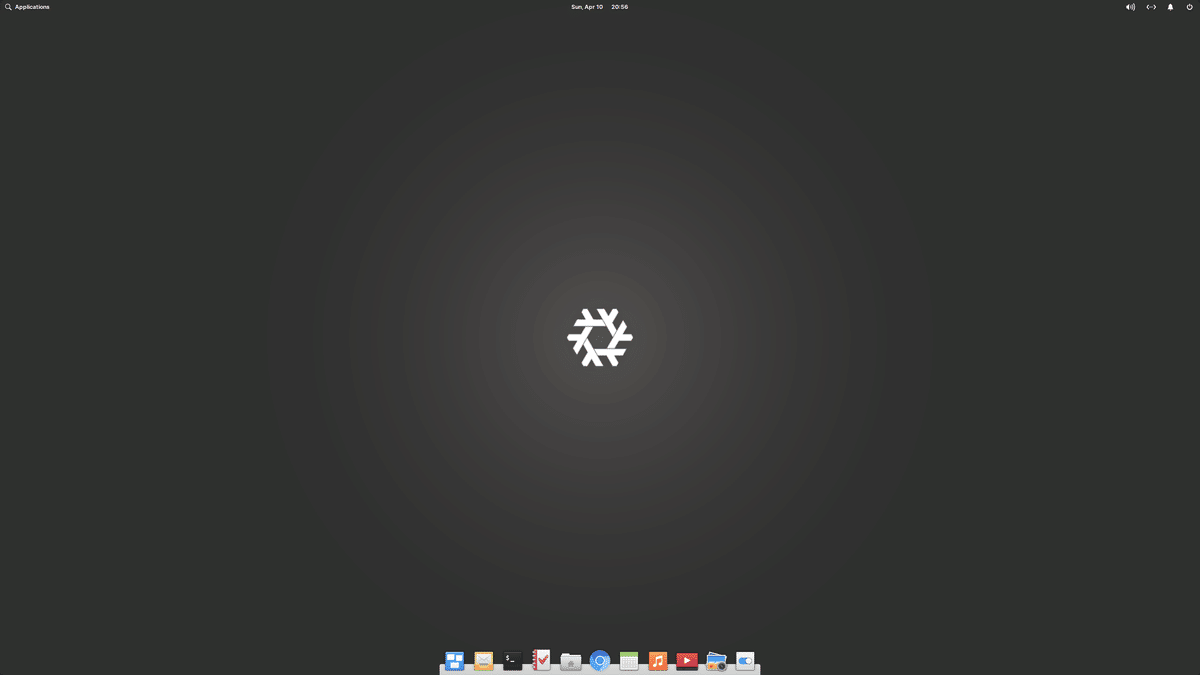
Pantheonデスクトップが広がりました。Linux環境の構築でこの瞬間は嬉しいものです。あと日本語入力の設定が残っています。
fcitx-configtoolfcitxの設定ツールを開きます。
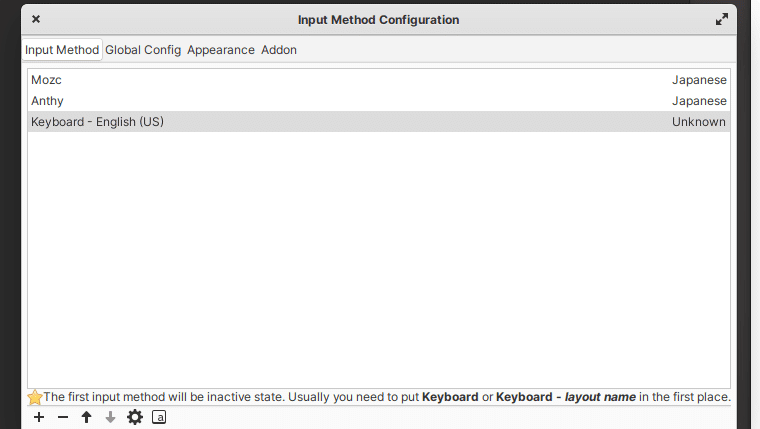
Mozcの設定をして終了です。無事に日本語が入力できましたでしょうか。
最後に
NixOSなるものを知ったのはわずか数日前。そこからのめり込むようにインストールを繰り返しました。何度も失敗してはやり直し、情報を漁り、ようやく最初に目指した形になりました。まだまだ足りない点は多いと思いますが、まずは形に残したい、困っている人の参考になればと思いnoteに残しました。
GUIインストーラーに物足りなさを感じる自分はインストールマニアかもしれません。テキストベースで環境を構築していくことに楽しみを見いだせるなら、Linuxの世界はとても大きく面白いと思います。
NixOSの設計思想は興味深く、ビルドをスイッチするたびに新しい世代のNixOSが出来上がり、それを過去に遡ることもできる大変面白い設計です。ブート時にビルドした世代を選ぶことで、違う環境を体感できます。今回で言えば第一世代はCUI。二回目にビルドした第二世代はGUIです。
また、configuration.nixファイルの編集で失敗してシステムがダウンしてしまうビルドをしても、前の世代で起動することであっさりとやり直しができます。この快適さを体感すると、他のディストリビューションを選ぶことがなくなってしまいそうです。
そんなわけで、しばらくNixOSが私のメインマシンになりそうです。
困ったときは本家Nixのサイトが参考になります。
ありがとうございました。
この記事が気に入ったらサポートをしてみませんか?