
"Blue-Black Sakazuki BDIF!" Deck and Matchup breakdown [ENGLISH][OP05 format]

Heyy, It's Nelson!
I'm going to pour my whole knowledge about the Blue-Black Sakazuki deck I used during the OP05 Japanese format. I noticed there are next to zero articles about One Piece TCG decks in English, so might as well make one!
Although the Japanese OPTCG is already in the OP06 format, I hope that this article could help English OPTCG players navigate this deck as I had so much fun playing it.
In this article, I'm going to discuss the Leader's effect and the overall concept of the deck. Followed with a decklist I used, general usage, and will comment on some cards I used or didn't use. I will finally discuss each matchup and the workarounds. Feel free to ask and initiate a discussion in the comment so everyone can join and benefit from it!
I'm going to start things with the very basic and climb up to the more detailed parts in the end. Hence I'll pace the reading slowly so everyone can understand. If you have tried the deck previously, feel free to jump to the section you wanted to read :)
I would also like to thank everyone who helped me in building and training for the whole format season! Also, those who guided and gave inspiration and ideas for the deck! You know who you are haha
Initially on its first release, OP05 was flooded with Purple Luffy and deemed to be the best deck in the format, given the deck's ability to quickly pressure the opponent. Meanwhile, Sakazuki decks were heavily focused on combining both colors' greatest mechanics, cost-minusing and cost-based removal. Using cost-minuses black cards like Navy HQ or Ice Age and big blue cards like the new Borsalino7 and the all-time favorite, Mihawk9. But even with high synergy, facing Purple Luffy that spams Magellan5 early and finishes with Kaido9 was hard because Sakazuki couldn't remove early with less don and the don differences in the late game make it harder to handle Kaido.
Even though Sakazuki has a significant usage % in tournaments, most didn't make it to the top.
After some months in the format, a new Sakazuki style was founded. It won various major tournaments and Flagships and changed the whole Meta.
Leader and Playstyle
As I've mentioned before, Blue and Black have a great synergy, arguably the best color combination in the game. Blue was designed to be a control color, having the strongest removal mechanic: bottom decking. This mechanic puts the removed cards to the hardest area to reach in the deck where to this date, only one card can deny this mechanic (enel7, with the cost of 1 life). Black maximizes this mechanic with the cost-minusing, opening up the removal range from 0 to 10 cost with many combinations of cards. On top of that, Black is armed with KO removal and blocker cards that improve this deck's consistency.
If you are a player who :
loves to control the board,
plays defensively,
and don't mind to use your brain cells every turn,
I think this deck is for you!
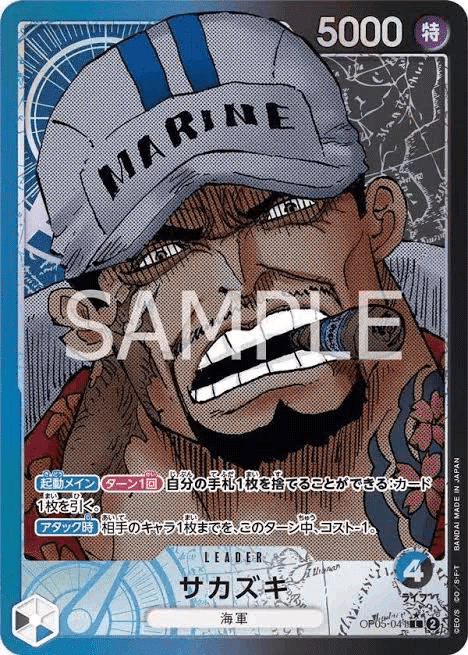
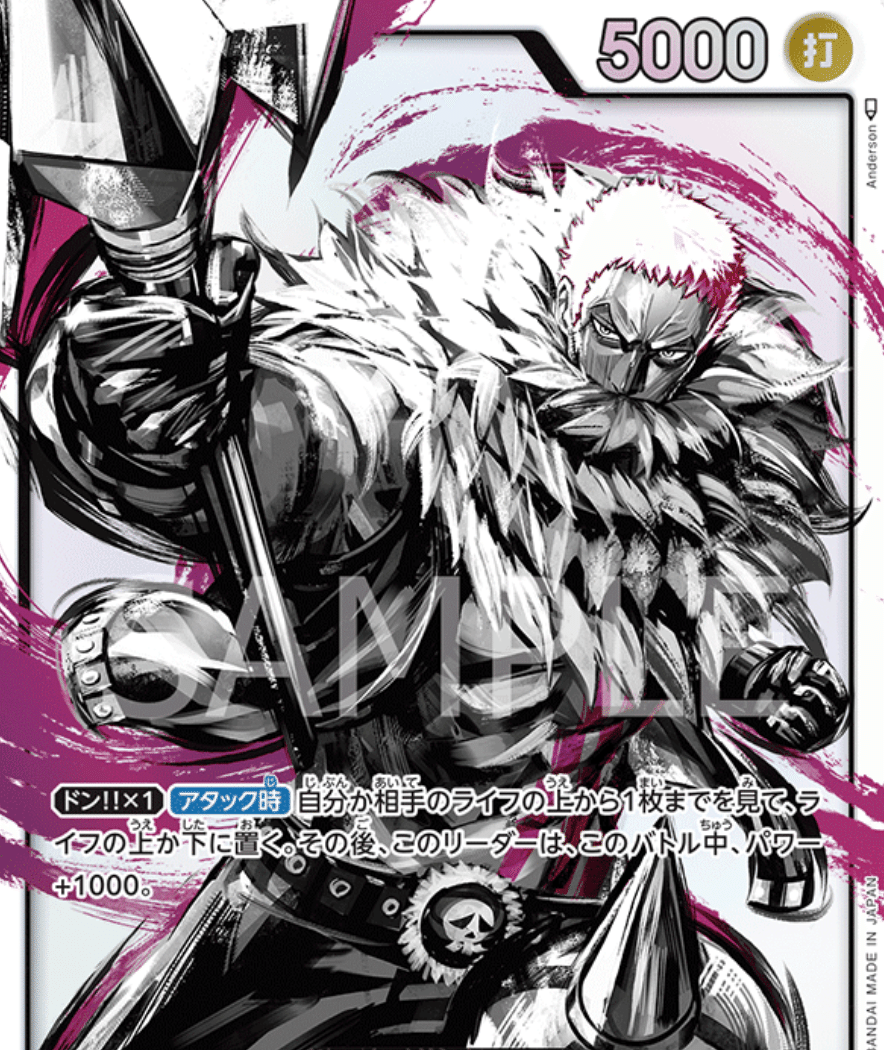
Leader
Sakazuki has 2 effects. An OPT discard 1 draw 1 and minus 1 cost on character when attacking.
The first effect is one of the great things about Sakazuki. Being able to dig deeper into 1 more card each turn helps you find the card combo you are looking for in any scenario. It also recycles your hand to remove 0-counters and put the cards that should be in the trash. This effect increases the consistency of the deck. One tip from my experience is to have a mark every time you use the first skill! It's easily forgettable whether you have used the first skill or not once you have drifted away in planning the combo sequence LOL I used a token on top of my leader as a mark and I saw some players discard the card horizontally. Please find what suits you!
The second effect works as a guarantee to minus every turn that helps you to hit the removal requirement. Always remember that you have 1 cost minus from your leader when planning your removal combo.
Playstyle
The deck is mainly stemmed from this trio :
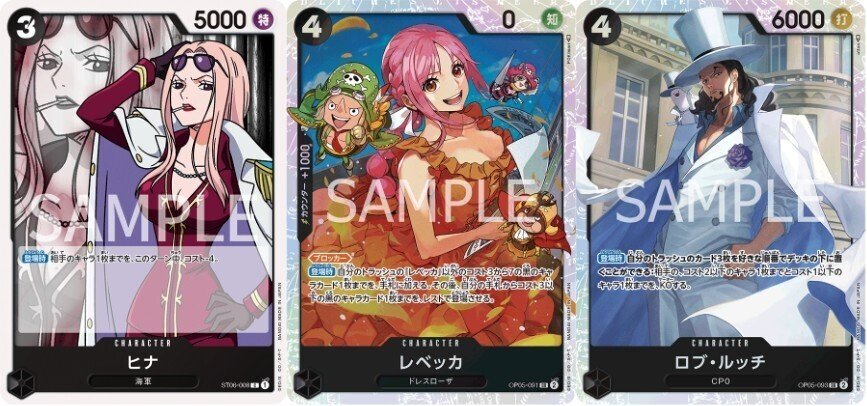
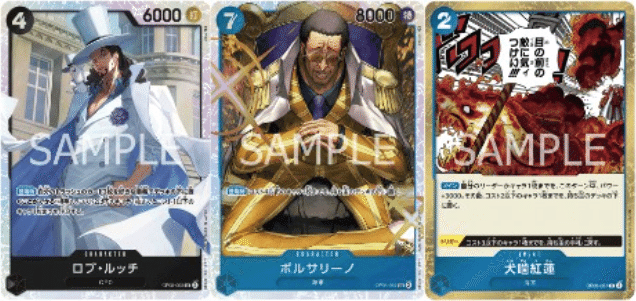
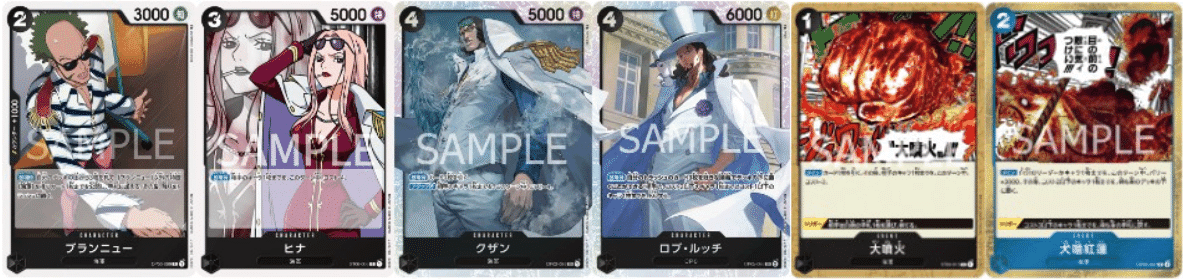
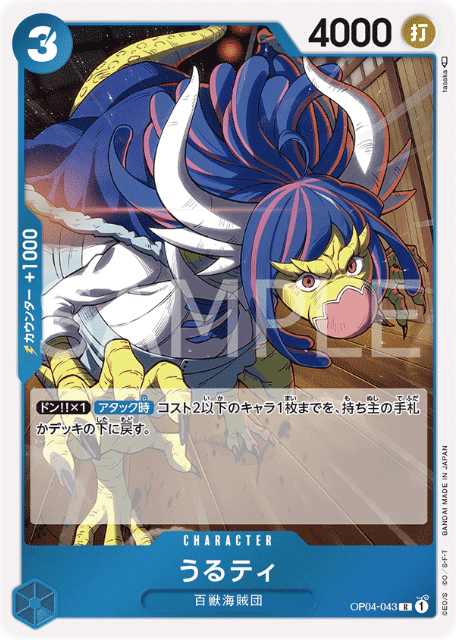
Lucci is a 6K body that can remove 2 cards in one go at a very cheap cost. The drawback is that you can only remove cost-2 and cost-1 characters. The drawback is covered with Hina's on-play effect where she can decrease a character cost by 4 directly, which helps Lucci to hit 5 to 6 cost characters. Rebecca works as a pivot as she could take Lucci or Hina from the trash and call Hina to activate the on-play effect. With Rebecca as a blocker, this combo covers both offense and defense in one play. Adding more cost minuses and removals, the deck is a very effective and versatile board control with low-cost cards.
On an important note, what makes the deck strong is having the trash as the second resource. The ability to take back cards from the trash helps you to reuse cards or use the discarded cards. In a sense, you can tap into more resources than your opponent. Trash is also the simplest form of secondary resource--not like Yellow's life area, as you can easily discard or use the card firstly as a counter OR use characters that were KO'ed previously.
With the OPTCG game nature that is not that dynamic in tapping different areas other than your hand, utilizing trash as a resource is powerful. This is why Moria was so popular (and strong) when the OP06 first came out.
The content is getting heavier hahaha please bear with it! Now onto the decklist!
Decklist
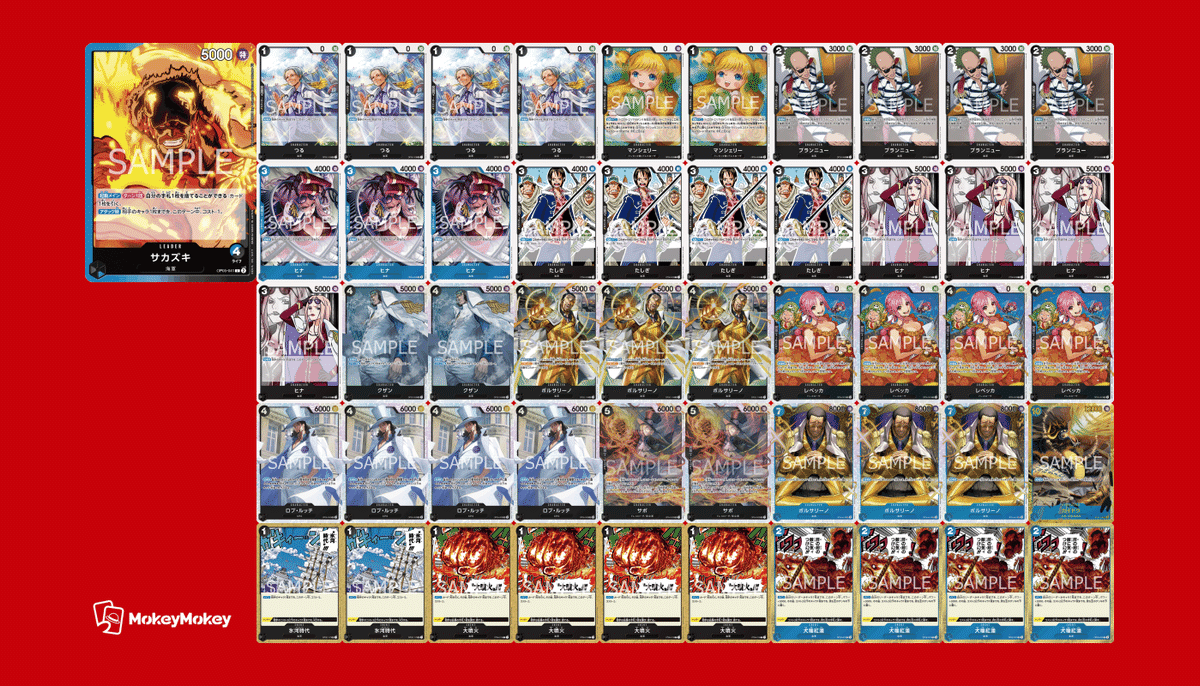
This is the decklist I used at the end of the format. The final tournament was Indonesia's BCF as it was held exactly when OP06 was released. I finished in the top 16 and I am happy with the result! (I was extremely lucky haha)
As this is a control deck, you can't net decking. Well… One Piece is not a game you can net-decking in the first place. But a control deck is built following the meta. Different locals will have different different deck populations.
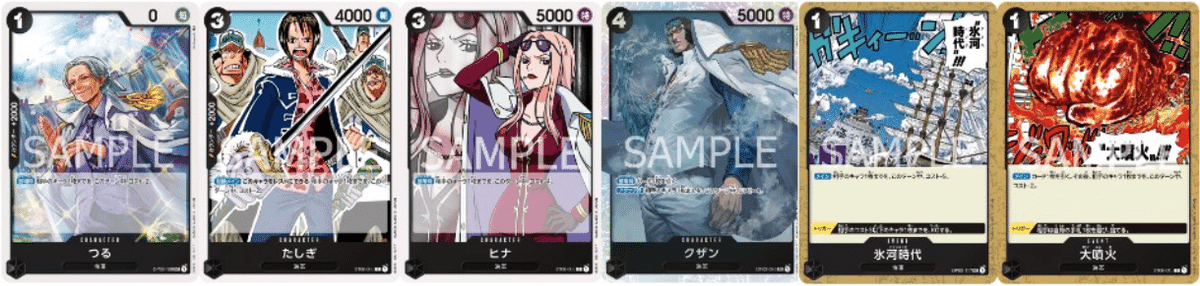
For example, during the BCF, I expected a lot of Yellows and Mirrors, so I added more Borsalino4, Blue Hina, and the new Kaido10. If your locals have fewer Yellow players, I think reducing Borsalino4 and adding more Kuzan4 for consistency is a good decision.
I would recommend you to follow this rule of thumb :
8-10 copy of 2K counters. Some use 10 for a more consistent defense, but I prefer to trade 2 spots for a more consistent removal which resulted in an easier defense. But please be aware not to carelessly discard your 2K counters if you only use 8 copies. Do consider more copies if there are a lot of Whitebeards and Utas (which is not the case for me).
12-13 Events, with Eruption and Houndblaze a definite 4.
4-4-4 of Becca-Hina-Lucci. Some use 3 Hinas, but I think Hina+Ice Age should be 6 copies in minimum.
Min. of 4 copies of blockers other than Rebecca and Bartolomeo. I'm referring to Borsalino4 and Sabo5. Try to find the combination between those 2. More Yellow = more blockers.
3-4 Big bosses. I'm referring to cards with a cost of > 5 dons. Here I'm using Borsalino7 and Kaido10.
2 Mansherrys and 2 Kuzan4s are a must. Feel free to bump it up following your play style preferences.
4 Brannews, defo.
Basic Gameplan
Early to Mid game
These are the cards you want to see in the early game, mostly in your starting hand. I am talking with the range 2-6 Dons at hand.
Use Brannew in your first/second turn to search your combo pieces and increase your trash so you can use Lucci more easily.
Kuzan4 is good for preparing you to remove big bodies without losing any hands. Master Kuzan4 by predicting your opponent's character call next turn.
Use Lucci and cheap cost minus in the early game to counter the Ohm-Holy/Ulti-PageOne/Brook-Nami combo
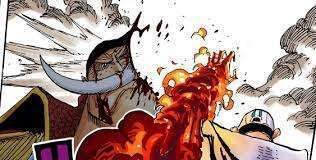
Houndblaze is a very powerful card. Use it to give power to your leader or Brannew and remove early to mid-range cards. This card is why Brannew is important in the early game. Remember that based on the ruling, you have to give power first and then use the removal effect.
Minus cost cheaply using Hina and Great Eruption to meet all of the removal requirements in the early game when you have a few dons.
As tempting as it is, generally it's more powerful to call Hina in the early game than discard it for later use. Remember that not only do you have to remove your opponent's board, but you also have to create a board presence of your own.
Refrain from using Tsuru/Tashigi the 2K counter for cost-minusing as the counters you have in this deck are very few. Use it if you are really in a pinch and you have to remove the card.
Don't burden yourself with removing all characters on the board. Focus on cards with 5K+ powers. It's even okay to let a 5K character live for a turn haha
Don't forget to use the Leader recycle effect every turn. In the early game, you generally want to see more removal and cost-minusing cards in your hand, so you have the option to remove 2K counters.
Mid to Late Game
Within the range of 6-10 dons, these 2 are great cards to find.
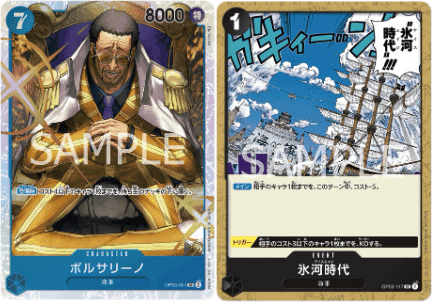
Borsalino7 has the highest range of removal. You can easily remove big characters with little support for cost-minus cards. He also an 8K beat stick to help you end the game.
You can also effectively use Ice Age as bigger characters are in play.
Late Late Game (10 don) :
Use the Becca-Hina-Lucci combo or any combination of cards to remove the board. Don't feel obligated to call characters on the curve every turn.
Don't forget to also develop your board with attackers such as Lucci, Hina, or Borsalino7.
Try to rotate your hand content to 2K counters in the late game.
Use Mansherry to replenish your resources such as Rebecca.
Here are some cards I would like to discuss :
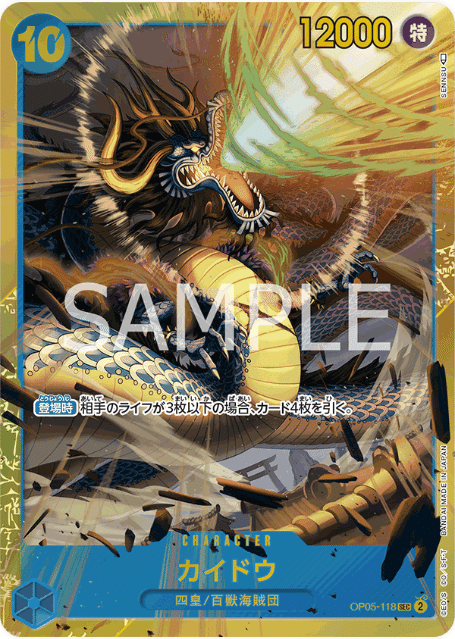
Although it uses all of the Don, this is a great card to replenish your resource and a forever beat stick on most matchups. The catch is that this card needs a very specific condition so you can call him safely. When your life is 2 or less, which mostly will after turn 5, You can only call this card if your opponent only has 1 body on the board. The reason is that if not, you will waste the 4 cards you draw to protect you on the opponent's next turn. This card is more powerful when facing mirrors or Yellows. On mirrors, the ideal condition is where they call 1 Borsalino on board. If they can't handle Kaido10 next turn, you have a very high winning chance by hitting the life next turn. As Yellow also calls 1 big body each turn in the late game, you can use this card to increase your resources. Then hit back the big body with Kaido10. Don't get baited to call this card when facing Purple Luffy and Kaido9 Rush is called, you will lose by just them hitting life haha
Ulti3 is an interesting card to add. If your opponent can't handle her when it enters the field, Ulti can be very beneficial. But Ulti3 is only useful in the early game and mostly a dead card in the late game. With that being said, it's only logical to use 3 to 4 copies in the deck to increase the chance of drawing her early. But then again, you have 3 to 4 copies of dead cards in the late game. That's why I chose not to bring her. This card is most useful in facing Purple Luffy as they have a lot of 5 cost cards which is an easy target for Ulti3.

I didn't consider this card much back then. But Indonesia's BCF winner used a copy of this card, so I must be wrong haha. This card would be suitable for handling big cards as it removes 5 costs cheaply. It is also a great card for mirrors to handle blockers to end the game.
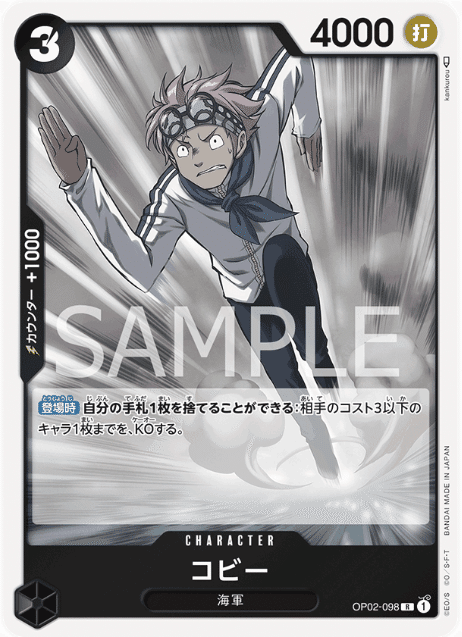
Some consider bringing this card as a removal that is targetable by Rebecca. The downside is that you should discard one card whereas Sakazuki has a low hand card to begin with. There's also no spot left in the deck. I had no problem finding removal cards when I didn't bring this card, so I chose not to bring Koby3.
Matchups
Purple Luffy

If you take the first turn, be ready to deal with cost 5s. If you take the second turn, be ready to deal with Ulti-PageOne. Choosing first or second is a personal preference on our end, depending on which character you prefer to deal with. I prefer to take the first turn.
Defend the early attacks if you only use 1 card so you can save up your Life for Kaido9 Rush.
Win the early board control as most of their early to mid-range character could easily hit 7K with 1 don.
Anticipate to remove Kaido9. It's very important to not let him live for 2 turns as he hits very hard.
Pressure them early as they need their life for Luffy's ability.
Enel

The game mostly depends on whether you can remove Enel7 immediately or not. The strategy is to prepare Lucci on the turn before they can call Enel7. On your next turn after they call Enel7, Use Ice Age/Hina+Houndblaze to bottom Enel7 and trigger his effect, then hit him again using Lucci with 9K power. At least, with very low counter cards, they have to spend 3K to counter, which is very advantageous for us.
Set a wide board to end the game. Remembering Enel could heal himself once every turn, pressure them with multiple attacks in a turn. If you only have 1 last attacker and they haven't used the leader skill, refrain from attacking as it only helps them refresh their hand.
Maintain your life so they can't KO your hitters using Yamato9, at least your cost 4 hitters.
Always consider that they can end you with Amuru and Thunderbolt. Most decks even bring 6-8 copies of them.
But also remember that Borsalino4 can deny Thunderbolt. Sabo5 can deny Amuru and deny Thunderbolt for all blockers for a turn.
Katakuri
There are 2 ways to deal with Katakuri. The first is to take any attacks on your life, the idea is to have a 0 life when they arrive at 10 dons (Bigmom10). "Instead of trashing your life, why not have it in your hand?" Once you have 0 life, drop your blockers. Borsalino4 and Sabo5 come in handy as they can't easily targeted by Amuru and Thunderbolt as I've mentioned before. This is a very risky approach as you just hope they don't have multiple removal events that could make lethal moves if you're not cautious.
The second one is to defend Katakuri as much as possible and hope that you can maintain your life cards as many as possible. It took up your hand and your life (Bigmom10's life discard) which limits your resources greatly.
By default, I choose the first method. But If the opponent rarely uses the don to make Katakuri hit 7K, I pivot my strategy to the second one. Everything depends on whether I can achieve 0 life on time or if I have enough blockers at hand.
One most definite thing is to Aggro the Katakuri so you won't have a long game. The longer the game, the higher the chance you lose. Katakuri has many 0 counter cards, so it's harder for them to counter a lot too--assume they haven't recycled much from Shirahoshi5.
With that being said, swarming the board with big hitters is the strategy as the game develops.
If you choose the second method, definitely give life to your opponent when Bigmom7 comes. If you choose the first method, Take life if you go first, and give life if you go second, following the 0 life timing.
The only way for them to disrupt your plan is to drop Katakuri8 and Bigmom10 on their curve. This way, Bigmom10 can discard your body that was placed by Katakuri8. To avoid this, give them the first turn (odd don curve) and drop Borsalino7 after their don 8/9 curve, so you won't lose much from this one-time strategy. Nothing much you can do here lol
Uta

Kuzan4 and Lucci is your friend here. Uta swarms a lot, making it easier for you to run out of your removal resources. The idea is to use Kuzan4 repeatedly to get free cost minuses. As they don't have a high offense, it's easier for you to protect Kuzan. Use Lucci to maximize the removal.
They have very low 2K counter cards, so hitting 6K 6K is sometimes more favorable than 5K 7K.
You will lose if they keep on spamming Luffy7 and deplete your resources. That's why, you don't have to remove all of their small characters (Usopp, Zoro, Brook), You have the option to attack them after they are rested instead.
Prepare your Ice Age to remove Kidd8.
Have your life, blockers, and counters ready for their restanding event.
Sakazuki (Mirror)

The idea of the whole game is to hold the tempo of board control. Each turn is a competition to control each other's board and maintain your resources. If you can't control the board, your opponent will use the characters to attack you, and as you know Sakazuki can't take many hits. You will be at a great disadvantage if you lose the board control which results in your loss.
The player who goes second holds the first tempo as you just respond to whatever the first player played. This is the favorable starting point.
As for the first player, worry not. Just challenge your opponent to remove your board with cards like Blue Hina and Kuzan4 and wait for them to flop and pressure them. This is the main reason I brought Blue Hina as she is the curve on turn 2 and hits 7K with Houndblaze, and most importantly without wasting my resources.
+3K from Houndblaze is important to pressure your opponent.
Mansherry is crucial in replenishing your resources.
Consider Brannew as an obstacle as it could easily hit you with Houndblaze.
I specifically bring Blue Hina and Kaido10 for this matchup.
Black Hina is the key to winning the board as you do the removal while developing your board pressure. But on the other hand, don't recklessly play out Black Hina as your opponent could easily bottom her and lose your access to utilize her in the trash. So, play her carefully.
Closing
And that's about it! Thank you for reading it to the end!
I might post a match on Youtube, feel free to subscribe first!
Also, if you have another deck to break down, please request it in the comment section! I will see what I can do :)
この記事が気に入ったらサポートをしてみませんか?