
Swift 勉強12.テーブルビューコントローラ(2)👉To Doリストアプリ

1.アウトレット変数とアクション関数の追加

import UIKit
class TableViewController: UITableViewController {
   @IBOutlet var tvListView: UITableView!

   override func viewDidLoad() {
       super.viewDidLoad()
       // Uncomment the following line to preserve selection between presentations
       // self.clearsSelectionOnViewWillAppear = false
       // Uncomment the following line to display an Edit button in the navigation bar for this view controller.
       // self.navigationItem.rightBarButtonItem = self.editButtonItem
   }
import UIKit
class AddViewController: UIViewController {
   @IBOutlet var tfAdditem: UITextField!

   override func viewDidLoad() {
       super.viewDidLoad()
       // Do any additional setup after loading the view.
   }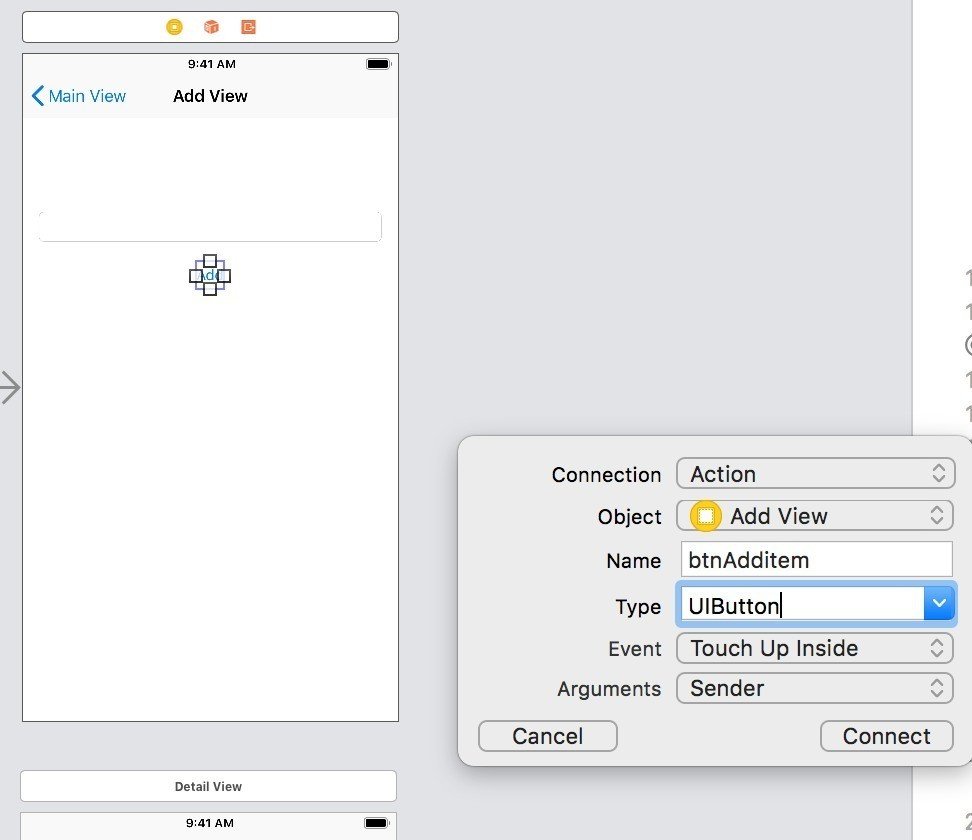
    @IBAction func btnAdditem(_ sender: UIButton) {
   }
@IBOutlet var IbIitem: UILabel!2.テーブルのリストを示す
cart.png/clock.png/pencil.png イメージを追加する

3.TableViewController.swift コード書く
var items = ["本を買う","約束","勉強"]
var itemsImageFile = ["cart.png","clock.png","pencile.png"]
    override func numberOfSections(in tableView: UITableView) -> Int {
       // #warning Incomplete implementation, return the number of sections
       return 1
   }
   override func tableView(_ tableView: UITableView, numberOfRowsInSection section: Int) -> Int {
       // #warning Incomplete implementation, return the number of rows
       return items.count
   }
関数の前後にある/* */を削除する。
    override func tableView(_ tableView: UITableView, cellForRowAt indexPath: IndexPath) -> UITableViewCell {
       let cell = tableView.dequeueReusableCell(withIdentifier: "reuseIdentifier", for: indexPath)
       // Configure the cell...
       return cell
   }
items/itemsImageが見えるようにする

\ここまで確認/
TableView 画像と文字が表示される。
Detail.View/ Add.View設定はまだなので、変わってない
4.リストを削除できるようにする
関数の前後にある/* */を削除&追加
    // Override to support editing the table view.
   override func tableView(_ tableView: UITableView, commit editingStyle: UITableViewCell.EditingStyle, forRowAt indexPath: IndexPath) {
       if editingStyle == .delete {
           // Delete the row from the data source


👇を追加する----------------------------------------------------------------
           items.remove(at: (indexPath as NSIndexPath).row)
           itemsImageFile.remove(at: (indexPath as NSIndexPath).row)
--------------------------------------------------------------------------

           tableView.deleteRows(at: [indexPath], with: .fade)
       } else if editingStyle == .insert {
           // Create a new instance of the appropriate class, insert it into the array, and add a new row to the table view
       }
   }
Deleteを日本語にする
   override func tableView(_ tableView: UITableView, titleForDeleteConfirmationButtonForRowAt indexPath: IndexPath) -> String? {
       return "削除"
   }
5.Edit ボタンを作ってリストを削除する
//を消す
self.navigationItem.rightBarButtonItem = self.editButtonItemAdd ボタンが右にあるのでEditは左に追加する
//rightBarButtonItemをleftにする

self.navigationItem.leftBarButtonItem = self.editButtonItem
\ここまで確認!/ Edit ボタンが左!

6.リストの順序を変更する
関数の前後にある/* */を削除&追加
    // Override to support rearranging the table view.
   override func tableView(_ tableView: UITableView, moveRowAt fromIndexPath: IndexPath, to: IndexPath) {
       //移動するアイテムをitemToMoveに保存
       👉let itemToMove = items[(fromIndexPath as NSIndexPath).row]
       //移動するimgをitemToMoveに保存
       👉let itemImageToMove = itemsImageFile[(fromIndexPath as NSIndexPath).row]
       //移動するアイテムをdel
       👉items.remove(at: (fromIndexPath as NSIndexPath).row)
       //移動するimgをdel
       👉itemsImageFile.remove(at: (fromIndexPath as NSIndexPath).row)
       //delしたアイテムを移動する位置に
       👉items.insert(itemToMove, at: (to as NSIndexPath).row)
       //delしたimgを移動する位置に
       👉itemsImageFile.insert(itemImageToMove, at: (to as NSIndexPath).row)
   }
7.新しいリストを追加する
AddViewController.swift コード書く
    @IBAction func btnAddItem(_ sender: UIButton) {
       👉//itemsにtextを追加
       items.append(tfAdditem.text!)
       👉//itemsImageFileにはclock.pngを追加する
       itemsImageFile.append("clock.png")
       👉//text の内容を消すとtable viewに戻る
           tfAdditem.text=""
           _ = navigationController?.popViewController(animated: true)
   }
tableviewには👇を追加
    override func viewWillAppear(_ animated: Bool) {
       tvListView.reloadData()
   }
8.リストの詳細内容を表示
DetailViewController.swift コード書く
import UIKit
class DetailViewController: UIViewController {

   var receiveItem = ""
   @IBOutlet var lblItem: UILabel!

   override func viewDidLoad() {
       super.viewDidLoad()
       // Do any additional setup after loading the view.
       lblItem.text = receiveItem
   }
   override func didReceiveMemoryWarning() {
       super.didReceiveMemoryWarning()
       // Dispose of any resources that can be recreated.
   }

   func reciveItem(_ item: String)
   {
       receiveItem = item
   }
   /*
   // MARK: - Navigation
   // In a storyboard-based application, you will often want to do a little preparation before navigation
   override func prepare(for segue: UIStoryboardSegue, sender: Any?) {
       // Get the new view controller using segue.destinationViewController.
       // Pass the selected object to the new view controller.
   }
   */
}
これで完成だけど+Add 画面にピッカービューを利用して作ってみる
結果!To Doリストアプリ完成!
