PhotoshopでAPNGやWebPアニメーションを作ろう

Photoshopのタイムライン機能を使ってアニメーションを作成し、APNGやWebPアニメーションとして書き出す方法についてご紹介します。
#朝までフォトショ
— Eri Matsushita 松下 絵梨 (@matsu_eri) June 22, 2023
私のセッションでは、Photoshopのタイムライン機能と、APNGやWebPアニメーションとして書き出す方法についてご紹介します✨ pic.twitter.com/ZMgH0bAJyY
サンプルファイル
サンプルファイルはこちらからダウンロードできます。
タイムラインパネル
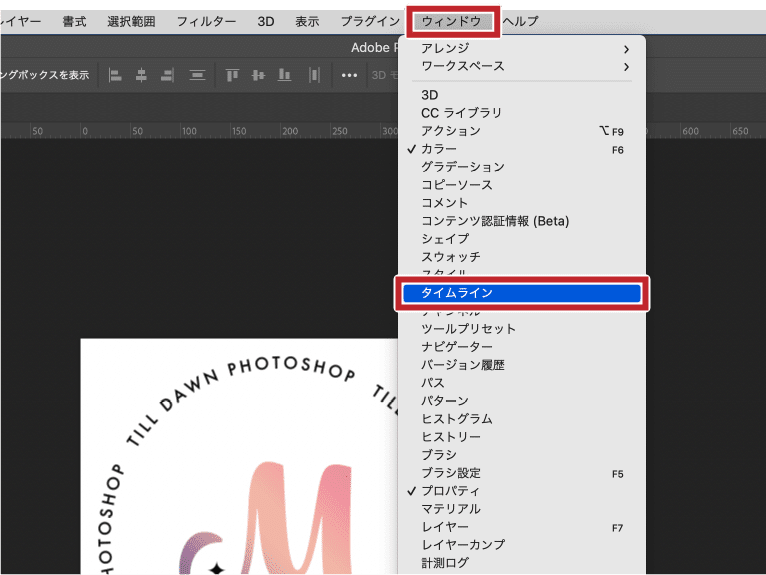
「m_logo.psd」をPhotoshopで開き、メニューバーの「ウィンドウ」から「タイムライン」をクリックして、タイムラインパネルを表示します。
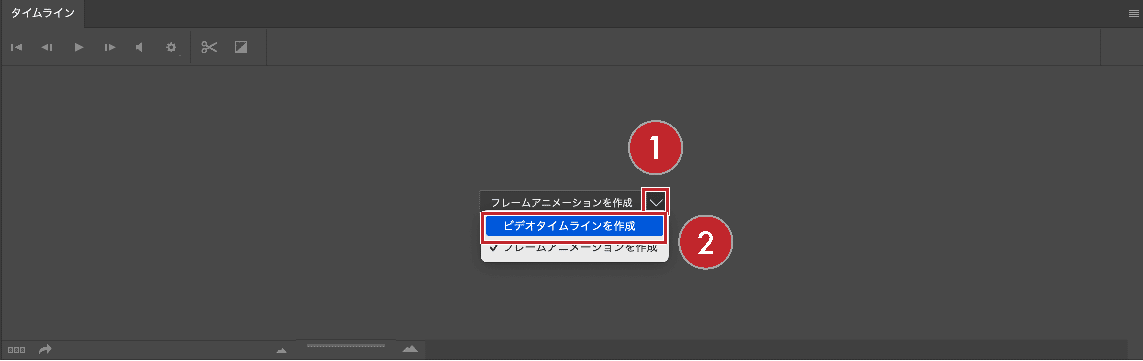
下向き矢印をクリックし、プルダウンメニューから「ビデオタイムラインを作成」を選択します。
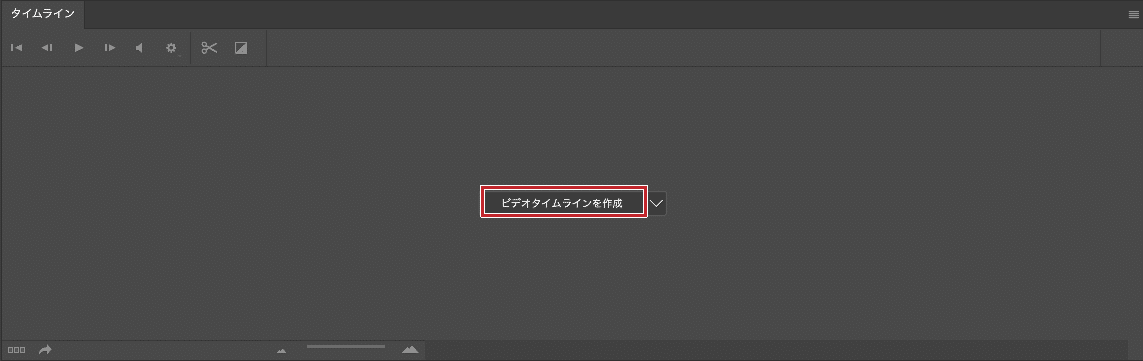
矢印の左側にある「ビデオタイムラインを作成」ボタンをクリックします。
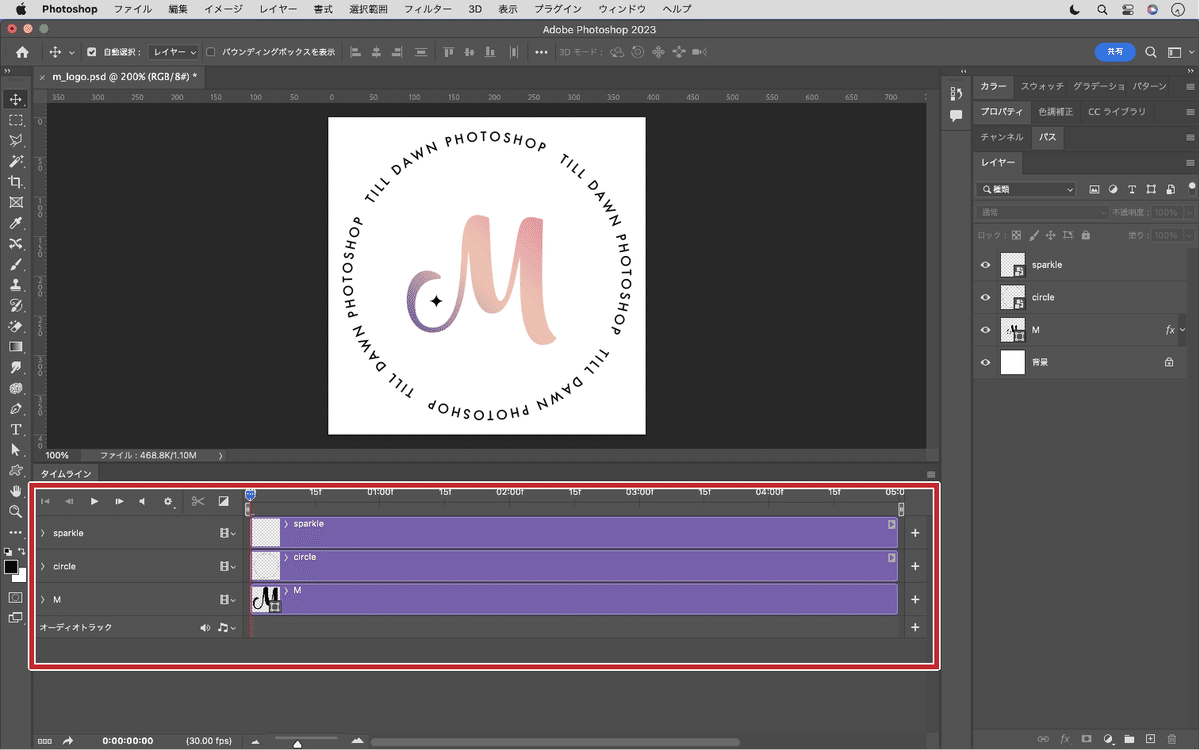
今回は3秒間のアニメーションを作成するので、
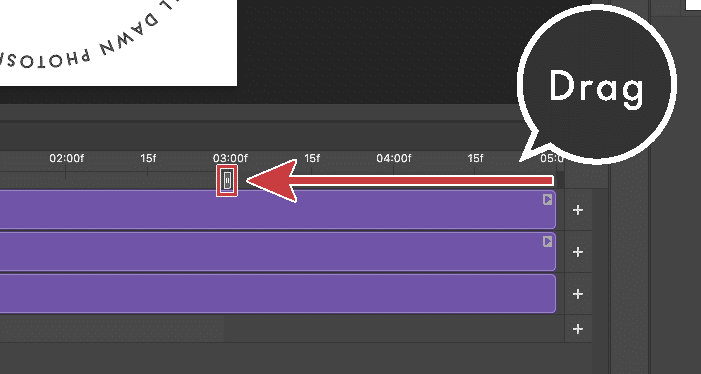
「ワークエリアの終了時間」を「03:00」に合わせます。
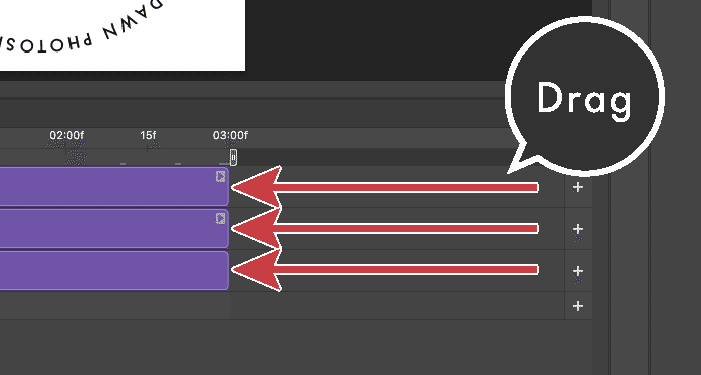
それぞれのレイヤーのタイムラインも「03:00」に合わせます。
拡大縮小のアニメーション
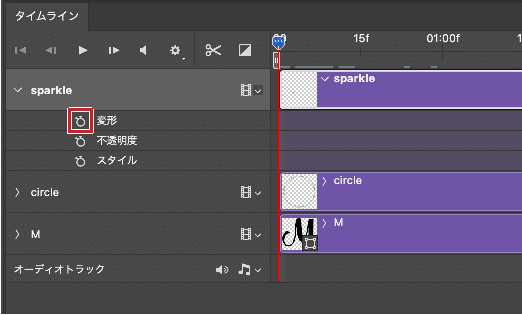
タイムラインパネルの、「sparkle」レイヤーの右向き矢印をクリックし、展開します。
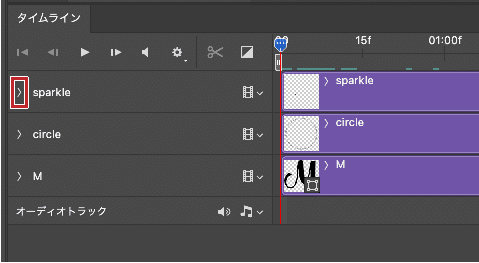
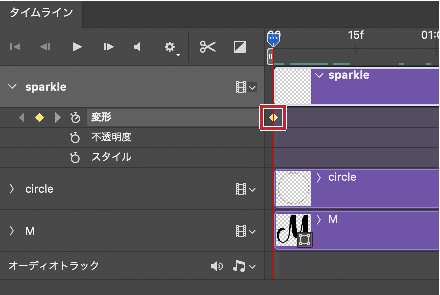
「変形」の左にある「キーフレームアニメーションを有効にする」ボタン(ストップウォッチのアイコン)をクリックします。
※「変形」「不透明度」「スタイル」が表示されない場合は、レイヤーがスマートオブジェクトになっている確認してください。
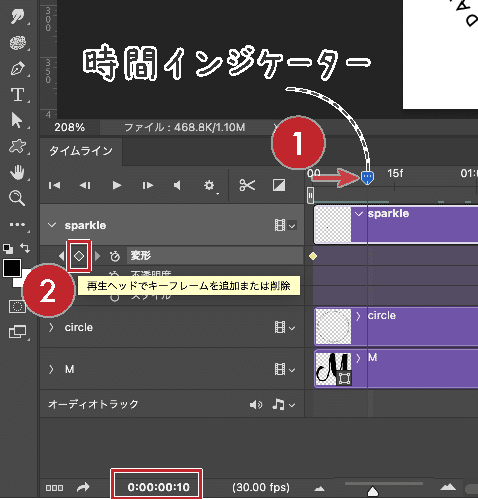
①「時間インジケーター」を右にドラッグして00:10まで動かし、
②「再生ヘッドでキーフレームを追加または削除」(ダイヤのアイコン)をクリックします。
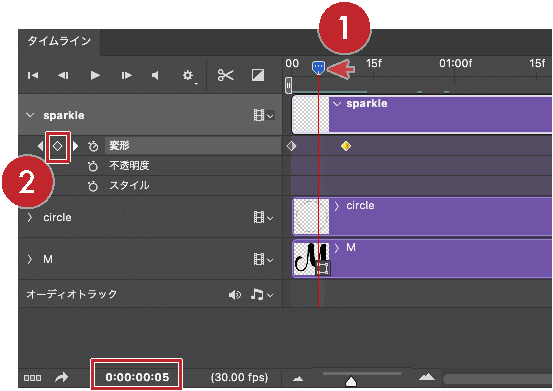
①「時間インジケーター」を左にドラッグして00:05まで動かし、
②「再生ヘッドでキーフレームを追加または削除」(ダイヤのアイコン)をクリックします。
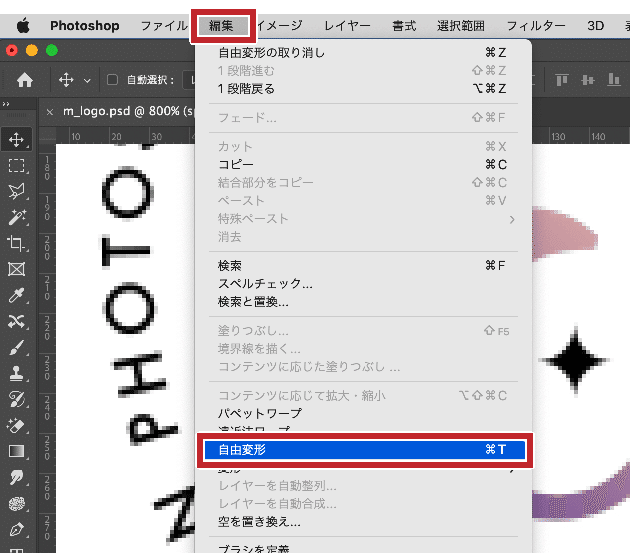
「時間インジケーター」が00:05にある状態で、「sparkle」レイヤーを選択し、「編集」→「自由変形」をクリックします
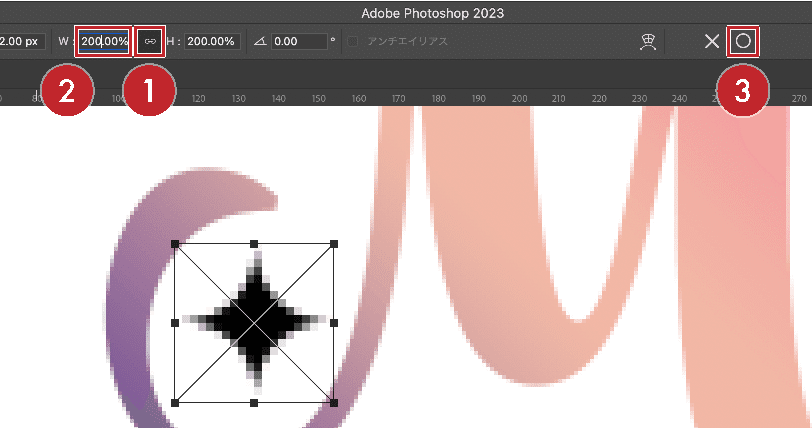
①オプションバーで「縦横比を固定」をONにして
②Wに「200%」と入力し、
③「変形を確定」をクリックします。
「再生」ボタンを押して確認します。
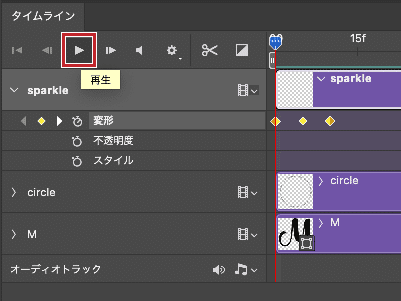
キラキラマークが、100%から200%に拡大し、100%の大きさに戻るというアニメーションを作成することができました。
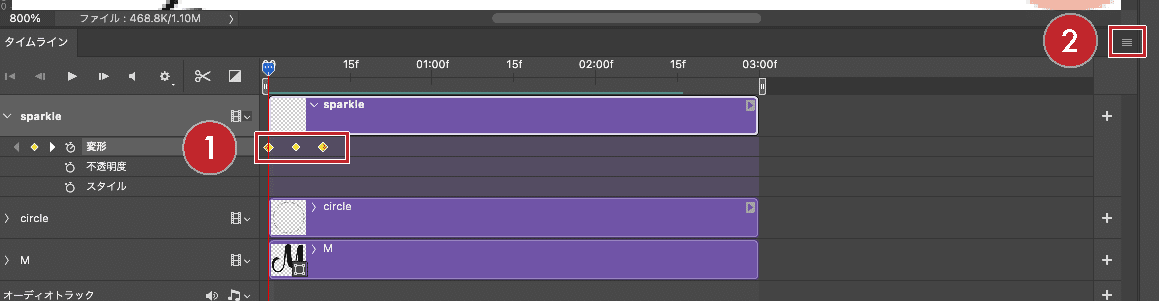
この動きをもう1回繰り返すために、
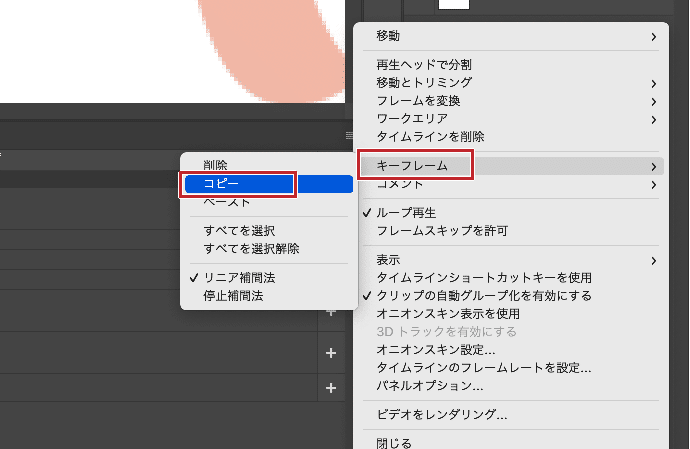
①3つのキーフレームを選択し、
②「タイムライン」パネルの右上にある「≡」ボタンをクリックします。
パネルメニューから「キーフレーム」→「コピー」をクリックします。
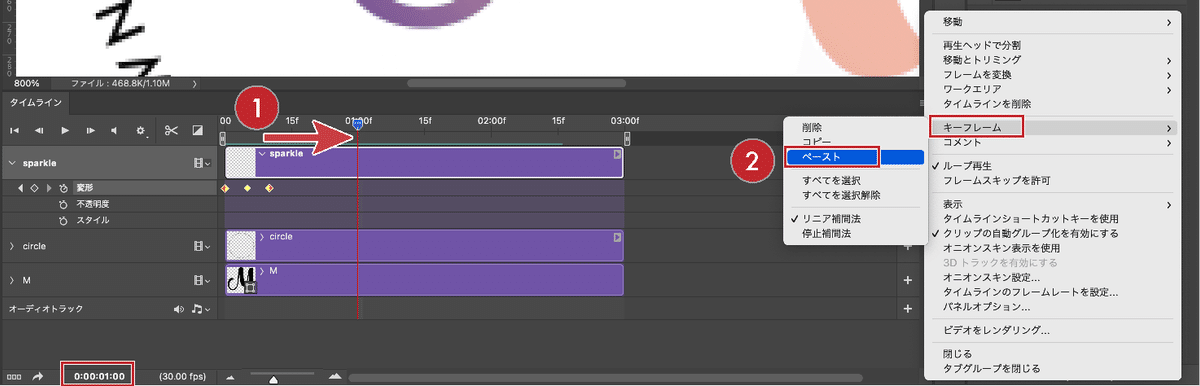
①「時間インジケーター」を01:00に合わせ、
②「タイムライン」パネルのパネルメニューから「キーフレーム」→「ペースト」をクリックします。
これで「sparkle」レイヤーの作業は完了です。

回転のアニメーション
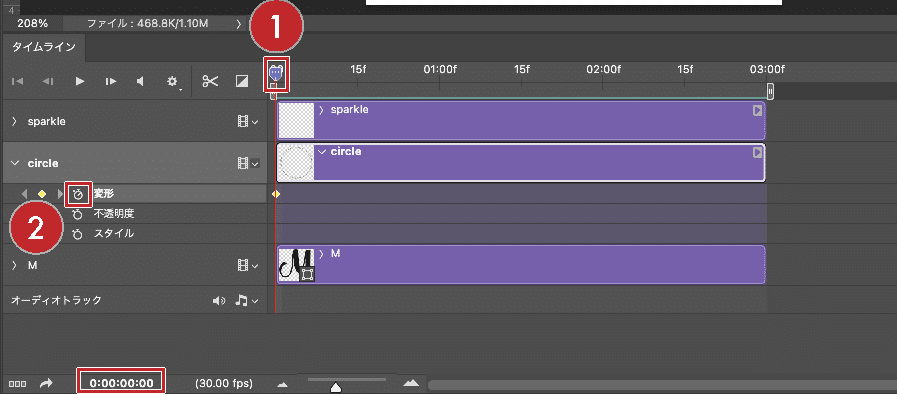
①「時間インジケーター」を00:00に合わせ、
②タイムラインパネルの「circle」レイヤーの「変形」の左にある「キーフレームアニメーションを有効にする」ボタン(ストップウォッチのアイコン)をクリックし、キーフレームを追加します。
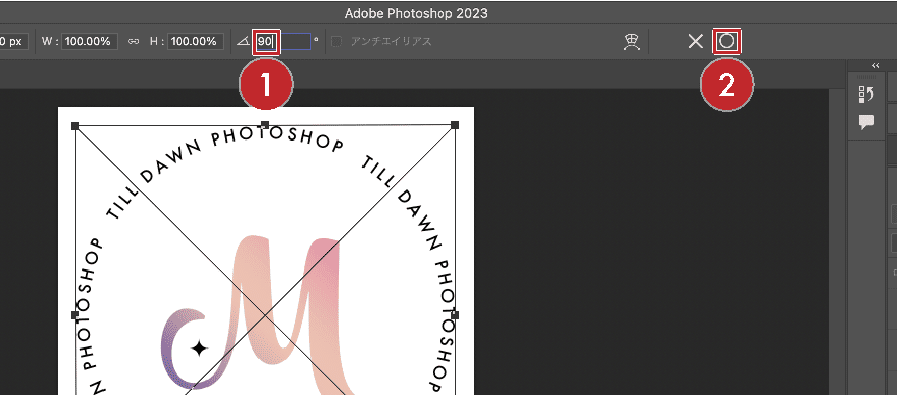
「時間インジケーター」を02:29に合わせ、「再生ヘッドでキーフレームを追加または削除」(ダイヤのアイコン)をクリックします。
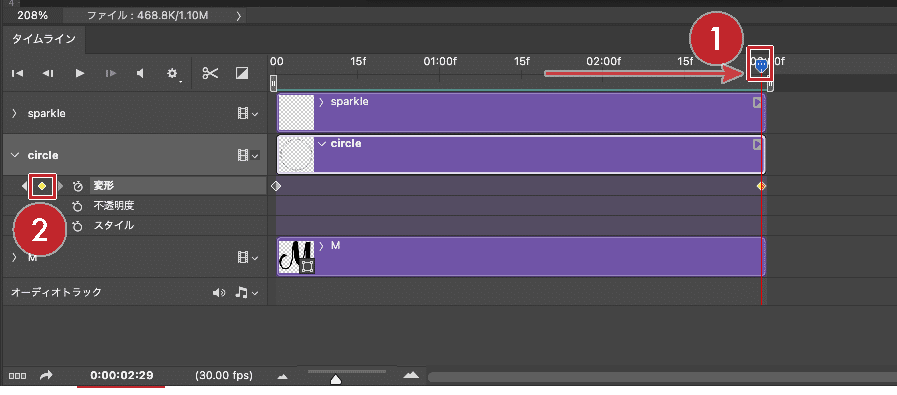
「編集」→「自由変形」をクリックし、オプションバーで「回転」に「90」と入力し、「変形を確定」をクリックします。
これで「circle」レイヤーの作業は完了です。

グラデーションのアニメーション
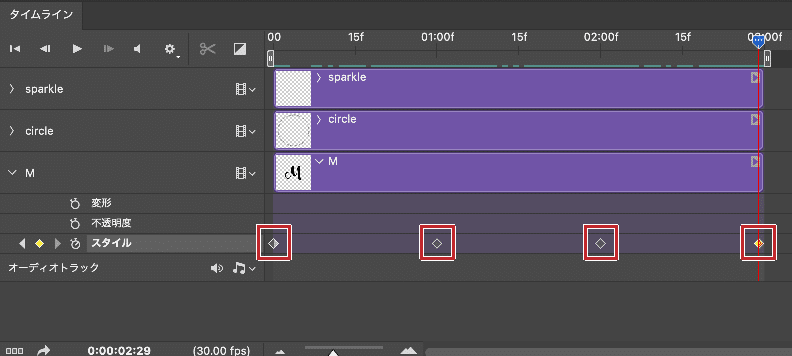
タイムラインパネルの、「M」レイヤーの「スタイル」の「00:00」「01:00」「02:00」「02:29」にキーフレームを追加します。
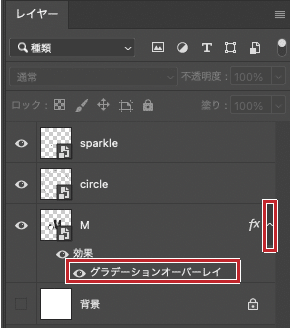
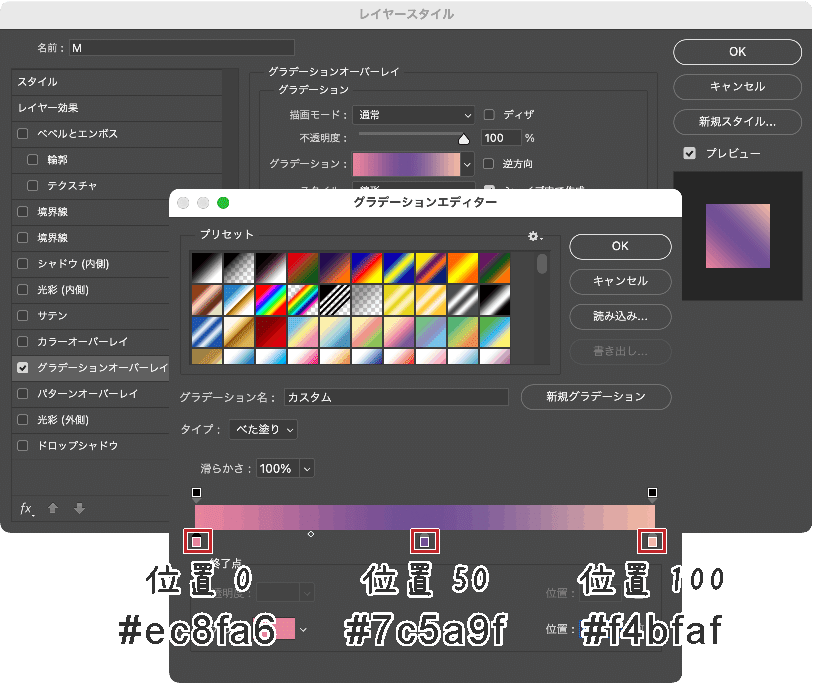
「時間インジケーター」を01:00に合わせ、レイヤーパネルの「M」の「グラデーションオーバーレイ」をダブルクリックします。
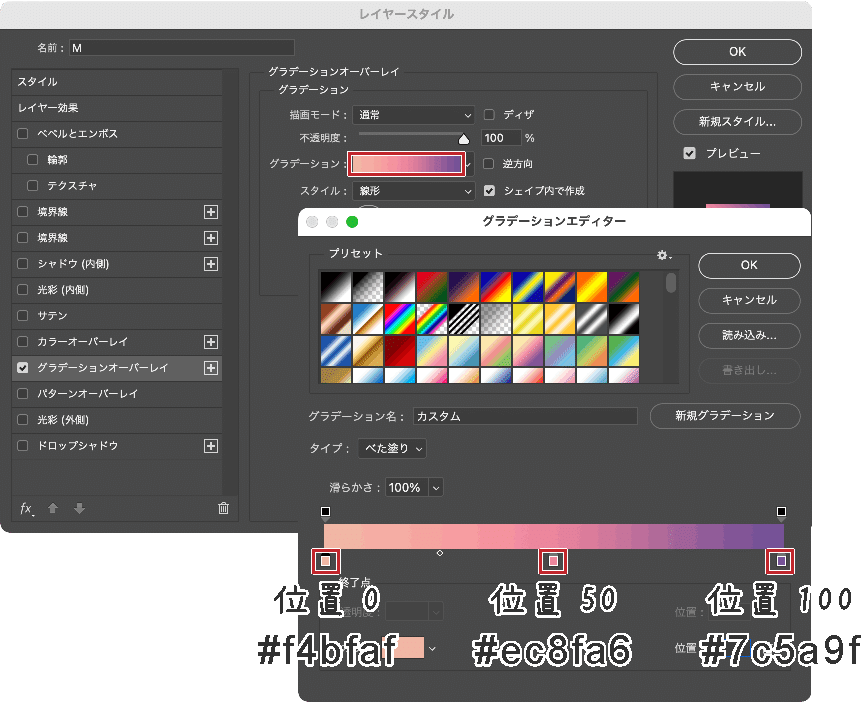
グラデーションオーバーレイの3つ分岐点の色を、それぞれ変更します。
位置0:#f4bfaf(オレンジ色)
位置50:#ec8fa6(ピンク色)
位置100:#7c5a9f(紫色)
「時間インジケーター」を02:00に合わせ、同様にグラデーションの色を変更します。
位置0:#ec8fa6(ピンク色)
位置50:#7c5a9f(紫色)
位置100:#f4bfaf(オレンジ色)
これで「M」レイヤーの作業は完了です。

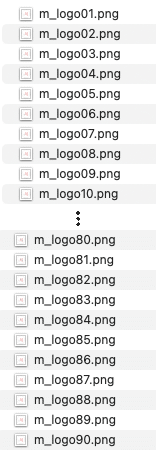
連番静止画の書き出し
Photoshopから直接APNGやWebPアニメーションを書き出すことはできないので、静止画のPNG画像を連番で書き出し、後述の「アニメ画像に変換する君」というアプリケーションを使って変換する、という方法で作業します。
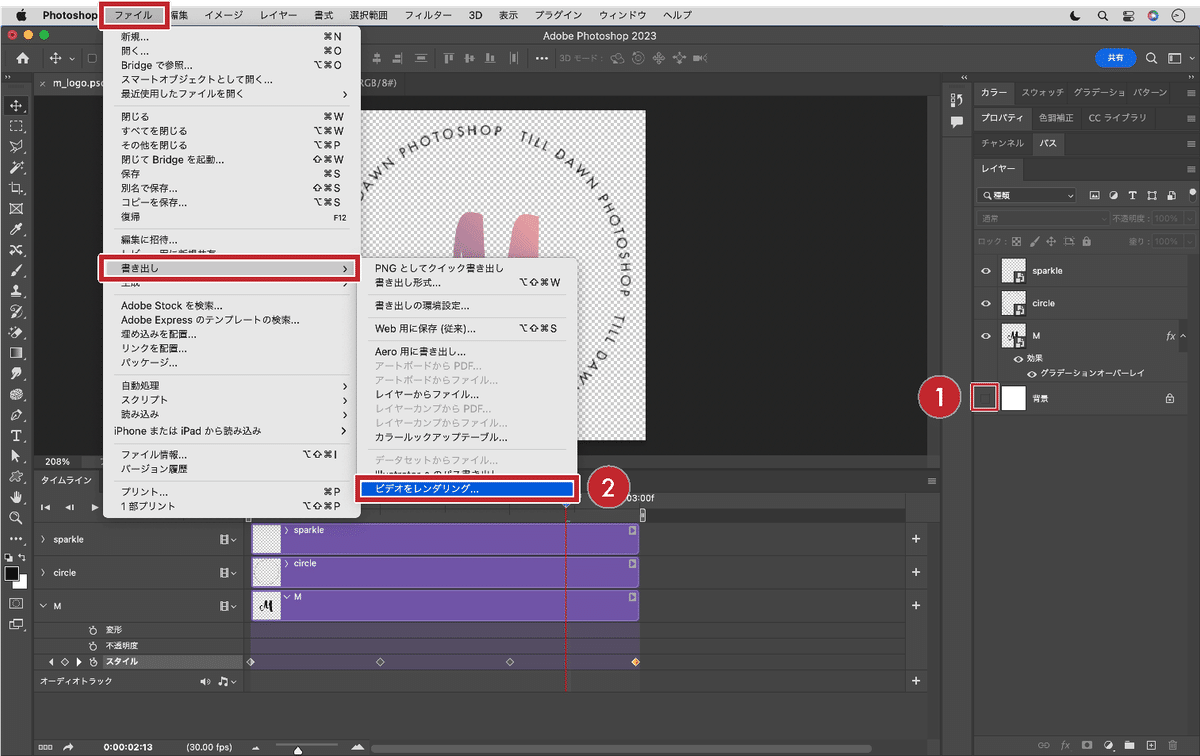
①「レイヤー」パネルで、「背景」レイヤーを非表示にします。
②「ファイル」メニュー→「書き出し」→「ビデオをレンダリング」をクリックします
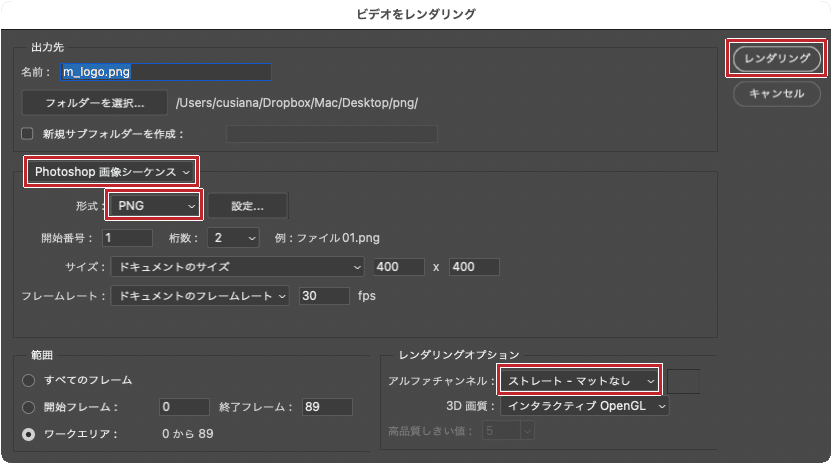
Photoshop画像シーケンス
形式:PNG
アルファチャンネル:ストレート-マットなし
「レンダリング」をクリックします。
APNG、WebPアニメーションに変換する
書き出した連番の静止画を、アニメーションに変換するため、「アニメ画像に変換する君」を起動します。
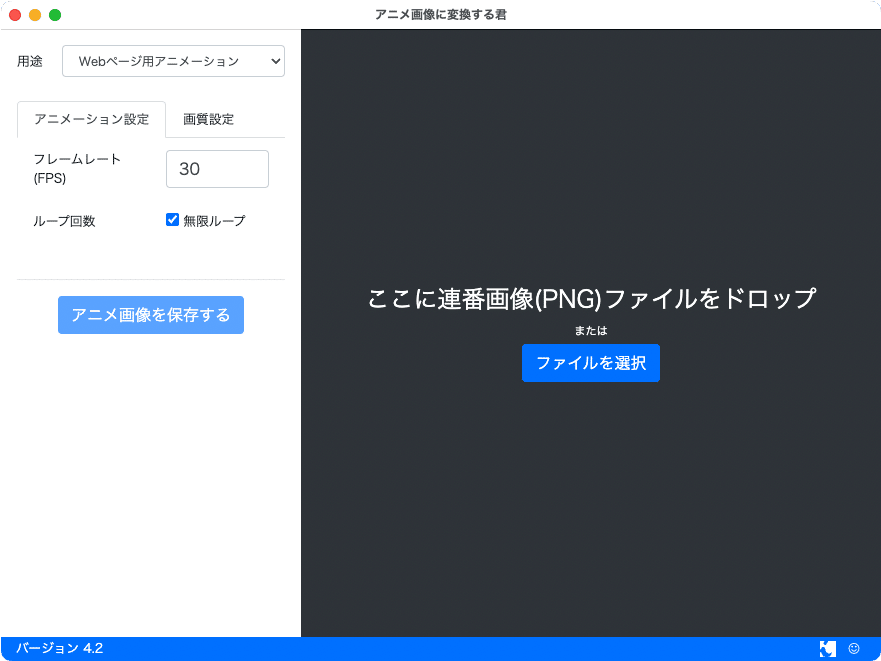
アニメ画像に変換する君
※「アニメ画像に変換する君」は株式会社ICSさんが無償で提供してくれている、APNGとWebP形式のアニメーション画像が作成可能なデスクトップアプリケーションです。 Windows 10以降とmacOS 10.9以降で利用できます。
ダウンロードページ: [Mac App Store] [ Microsoft Store (Windows用)]
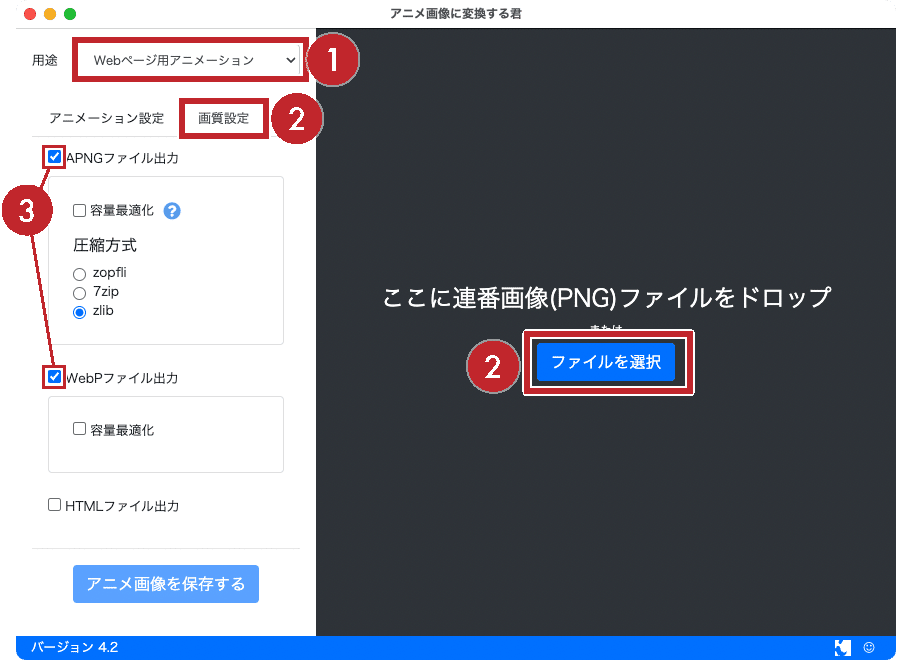
①用途を「Webページ用アニメーション」にし、
②「画質設定」をクリックし、
③「APNGファイル出力」「WebPファイル出力」にチェックを入れ、
④「ファイルを選択」から先ほど書き出した90枚のPNGを選択します。
「アニメ画像を保存する」をクリックし、任意の場所を選択し、任意の名前を入力して「保存」をクリックします。
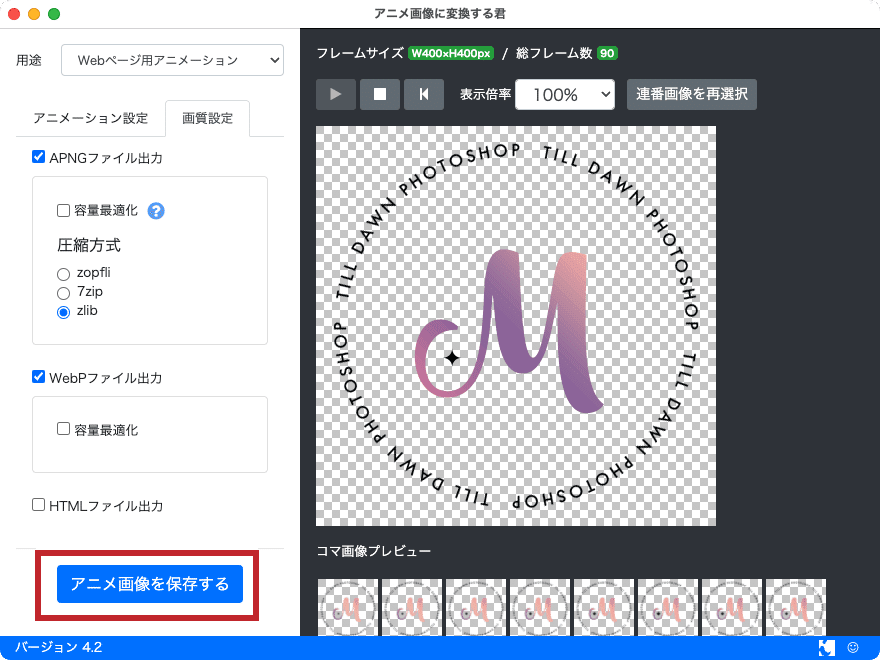
APNG(PNGアニメーション)、WebPアニメーションを書き出すことができました。
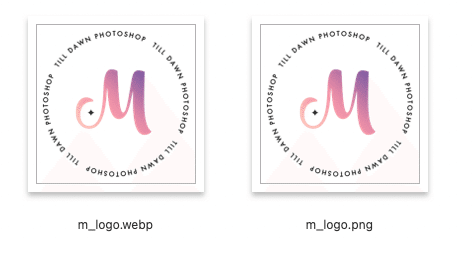
背景を透明にしているので、Webページで背景画像の上に表示しても綺麗に表示されます。
(アニメーションGIFは半透明の表現ができないので、ロゴの周り白いジャギジャギが表示されます)
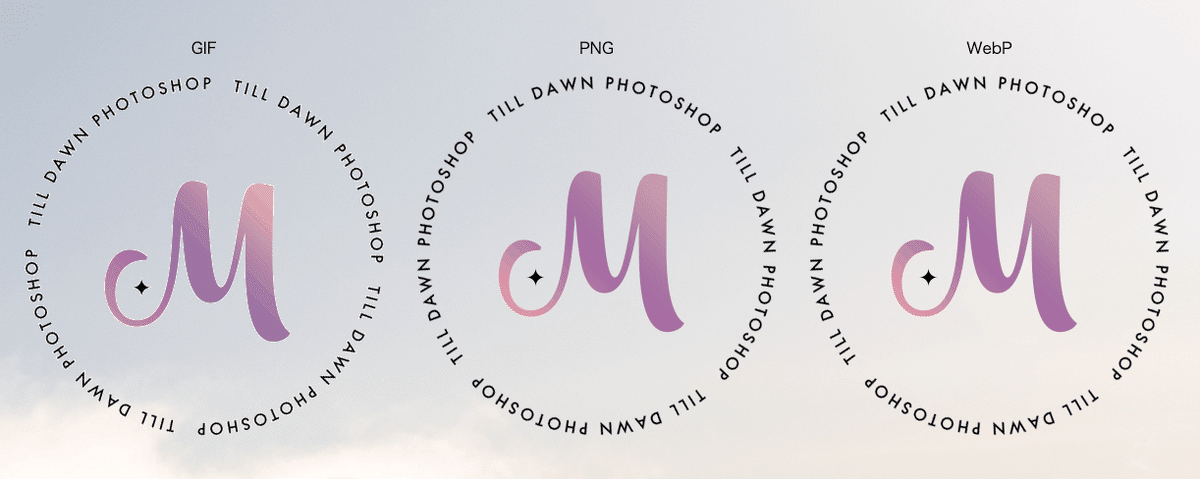
上記スクリーンショットだと違いが分かりにくいと思うので、アニメーションGIF、APNG、WebPアニメーションを並べて表示したデモページでご確認ください。
デモページを見る
まとめ
フルカラーで透過もできるAPNGとWebPアニメーションは、GIFアニメーションに置き換わる新世代のアニメーション画像形式と言われています。
今回は手軽に使えるPhootshopを使って連番の静止画画像を書き出しましたが、After Effects等から書き出した静止画画像からでも、「アニメ画像に変換する君」を使ってAPNGやWebPアニメーションを作成することができます。
補足
#朝までフォトショ
この記事は、2023-06-23(金)開催の「#朝までフォトショ」の補足記事として書きました。
フレームアニメーションや、シネマグラフの作り方は以下の動画をご覧ください。