【Python】Djangoで処理を一定期間おきに実行するようにスケジューリングする方法

APSchedulerというライブラリを使って、Djangoである処理を一定期間おきに実行させる方法を紹介していきます。APSchedulerは自動実行のスケジュール管理をするライブラリです。
この記事では例として、12秒おきにUpdate!とPrintするように作っていきます。
:参考にした記事はこちら
1. APSchedulerライブラリのインストール
まず、ターミナルからAPSchedulerをインストールします。
pip install apscheduler2. 実行したい処理を書く
アプリフォルダーの中(実際にはどこに処理を書いても良い)にupdate.pyというファイルを作り、この中に実行したい処理を書きます。
今回は、Update!とPrintしたいだけなので、以下のような関数を作ります。
(update.py)
def update():
   """
   This function is called by start() below
   """
   print('Update!')
3. APSchedulerでスケジュールを追加する。
先ほど作ったupdate関数のしたに、start()という関数を追加し、updateを実行するタイミングを設定します。
(update.py)
from datetime import datetime

from apscheduler.schedulers.background import BackgroundScheduler

def update():
   """
   This function is called by start() below
   """
   print('Update!')

# new=>
def start():
   """
   Scheduling data update
   Run update function once every 12 seconds
   """
   scheduler = BackgroundScheduler()

   scheduler.add_job(update, 'interval', seconds=12) # schedule
   scheduler.start()
add_job()という関数で設定。(下から2行目)
scheduler.add_job(update, 'interval', seconds=12) # schedule3つ目の引数で seconds=12として12秒おきにupdateを実行するようにしています。seconds以外にも、minutes, daysなどあります。
ここまでやったら、最後に、runserverしたときに、このstart()関数を呼び出すようにしてあげる必要があります。
4. runserver時にstartを呼び出すようにする
アプリフォルダー内のapp.py(startapp時に作成されるファイル)に修正を加えます。
from django.apps import AppConfig


class アプリ名Config(AppConfig):
   name = 'アプリ名'

# new =>
   def ready(self):
       """
       This function is called when startup.
       """
       from .updater import start # <= さっき作った start関数をインポート
       start()
startapp時に作成されているAppConfigクラスのready関数をoverrideします。
def ready(self):
"""
This function is called when startup.
"""
from .updater import start # <= さっき作った start関数をインポート
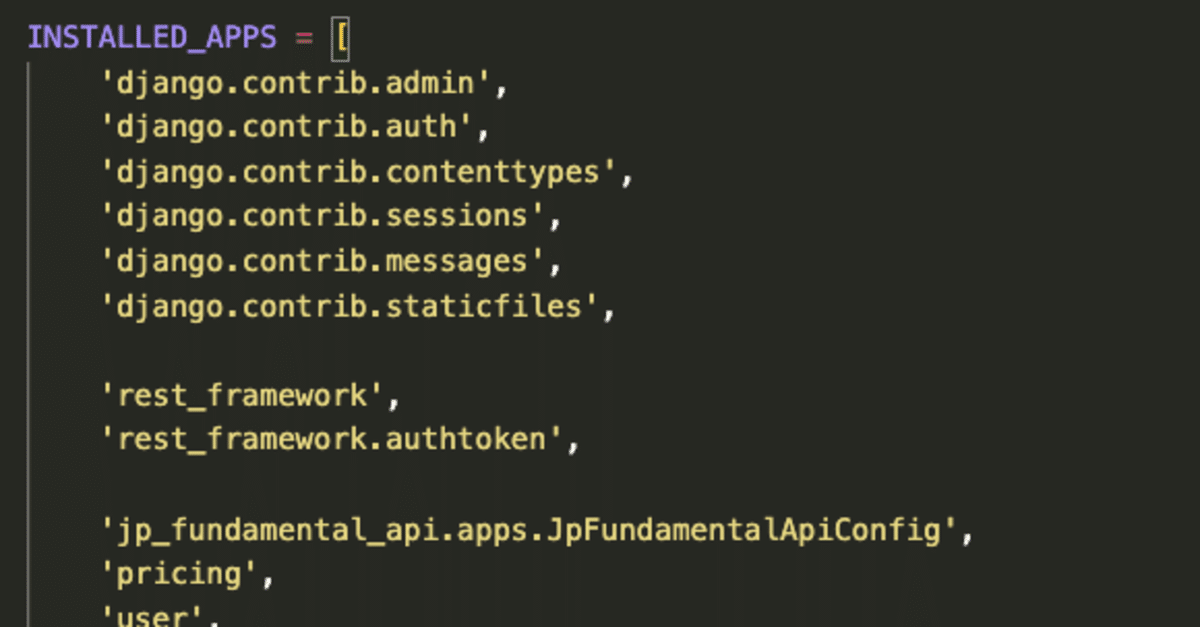
start()最後に、Djangoがいま作成したConfigを読み込めるように、settings.pyファイルを編集します。
INSTALLED_APPS = [
   'django.contrib.admin',
   'django.contrib.auth',
   'django.contrib.contenttypes',
   'django.contrib.sessions',
   'django.contrib.messages',
   'django.contrib.staticfiles',
    ...
    # new=>
   'アプリ名.apps.JpFundamentalApiConfig',
   ...
]
以上で完了です!
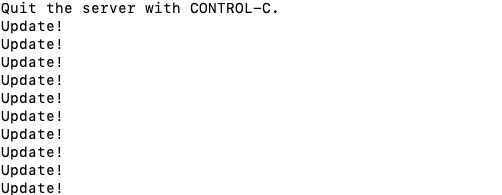
サーバーを起動して確認すると、
python manage.py runserver

...

Quit the server with CONTROL-C.
Update!
Update!
Update!
Update!
Update!
Update!
Update!
Update!
Update!
こんな感じで、12秒おきにUpdate!とPrintされます。
この記事が気に入ったらサポートをしてみませんか?